🎃
useTabControllerを使ってみた!
Overview
flutter_hooksには、useTabControllerというtabメニューを簡単に作成して制御できるWidgetがあるみたいです。
早速使ってみましたので、ご紹介します。
summary
自動的に破棄される TabController を作成します。
以下も参照してください。
本来のものだとこんなに長く書く。設定も複雑なですね。
main.dart
import 'package:flutter/material.dart';
/// Flutter code sample for [TabController].
void main() => runApp(const TabControllerExampleApp());
class TabControllerExampleApp extends StatelessWidget {
const TabControllerExampleApp({super.key});
Widget build(BuildContext context) {
return const MaterialApp(
home: TabControllerExample(),
);
}
}
const List<Tab> tabs = <Tab>[
Tab(text: 'Zeroth'),
Tab(text: 'First'),
Tab(text: 'Second'),
];
class TabControllerExample extends StatelessWidget {
const TabControllerExample({super.key});
Widget build(BuildContext context) {
return DefaultTabController(
length: tabs.length,
// The Builder widget is used to have a different BuildContext to access
// closest DefaultTabController.
child: Builder(builder: (BuildContext context) {
final TabController tabController = DefaultTabController.of(context);
tabController.addListener(() {
if (!tabController.indexIsChanging) {
// Your code goes here.
// To get index of current tab use tabController.index
}
});
return Scaffold(
appBar: AppBar(
bottom: const TabBar(
tabs: tabs,
),
),
body: TabBarView(
children: tabs.map((Tab tab) {
return Center(
child: Text(
'${tab.text!} Tab',
style: Theme.of(context).textTheme.headlineSmall,
),
);
}).toList(),
),
);
}),
);
}
}
flutter_hooksを使うとこれは、UIが違いますがコードを簡潔に記述できます。
import 'package:flutter/material.dart';
import 'package:flutter_hooks/flutter_hooks.dart';
class HookTab extends HookWidget {
const HookTab({super.key});
Widget build(BuildContext context) {
// TabControllerを作成
final tabController = useTabController(initialLength: 2);
return Scaffold(
appBar: AppBar(
backgroundColor: Colors.black87,
title: const Text('Flutter Hooks Tabs'),
// TabBarを設定
bottom: TabBar(
controller: tabController,
tabs: const [
Tab(text: 'Home'),
Tab(text: 'Feed'),
],
),
),
// TabBarViewを設定
body: TabBarView(
controller: tabController,
children: const [
// それぞれのタブに表示するWidgetを設定
HomeTab(),
FeedTab(),
],
),
);
}
}
// HomeのタブのWidget
class HomeTab extends StatelessWidget {
const HomeTab({Key? key}) : super(key: key);
Widget build(BuildContext context) {
return const Scaffold(
backgroundColor: Colors.yellowAccent,
body: Center(child: Icon(Icons.home, size: 150)),
);
}
}
// FeedのタブのWidget
class FeedTab extends StatelessWidget {
const FeedTab({Key? key}) : super(key: key);
Widget build(BuildContext context) {
return const Scaffold(
backgroundColor: Colors.blueAccent,
body: Center(child: Icon(Icons.feed, size: 150)),
);
}
}
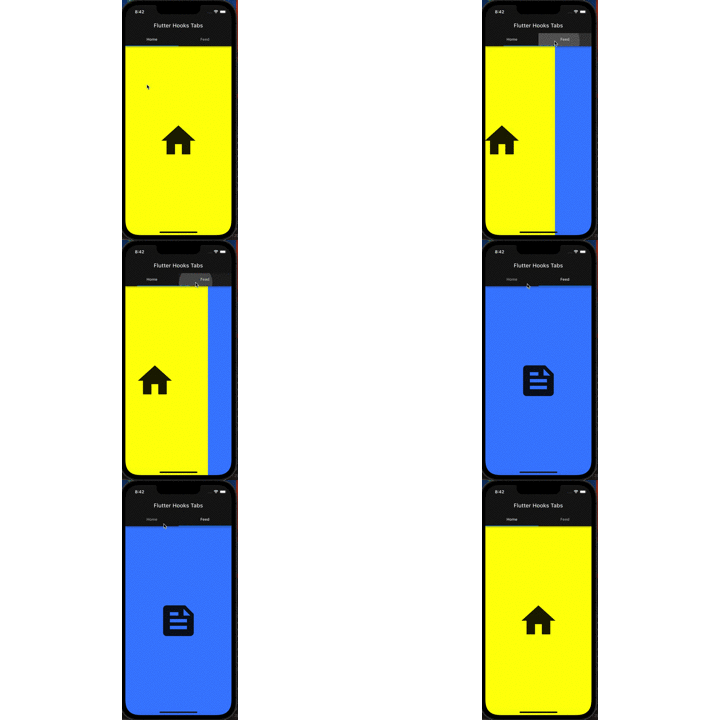
こんな感じで動きます。

Riverpodを使用したパターン
まずはパッケージを追加してください。
name: widget_cook
description: A new Flutter project.
# The following line prevents the package from being accidentally published to
# pub.dev using `flutter pub publish`. This is preferred for private packages.
publish_to: 'none' # Remove this line if you wish to publish to pub.dev

# The following defines the version and build number for your application.
# A version number is three numbers separated by dots, like 1.2.43
# followed by an optional build number separated by a +.
# Both the version and the builder number may be overridden in flutter
# build by specifying --build-name and --build-number, respectively.
# In Android, build-name is used as versionName while build-number used as versionCode.
# Read more about Android versioning at https://developer.android.com/studio/publish/versioning
# In iOS, build-name is used as CFBundleShortVersionString while build-number is used as CFBundleVersion.
# Read more about iOS versioning at
# https://developer.apple.com/library/archive/documentation/General/Reference/InfoPlistKeyReference/Articles/CoreFoundationKeys.html
# In Windows, build-name is used as the major, minor, and patch parts
# of the product and file versions while build-number is used as the build suffix.
version: 1.0.0+1

environment:
  sdk: '>=3.1.0 <4.0.0'

# Dependencies specify other packages that your package needs in order to work.
# To automatically upgrade your package dependencies to the latest versions
# consider running `flutter pub upgrade --major-versions`. Alternatively,
# dependencies can be manually updated by changing the version numbers below to
# the latest version available on pub.dev. To see which dependencies have newer
# versions available, run `flutter pub outdated`.
dependencies:
  build_runner: ^2.4.6
  cupertino_icons: ^1.0.2
  flutter:
    sdk: flutter
  flutter_hooks: ^0.20.2
  hooks_riverpod: ^2.4.3
  riverpod_annotation: ^2.2.0
  riverpod_generator: ^2.3.3

dev_dependencies:
  flutter_lints: ^2.0.0
  flutter_test:
    sdk: flutter

# For information on the generic Dart part of this file, see the
# following page: https://dart.dev/tools/pub/pubspec
# The following section is specific to Flutter packages.
flutter:

  # The following line ensures that the Material Icons font is
  # included with your application, so that you can use the icons in
  # the material Icons class.
  uses-material-design: true
  # To add assets to your application, add an assets section, like this:
  # assets:
  #   - images/a_dot_burr.jpeg
  #   - images/a_dot_ham.jpeg
  # An image asset can refer to one or more resolution-specific "variants", see
  # https://flutter.dev/assets-and-images/#resolution-aware
  # For details regarding adding assets from package dependencies, see
  # https://flutter.dev/assets-and-images/#from-packages
  # To add custom fonts to your application, add a fonts section here,
  # in this "flutter" section. Each entry in this list should have a
  # "family" key with the font family name, and a "fonts" key with a
  # list giving the asset and other descriptors for the font. For
  # example:
  # fonts:
  #   - family: Schyler
  #     fonts:
  #       - asset: fonts/Schyler-Regular.ttf
  #       - asset: fonts/Schyler-Italic.ttf
  #         style: italic
  #   - family: Trajan Pro
  #     fonts:
  #       - asset: fonts/TrajanPro.ttf
  #       - asset: fonts/TrajanPro_Bold.ttf
  #         weight: 700
  #
  # For details regarding fonts from package dependencies,
  # see https://flutter.dev/custom-fonts/#from-packages
最近流行りのジェネレーターを使ってみました。プロバイダー書かなくていいからコードが短くなる。タブの状態管理は、Notifierを使用しています。デフォルトの値は0を指定。タブを押すと、表示されるWidgetが切り替わるようになっております。
import 'package:flutter/material.dart';
import 'package:hooks_riverpod/hooks_riverpod.dart';
import 'package:riverpod_annotation/riverpod_annotation.dart'; // このコードを書く
part 'tab_notifier.g.dart'; // note_providerのところは、ファイル名と同じにする.
// ファイルを自動生成するコマンド
// dart pub run build_runner watch --delete-conflicting-outputs
class TabControllerNotifier extends _$TabControllerNotifier {
int build() => 0;
void changeTab(int index) {
state = index;
}
}
class TabNotifier extends ConsumerWidget {
const TabNotifier({Key? key}) : super(key: key);
Widget build(BuildContext context, WidgetRef ref) {
final tabIndex = ref.watch(tabControllerNotifierProvider);
return DefaultTabController(
length: 2,
initialIndex: tabIndex,
child: Scaffold(
appBar: AppBar(
title: const Text('generate Tabs'),
bottom: TabBar(
tabs: const [
Tab(text: 'Home'),
Tab(text: 'Feed'),
],
onTap: (index) {
ref.read(tabControllerNotifierProvider.notifier).changeTab(index);
},
),
),
body: const TabBarView(
children: [
HomeTab(),
FeedTab(),
],
),
),
);
}
}
// HomeのタブのWidget
class HomeTab extends StatelessWidget {
const HomeTab({Key? key}) : super(key: key);
Widget build(BuildContext context) {
return const Scaffold(
backgroundColor: Colors.greenAccent,
body: Center(child: Icon(Icons.home, size: 150)),
);
}
}
// FeedのタブのWidget
class FeedTab extends StatelessWidget {
const FeedTab({Key? key}) : super(key: key);
Widget build(BuildContext context) {
return const Scaffold(
backgroundColor: Colors.cyanAccent,
body: Center(child: Icon(Icons.feed, size: 150)),
);
}
}
これが自動生成されたプロバイダー
// GENERATED CODE - DO NOT MODIFY BY HAND
part of 'tab_notifier.dart';
// **************************************************************************
// RiverpodGenerator
// **************************************************************************
String _$tabControllerNotifierHash() =>
r'bd383293027a945c24e7ed9291cb36e3fc1d67e7';
/// See also [TabControllerNotifier].
(TabControllerNotifier)
final tabControllerNotifierProvider =
AutoDisposeNotifierProvider<TabControllerNotifier, int>.internal(
TabControllerNotifier.new,
name: r'tabControllerNotifierProvider',
debugGetCreateSourceHash: const bool.fromEnvironment('dart.vm.product')
? null
: _$tabControllerNotifierHash,
dependencies: null,
allTransitiveDependencies: null,
);
typedef _$TabControllerNotifier = AutoDisposeNotifier<int>;
// ignore_for_file: type=lint
// ignore_for_file: subtype_of_sealed_class, invalid_use_of_internal_member, invalid_use_of_visible_for_testing_member
main.dartは修正して使っているので、riverpodを使用したコードを使っていただいた方が良さそうです。
main.dart
import 'package:flutter/material.dart';
import 'package:hooks_riverpod/hooks_riverpod.dart';
import 'package:widget_cook/hook_tab.dart';
import 'package:widget_cook/tab_notifier.dart';
void main() {
runApp(const ProviderScope(child: MyApp()));
}
class MyApp extends StatelessWidget {
const MyApp({super.key});
Widget build(BuildContext context) {
return MaterialApp(
debugShowCheckedModeBanner: false,
title: 'Flutter Demo',
theme: ThemeData(),
home: const HookTab(),
// home: const TabNotifier()
);
}
}
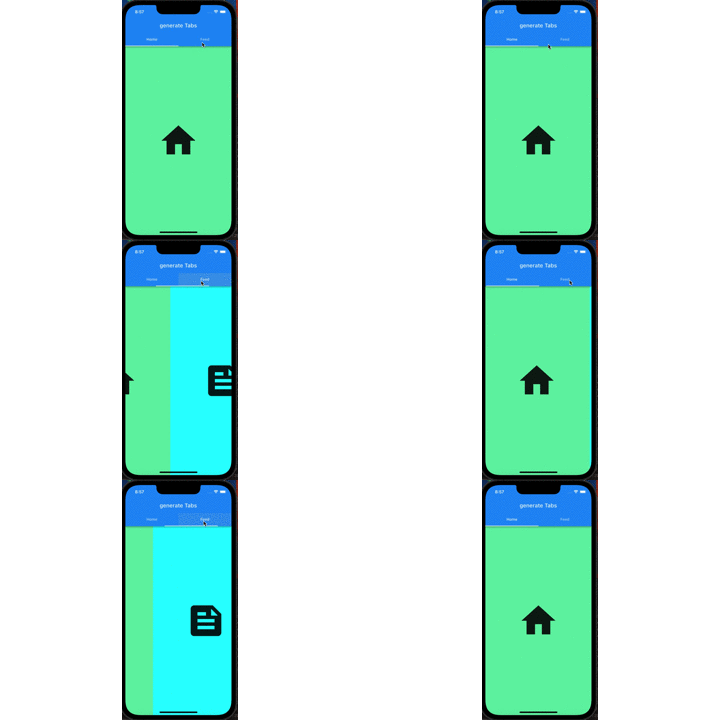
これが実際に動いているもの

thoughts
新しく入った仕事で、Tabを作る設定をflutter_hooksでやったりriverpodを使ったパターンを経験しました。作ったものはもっと複雑なロジックでしたが、Notifier使ってくれたらもっと簡潔に書ける気がしますね😅


Discussion