react-transition-groupを使ってページ遷移にスライドアニメーションをつける方法
作るもの

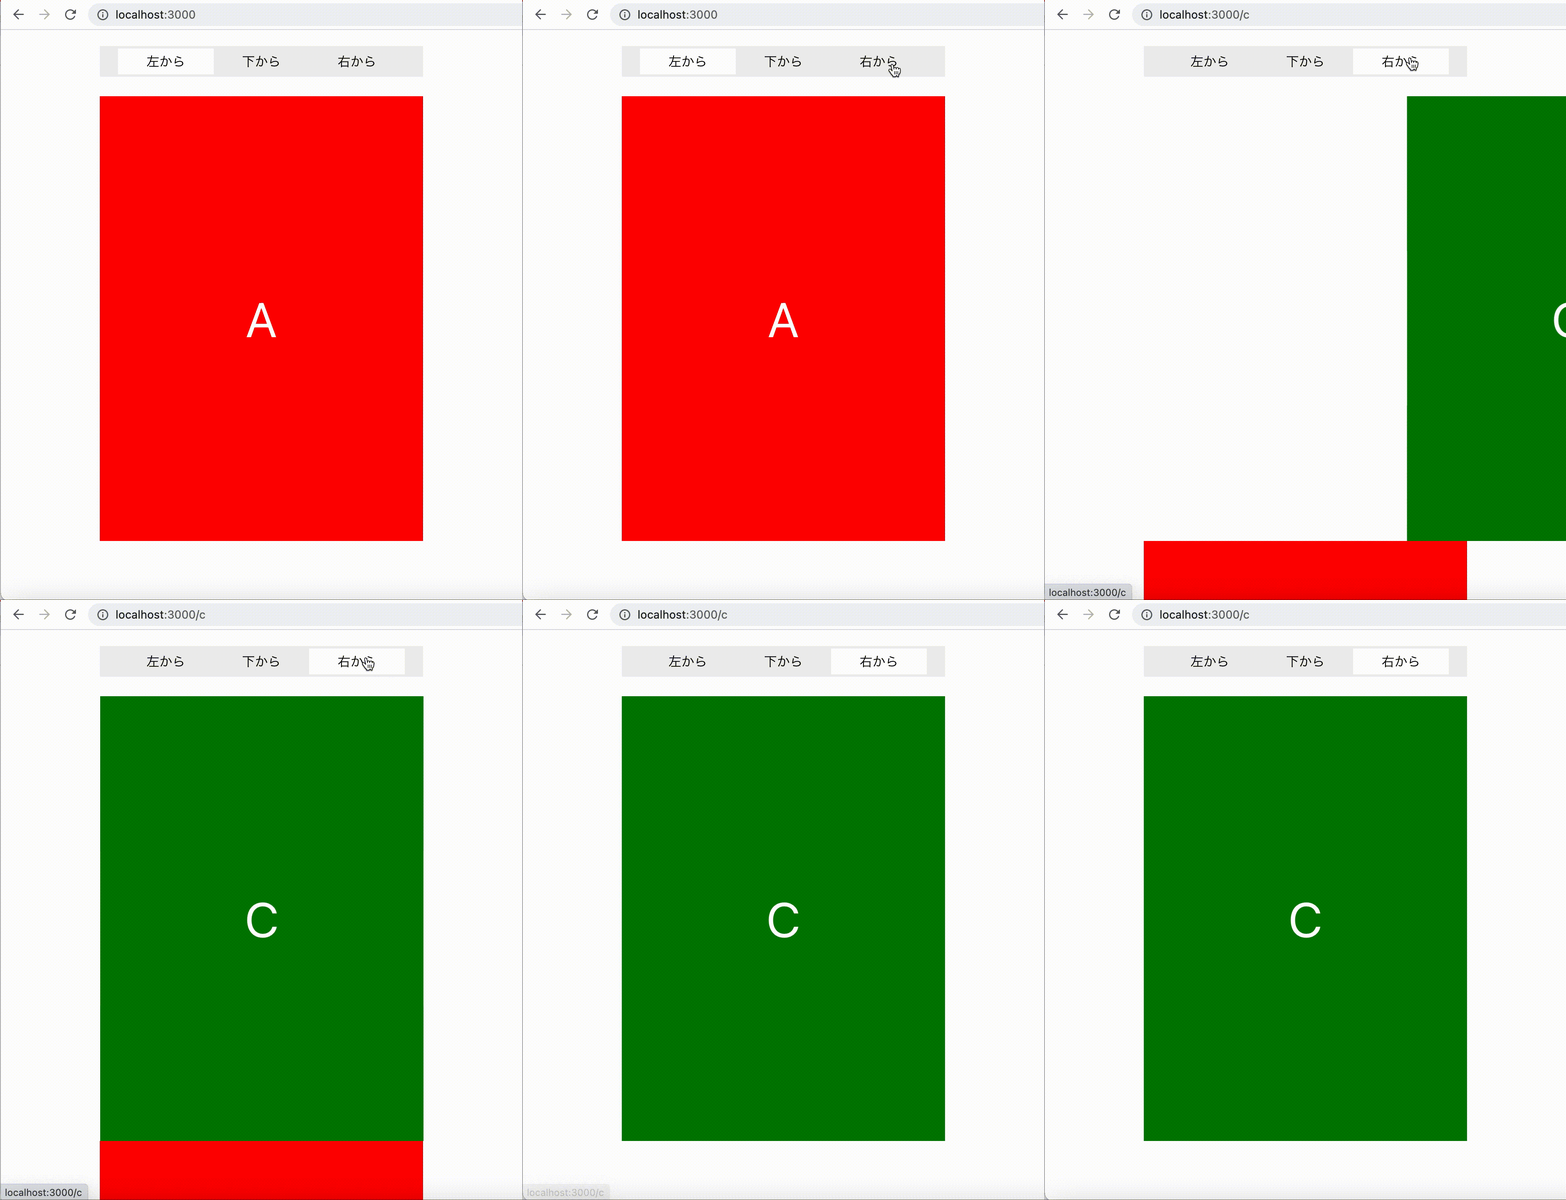
こんな感じのものを作ります。
スライドで次のページが現れ、URLも変わっているのが分かりますね。
コード
import React from 'react';
import ReactDOM from 'react-dom';
import { BrowserRouter } from 'react-router-dom';
import './index.css';
import App from './App';
import reportWebVitals from './reportWebVitals';

ReactDOM.render(
  <React.StrictMode>
    <BrowserRouter>
      <App />
    </BrowserRouter>
  </React.StrictMode>,
  document.getElementById('root'),
);

// If you want to start measuring performance in your app, pass a function
// to log results (for example: reportWebVitals(console.log))
// or send to an analytics endpoint. Learn more: https://bit.ly/CRA-vitals
reportWebVitals();
import { Route, Routes, useLocation, NavLink } from 'react-router-dom';
import { CSSTransition, TransitionGroup } from 'react-transition-group';

import './styles.css';

const A = () => <div className="card a">A</div>;
const B = () => <div className="card b">B</div>;
const C = () => <div className="card c">C</div>;

const direction = {
  '/': 'right',
  '/b': 'bottom',
  '/c': 'left',
};

function App() {
  const location = useLocation();
  const pathname = location.pathname;
  const timeout = { enter: 1000, exit: 1000 };
  const getDirection = (currentKey: string) => direction[currentKey as keyof typeof direction] ?? 'left';

  return (
    <>
      <nav>
        <NavLink to="/" className="nav-item">
          左から
        </NavLink>
        <NavLink to="/b" className="nav-item">
          下から
        </NavLink>
        <NavLink to="/c" className="nav-item">
          右から
        </NavLink>
      </nav>
      <TransitionGroup component="div" className="App">
        <CSSTransition key={pathname} timeout={timeout} classNames="slider">
          <div className={getDirection(pathname)}>
            <Routes location={location}>
              <Route path="/" element={<A />} />
              <Route path="/b" element={<B />} />
              <Route path="/c" element={<C />} />
            </Routes>
          </div>
        </CSSTransition>
      </TransitionGroup>
    </>
  );
}

export default App;
body {
  margin: 20px auto;
  max-width: 400px;
}

nav {
  padding: 3px;
  margin-bottom: 24px;
  background: #eee;
  text-align: center;
}
.nav-item {
  width: 30%;
  text-align: center;
  background-color: #eee;
  display: inline-block;
}
a {
  color: #000;
  line-height: 32px;
  text-decoration: none;
}
a.active {
  background: #fff;
  font-weight: 500;
}

.card {
  display: flex;
  justify-content: center;
  align-items: center;
  font-size: 60px;
  height: 550px;
  color: #fff;
}
.a {
  background: red;
}
.b {
  background: blue;
}
.c {
  background: green;
}

.slider-enter.left {
  transform: translateX(100%);
}

.slider-enter.right {
  transform: translateX(-100%);
}

.slider-enter.bottom {
  transform: translateY(100%);
}

.slider-exit.left {
  margin-top: -550px;
}

.slider-exit.right {
  margin-top: -550px;
}

.slider-exit.bottom {
  margin-top: -550px;
}

.slider-enter.slider-enter-active {
  transform: translate3d(0, 0, 0);
  transition: all 1s;
}
動きだけ見たい人はコピペして動かしてみてください。
解説
CSS
.slider-enter.right {
  transform: translateX(100%);
}

...

.slider-exit.right {
  margin-top: -550px;
}

...

.slider-enter.slider-enter-active {
  transform: translate3d(0, 0, 0);
  transition: all 1s;
}
AページからCページに移動するとします。
ボタンをクリックしてCページに遷移するとき、Cページにはslider-enterというクラス名が付与されます。その時にtransformにtranslateX(100%)を指定し、Cページを画面右の方に表示させます。
その後、Cページにslider-enter-activeというクラス名が付与されます。この時はslider-enterというクラス名もまだついています。最後にこれらのクラス名は取り除かれ、slider-enter-doneというクラス名に変わります。
transform: translate3d(0, 0, 0);
transition: all 1s;
slider-enterとslider-enter-activeというクラス名がついている間に、上記のcssが指定されているので、1秒かけて画面右から真ん中にスライドインしてくるようになっています。
さらに、この時Aページにはslider-exitというクラス名が付与されます。その時margin-top: -550px;を指定することで、CページがスライドしてくるまでAページを表示したままにすることができます。
もしこれをしないと、Aページは下に移動してから消えるようになるので、真っ白な画面にCページがスライドインしてくる感じになります。こんな感じになっちゃいます↓

Aページが下に移動してからCページがスライドしてきていますね。これを防ぐためにmargin-top: -550px;を指定しています。(Aページの高さ= 550px)
CSSTransition
CSSTransitionを使うことでslider-enterやslider-exit, slider-enter-activeなどのクラス名が適切なタイミングで付与されます。
<CSSTransition key={pathname} timeout={timeout} classNames="slider">
上記のようにclassNamesにsliderを指定しているのでslider-enterなどのクラス名になっていますが、classNamesに別の文字列を指定すると〇〇-enterとなります。
クラス名とそれが付与されるタイミングの関係は以下のような感じになっています。
| クラス名 | タイミング | 対象 |
|---|---|---|
| 〇〇-enter | 次のページが呼ばれた時 | 次のページ |
| 〇〇-enter-active | 次のページが完全に表示されるまでの間 | 次のページ |
| 〇〇-enter-done | 次のページが完全に表示された時 | 次のページ |
| 〇〇-exit | 次のページが呼ばれた時 | 前のページ |
| 〇〇-exit-active | 前のページが完全に消えるまでの間 | 前のページ |
| 〇〇-exit-done | 前のページが完全に消えた時 | 前のページ |
方向の指定
以下のdirectionというオブジェクトを使い、pathに応じたクラス名を取得し、スライドしてくる方向を変えるようにしています。
const direction = {
  '/': 'left',
  '/b': 'bottom',
  '/c': 'right',
};
クラス名がleftの場合は、translateX(-100%)を指定し、左からスライドしてくるようにしています。
クラス名がbottomの場合は、translateY(100%)を指定し、下からスライドしてくるようにしています。
まとめ
react-transition-groupを使って、reactのページ遷移にスライドアニメーションをつける方法を調査しました。cssのアニメーションも普段からあまり書いていないので少し苦戦しましたがなんとか実装することができました。
次は特定のpath配下のみページ遷移でアニメーションをつけるといったことができるのか試してみたいと思います。
Discussion