SwiftUI カスタムしたアラートを条件によって出し分ける
やりたいこと
データを保存したり何かしらアクションしたときにカスタムしたアラートを表示したい
頻出するのにパっとコードとデータの流れが思いつかなかったりしたので,自分なりに実装内容を整理してみました.

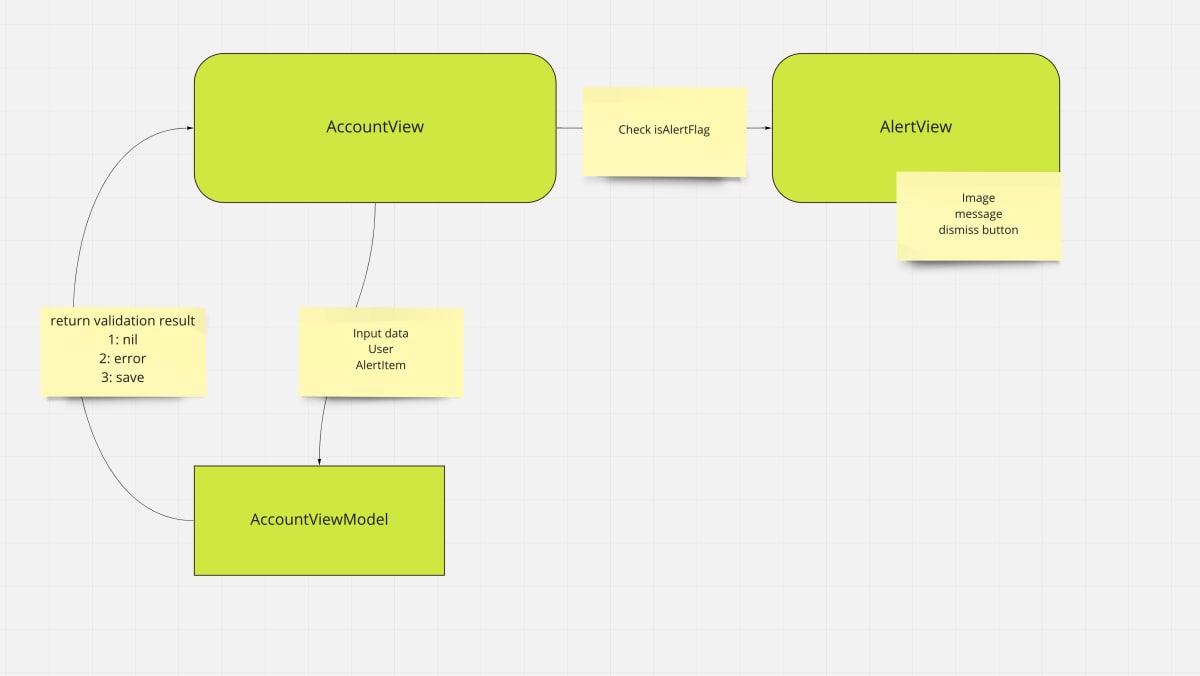
データの流れを可視化する
SwiftUIはデータが複数のView間でやり取りされることが多いため,すぐにコードに落とし込むことが難しかったりします.
そこで便利なのがMiro!
UML書くのはしんどいけど,軽くメモシたいというときに便利です
今回は,ユーザーが入力をした内容に応じてデータを出し分けるという実装をしたいと思います
処理の流れ
===
① AccountViewでボタンをタップ
② ViewModelで入力内容を判定
③ 判定に応じてAlert構造体を返す
④ 判定結果のAlertをAlertViewにわたす
⑤ Alertの内容に応じて表示内容を変更してOKタップをするとAccountViewを表示する

実装していく
Viewの実装
1. AccountView
ここでは,入力を受け取るテキストフィールドと保存を行うボタンを定義しておきます.
AlertViewの表示はshownで管理し,VSTACKの上にoverlayで表示することにします.
struct AccountView: View {
    @StateObject var viewModel = ViewModel()
    var body: some View {
        ZStack {
            VStack {
                VStack {
                    Form {
                        Section {
                            TextField("おれが悟空でお前が", text: $viewModel.input)
                        }
                        HStack {
                            Spacer()
                            Button("Save") { // Button title
                                // Button action
                                viewModel.save()
                            }
                            Spacer()
                        }//: HSTACK
                    }//: FORM
                }//: VSTACK
            }//: VSTACK
            .overlay {
                if viewModel.shown {
                    CutomAlertView(shown: $viewModel.shown, alert: viewModel.alert!) // AlertView intialize with shown property
                   }
            }//: Overlay
        }//: ZSTACK
    }
}
2. AlertView
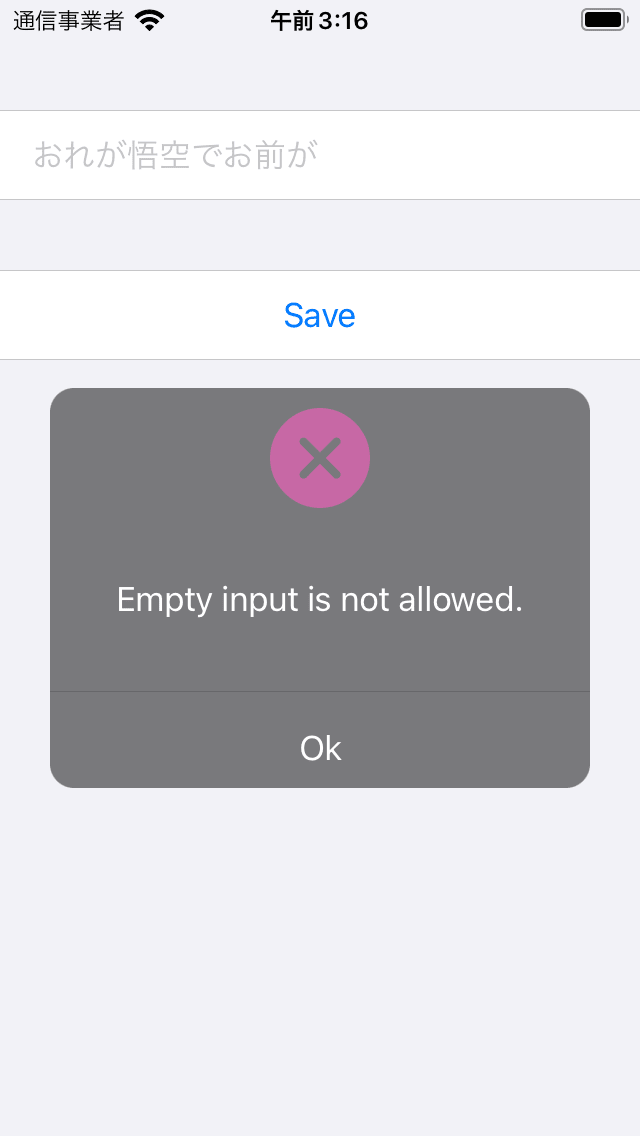
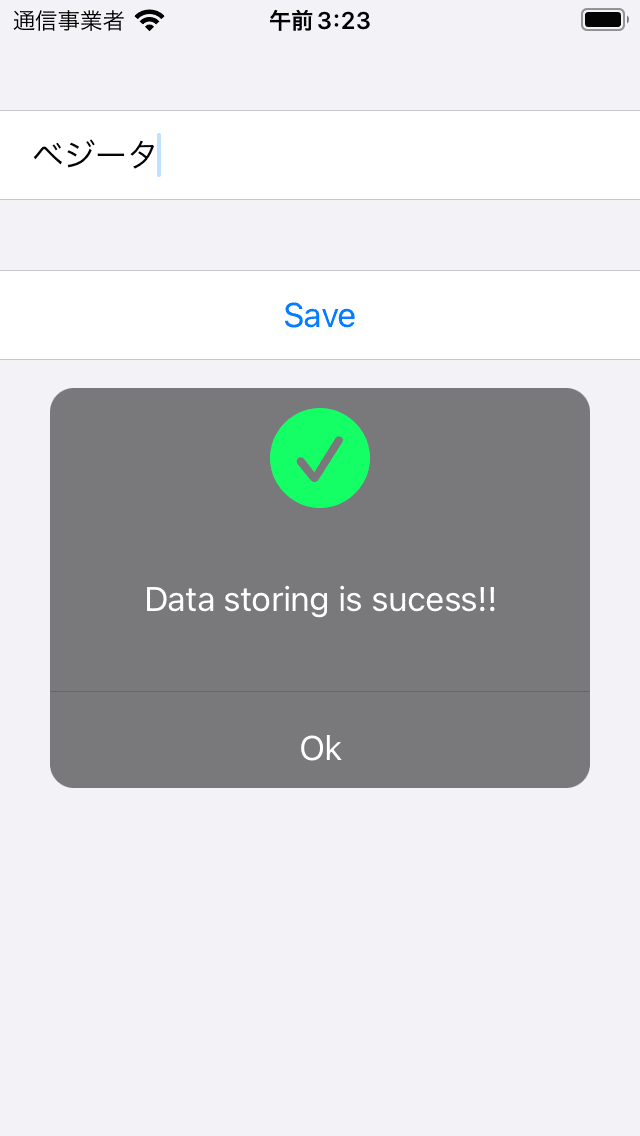
Alertの完成形は画像のようになります.成功時と失敗時でテキスト,画像,色の3つを変えるようにします
今回はAlertを介して表示内容を決定するという形にしました.
また,shownはOKボタンをタップするとfalseになりAlertが消えます


struct CutomAlertView: View {

    @Binding var shown: Bool
    var alert: Alert

    var body: some View {
        VStack {
            Image(systemName: alert.imageName)
                .resizable().frame(width: 50, height: 50)
                .padding(.top, /*@START_MENU_TOKEN@*/10/*@END_MENU_TOKEN@*/)
                .foregroundColor(Color(alert.title))
            Spacer()
            Text(alert.message).foregroundColor(Color.white)
            Spacer()
            Divider()
            HStack {
                Button("Ok") {
                    shown.toggle()
                }//: BUTTON
                .frame(width: UIScreen.main.bounds.width, height: 40)
                .foregroundColor(.white)
            }//: HSTACK
        }//: VSTAC
        .frame(width: UIScreen.main.bounds.width-50, height: 200)
        .background(Color.black.opacity(0.5))
        .cornerRadius(12)
        .clipped()

    }
}
Alertオブジェクトの定義
AlertViewの表示内容を定義したAlertオブジェクトを定義します
AlertContextに各ケース別の条件を設定しておくことにしました.
struct Alert {
    var color: String
    var message: String
    var imageName: String
}

struct AlertContext {
    static let sucess = Alert(color: "Sucess", message: "Data storing is sucess!!", imageName: SFSymbolString.sucess.rawValue)
    static let empty = Alert(color: "Failer", message: "Empty input is not allowed.", imageName: SFSymbolString.failer.rawValue)
    static let invalidData = Alert(color: "Failer", message: "Something went wrong.", imageName: SFSymbolString.failer.rawValue)
}

enum SFSymbolString: String {
    case sucess = "checkmark.circle.fill"
    case failer = "xmark.circle.fill"
}
ViewModelの実装
ボタンがタップされるとまずsaveメソッドが実行されます
今回はisValidInputというpropertyで条件に応じてAlertContextを渡すようにしています.
メソッド内でshownをtrueにすることでAlertが表示されます
class ViewModel: ObservableObject {

    @Published var shown = false // trigger
    @Published var input = ""
    @Published var alert: Alert?

    // store data
    func save() {
        guard isValidInput else { return }
        alert = AlertContext.sucess
        shown = true
    }
    // validation input data
    var isValidInput: Bool {
        if input.isEmpty {
            alert = AlertContext.empty
            return false
        } else if !(input == "ベジータ") {
            alert = AlertContext.invalidData
            return false
        }
        return true
    }
}
まとめ
ベストプラクティスとまでは行かないかもしれないですが,カスタムしたアラートを使いたいという方の参考になれば幸いです!
下記にサンプルのプロジェクトがあるのでお試しあれ!
Discussion