Hono + Cloudflare Workers でパスキーを試してみる
近年、パスキーと呼ばれる、パスワードの代わりに生体認証技術等を利用した認証方法が普及しつつあります。ブラウザからは、WebAuthn と呼ばれる API を介してパスキーを利用することが可能です。Cloudflare Workes + Hono を用いて WebAuthn を試してみたので、その実装を紹介します。
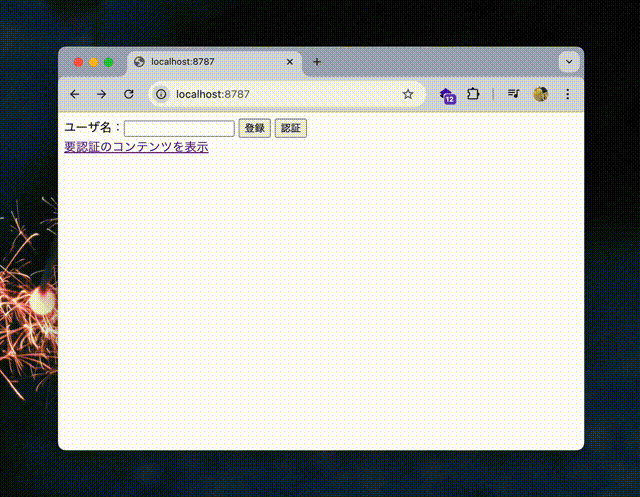
パスキーによる認証の実装例
なお、WebAuthn の情報に関しては、次の記事が参考になります。
- ウェブ認証 API - MDN Web Docs
- Yahoo! JAPANでの生体認証の取り組み(FIDO2サーバーの仕組みについて - Yahoo! JAPAN Tech Blog)
- WebAuthnことはじめ | メルカリエンジニアリング
- 次世代の認証技術 WebAuthnを紹介【前編】 | TECH | NRI Digital
実装
実装は GitHub 上に公開しています。記事中のコードでは細部を端折っているため、詳しくはこちらを参照してください。
認証サーバ(Relying Party: RP)およびフロントエンドの実装には、ライブラリである SimpleWebAuthn を利用します。SimpleWebAuthn はバックエンド用の @simplewebauthn/server、フロントエンド用の @simplewebauthn/browser、および型定義からなる @simplewebauthn/types から構成されます。
SimpleWebAuthn を利用することによって、各種パラメータの検証等の複雑な処理をライブラリに一任することができます。
公開鍵とユーザの関連を示す情報は、RDB である Cloudflare D1 にて管理します。以下に最低限必要なテーブル定義を示します。
CREATE TABLE passkey(
  id TEXT PRIMARY KEY,         # ユーザ名 + 認証器の ID
  credencial_id TEXT NOT NULL, # 認証情報の ID
  public_key TEXT NOT NULL,    # 公開鍵
  username TEXT NOT NULL,      # ユーザ名、本来は外部キーが望ましい
  counter INTEGER NOT NULL,    # 認証回数
  updated_at TEXT NOT NULL DEFAULT (DATETIME('now', 'localtime')),
  created_at TEXT NOT NULL DEFAULT (DATETIME('now', 'localtime'))
);
一方、あくまで一時的な情報に過ぎない情報(チャレンジ[1]、セッション)は Cloudflare Workers KV を用いて管理します。本来は分離して管理すべきでしょうが、本実装例では簡単のために同一ストレージを使用しています。
認証サーバ
Yarn 等を用いて環境構築を行います。
yarn create hono my-app
yarn add hono @simplewebauthn/server workers-qb base64-js uuid
yarn add -D @simplewebauthn/types @types/base64-js @types/uuid
公開鍵の登録および認証にあたって、サーバ側では以下の 4 つのエンドポイントが必要です。これらの実装を簡単に見ていきます。
- 公開鍵の登録
-
/attestation/options:チャレンジを含むオプションを生成、返却 -
/attestation/result:パラメータを検証した上で公開鍵を登録
-
- 認証
-
/assertion/options:チャレンジを含むオプションを生成、返却 -
/assertion/result:パラメータを検証
-
/attestation/options
SimpleWebAuthn の generateRegistrationOptions を用いて、チャレンジを含むオプションを生成します。チャレンジは後ほど使用するため、ユーザ名をキーにして KV に保存します。excludeCredentials を指定することによって、あるアカウントに対して同一の認証器が登録される事態を防ぐことができます。
import { generateRegistrationOptions } from "@simplewebauthn/server";

const rpName = "TestWebAuthn";
const rpID = "localhost";
// フロントエンドのオリジンを指定
const origin = `http://localhost:8787`;

// ユーザ名に紐づいたパスキーをすべて取得
const getUserPasskeys = async (userName: string, { DB }: Env) => {
  const qb = new D1QB(DB);
  const result = await qb.fetchAll<DBPasskey>({
    tableName: "passkey",
    fields: "*",
    where: { conditions: "username = ?1", params: [userName] },
  }).execute();

  const values = result.results ?? [];
  const passkeys: Passkey[] = [];
  for (const value of values) {
    passkeys.push(await DBPasskeyToPassKey(value));
  }
  return passkeys;
};

// チャレンジを KV に保存
const storeChallenge = async (userName: string, challenge: string, { KV }: Env) => {
  await KV.put(`challenge/${userName}`, challenge);
};

export const getRegistrationOptions = async (userName: string, env: Env) => {
  const passkeys = await getUserPasskeys(userName, env);
  const options = await generateRegistrationOptions({
    rpName,
    rpID,
    userName,
    excludeCredentials: passkeys.map((passkey) => ({ id: passkey.credentialId })),
    authenticatorSelection: { residentKey: "preferred", userVerification: "preferred" },
  });
  await storeChallenge(userName, options.challenge, env);
  return options;
};
定義した getRegistrationOptions は、Hono のハンドラから呼び出して適切に処理します。
import { Hono } from "hono";
const app = new Hono<{ Bindings: Bindings }>();

app.get("/attestation/options", async (c) => {
  try {
    const { userName } = c.req.query();
    const options = await getRegistrationOptions(userName, c.env);
    return c.json({ status: "success", options });
  } catch (e: any) {
    return c.json({ status: "error", error: e.toString() }, 500);
  }
});
/attestation/result
/attestation/options にて生成したチャレンジ、および認証器にして生成された情報を SimpleWebAuthn の verifyRegistrationResponse に渡して検証します。検証結果が有効であった場合、公開鍵等の情報をユーザ名に紐づけて DB に保存します。
import { verifyRegistrationResponse } from "@simplewebauthn/server";

// チャレンジを KV から取得
const getChallenge = async (userName: string, { KV }: Env) => {
  const challenge = await KV.get(`challenge/${userName}`);
  if (!challenge) throw new Error("No challenge exists.");
  return challenge;
};

// パスキーを DB に保存
const insertPassKey = async (passkey: Passkey, { DB }: Env) => {
  const qb = new D1QB(DB);
  await qb.insert<DBPasskey>({
    tableName: "passkey",
    data: passkeyToDBPasskey(passkey),
  }).execute();
};

export const verifyRegistration = async (userName: string, body: RegistrationResponseJSON, env: Env) => {
  const challenge = await getChallenge(userName, env);
  const verification = await verifyRegistrationResponse({
    response: body,
    expectedChallenge: challenge,
    expectedOrigin: origin,
    expectedRPID: rpID,
  });
  if (!verification.verified) {
    throw new Error("Not verified.");
  }
  const info = verification.registrationInfo!;
  await insertPassKey({
    userName,
    id: `${userName}/${info.aaguid}`,
    credentialId: info.credentialID,
    publicKey: info.credentialPublicKey,
    counter: info.counter,
  }, env);
};
/assertion/options
/attestation/options と同様の手続きです。SimpleWebAuthn の generateAuthenticationOptions を用いて、チャレンジを含むオプションを生成し、チャレンジを KV に保存します。allowCredentials には許可する認証情報の配列を指定します。
import { generateAuthenticationOptions } from "@simplewebauthn/server";

export const getAuthenticationOptions = async (env: Env) => {
  const userPasskeys = await getUserPasskeys(userName, env);
  const options = await generateAuthenticationOptions({
    rpID,
    allowCredentials: userPasskeys.map((passkey) => ({ id: passkey.credentialId })),
  });
  await storeChallenge(userName, options.challenge, env);
  return options;
};
/assertion/result
/assertion/options にて生成したチャレンジ、および認証器にして生成された情報を SimpleWebAuthn の verifyAuthenticationResponse に渡して検証します。検証結果が有効であった場合、認証回数を最新の状態に更新して DB に保存します。
import { verifyAuthenticationResponse } from "@simplewebauthn/server";

export const verifyAuthentication = async (
  body: AuthenticationResponseJSON,
  env: Env
) => {
  const challenge = await getChallenge(userName, env);
  const allPasskeys = await getUserPasskeys(userName, env);
  const passkey = allPasskeys.find(({ credentialId }) => credentialId === body.id);
  if (!passkey) {
    throw new Error(`No passkey exists.`);
  }
  const verification = await verifyAuthenticationResponse({
    response: body,
    expectedChallenge: challenge,
    expectedOrigin: origin,
    expectedRPID: rpID,
    authenticator: {
      credentialID: passkey.credentialId,
      credentialPublicKey: passkey.publicKey,
      counter: passkey.counter,
    },
  });
  if (verification.verified) {
    const newPasskey = structuredClone(passkey);
    passkey.counter = verification.authenticationInfo.newCounter;
    await updatePasskey(newPasskey, env);
  }
  return verification.verified;
};
認証に成功した場合、適切な処理を行います。本実装例ではログインセッションを発行しています。
import { setCookie } from "hono/cookie";
import { v4 as uuidv4 } from "uuid";

app.post("/assertion/result", async (c) => {
  try {
    const { userName, body } = await c.req.json();
    const verified = await verifyAuthentication(userName, body, c.env);

    // セッションを発行
    if (verified) {
      const ttl = 60 * 60;
      const sessionId = uuidv4();
      setCookie(c, "session_id", sessionId, {
        httpOnly: true,
        secure: true,
        sameSite: "None",
        maxAge: ttl,
        path: "/",
      });
      await c.env.KV.put(`session/${sessionId}`, userName, { expirationTtl: ttl });
    }
    return c.json({ verified }, 500);
  } catch (e: any) {
    console.error(e);
    return c.json({ verified: false, error: e.toString() }, 500);
  }
});
フロントエンド
生の JS で記述するため、CDN から @simplewebauthn/browser をインポートします。
<script src="https://unpkg.com/@simplewebauthn/browser/dist/bundle/index.umd.min.js"></script>
<script src="/script.js"></script>
公開鍵の登録
公開鍵の登録処理を以下に示します。/attestation/options に fetch した後、startRegistration を呼び出します。これにより、パスキーの登録を要求する画面が表示されます。
const register = async () => {
  try {
    const userName = document.getElementById("userName").value;
    const optionsUrl = new URL("/attestation/options");
    optionsUrl.searchParams.append("userName", userName);
    const optionsResponse = await fetch(optionsUrl);
    const { options } = await optionsResponse.json();

    const registration = await SimpleWebAuthnBrowser.startRegistration(options);
    const verificationResponse = await fetch("/attestation/result", {
      method: "POST",
      headers: { "Content-Type": "application/json" },
      body: JSON.stringify({ userName, body: registration }),
    });
    const verification = await verificationResponse.json();
    if (verification.verified) {
      alert("登録に成功しました");
    } else {
      alert(`登録に失敗しました: ${verification.error}`);
    }
  } catch (e) {
    alert(`登録に失敗しました: ${e}`);
  }
};
認証
認証処理を以下に示します。登録時と同様に、/assertion/options に fetch した後、startAuthentication を呼び出します。これにより、パスキーによる認証要求が表示されます。
const verify = async () => {
  try {
    const userName = document.getElementById("userName").value;
    const params = new URLSearchParams({ userName: userName });
    const optionsResponse = await fetch(`/assertion/options?${params}`);
    const { options } = await optionsResponse.json();

    const authentication = await SimpleWebAuthnBrowser.startAuthentication(options);
    const verificationResponse = await fetch("/assertion/result", {
      method: "POST",
      headers: { "Content-Type": "application/json" },
      body: JSON.stringify({ userName, body: authentication }),
    });
    const verification = await verificationResponse.json();
    if (verification.verified) {
      alert("認証に成功しました");
    } else {
      alert(`認証に失敗しました: ${verification.error}`);
    }
  } catch (e) {
    alert(`認証に失敗しました: ${e}`);
  }
};
認可処理
セッションの有無に応じて認可処理を行います。このあたりは、以前 Cloudflare Workers 上で OAuth2.0 クライアント を実装した際と同様の処理です。
app.get("/restricted", async (c) => {
  const sessionId = getCookie(c, "session_id");
  if (!sessionId) {
    return c.text("Unauthorized", 401);
  }
  const userName = await c.env.KV.get(`session/${sessionId}`);
  if (!userName) {
    return c.text("Unauthorized", 401);
  }
  return c.text(`Welcome, ${userName}!`);
});
むすびに
Cloudflare Workers + Hono 上にて、ライブラリを用いてパスキー認証を実装する方法を示しました。今回の実装では、任意のユーザ ID に対して認証情報を紐づけることが可能であるため、実用性はありませんが、パスキーを試してみるという目的は達成されたかと思います。
-
サーバからクライアントに送信されるランダムな文字列(チャレンジ & レスポンス認証) ↩︎
Discussion