証明書認証を使ってLog Ingect API経由でLogAnalyticsにログを登録する
1.記事を作成した目的
以下の記事を参考に、Azure LogAnalyticsにカスタムログファイルの取り込みを実装しようとしましたが、サービスプリンシパル認証にクライアントシークレットではなく証明書を使いたかったので調査を行いました。
2.サービスプリンシパル(Entra ID アプリケーション)の作成
2.1. 証明書の作成
(1)サービスプリンシパル用の証明書を作成し、エクスポートする
参考:自己署名公開証明書を作成してアプリケーションを認証する - Microsoft identity platform | Microsoft Learn
$certname = "LogAnalyticsConnect"
$cert = New-SelfSignedCertificate -Subject "CN=$certname" -CertStoreLocation "Cert:\CurrentUser\My" -KeyExportPolicy Exportable -KeySpec Signature -KeyLength 2048 -KeyAlgorithm RSA -HashAlgorithm SHA256
Export-Certificate -Cert $cert -FilePath ".\$certname.cer"
(2) 秘密キーつきの証明書をエクスポートする(後ほどPython用に利用する)
$mypwd = ConvertTo-SecureString -String "password" -Force -AsPlainText
Export-PfxCertificate -Cert $cert -FilePath ".\$certname.pfx" -Password $mypwd
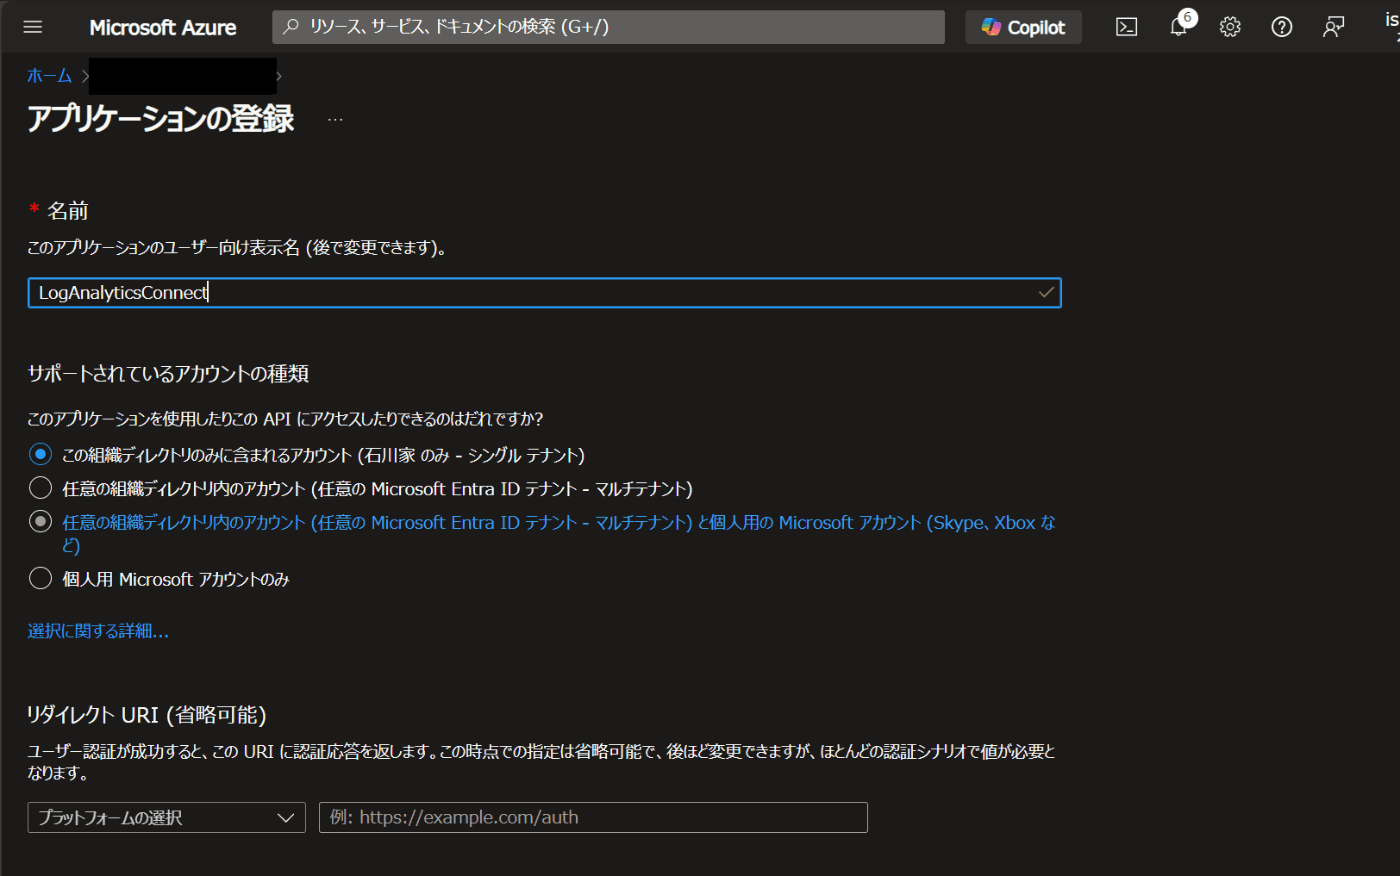
2.2. サービスプリンシパル(Entra IDアプリ)の登録
以下のURLの手順に従い登録する
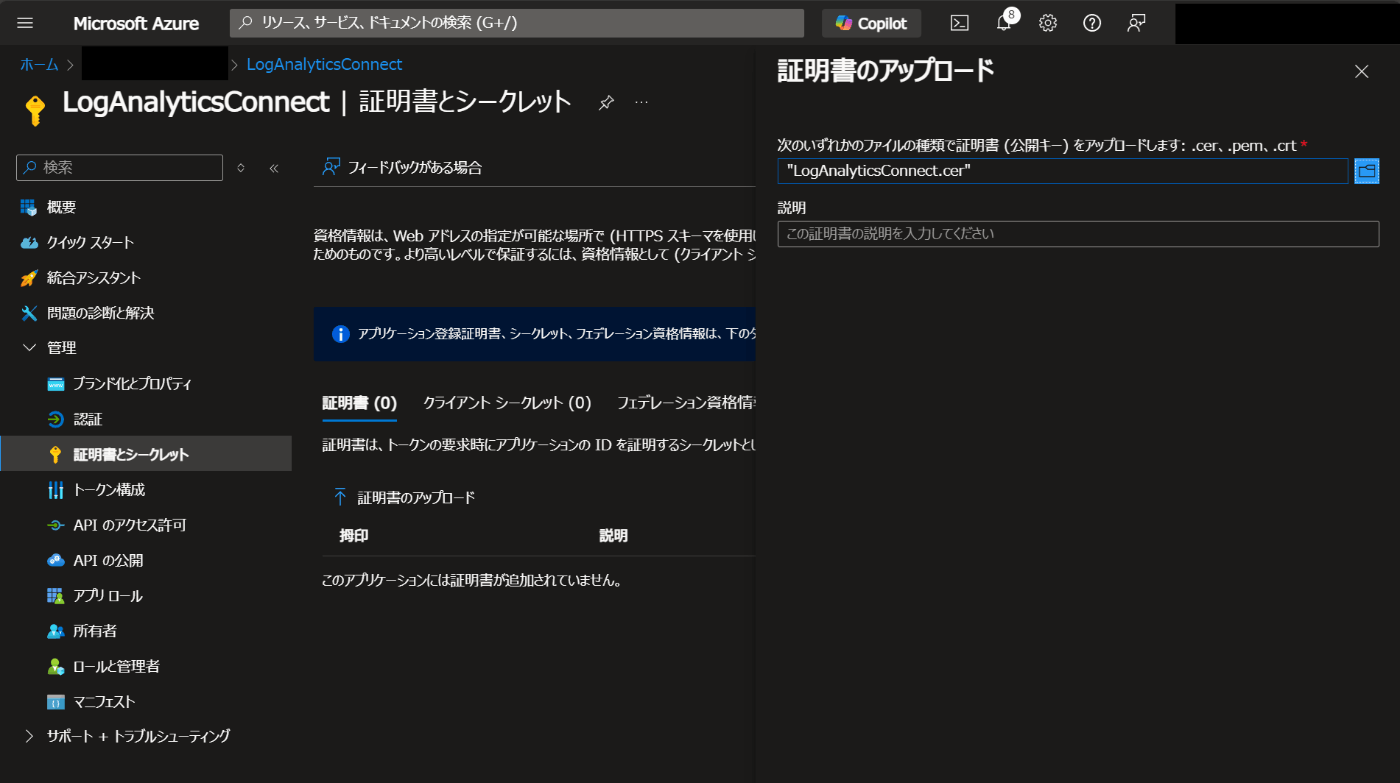
証明書(cerファイル)をアップロードして登録する

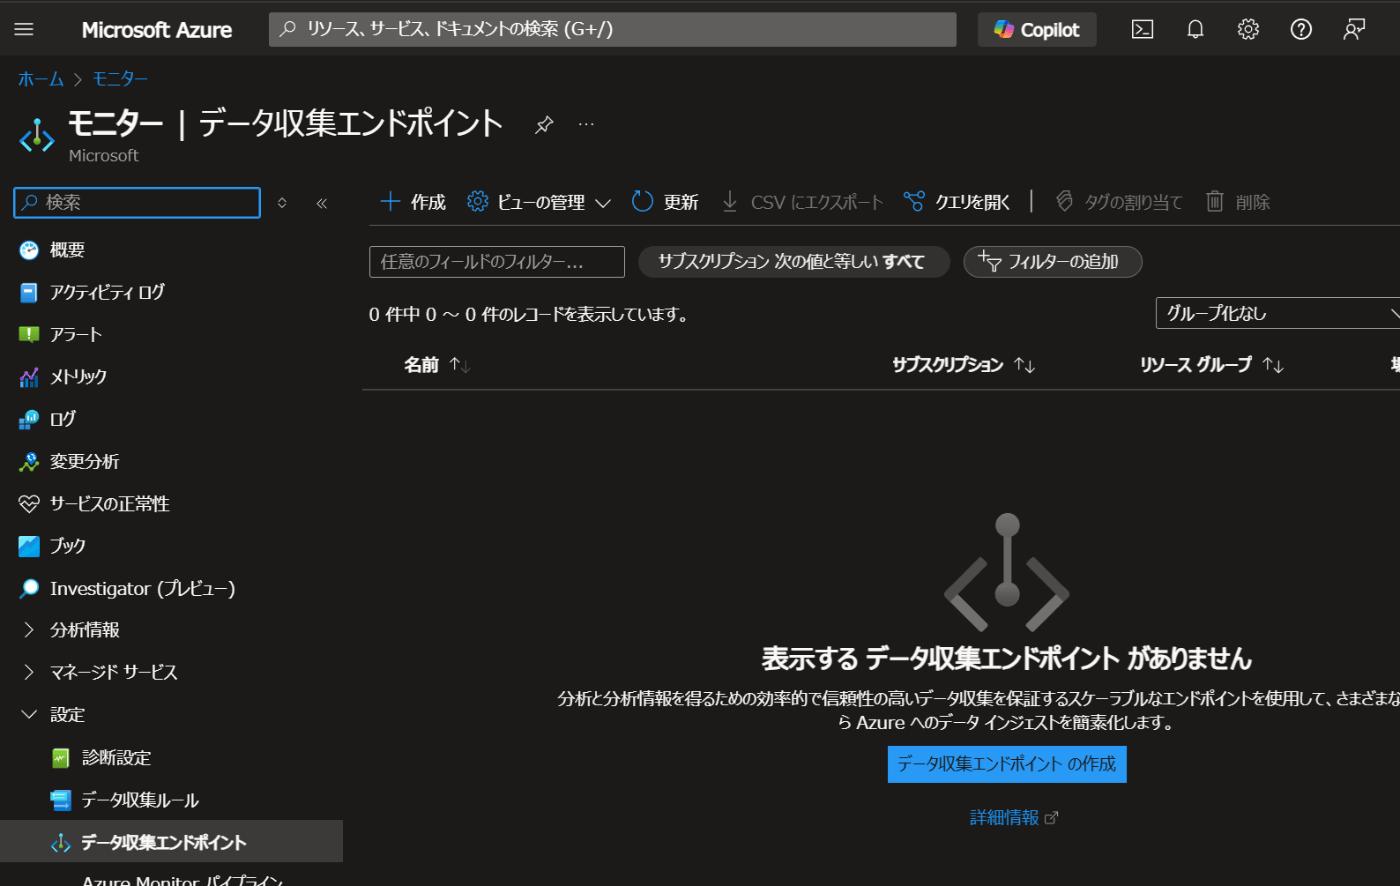
2.3. データ収取エンドポイントの作成
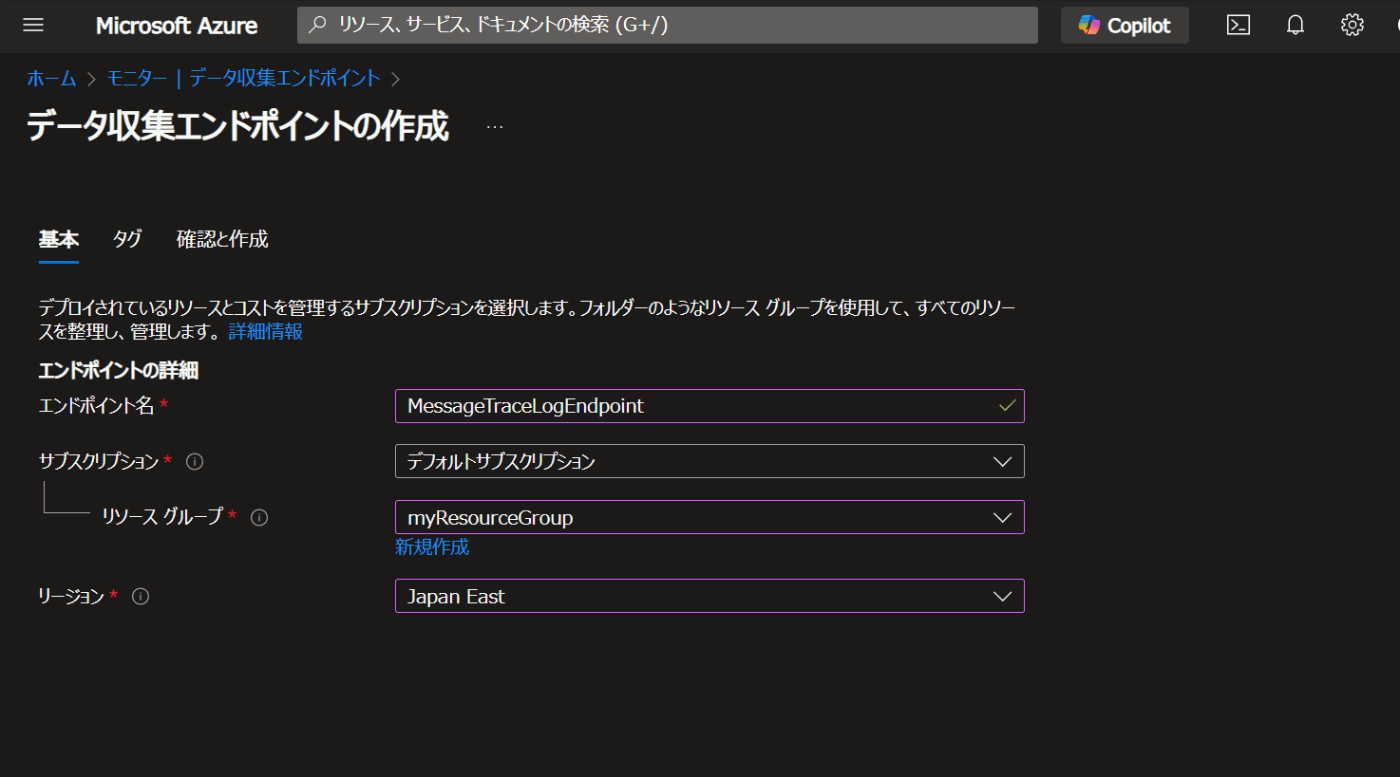
作成したDCRのログインジェストURLをメモする
2.4. Log Analyticsワークスペースを作成し、カスタムログテーブルを作成する
(1)Log Analyticsワークスペースを作成する
(2)カスタムログテーブル(DCRベース)を作成する
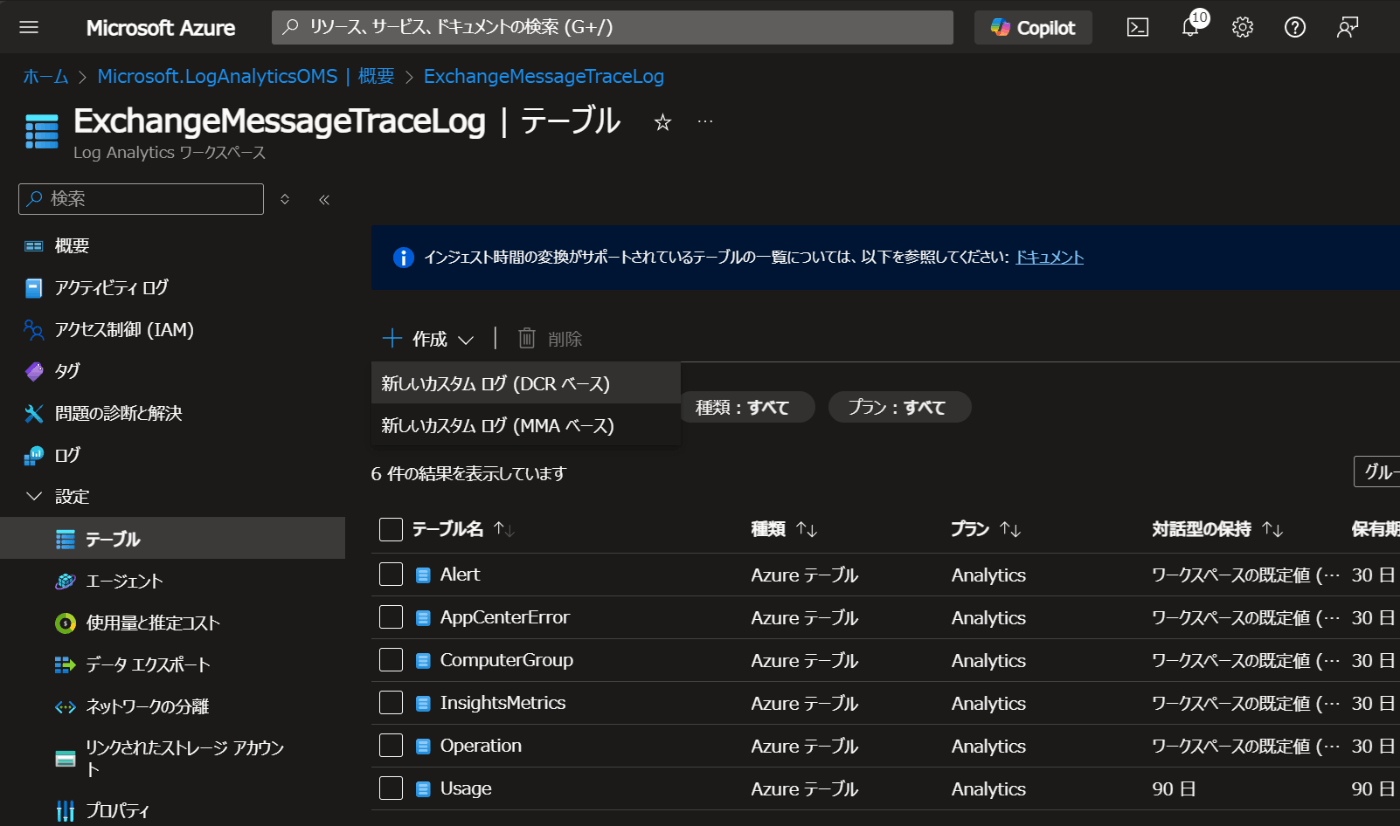
(3)テーブル(カスタムログ)、データ収集ルールを作成する

(4)スキーマと変換の画面で、サンプルログファイルをアップロードする
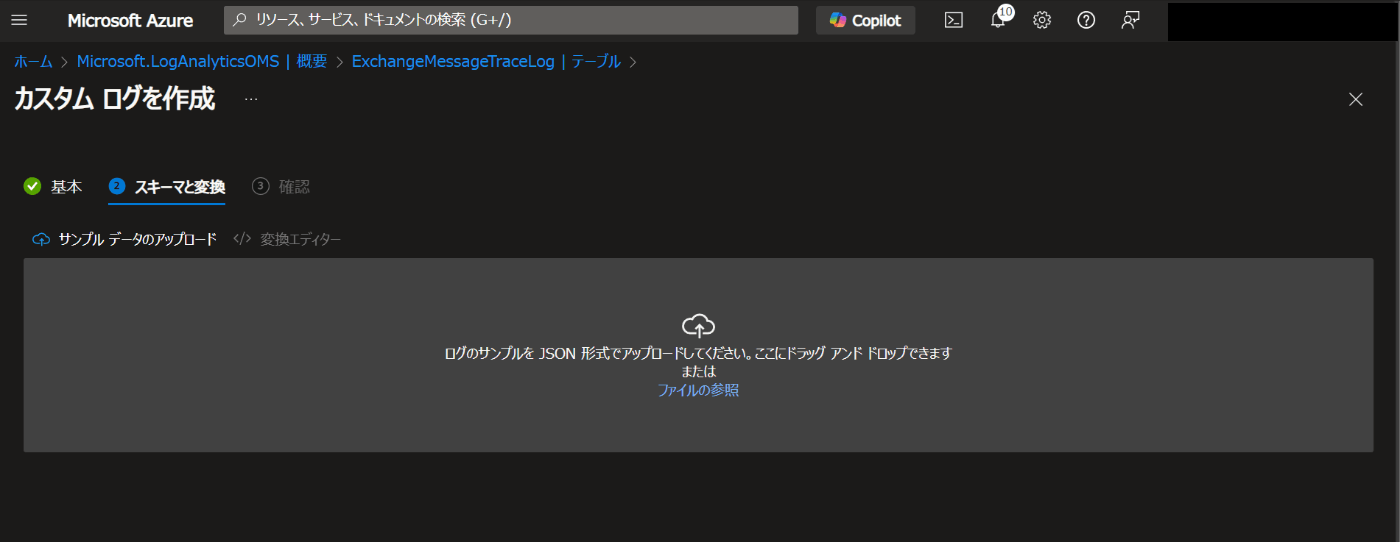
今回は以下のようなJSONファイル(サンプルログファイル)をアップロードします
[
  {
    "Organization": "XXXXXXXX.onmicrosoft.com",
    "MessageId": "<TY3P286MB24996AC897F20C1849AF996EE0472@TY3P286MB2499.JPNP286.PROD.OUTLOOK.COM>",
    "Received": "2024-10-17T11:04:02.890701",
    "SenderAddress": "test@hogehoge.com",
    "RecipientAddress": "sample@ageage.com",
    "Subject": "Mail Subject",
    "Status": "Delivered",
    "ToIP": null,
    "FromIP": "209.85.160.55",
    "Size": 72635,
    "MessageTraceId": "94f4e7bd-689d-4d86-e602-08dcee9b6902",
    "StartDate": "2024-10-17T00:00:00",
    "EndDate": "2024-10-18T00:00:00",
    "Index": 0
  },
 (中略)
]
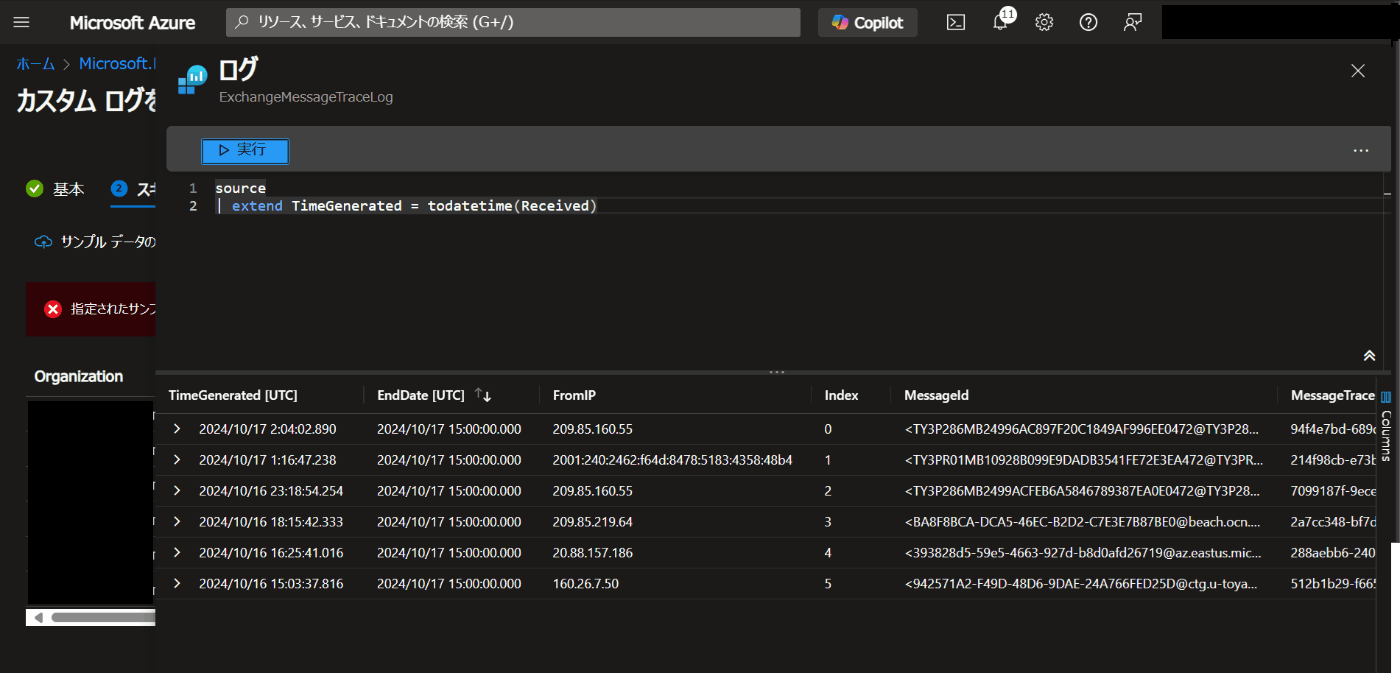
(5)ログファイルにTmeGeneratedフィールドが見つからないというメッセージが出ることを確認する

(6)「変換エディタ」を選択してJSONデータ中の Receivedの日付をTimeGenerated列になるよう指定する
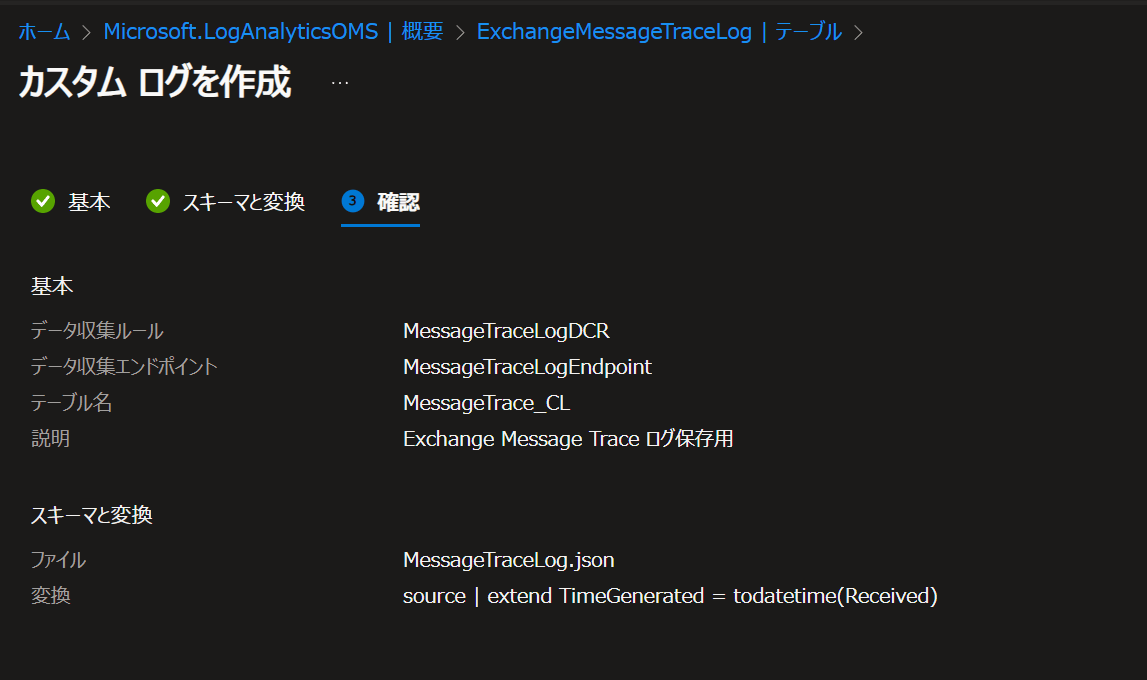
(7)作成したDCRからimmutableIDを確認する

(8)作成したDCRにIAMから「監視メトリック発行者」のアクセス許可を追加する

ロール割り当てのメンバーとして、先ほど作成したサービスプリンシパル(Entra IDアプリケーションを選択する)

3.Pythonコードの作成
3.1. Pythonの必要ライブラリのインストール
pip install azure-monitor-ingestion
pip install azure-identity
3.2. サンプルコード
以下のようなコードを作成する。
endpoint URL, dcr_immutableid, stream_name, tenant_id, client_id, cert_pathを環境に合わせて修正する
import json
from azure.identity import CertificateCredential
from azure.monitor.ingestion import LogsIngestionClient
from azure.core.exceptions import HttpResponseError

endpoint_uri = "https://XXXXXXXXXXXXXXXXXXXXXXXXXXXXX.japaneast-1.ingest.monitor.azure.com" # logs ingestion endpoint of the DCR
dcr_immutableid = "dcr-XXXXXXXXXXXXXXXXXXXXXXXX" # immutableId property of the Data Collection Rule
stream_name = "Custom-MessageTrace_CL" #name of the stream in the DCR that represents the destination table

#接続情報
tenant_id = "XXXXXXXXXXXXXXXXXXXXXXXXXXXXXXXXXXXX"
client_id = "XXXXXXXXXXXXXXXXXXXXXXXXXXXXXXXXXXXX"
cert_path = "C:\\path\\to\\cert\\LogAnalyticsConnect.pfx"
# if the private key is password protected, provide a 'password' keyword argument
credential = CertificateCredential(tenant_id, client_id, cert_path, password="password")

client = LogsIngestionClient(endpoint=endpoint_uri, credential=credential, logging_enable=True)

with open('C:\\path\\to\\json\\MessageTraceLog.json', 'r', encoding='utf-8') as file:
    body = json.load(file)

try:
    client.upload(rule_id=dcr_immutableid, stream_name=stream_name, logs=body)
except HttpResponseError as e:
    print(f"Upload failed: {e}")
<参考>
3.3. 実行結果
上記コードを実行した結果、JSONファイルをLogAnalyticsにインポートできたことを
Discussion