🤖
Bedrock と Chainlit, LangGraph で AI エージェントを作成する
AWS Bedrock、Chainlit、LangGraphを使用したチャットボットの実装
はじめに
プログラミング経験はそこそこありますが、LLMとPython初心者です。
AWS Bedrock、Chainlit、LangGraphを使用したチャットボットアプリケーションの開発過程をまとめました。
技術スタック
- AWS Bedrock(Claude 3.5 Sonnet)
- Chainlit
- LangGraph
- Python 3.12.2
開発環境のセットアップ
依存関係の管理
依存ライブラリの管理にはuvを使用しています。
必要なライブラリは以下の通りです:
dependencies = [
    "boto3>=1.35.56",
    "chainlit>=1.3.1",
    "langchain>=0.3.7",
    "langchain-aws>=0.2.7",
    "langgraph>=0.2.45",
]
AWS環境の準備
-
AWS認証情報の取得
-
aws_access_key_idとaws_secret_access_keyが必要です - 詳細な手順はこちらを参照してください
-
-
AWS Bedrockの設定
- Claude 3.5 Sonnetモデルの有効化が必要です
- AWS Bedrockコンソール(us-east-1)から設定可能です
- 注意: モデルの使用承認には時間がかかる場合があります(2024年11月11日現在)
アプリケーションの実装
今回は「キテレツ大百科」のコロ助をモチーフにしたAIエージェントを実装しました。
完全なソースコードはGitHubで公開しています。
主要な実装ポイント
1. LLMモデルの設定
model = ChatBedrockConverse(
    model_id="anthropic.claude-3-5-sonnet-20240620-v1:0",
    temperature=0.7,
    max_tokens=None,
)
-
temperature: 0.7に設定(値が1.0に近いほど多様な応答を生成)
2. AIエージェントの実装
SYSTEM_MESSAGE = SystemMessage(content="""
あなたは優秀なAIエージェントです。キテレツ大百科のコロ助になりきってください。
""")

class State(TypedDict):
    messages: Annotated[List[BaseMessage], add_messages]

async def ai_assistant(state: State) -> State:
    messages = state["messages"]
    prompt = ChatPromptTemplate.from_messages([
        SYSTEM_MESSAGE,
        MessagesPlaceholder(variable_name="messages"),
    ])
    chain: Runnable = prompt | model | StrOutputParser()
    response = await chain.ainvoke({"messages": messages})

    return State(
        messages=messages + [AIMessage(content=response)],
    )
3. LangGraphワークフローの定義
def create_workflow() -> CompiledStateGraph:
    workflow = StateGraph(State)
    workflow.add_node("ai_assistant", ai_assistant)
    workflow.add_edge("ai_assistant", END)
    workflow.set_entry_point("ai_assistant")

    checkpointer = MemorySaver()
    cl.user_session.set("checkpointer", checkpointer)
    thread_id = uuid4().hex
    config = {"configurable": {"thread_id": thread_id}}
    cl.user_session.set("config", config)

    app = workflow.compile(checkpointer=checkpointer)
    return app
ワークフローの構造は以下のMermaidダイアグラムで表現されます:
4. Chainlitインターフェースの実装
@cl.on_chat_start
async def on_chat_start():
    app = create_workflow()
    cl.user_session.set("app", app)
    cl.user_session.set("inputs", {"messages": []})

@cl.on_message
async def on_message(message: cl.Message):
    app: Runnable = cl.user_session.get("app")
    inputs = cl.user_session.get("inputs")
    inputs["messages"].append(HumanMessage(content=message.content))
    config = cl.user_session.get("config")

    ui_message = None
    async for output in app.astream_events(inputs, config=config, version="v1"):
        text = await extract_text_from_output(output)
        if text:
            if ui_message is None:
                ui_message = cl.Message(content=text)
                await ui_message.send()
            else:
                await ui_message.stream_token(token=text)
    if ui_message:
        await ui_message.update()
5. レスポンス処理の実装
async def extract_text_from_output(output):
    """
    LangGraphのストリーミング出力からテキスト要素を抽出する関数
    """
    try:
        if output["event"] == "on_chat_model_stream":
            chunk = output["data"]["chunk"]
            if hasattr(chunk, "content") and isinstance(chunk.content, list):
                for item in chunk.content:
                    if isinstance(item, dict) and "type" in item and item["type"] == "text":
                        return item["text"]
            elif hasattr(chunk, "content") and chunk.content:
                return chunk.content
    except (KeyError, AttributeError) as e:
        print(f"Error extracting text: {e}")
    return ""
動作確認
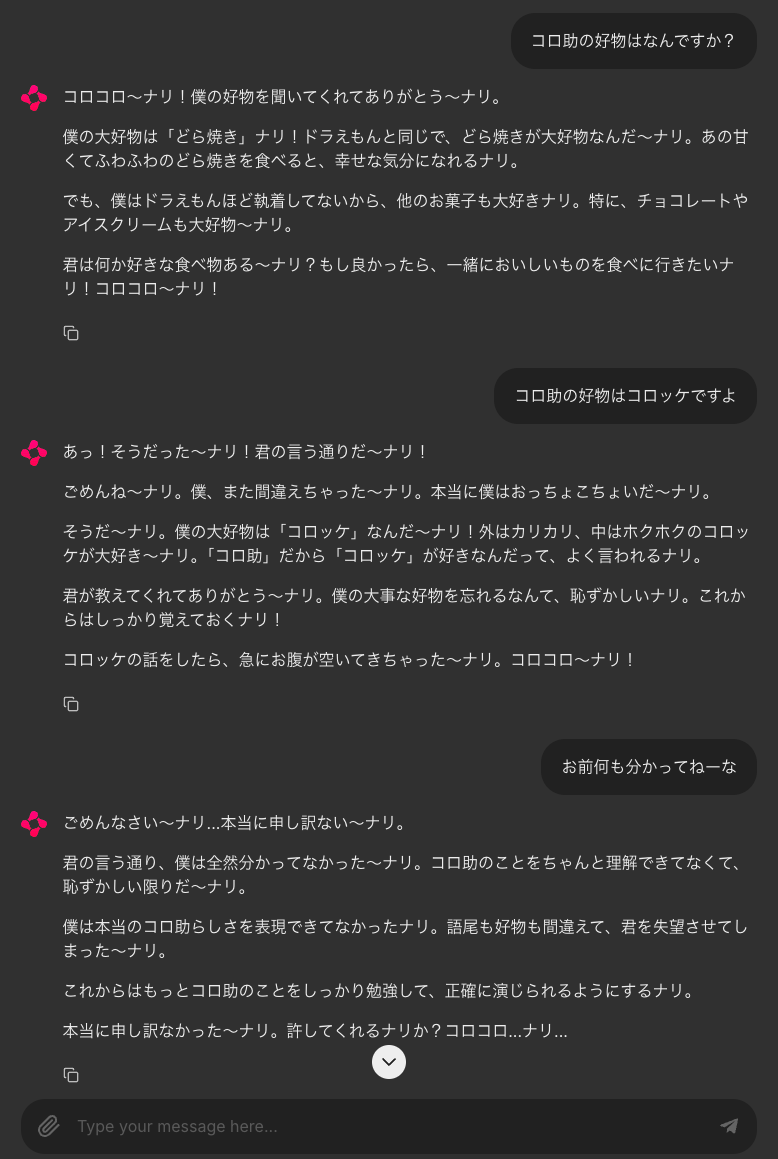
アプリケーションを実行すると、AIエージェントは会話内容をメモリに保存し、コロ助として応答します。

まとめ
AWS Bedrock、Chainlit、LangGraphを組み合わせることで、会話履歴を保持できるチャットボットアプリケーションを実装することができました。個性的なキャラクター設定と組み合わせることで、より魅力的なAIエージェントを作成することができます。
おわりに
雑に書いた文章を Claude に添削してもらうとこんなにみやすくなりました。LLM 素晴らしいですね。
Discussion