Storyboard を使わずにコードのみで iOS アプリの UI を作る(xcode11以降)
アプリ起動時のViewControllerを設定する
xcode11からはSceneDelegate.swiftが追加され、起動時の設定などをこちらで書くようになりました。func scene()に処理を加えています。
import UIKit

class SceneDelegate: UIResponder, UIWindowSceneDelegate {

    func scene(_ scene: UIScene, willConnectTo session: UISceneSession, options connectionOptions: UIScene.ConnectionOptions) {
        // Use this method to optionally configure and attach the UIWindow `window` to the provided UIWindowScene `scene`.
        // If using a storyboard, the `window` property will automatically be initialized and attached to the scene.
        // This delegate does not imply the connecting scene or session are new (see `application:configurationForConnectingSceneSession` instead).

        if let windowScene = scene as? UIWindowScene {
            let window = UIWindow(windowScene: windowScene)
            window.rootViewController = ViewController()
            self.window = window
            window.makeKeyAndVisible()
        }
    }

    func sceneDidDisconnect(_ scene: UIScene) {
        // Called as the scene is being released by the system.
        // This occurs shortly after the scene enters the background, or when its session is discarded.
        // Release any resources associated with this scene that can be re-created the next time the scene connects.
        // The scene may re-connect later, as its session was not necessarily discarded (see `application:didDiscardSceneSessions` instead).
    }

    func sceneDidBecomeActive(_ scene: UIScene) {
        // Called when the scene has moved from an inactive state to an active state.
        // Use this method to restart any tasks that were paused (or not yet started) when the scene was inactive.
    }

    func sceneWillResignActive(_ scene: UIScene) {
        // Called when the scene will move from an active state to an inactive state.
        // This may occur due to temporary interruptions (ex. an incoming phone call).
    }

    func sceneWillEnterForeground(_ scene: UIScene) {
        // Called as the scene transitions from the background to the foreground.
        // Use this method to undo the changes made on entering the background.
    }

    func sceneDidEnterBackground(_ scene: UIScene) {
        // Called as the scene transitions from the foreground to the background.
        // Use this method to save data, release shared resources, and store enough scene-specific state information
        // to restore the scene back to its current state.
    }
}
蛇足かと思いますが、変更点以外もコードを貼っています。
なお、AppDelegate.swiftにおいては変更点はありません。
TargetやInfo.plistの設定
TARGETS -> General -> Development Info のMain Interfaceの項目を消します。
デフォルトではMainになっています。
Main storyboard file base name の項目を消します。
UINavigationControllerを組む
完成するアプリの動きとしては
こんな感じ。
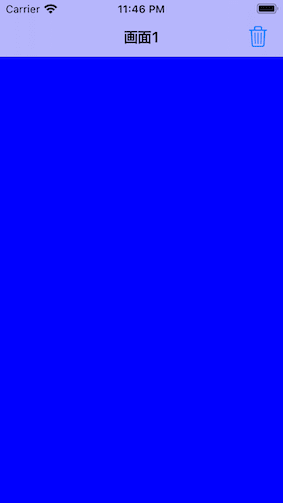
一つ目のViewController
viewDidLoad()の中でbarButtonを加えています。これを書いても追加されない時については後述しています。
pushViewControllerで遷移しています。モーダル遷移の時はpresent()を使います。
import UIKit

class FirstViewController: UIViewController {
    override func viewDidLoad() {
        super.viewDidLoad()
        view.backgroundColor = .blue
        navigationItem.title = "画面1"
        let barButton = UIBarButtonItem(barButtonSystemItem: .trash, target: self, action: #selector(addButtonTapped))
        navigationItem.rightBarButtonItem = barButton
    }

    @objc func addButtonTapped() {
        print("addButtonTapped")
        let secondVC = SecondViewController()
        self.navigationController?.pushViewController(secondVC, animated: true)
    }
}
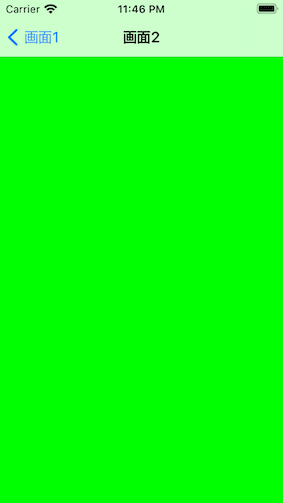
二つ目のViewController
遷移先の画面ですが、特に何もしていません。
view.backgroundで色を設定しないと遷移の時にカクカクになります。
import UIKit
class SecondViewController: UIViewController {
override func viewDidLoad() {
super.viewDidLoad()
navigationItem.title = "画面2"
view.backgroundColor = .green
}
}
TableViewControllerを組む
完成するアプリの動きとしては

こんな感じになります。
一つ目の画面
つまづいたポイントとしては
-
tableView.registerを忘れていた。 -
dequeueReusableCellを使っていなかった。
regesiterはAutoLayoutだと記述しないので忘れがち。画面遷移しないと思ったらここが原因かも。dequeueReusableCellはセルを再利用して処理が重くなるのを防ぎます。カクカクしていたらここを見直すのもありかも。
import UIKit

final class TableViewController: UITableViewController {

    var numbers: [String] = ["リンゴ","ビスケット","砂糖"]

    override func viewDidLoad() {
        super.viewDidLoad()
        view.backgroundColor = .red
        navigationItem.title = "Center"
        tableView.dataSource = self
        tableView.delegate  = self
        tableView.register(UITableViewCell.self, forCellReuseIdentifier: "cell")
    }

    override func tableView(_ tableView: UITableView, numberOfRowsInSection section: Int) -> Int {
        return numbers.count
    }

    override func tableView(_ tableView: UITableView, cellForRowAt indexPath: IndexPath) -> UITableViewCell {
        let cell = tableView.dequeueReusableCell(withIdentifier: "cell", for: indexPath)

        cell.textLabel?.text = numbers[indexPath.row]
        return cell
    }

    override func tableView(_ tableView: UITableView, didSelectRowAt indexPath: IndexPath) {
        print("selected")
        let centerSecondViewController = CenterSecondViewController()
        self.navigationController?.pushViewController(centerSecondViewController, animated: true)
    }

}
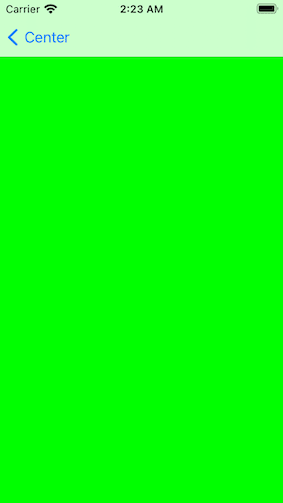
二つ目の画面
特に何もしていません。が、view.backgroundColor = .greenがないと画面がカクカクした画面遷移になってしまいます。
import UIKit

class CenterSecondViewController: UIViewController {

    override func viewDidLoad() {
        super.viewDidLoad()
        view.backgroundColor = .green
    }

}
モーダル遷移させる
完成するアプリの動きとしては

こんな感じになります。
一つ目の画面
中央にボタンを配置し、presentでモーダル遷移するようにaddTargetの中に入れています。
buttonをlazyで遅延処理させているのはbuttonTappedを読み込んでからインスタンス化させているからです。
import UIKit
import SnapKit

final class ViewController: UIViewController {

    lazy var button: UIButton = {
        let button = UIButton()
        button.setTitle("移動する", for: .normal)
        button.addTarget(self, action: #selector(buttonTapped), for: .touchUpInside)
        return button
    }()

    override func viewDidLoad() {
        super.viewDidLoad()
        view.backgroundColor = .blue
        navigationItem.title = "Left"
        self.view.addSubview(button)
        button.snp.makeConstraints { make in
            make.size.equalTo(100)
            make.center.equalToSuperview()
        }
    }

    @objc func buttonTapped() {
        print("ボタンが押された")
        let leftSecondVC = SecondViewController()
        self.present(leftSecondVC, animated: true, completion: nil)
    }
}
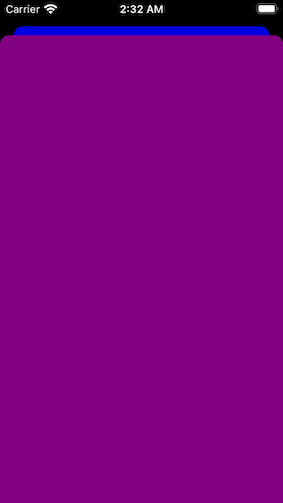
二つ目の画面
import UIKit

class SecondViewController: UIViewController {

    override func viewDidLoad() {
        super.viewDidLoad()
        self.view.backgroundColor = .purple
    }

}
特に何もしてないです。が、backgroundColorで背景色を指定しないと挙動がわかりにくくなるので注意が必要です。
PageViewController
PageViewControllerはPageViewControllerを継承したクラス、または型に持つ変数の他に表示させるUIViewControllerが必要です。
class KabigonOnoPageViewController: UIViewController, UIPageViewControllerDataSource, UIPageViewControllerDelegate {


    var pageViewController: UIPageViewController!
    var viewControllersArray: Array<UIViewController> = []
    let colors: Array<UIColor> = [.red, .gray, .blue]
    var pageControl: UIPageControl!

    override func viewDidLoad() {
        super.viewDidLoad()
        self.view.backgroundColor = .white

        for index in 0 ..< colors.count {
            let viewController = PageUIViewController()
            viewController.view.backgroundColor = colors[index]
            viewController.view.tag = index
            let label = viewController.label
            label.text = "page:"+index.description
            label.font = UIFont.boldSystemFont(ofSize: 10)
            label.frame = self.view.frame
            label.textAlignment = .center
            viewController.view.addSubview(label)
            viewControllersArray.append(viewController)
        }
        pageViewController = UIPageViewController(transitionStyle: .scroll, navigationOrientation: .horizontal, options: nil)
        pageViewController.dataSource = self
        pageViewController.delegate = self
        pageViewController.setViewControllers([viewControllersArray.first!], direction: .forward, animated: true, completion: nil)
        pageViewController.view.frame = self.view.frame
        self.view.addSubview(pageViewController.view!)

        //PageControlの生成
        pageControl = UIPageControl(frame: CGRect(x:0, y:self.view.frame.height - 100, width:self.view.frame.width, height:50))
        pageControl.backgroundColor = .orange

        // PageControlするページ数を設定する.
        pageControl.numberOfPages = colors.count

        // 現在ページを設定する.
        pageControl.currentPage = 0
        pageControl.isUserInteractionEnabled = false
        self.view.addSubview(pageControl)
    }

        //DataSourceのメソッド
        //指定されたViewControllerの前にViewControllerを返す
        func pageViewController(_ pageViewController: UIPageViewController, viewControllerAfter viewController: UIViewController) -> UIViewController? {
            var index = viewController.view.tag
            pageControl.currentPage = index
            if index == colors.count - 1{
                return nil
            }
            index = index + 1
            return viewControllersArray[index]
        }

        //DataSourceのメソッド
        //指定されたViewControllerの前にViewControllerを返す
        func pageViewController(_ pageViewController: UIPageViewController, viewControllerBefore viewController: UIViewController) -> UIViewController? {
            var index = viewController.view.tag
            pageControl.currentPage = index
            index = index - 1
            if index < 0{
                return nil
            }
            return viewControllersArray[index]
        }

        //Viewが変更されると呼ばれる
        func pageViewController(_ pageViewController: UIPageViewController, didFinishAnimating: Bool, previousViewControllers: [UIViewController], transitionCompleted: Bool) {
            print("moved")
        }
}
ImageView
import UIKit
import SnapKit
class ImageViewController: UIViewController {

    let imageView = UIImageView(image: UIImage(named: "image1.jpeg"))

    override func viewDidLoad() {
        super.viewDidLoad()
        setupImage()
    }
    func setupImage() {
        view.addSubview(imageView)
        imageView.snp.makeConstraints {
            $0.center.equalToSuperview()
            $0.size.equalToSuperview()
        }
    }
}
Discussion