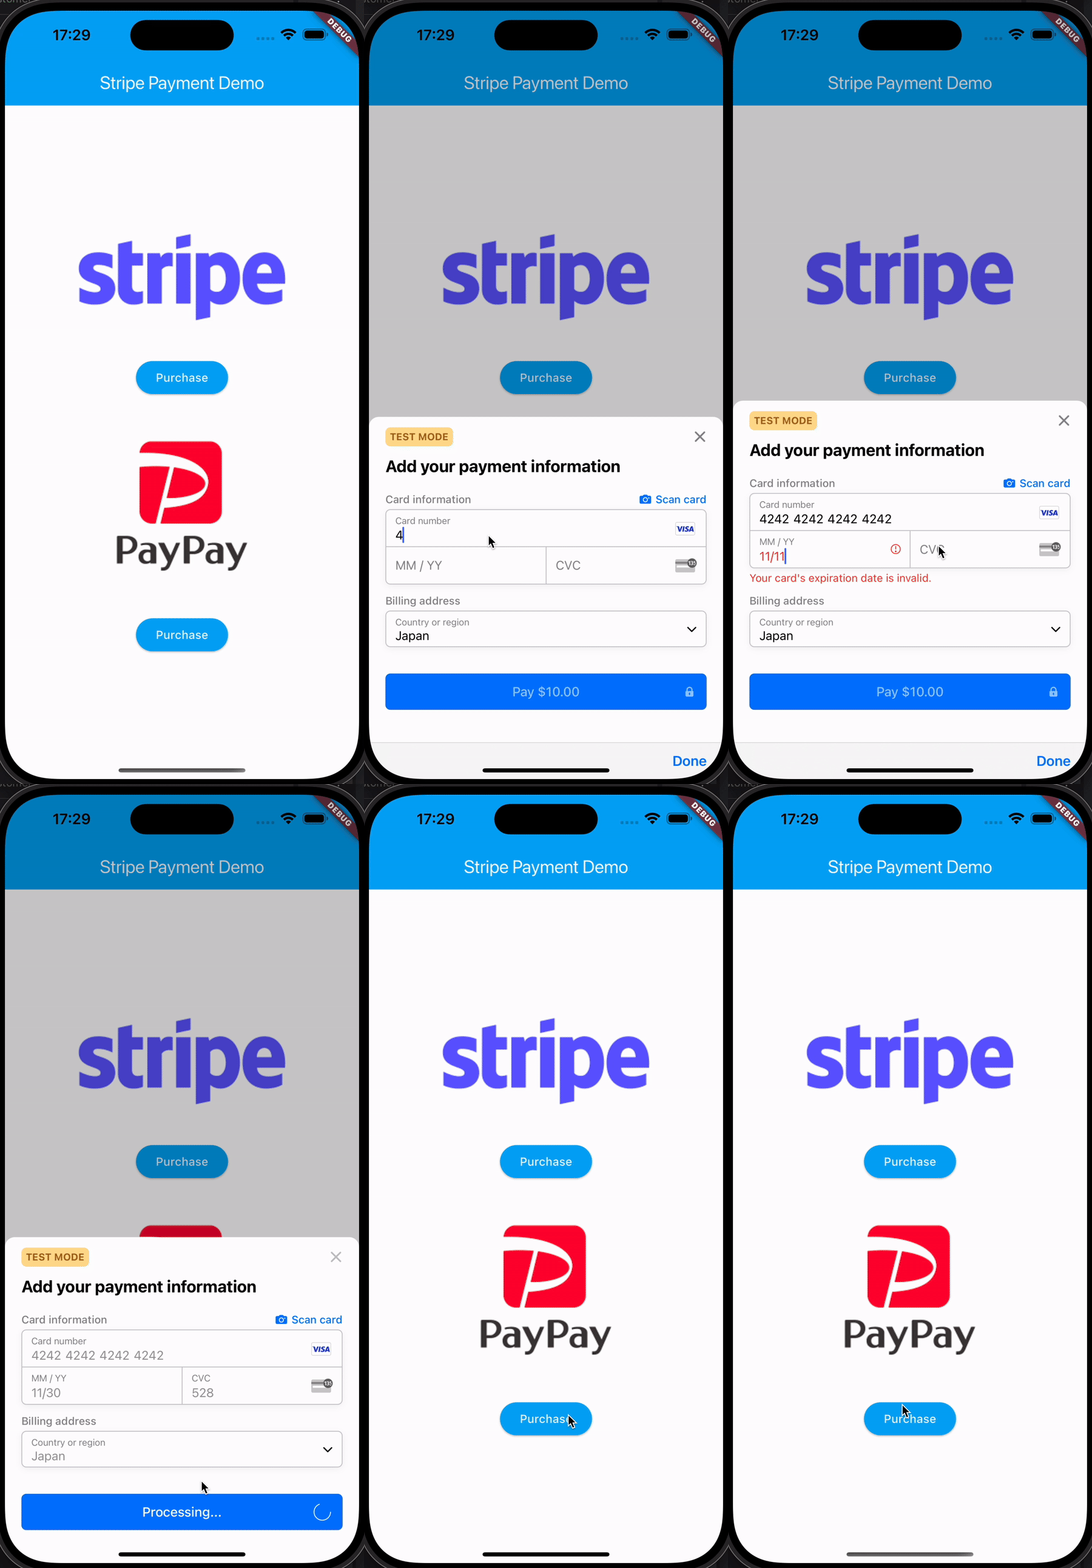
「Flutter + Nestjs」Stripe決済モジュールを連携してみた。
目的
・FlutterとStripeの決済機能のインテグレーション (PayPayはおまけ。Stripeとやり方は同じですね)
・デモ動画

同じ方法でPayPayモジュールも連携してみました。
事前準備
・flutter_stripeのライブラリを追加 (ちょっと面倒なことが出てくるかも)
# Uncomment this line to define a global platform for your project
platform :ios, '13.0'
Androidの彼方一番下のflutter_stripeライブラいサイトのところを参照してください。
...
    <key>NSCameraUsageDescription</key>
    <string>Scan your card to add it automatically</string>
...
dependencies:
   ...
  flutter_stripe: ^11.0.0
  dio: ^5.6.0
   ...
左のRunner/Runner.xcworkspaceを右クリック → Open In → Finder

ios/Runner.xcworkspaceを開いて左上のRunnerをクリック → iOS 13.0を選択

いざ実装してみよう
1. 構造
普段Front AppからStripe APIを直接にrequestするケースが多かったのですが、今回は自分が作った簡単なサーバを経由する形で実装してみました。理由としてはやはりStripe APIを requestする時に必要な各種Keyの管理がややこしいことです。サーバ側が管理するため、比較的にアクセスキー漏洩のリスクが減ります。 二つ目の理由としては単純に僕はバックエンドエンジニアだからです。アーキテクチャも普段から興味があるので、なるべくサーバも自分が作ってみたいですね。
2.まず Front Appから Serverまで
まずmain.dartです。 main()関数でStripeライブラリをセットアップします。この時にpublishableKeyが必要になります。Stripeウィゼットを使うため必要なものなので忘れずに。
メイン画面はHomePageというWidgetで実装します。
import 'package:flutter/material.dart';
import 'package:flutter_stripe/flutter_stripe.dart';
import 'package:flutter_stripe_payment/presentation/home/home_page.dart';
void main() async {
await _setup();
runApp(const MyApp());
}
Future<void> _setup() async {
> WidgetsFlutterBinding.ensureInitialized();
> Stripe.publishableKey = "pk_test_51PnZ9NEE4RPnyNH...";
}
class MyApp extends StatelessWidget {
const MyApp({super.key});
// This widget is the root of your application.
Widget build(BuildContext context) {
return const MaterialApp(
home: HomePage(),
);
}
}
次はHomePageウィゼットのところです。 onPressed: (){ StripeService.instance.makePayment();}, で 購入ボタンをクリックすると、Stripeの新スタンスを生成しながら注文プロセスが始まるようにします。
import 'package:flutter/material.dart';
import 'package:flutter_stripe_payment/services/stripe_service.dart';
class HomePage extends StatefulWidget {
const HomePage({super.key});
State<HomePage> createState() => _HomePageState();
}
class _HomePageState extends State<HomePage> {
Widget build(BuildContext context) {
return Scaffold(
backgroundColor: Colors.white,
appBar: AppBar(
centerTitle: true,
title: const Text(
"Stripe Payment Demo",
),
backgroundColor: Colors.lightBlue,
foregroundColor: Colors.white,
),
body: SizedBox.expand(
child: Column(
mainAxisAlignment: MainAxisAlignment.center,
crossAxisAlignment: CrossAxisAlignment.center,
children: [
Image.asset('asset/download.png'),
const SizedBox(height:20),
ElevatedButton(
onPressed: (){
> StripeService.instance.makePayment();
},
style: ElevatedButton.styleFrom(
foregroundColor: Colors.white, backgroundColor: Colors.lightBlue
),
child: const Text("Purchase"),
),
const SizedBox(height:20),
],
),
),
);
}
}
次はstripeサービスのところです。 決済金額の設定とサーバーに決済requestをするだけのが入ってます。
import 'package:dio/dio.dart';
import 'package:flutter_stripe/flutter_stripe.dart';

class StripeService {
  StripeService._();
  static final StripeService instance = StripeService._();

  Future<void> makePayment() async {
    try {

      String? paymentIntentClientSecret = await _createPaymentIntent(10, "usd");
      if(paymentIntentClientSecret ==null) return;
      await Stripe.instance.initPaymentSheet(paymentSheetParameters: SetupPaymentSheetParameters(
        paymentIntentClientSecret: paymentIntentClientSecret,
        merchantDisplayName: "PayPay",
      ),);
      _processPayment();
    } catch(e){
      print(e);
    }
  }

  Future<String?> _createPaymentIntent(int amount, String currency) async {
    try {
      final Dio dio = Dio();
      Map<String, dynamic> data = {
        "amount":_calculateAmount(amount),
        "currency":currency,
      };
>       var response = await dio.post('http://localhost:3000/order/payment-sheet',
>      data:data,
>      );

      if(response.data != null) {
        return response.data["paymentIntent"];
      }
    } catch(e) {
      print(e);
    }
    return null;
  }

  Future<void> _processPayment() async {
    try{
      await Stripe.instance.presentPaymentSheet();
    } catch(e) {
      print(e);
    }
  }

  String _calculateAmount(int amount){
   //セントをドルに変換
    final calculateAmount = amount * 100;
    return calculateAmount.toString();
  }

}
3. サーバーからStripeまで
nestjsのcontrollerとserviceを実装しました。stripe npmライブライを利用したため、すぐにかけました。私は非同期処理を扱う時、基本Rxjsを使うので、Reactiveプログラミングが慣れてない方にはややこしく感じるかもしれません。
controller.tsふぁいるで仕様が確認でき、service.tsでApi requestのロジックを作ります。
import {Body, Controller, Get, Post} from '@nestjs/common';
import { OrderService } from './order.service';

@Controller('order')
export class OrderController {
  constructor(private orderService: OrderService) {}

  @Post('/payment-sheet')
  async createCustomer(@Body() body: any) {
    return this.orderService.orderByPaymentSheet(body);
  }
}
import { Injectable } from '@nestjs/common';
import Stripe from 'stripe';
import 'dotenv/config.js';

import * as process from 'process';
import { mergeMap, Observable, of, from } from 'rxjs';

@Injectable()
export class OrderService {
  private stripe: Stripe;
     ...
  constructor() {
    this.stripe = new Stripe(process.env.SECRET_KEY);
     ...
  }

  orderByPaymentSheet(body: ICustomerOrder): Observable<any> {
    return of(null).pipe(
      mergeMap(() => {
        return from(
          this.stripe.customers.create({
            email: 'test@test.co.jp',
          }),
        );
      }),
      mergeMap((customer) => {
        return of(
          this.stripe.ephemeralKeys.create(
            {
              customer: customer.id,
            },
            { apiVersion: '2024-06-20' },
          ),
        ).pipe(
          mergeMap((ephemeralKey) => {
            return of({ customer, ephemeralKey });
          }),
        );
      }),
      mergeMap(({ customer, ephemeralKey }) => {
        return from(
          this.stripe.paymentIntents.create({
            amount: body.amount,
            currency: body.currency,
            customer: customer.id,
            automatic_payment_methods: {
              enabled: true,
            },
          }),
        ).pipe(
>          mergeMap((paymentIntent) => {
>            return of({
>              paymentIntent: paymentIntent.client_secret,
>              ephemeralKey: ephemeralKey,
>              customer: customer.id,
>              publishableKey: this.publishableKey,
>            });
          }),
        );
      }),
    );
  }
}
ハイライトされた return of({...})のところがstripeからresponseしてもらったデータであり、frontにresponseするデータです。
終わりに
今までStripe決済モジュールをFlutterに連携してみました。結構シンプルで基本中の基本だと思います。実装も簡単ですね。ただ、Dartの文法すら知らなくて、APIに関して公式文書もじっくり読む必要があったので処理ロジックの流れを理解するのに結構時間をかけました。苦労したのですが、何となく決済モージュル導入のやり方を学び付けたので、今後はProductionレベルぐらいに作っていきたいですね。
今後の課題としては
・ユーザ認証・認可(Goolgeログインなど、ただKeycloakを1から立ち上げてみたいですね。)
・支払い有無を画面上に表示(FlutterのProviderを学習、支払い状態を管理。)
・バックエンドとFlutterを独立させたいので、BFFパータンを導入。(BFFにApi仕様を集めておくと、今後バックエンドとのタスクの分担がしやすい。)
参考
Discussion