Open1
MisskeyをDocker Compose+Cloudflare Tunnelでサクッと建てる
サクッとMisskeyインスタンスを建ててみたのでメモ。
前提として、Misskeyを公開するドメインは既にCloudflareで管理していること。
トンネルの作成
Zero Trust ダッシュボードを開き、Access > Tunnels に進む。
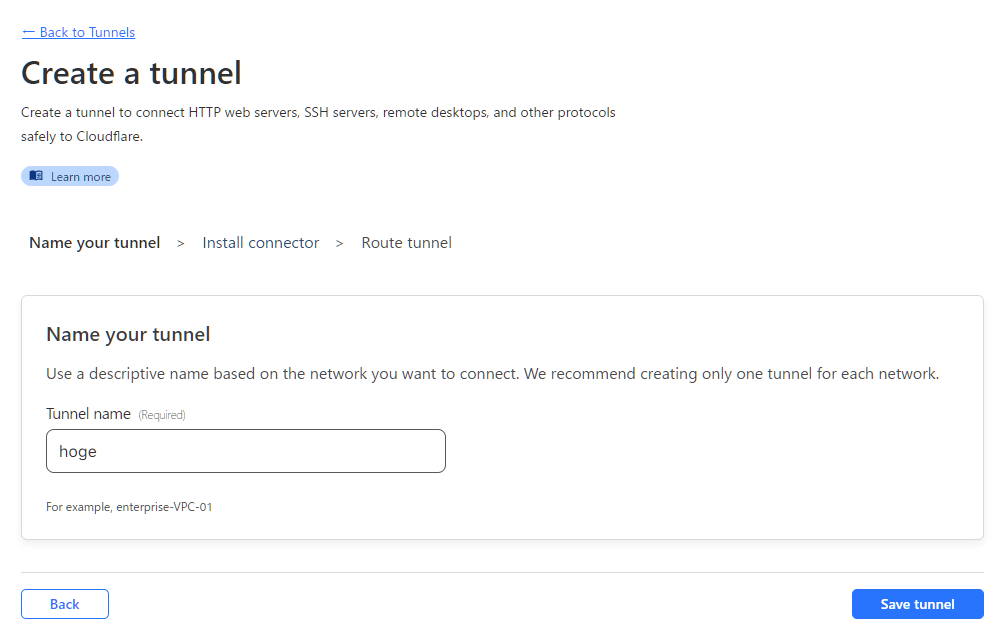
任意の名前でトンネルを作る。

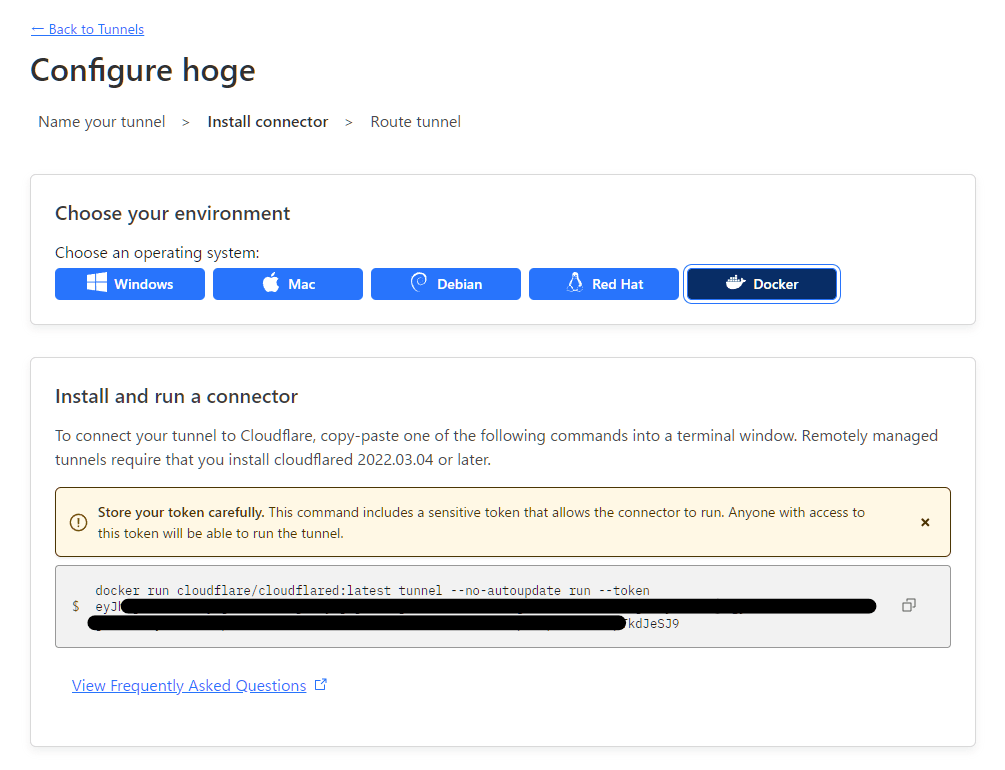
トークンが生成されるので、これを控えておく。(コマンドは実行しない)

Public hostnameにはMisskeyインスタンスを公開するドメイン名を、Serviceにhttp://misskey:3000/を指定する。あとはSave tunnelで完了。DNS側の設定は自動で行われる。

Misskeyの起動
ディレクトリを作成。
$ mkdir misskey
$ cd misskey
$ mkdir -p data/db data/misskey data/redis
中身やこんな感じにする。
ディレクトリ構造
.
├── compose.yml
├── data
│   ├── db
│   ├── misskey
│   └── redis
└── default.yml
compose.yml
services:
  misskey:
    restart: always
    image: misskey/misskey:13.13.2
    depends_on:
      db:
        condition: service_healthy
      redis:
        condition: service_healthy
    ports:
      - "3000:3000"
    volumes:
      - ./data/misskey:/misskey/files
      - ./default.yml:/misskey/.config/default.yml:ro
  redis:
    restart: always
    image: redis:7-alpine
    volumes:
      - ./data/redis:/data
    healthcheck:
      test: "redis-cli ping"
      interval: 5s
      retries: 20
  db:
    restart: always
    image: postgres:15-alpine
    environment:
      - POSTGRES_USER=misskey
      - POSTGRES_PASSWORD=misskey
      - POSTGRES_DB=misskey
    volumes:
      - ./data/db:/var/lib/postgresql/data
    healthcheck:
      test: "pg_isready -U $$POSTGRES_USER -d $$POSTGRES_DB"
      interval: 5s
      retries: 20
  tunnel:
    restart: always
    image: cloudflare/cloudflared
    command: tunnel run
    environment:
      - TUNNEL_TOKEN=トンネル作成の時に控えたトークン
#━━━━━━━━━━━━━━━━━━━━━━━━━━━━━━━━━━━━━━━━━━━━━━━━━━━━━━━━━━━━━━━
# Misskey configuration
#━━━━━━━━━━━━━━━━━━━━━━━━━━━━━━━━━━━━━━━━━━━━━━━━━━━━━━━━━━━━━━━

#   ┌─────┐
#───┘ URL └─────────────────────────────────────────────────────

# Final accessible URL seen by a user.
url: https://トンネル作成の時にPublic hostnameで指定したドメイン名/

# ONCE YOU HAVE STARTED THE INSTANCE, DO NOT CHANGE THE
# URL SETTINGS AFTER THAT!

#   ┌───────────────────────┐
#───┘ Port and TLS settings └───────────────────────────────────

#
# Misskey requires a reverse proxy to support HTTPS connections.
#
#                 +----- https://example.tld/ ------------+
#   +------+      |+-------------+      +----------------+|
#   | User | ---> || Proxy (443) | ---> | Misskey (3000) ||
#   +------+      |+-------------+      +----------------+|
#                 +---------------------------------------+
#
#   You need to set up a reverse proxy. (e.g. nginx)
#   An encrypted connection with HTTPS is highly recommended
#   because tokens may be transferred in GET requests.

# The port that your Misskey server should listen on.
port: 3000

#   ┌──────────────────────────┐
#───┘ PostgreSQL configuration └────────────────────────────────

db:
  host: db
  port: 5432

  # Database name
  db: misskey

  # Auth
  user: misskey
  pass: misskey

  # Whether disable Caching queries
  #disableCache: true

  # Extra Connection options
  #extra:
  #  ssl: true

dbReplications: false

# You can configure any number of replicas here
#dbSlaves:
#  -
#    host:
#    port:
#    db:
#    user:
#    pass:
#  -
#    host:
#    port:
#    db:
#    user:
#    pass:

#   ┌─────────────────────┐
#───┘ Redis configuration └─────────────────────────────────────

redis:
  host: redis
  port: 6379
  #family: 0  # 0=Both, 4=IPv4, 6=IPv6
  #pass: example-pass
  #prefix: example-prefix
  #db: 1

#redisForPubsub:
#  host: redis
#  port: 6379
#  #family: 0  # 0=Both, 4=IPv4, 6=IPv6
#  #pass: example-pass
#  #prefix: example-prefix
#  #db: 1

#redisForJobQueue:
#  host: redis
#  port: 6379
#  #family: 0  # 0=Both, 4=IPv4, 6=IPv6
#  #pass: example-pass
#  #prefix: example-prefix
#  #db: 1

#   ┌───────────────────────────┐
#───┘ MeiliSearch configuration └─────────────────────────────

#meilisearch:
#  host: meilisearch
#  port: 7700
#  apiKey: ''
#  ssl: true
#  index: ''

#   ┌───────────────┐
#───┘ ID generation └───────────────────────────────────────────

# You can select the ID generation method.
# You don't usually need to change this setting, but you can
# change it according to your preferences.

# Available methods:
# aid ... Short, Millisecond accuracy
# meid ... Similar to ObjectID, Millisecond accuracy
# ulid ... Millisecond accuracy
# objectid ... This is left for backward compatibility

# ONCE YOU HAVE STARTED THE INSTANCE, DO NOT CHANGE THE
# ID SETTINGS AFTER THAT!

id: 'aid'

#   ┌─────────────────────┐
#───┘ Other configuration └─────────────────────────────────────

# Whether disable HSTS
#disableHsts: true

# Number of worker processes
#clusterLimit: 1

# Job concurrency per worker
# deliverJobConcurrency: 128
# inboxJobConcurrency: 16

# Job rate limiter
# deliverJobPerSec: 128
# inboxJobPerSec: 16

# Job attempts
# deliverJobMaxAttempts: 12
# inboxJobMaxAttempts: 8

# IP address family used for outgoing request (ipv4, ipv6 or dual)
#outgoingAddressFamily: ipv4

# Proxy for HTTP/HTTPS
#proxy: http://127.0.0.1:3128

proxyBypassHosts:
  - api.deepl.com
  - api-free.deepl.com
  - www.recaptcha.net
  - hcaptcha.com
  - challenges.cloudflare.com

# Proxy for SMTP/SMTPS
#proxySmtp: http://127.0.0.1:3128   # use HTTP/1.1 CONNECT
#proxySmtp: socks4://127.0.0.1:1080 # use SOCKS4
#proxySmtp: socks5://127.0.0.1:1080 # use SOCKS5

# Media Proxy
#mediaProxy: https://example.com/proxy

# Proxy remote files (default: false)
#proxyRemoteFiles: true

# Sign to ActivityPub GET request (default: true)
signToActivityPubGet: true

#allowedPrivateNetworks: [
#  '127.0.0.1/32'
#]

# Upload or download file size limits (bytes)
#maxFileSize: 262144000
あとは起動するだけ。
$ chmod 777 data/misskey
$ sudo docker compose up -d
参考