CloudFront + Lambda Function URLs + Hono + htmx でPOST/PUTリクエストに対応させる
現状、Lambda Function URL を安全に使う方法は Cloudfront の OAC と組み合わせるのが良さそうです。
ただし、GET リクエストだけであれば問題ないのですが、ヘッダーにペイロードのハッシュ値のないPOST/PUTリクエストが許可されていない問題があります。
Note
If you use PUT or POST methods with your Lambda function URL, your users must include the payload hash value in the x-amz-content-sha256 header when sending the request to CloudFront. Lambda doesn't support unsigned payloads.
Lambda Function URL で POST/PUT リクエストを使う
cURL で POST リクエストをする場合はペイロードのハッシュ値を計算して x-amz-content-sha256 ヘッダーを付与することで解決します。(参考)
curl -X POST https://<distribution-id>.cloudfront.net/post \
  -H "x-amz-content-sha256:$(echo -n '{"name": "John Doe", "age": 32}' | openssl dgst -sha256 -hex | cut -d' ' -f2)" \
  -H "Content-Type: application/json" \
  -d '{"name": "John Doe", "age": 32}'
Hono + htmx で簡単なWebアプリケーションを作成している場合に、ペイロードのハッシュ値をヘッダーに付与することに苦労したので、どのように解決したかを書いていきます。
ベースとなるアプリケーションを用意する
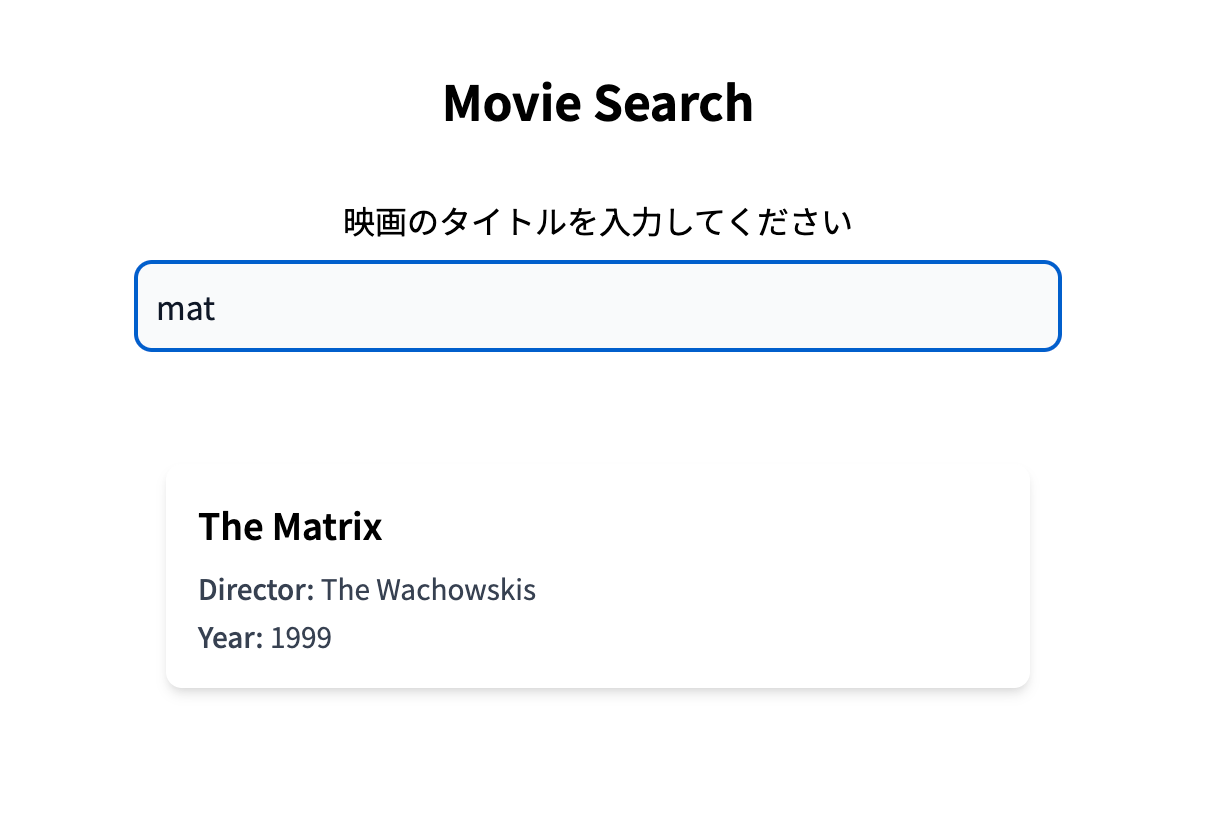
AWS CDK を使用して、すでにプロジェクトが作成されている状態を想定しています。説明をしやすくするため、例として映画を検索するアプリを考えます。
まず、/ にアクセスすると検索ができる HTML が返却されるようにします。検索部分は htmx を使用します。
// index.tsx
const app = new Hono();

app.get("/", (c) => {
  return c.render(
    <main>
      <h1>Movie Search</h1>
      <input
        id="search"
        type="text"
        name="q"
        hx-post="/search"
        hx-trigger="keyup delay:500ms changed"
        hx-target="#result"
      />
      <div id="result"/>
    </main>
  );
});

export const handler = handle(app);
jsxRenderer ミドルウェアを使ってレイアウトを作成します。htmx はここで CDN 版を読み込んでいます。
// index.tsx
app.use(jsxRenderer(({ children }) => <Layout>{children}</Layout>));

// ./Layout.tsx
import { html } from "hono/html";
import type { FC } from "hono/jsx";

export const Layout: FC = ({ children }) => html`
  <!doctype html>
  <html lang="ja">
    <head>
      <meta name="viewport" content="width=device-width, initial-scale=1.0" />
      <script src="https://unpkg.com/htmx.org@2.0.3" integrity="sha384-0895/pl2MU10Hqc6jd4RvrthNlDiE9U1tWmX7WRESftEDRosgxNsQG/Ze9YMRzHq" crossorigin="anonymous"></script>
      <title>Movie Search</title>
    </head>
    <body>
      ${props.children}
    </body>
  </html>
`;
index.tsx に戻り、検索用の POST /search を追加します。
// index.tsx
app.post('/search', async (c) => {
  const q = (await c.req.formData()).get('q');
  if (typeof q !== 'string' || q === '') return c.text('');

  const items = await searchMovie(q);
  return c.html(
    items.length > 0 ? (
      <MovieList items={items}/>
    ) : (
      <p>該当するものが見つかりませんでした</p>
    )
  );
});
動作確認
Lambda を更新して挙動を確認します。
% cdk deploy --hotswap

{"message": "The request signature we calculated does not match the signature you provided. Check your AWS Secret Access Key and signing method. Consult the service documentation for details."}
先述の通り 403 が返ってきます。
リクエストが成功するように修正する
Layout.tsx に下記のスクリプトを追加します。
<script>
  let hashValue = null;
  const calcHash = (event, data) => {
    if (hashValue === null) {
      event.preventDefault();
      crypto.subtle.digest("SHA-256", new TextEncoder().encode(data)).then(hashBuffer => {
        const hashArray = Array.from(new Uint8Array(hashBuffer));
        const hash = hashArray.map((byte) => byte.toString(16).padStart(2, "0")).join("");
        hashValue = hash;
        event.detail.issueRequest();
      });
    }
  }
  htmx.on("htmx:configRequest", (event) => {
    if (hashValue) {
      event.detail.headers["x-amz-content-sha256"] = hashValue;
    }
  });
  htmx.on("htmx:afterRequest", () => {
    hashValue = null;
  });
</script>
calcHash 関数は index.tsx で使用するため後述します。
htmx:configRequest はリクエストの発行前に呼び出されるイベントのため、ここでヘッダーを書き換えます。リクエスト後に htmx:afterRequest が呼び出されるので hashValue をリセットします。今回は input が1つしかないですが htmx:configRequest と htmx:afterRequest をグローバルに定義することで共通で呼び出される処理としています。
ハッシュ値の計算とリクエストの発行
index.tsx の検索フィールドに対して、ユーザーが文字入力を確定した際にハッシュ計算を行うため、hx-on--confirm 属性を追加して、calcHash 関数を呼び出します。この関数は、非同期でハッシュ値を計算し、その結果を hashValue に格納します。
 <input
   id="search"
   type="text"
   name="q"
   hx-post="/search"
   hx-trigger="keyup delay:500ms changed"
   hx-target="#result"
+  hx-on--confirm="calcHash(event, 'q=' + event.detail.elt.value)"
 />
ここで、calcHash 関数に渡される第2引数は、リクエストペイロード用に構築された文字列です。今回の例では検索クエリをパラメータとして渡すため、q=[検索文字列] の形式で指定します。また、content-type: application/json の場合は、JSON 文字列を渡します。
リクエストの非同期発行
calcHash 関数では、以下の処理を通して非同期にハッシュ計算を行います。
- htmx:confirm イベントの event.preventDefault() を呼び出し、リクエストが発行されないようにする。
- crypto.subtle.digest() でデータのハッシュ値を計算し、計算完了後に hashValue に格納。
- event.detail.issueRequest() を呼び出し、準備が整った段階でリクエストを発行。
この非同期処理を使うことで、リクエストを発行する直前にハッシュ値が計算され、ヘッダーに追加されるという処理を実現できます。
なぜリクエストとハッシュ計算を分離するか
htmx:configRequest イベントでは非同期処理ができないため、リクエスト前にハッシュ値を同期的に計算する必要があります。そこで、htmx:confirm イベント内で非同期処理を行い、計算完了後にリクエストを発行することで、この制限を回避しています。
デプロイして再実行
デプロイしなおして検索をしてみると正しくヘッダーが付与されレスポンスを確認できました。

まとめと感想
- CloudFront + Lambda Function URLs でも POST/PUT が使えることを確認できた。ちょっとしたツールを作るときに大変重宝しているスタックなのですが、仕事で使うには WAF を入れたかったのでとても嬉しいです。
- ヘッダーにペイロードのハッシュ値を格納するのがキモになります。そこをどうやるかというところで、 Hono + htmx の場合の例をあげました。
- htmx のイベント内の js が文字列になってしまうのが開発し辛いです。
- ハッシュ値を格納する変数や計算する関数がグローバルになるのがイケてないです。
参考
Discussion