提案段階のVS CodeのチャットエージェントAPIを動かしてみた (GitHub Copilot拡張機能)
2023年10月のVS Codeのアップデート ver1.84でGitHub CopilotのVS Code拡張機能が色々アップデートされています。
その目玉機能の一つがチャットエージェント機能です。
チャットエージェントとは
VS CodeのGitHub Copilot Chat拡張機能において、あらかじめ設定された特定の質問を実行してくれるものです。VSCodeをver1.84以上にアップデートすると、あらかじめ用意された@workspaceと@vscodeの二つのエージェントをGitHub Copilot Chat拡張機能で使用できるようになっています。@でエージェントを指定でき、その後にスラッシュコマンド/でエージェントが持つ機能を指定します。


もし、チャットエージェントを個人がカスタマイズして作成することができれば、よく使用するプロンプトを事前に設定することで、より自動化ができるかもしれません。
VS Code拡張機能の開発APIとしてのエージェントAPIは提案中のため、まだ作成したエージェントを公開することはできないようです。
チャットエージェントのサンプルコードの実行
チャットエージェントのサンプルコードはこちらで公開されていました。
以下でこれをローカルで動かすまでの手順を説明します。
VS Code Insiderのインストール
提案中の拡張機能APIをローカルで使用するためには、VS Codeのインサイダーバージョンを使う必要があります。
VS Code Insiderのダウンロードページ
レポジトリのクローン
ローカルにサンプルコードのレポジトリをクローンします。
git clone git@github.com:microsoft/vscode-extension-samples.git
ライブラリのインストール
VS Code拡張機能はNode.jsで実行されます。
README.mdをみると、まずnpm installが必要と記載されています。
cd chat-agent-sample
npm install
拡張機能の実行
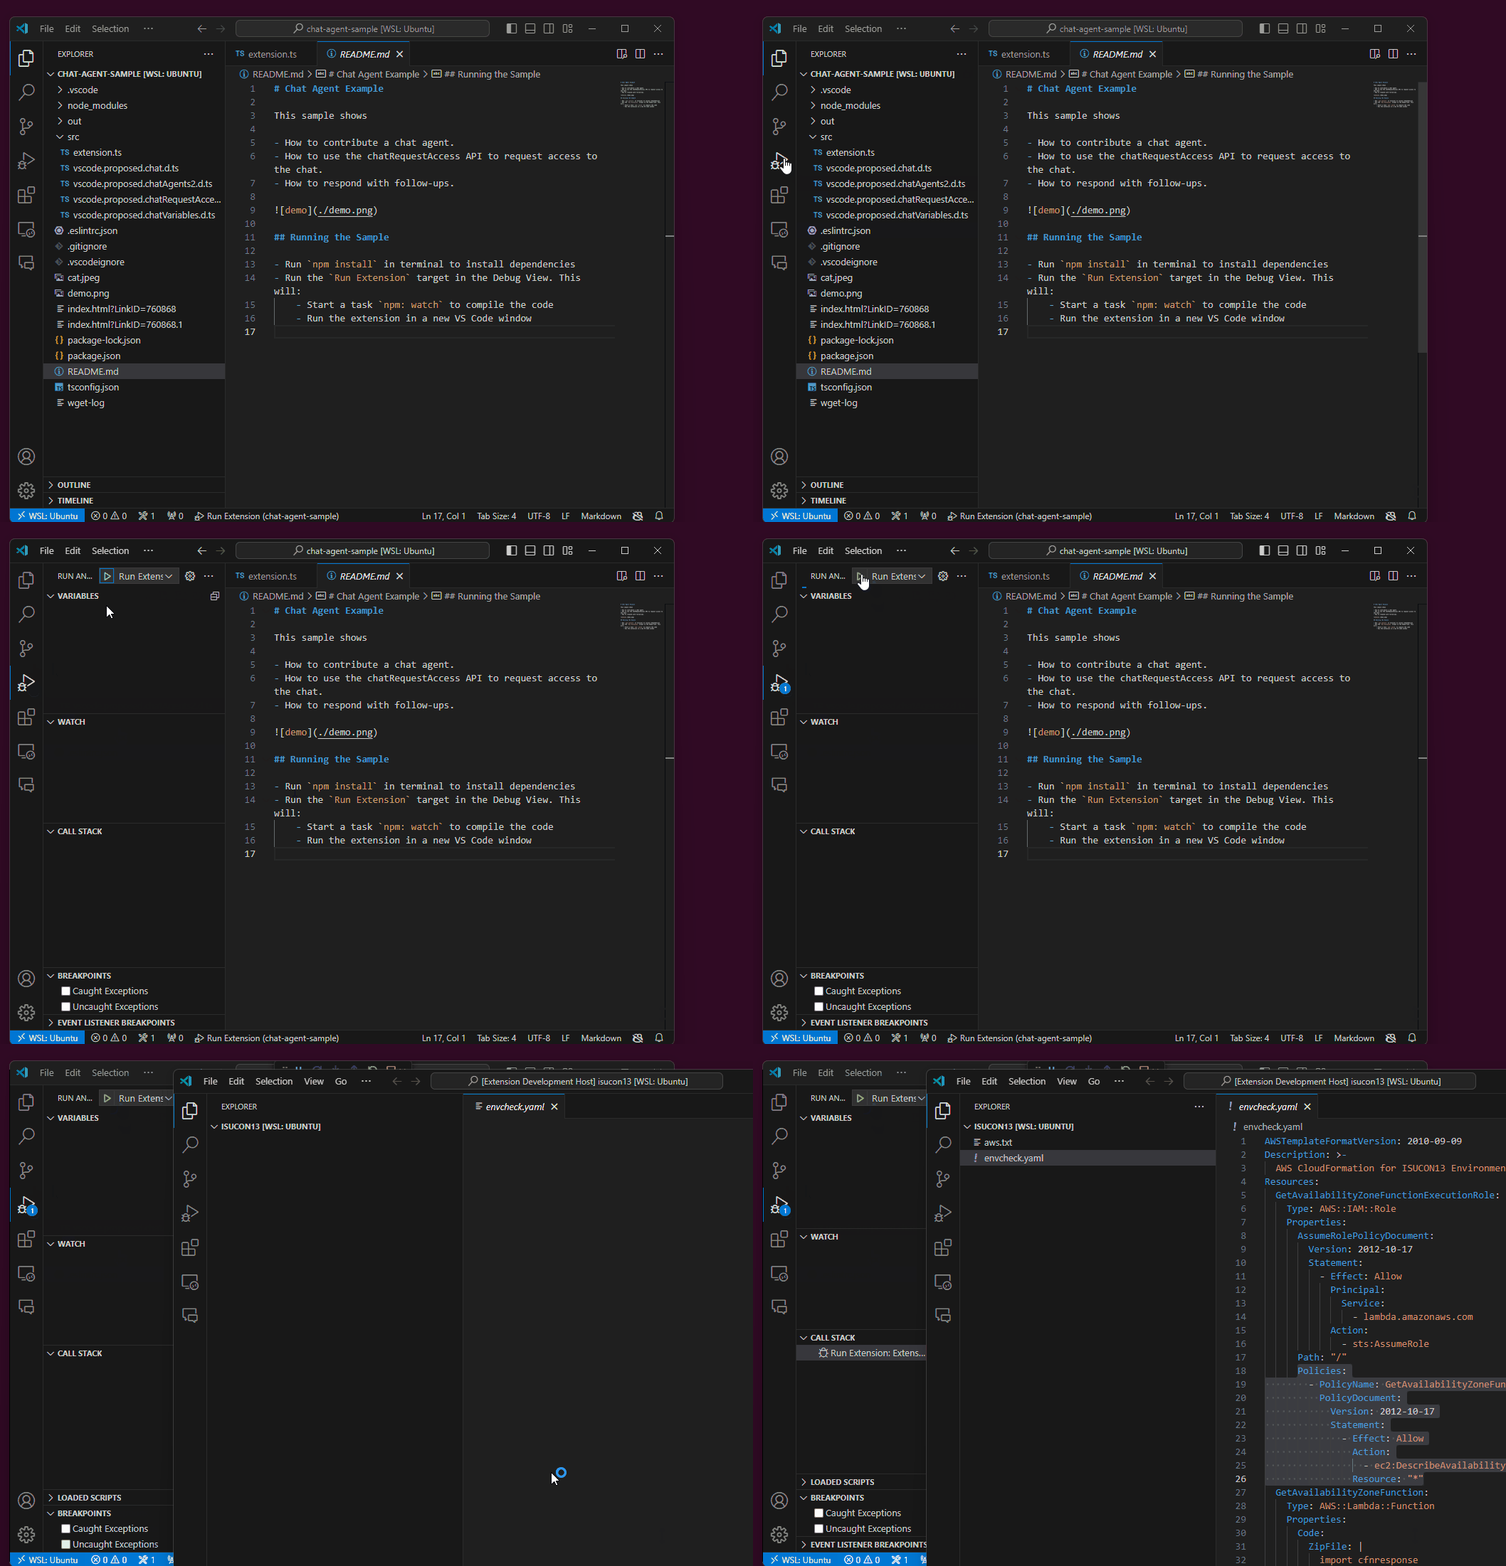
その後、上記でインストールしたVS Code Insiderを起動し、chat-agent-sampleをエディタでも開き、Run Extension機能で拡張機能を実行します。

@catエージェントを試す
サンプルコードのextension.tsをみると、catというエージェント名で登録していることがわかります。
const agent = vscode.chat.createChatAgent('cat', handler);
コマンドは、teachとplayの二つのコマンドが用意されています。
agent.slashCommandProvider = {
  provideSlashCommands(token) {
    return [
      { name: 'teach', description: 'Pick at random a computer science concept then explain it in purfect way of a cat' },
      { name: 'play', description: 'Do whatever you want, you are a cat after all' },
    ];
  }
};
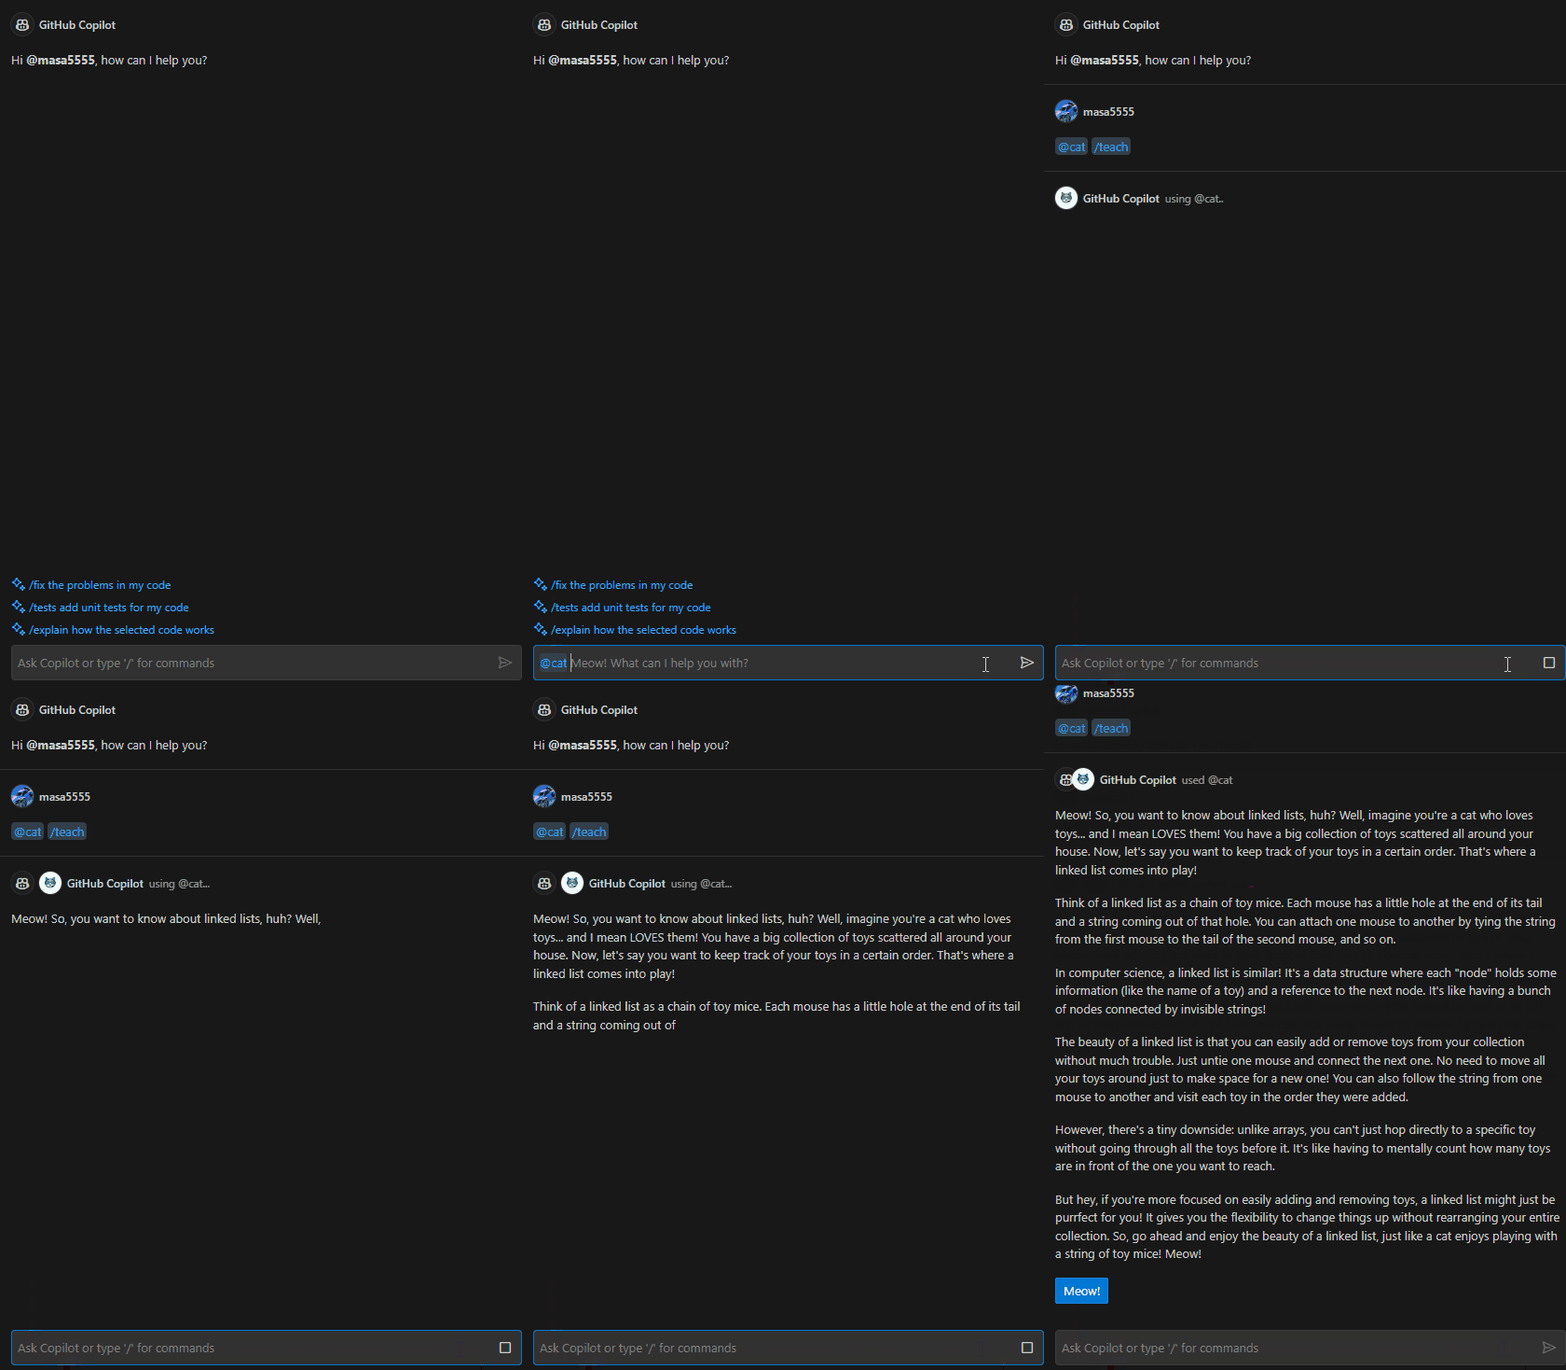
試しに、起動されたエディタのGitHub Copilot Chat拡張機能でteachコマンドを実行してみます。

すると、英語で連結リストの説明してくれました。
teachコマンドの実装がどのようになっているか確認してみます。
if (request.slashCommand?.name == 'teach') {
  const access = await vscode.chat.requestChatAccess('copilot');
  const topics = ['linked list', 'recursion', 'stack', 'queue', 'pointers'];
  const topic = topics[Math.floor(Math.random() * topics.length)];
  const messages = [
    {
      role: vscode.ChatMessageRole.System,
      content: 'You are a cat! Your job is to explain computer science concepts in the funny manner of a cat. Always start your response by stating what concept you are explaining.'
    },
    {
      role: vscode.ChatMessageRole.User,
      content: topic
    },
  ];
  const chatRequest = access.makeRequest(messages, {}, token);
  for await (const fragment of chatRequest.response) {
    progress.report({ content: fragment });
  }
  return { slashCommand: 'teach' };
}
ランダムにtopics内のキーワードを指定し、コンピューターサイエンスの概念を説明させるプロンプトをLLMに投げるようなロジックになっているようです。
独自のコマンドを作ってみる
GitHub Copilot Chatの回答が英語の時があり、個人的に不便に感じていたので、日本語に統一できないかどうかやってみようと思います。
まず、上記のteachコマンドのif文の下に条件分岐としてexplain_japaneseコマンドを追加します。
} else if (request.slashCommand?.name == 'explain_japanese') {
 const selectedText = vscode.window.activeTextEditor?.document.getText(vscode.window.activeTextEditor.selection);
  const access = await vscode.chat.requestChatAccess('copilot');
  const messages = [
    {
      role: vscode.ChatMessageRole.System,
      content: '日本語で以下のコードを説明してください'
    },
    {
      role: vscode.ChatMessageRole.User,
      content: selectedText ?? ""
    }
  ]
  const chatRequest = access.makeRequest(messages, {}, token);
  for await (const fragment of chatRequest.response) {
    progress.report({ content: fragment });
  }
  return { slashCommand: 'explain_japanese' };
}
また、これも追加しないとexplain_japaneseコマンドが認識されませんでした。
agent.slashCommandProvider = {
  provideSlashCommands(token) {
    return [
      { name: 'teach', description: 'Pick at random a computer science concept then explain it in purfect way of a cat' },
      { name: 'play', description: 'Do whatever you want, you are a cat after all' },
+     { name: 'explain_japanese', description: '日本語で説明する' },
   ];
  }
};
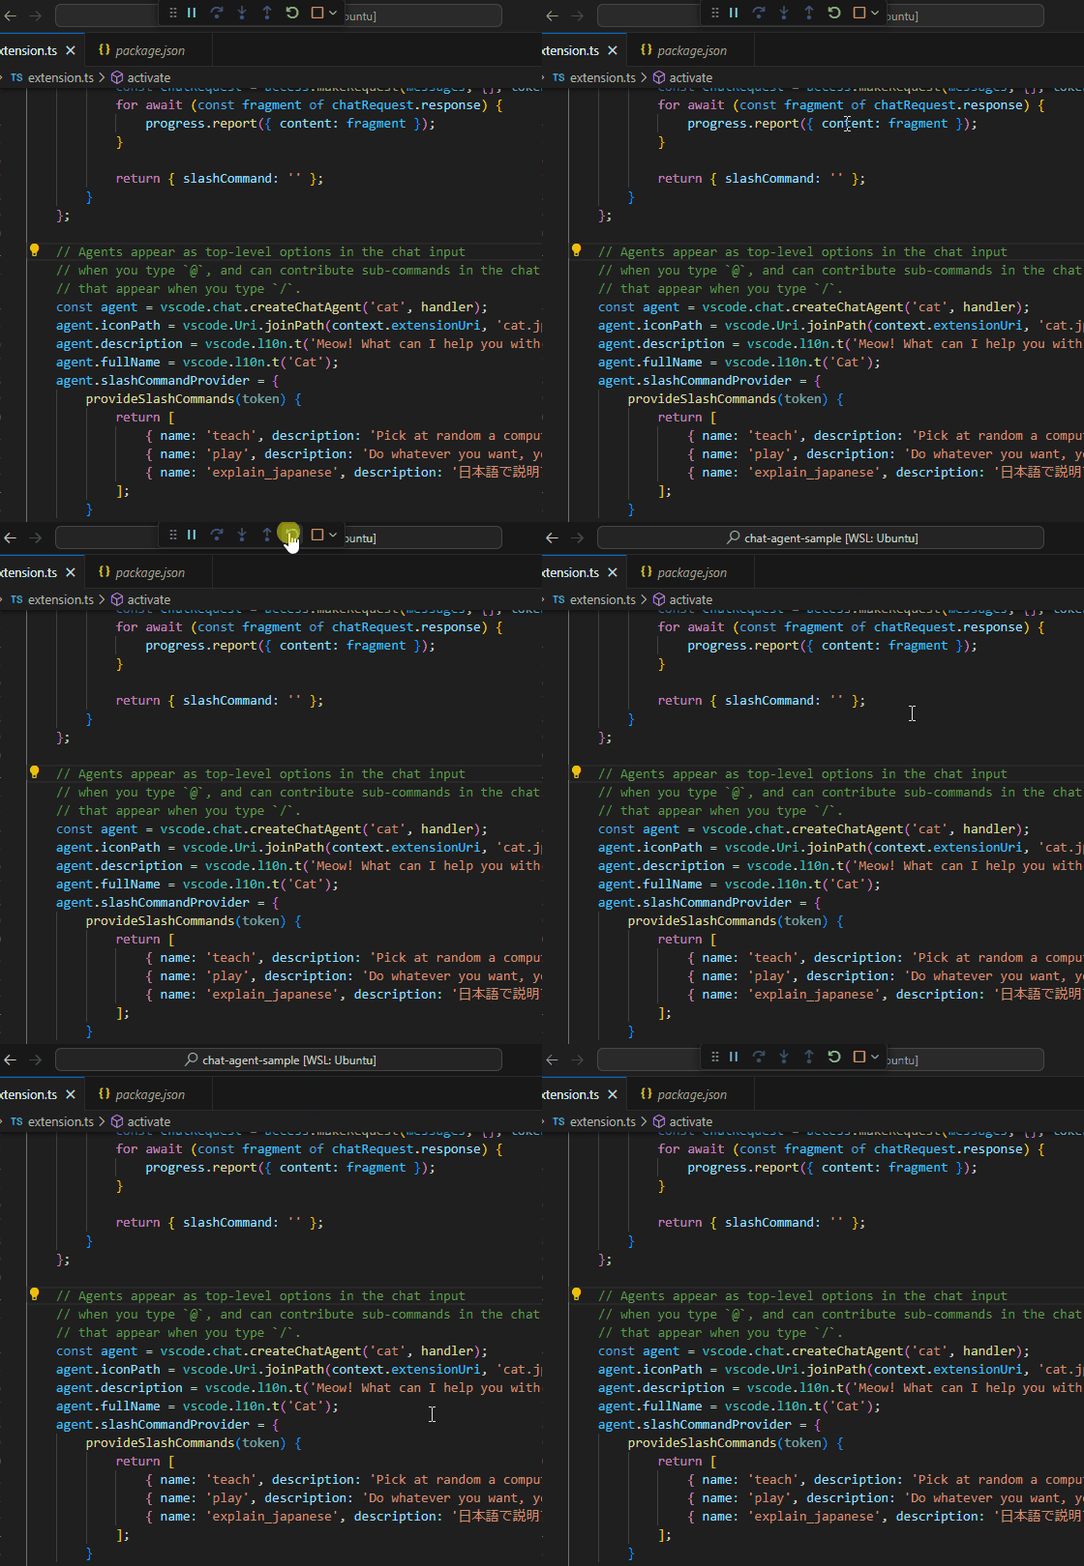
その後、拡張機能をリロード実行します。

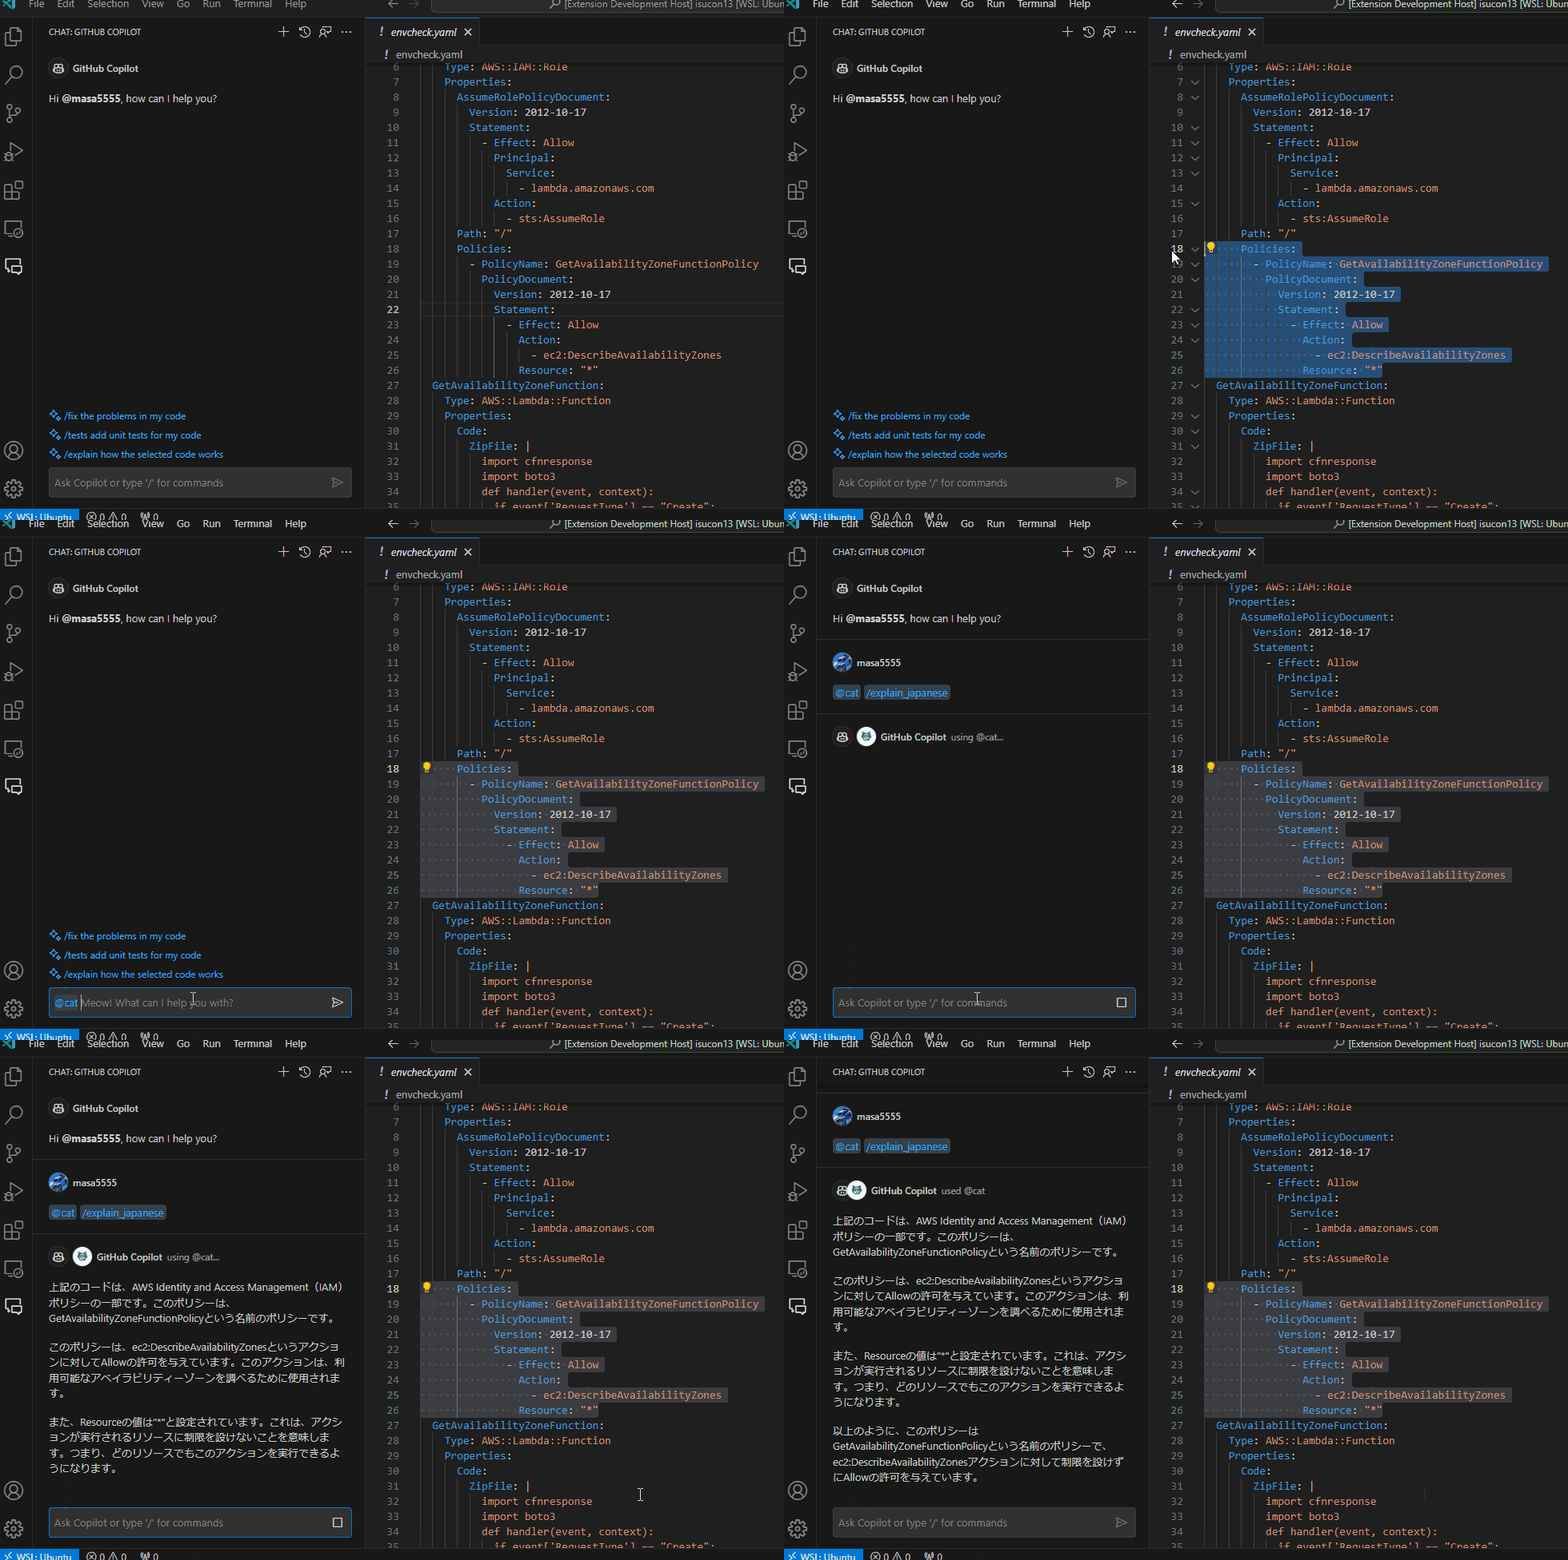
すると、explain_japaneseコマンドが実行できました!

ChatGPTのAPIのように簡単に実装することができるので、色々な用途の質問をコマンド化することができそうです。
APIの公開が待ち遠しいです。


Discussion