めざせコントリビューター【完全攻略本】
ああ あこがれの コントリビューターに
なりたいな ならなきゃ
ゼッタイなってやるーッ!
「はじめまして! プログラミングの せかいへ ようこそ!」
「わたしの なまえは ヤマダ」
「ひごろは Yamada UI Next.js Chakra UI Mantine Refine のコントリビューターをして おるよ」
改めまして、『まだマサラタウンにいるプログラマーのみなさん』こんにちは。プログラマーを始めて3年目の山田です。
今回は、みんなが憧れるOSSのコントリビューターになる、『1番道路』へ踏み入れるための完全攻略本です。そして、日本で大注目されている(はず)のYamada UIを題材にして進めていこうと思います。
また、この完全攻略本では以下の内容は省略しています。
- OSSとは
- OSSに貢献することのメリット
- GitHubの使い方
- Gitの使い方
理由は、この攻略本を見ているあなたは、すでにOSSの貢献のメリットを知っており意欲がある、日頃GitHubやGitを使っていることは、目に見えているので省略しています。
【第1話】 オープンソース!きみにきめた!
まず、初学者が貢献するオープンソースを見つけるには、いくつかのルートがあります。
- 用意されている練習用のリポジトリで学ぶ。
- good first issueで探す。
- 日頃使用しているOSSに貢献する。(オススメ)
1. 用意されている練習用のリポジトリで学ぶ。
これは、OSSに貢献する方法を簡単に学ぶことを目的としたリポジトリです。
このリポジトリのREADME.mdを見ると貢献のフローを把握することができます。そして、日本語を含めた各言語に対応しているところも良いところです。
しかし、各OSSには
- ブランチの命名規則
- コミットルール
- Issue・PRのテンプレート
- PRチェック
- レビュー
などのルールやフローが設けられており、このリポジトリは実践的ではありません。
『貢献のフローをまずは学んでみたい』という方にオススメです。
2. good first issueで探す。
good first issueのラベルが付いたイシューを集めているサイトです。
good first issueとは、OSSが『このイシューは簡単だよ』という意味で付けることが一般的です。そのため、初学者向けとも言えます。
多くのリポジトリ、good first issueが付いたイシューを閲覧できますが、日頃使っているOSSと違って使い勝手も分からず貢献することになります。大半が沼るのでオススメしません。
3. 日頃使用しているOSSに貢献する。(オススメ)
タイトルの通り、日頃使用しているOSSに貢献することをオススメします。
理由は、イシューに記載されている不具合などの関数やコンポーネントがどのように使用するのか、どんな役割があるのか把握しているため、コードを読んだり、修正することが容易になります。
また、実践的な経験も積めるため、次回の貢献に大きな自信がつくことでしょう。
このセクションでは、3つのルートを紹介しました。
これからのフローは実践的な3. 日頃使用しているOSSに貢献する。で進めていきます。
【第2話】 バグ(イシュー) ゲットだぜ!
まず、貢献するには目的・やることが必要です。
その目的・やることは、大きく分けて2つあると思います。
- バグを修正する。
- 新しい機能を提案・実装する。
1. バグを修正する。
語るものがありません。タイトルの通りです。
イシューのラベルにはbugが付いていることが多いです。
2. 新しい機能を提案・実装する。
これは、
- 日頃使っている関数やコンポーネントで『追加でこの機能がほしいな』と思った。
- ドキュメントサイトを見ていて、使用しようとしている関数やコンポーネントの説明がない。
が、挙げられるかと思います。
イシューのラベルにはenhancementが付いていることが多いです。
今回は、前者の1. バグを修正する。で進めていきます。
まず、バグをゲットするにはオーキド博士(Issues)からバグをもらうか野生のバグをゲットするがあると思います。
オーキド博士(Issues)からバグをもらう
リポジトリのIssuesで、bugのラベルが付いているイシューを探します。内容を見て、自分が取り組めそうなもの見つけたら、そのイシューに自分が取り組みたいことをコメントしましょう。
野生のバグをゲットする
あなたがオープンソースを使用して、なにかを開発しているときに野生のバグと遭遇することは、よくあることでしょう。もし、野生のバグと遭遇したら喜びましょう。なぜなら、遭遇するということは、開発者が想定していない使い方をした、提供されている機能を応用的に使用したということです。

そして、Issuesに遭遇したバグのイシューが無い場合は、イシューを作成しましょう。
大半のOSSは、イシューのテンプレートがあり、作成した際にテンプレートが適用されて、質問形式で入力欄を埋めていくだけです。
もし、すでに存在していたら『残念ながら、あなたが第一発見者ではなかった』ということです。ただ、作成されたイシューで作業するコメントがされていない場合は、チャンスです。コメントしましょう。
今回は、オーキド博士(Issues)からバグをもらうで進めていきます。
まず、Issuesを見にいきましょう。
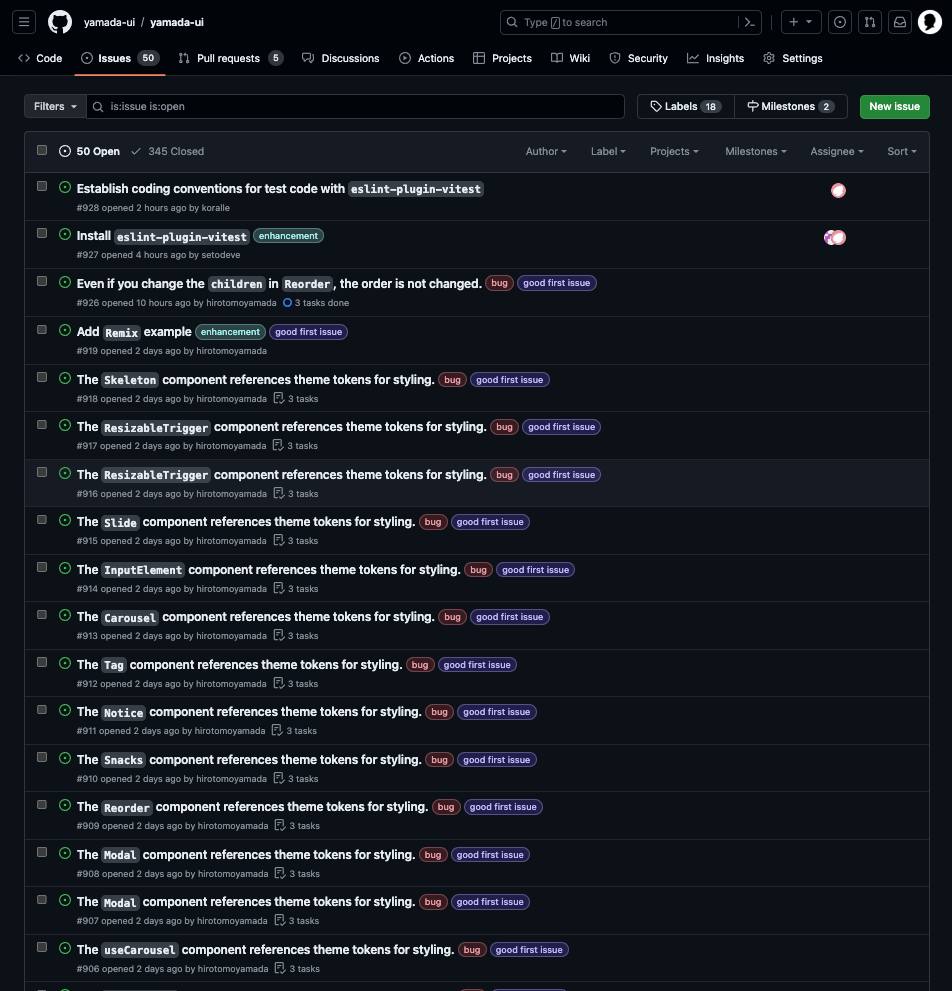
結構なバグが報告されておりイシューが作成されています。bugとgood first issueのラベルが付いているイシューに注目して、あなたが取り組めそうなイシューを探しましょう。
今回は、このイシューを取り組んでみましょう。

どうやら、タイトルを見るとSlideコンポーネントのスタイリングにテーマのトークンが使われていることが問題だそうです。もう少しイシューの内容を読んでいきましょう。
Yamada UI allows you to use components without applying a theme. It is a mistake to use theme tokens inside components.
なるほど。Yamada UIでは、テーマを適用せずにコンポーネントを使用できる。コンポーネント内でテーマのトークンを使用していることは間違っている。だそうです。
それでは、内容を理解して自分が取り組めそうだと感じたらコメントをしましょう。

コメントをしたら、そのコメントに返信があったりアサインを割り当ててもらえます。もし、コメントやアサインがされなくても、作業を進めて大丈夫だと思います。ガンガン進めましょう。
【第3話】 フォークへのみち
取り組むイシューが決まったら、いよいよ作業です。
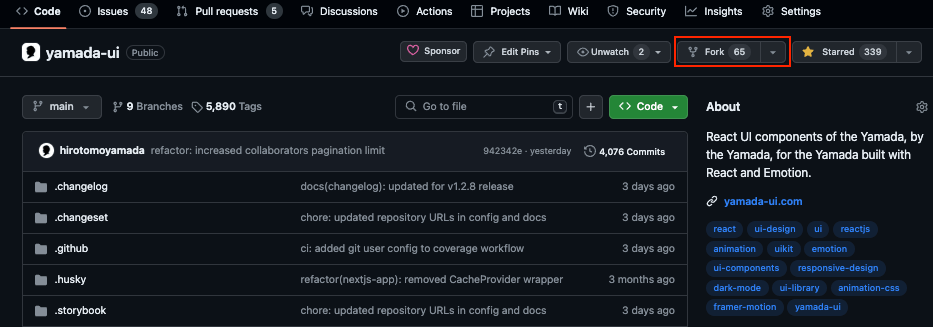
まず、OSSのリポジトリをフォークして、フォークした先の自分のリポジトリをクローンします。
【第4話】 CONTRIBUTING.mdをみる!
ほとんどのOSSには、/にCONTRIBUTING.mdが存在しています。これは、OSSへ貢献するためのロードマップだと思ってください。
OSSによって、項目名や内容に違いはありますが、ほとんど書かれる項目は一緒です。
よくある項目です。
- 作業するための便利なコマンド一覧。
- ブランチの命名規則。
- コミットのルール。
- プルリクエストを出すためにやってほしいこと。
作業するための便利なコマンド一覧。
Commands
pnpm install: bootstraps the entire project, symlinks all dependencies for cross-component development.pnpm storybook: starts storybook server and loads stories.pnpm build: run build for all component packages.pnpm test: run test for all component packages.pnpm gen:component: create a component package from a template using Plop.
- Please enter package and component names in kebab case
- If the provider is true, then it is wrapped with a provider that contains the style to be used by the children.
pnpm gen:hook: create a hook package from a template using Plop.
- Please enter package and custom hook names in kebab case
pnpm gen:token: generate theme tokens.
どうやら、pnpm installして依存関係をインストールして、pnpm storybookでサーバーを立ち上げてコンポーネントの動作確認をすれば良さそうです。
詳しくは、【第5話】 ブランチをつくる!で行います。
ブランチの命名規則。
Create a new branch out of the `main` branch
- Create a new branch out of the
mainbranch. We follow the convention
[type/scope]. For examplefix/accordion-hookordocs/menu-typo.type
can be eitherdocs,fix,feat,build, or any other conventional
commit type.scopeis just a short id that describes the scope of work.
[タイプ/スコープ]という命名規則に従い、タイプはdocs、fix、feat、buildなどの標準的なコミットタイプのいずれか、スコープは作業範囲を表す短い言葉だそうです。
詳しくは、【第5話】 ブランチをつくる!で行います。
コミットのルール。
Commit Convention
Before you create a Pull Request, please check whether your commits comply with
the commit conventions used in this repository.When you create a commit we kindly ask you to follow the convention
category(scope or module): messagein your commit message while using one of
the following categories:
feat / feature: all changes that introduce completely new code or new featuresfix: changes that fix a bug (ideally you will additionally reference an issue if present)refactor: any code related change that is not a fix nor a featuredocs: changing existing or creating new documentation (i.e. README, docs for usage of a lib or cli usage)build: all changes regarding the build of the software, changes to dependencies or the addition of new dependenciestest: all changes regarding tests (adding new tests or changing existing ones)ci: all changes regarding the configuration of continuous integration (i.e. github actions, ci system)chore: all changes to the repository that do not fit into any of the above categories[!TIP]
If you are interested in the detailed specification you can visit Conventional Commits or check out the Angular Commit Message Guidelines.
どうやら、Conventional Commitsのルールに従ってコミットしてほしいことが書いてあります。結構な割合で、他のOSSもこのルールを採用しています。
詳しくは、【第7話】 コミットのあいうえおで行います。
プルリクエストを出すためにやってほしいこと。
Steps to PR
Fork and clone the repository.
Create a new branch out of the
mainbranch. We follow the convention
[type/scope]. For examplefix/accordion-hookordocs/menu-typo.type
can be eitherdocs,fix,feat,build, or any other conventional
commit type.scopeis just a short id that describes the scope of work.Make and Run
pnpm changesetto create a detailed description of your changes. This
will be used to generate a changelog when we publish an update.
Learn more about Changeset.Also, if you provide
jsxsnippets to the changeset, please turn off the
live preview by doing the following at the beginning of the snippet:
```jsx live=falseIf you made minor changes like CI config, prettier, etc, you can run
pnpm changeset add --emptyto generate an empty changeset file to document
your changes.
Next, commit your changes following the
commit convention.
Confirming changes: Run thepnpm storybookcommand to launch Storybook. The source for Storybook is in./stories.Creating a new component: When you run the pnpmgen:componentcommand, a component is created from a template and dependencies are installed.Adding functionality to an existing component: After adding, please add a story for the target component so that the functionality can be understood.Creating a new hook: When you run thepnpm gen:hookcommand, a hook is created from a template and dependencies are installed.Adding functionality to an existing hook: After adding, please add a story for the target hook so that the functionality can be understood.Once you have completed all of the above tasks, please push your changes.
After pushing, a URL for the pull request will be generated. Follow the template and submit your request accordingly.
Additionally, check the Checks within the pull request and ensure that the Quality check has successfully completed.
If there are any issues, this pull request will not be merged.
コミットの前にpnpm changesetを実行してチェンジログを生成してほしいことが書いてあります。JavaScriptのプロジェクトでは、このchangesetは、よく使われています。
詳しくは、【第7話】 コミットのあいうえおで行います。
さて、ある程度CONTRIBUTING.mdを見たところで、ブランチを作成していきましょう。
【第5話】 ブランチをつくる!
先ほどのCONTRIBUTING.mdでブランチの命名規則がありました。この通りに、ブランチを作成していきましょう。
- Create a new branch out of the
mainbranch. We follow the convention
[type/scope]. For examplefix/accordion-hookordocs/menu-typo.type
can be eitherdocs,fix,feat,build, or any other conventional
commit type.scopeis just a short id that describes the scope of work.
今回は、Slideコンポーネントで使用されているテーマのトークンを修正したので、下記のようなブランチ名になるかと思います。
git checkout -b fix/slide-theme-token
Switched to a new branch 'fix/slide-theme-token'
ブランチを作成したあと、pnpm installとpnpm storybookを実行してサーバーを起動しましょう。
pnpm install
...
. postinstall$ cd packages/cli && pnpm build
[10 lines collapsed]
│ CJS dist/command/tokens/config.js               1.56 KB
│ CJS dist/command/colors/index.js                18.96 KB
│ CJS dist/utils/object.js                        1.22 KB
│ CJS dist/command/tokens/index.js                26.53 KB
│ CJS dist/command/tokens/create-theme-typings.js 8.99 KB
│ CJS dist/command/tokens/resolve-output-path.js  2.80 KB
│ CJS dist/index.js                               694.09 KB
│ CJS dist/utils/index.js                         683.52 KB
│ CJS dist/utils/cli.js                           681.58 KB
│ CJS ⚡️ Build success in 394ms
└─ Done in 1.7s
. prepare$ husky install
│ install command is deprecated
└─ Done in 359ms
Done in 4.6s
pnpm storybook
...
info => Starting manager..
info => Starting preview..
╭─────────────────────────────────────────────────────╮
│                                                     │
│   Storybook 7.6.17 for react-vite started           │
│   1.84 s for manager and 854 ms for preview         │
│                                                     │
│    Local:            http://localhost:6006/         │
│                                                     │
╰─────────────────────────────────────────────────────╯

Storybookが起動したら、バグを修正していきましょう。
【第6話】 バイバイバグ
さて、これが本題なのですが、もう一度イシューの内容を確認してみましょう。
もう一度イシューの内容を確認する。
Description
Yamada UI allows you to use components without applying a theme. It is a mistake to use theme tokens inside components.
const css: CSSUIObject = {
 position: "fixed",
 zIndex: "jeice",
 ...__css,
 ...position,
}
このzIndex: "jeice"は、明らかにCSSプロパティの値ではありません。ここを修正するだけで良さそうです。

該当するソースコードを探す。
では、実際のSlideコンポーネントをソースコードから探しにいきましょう。
grep -r --include=\*.tsx -w "const Slide" .
./packages/components/transitions/src/slide.tsx:export const Slide = forwardRef<SlideProps, "div", false>(
どうやら、./packages/components/transitions/src/slide.tsxに定義されているようです。
次に、zIndexの"jeice"がテーマでどんな数値が設定されているのか見に行きましょう。
grep -r --include=\*.{ts,tsx} -w "jeice" .
./packages/core/dist/generated-theme.types.d.ts:    zIndices: "yamcha" | "kurillin" | "nappa" | "guldo" | "jeice" | "burter" | "recoome" | "ginyu" | "dodoria" | "zarbon" | "freeza" | "vegeta" | "sonGoku" | "beerus" | (string & {});
./packages/core/src/generated-theme.types.ts:    | "jeice"
./packages/components/transitions/src/slide.tsx:      zIndex: "jeice",
./packages/theme/dist/index.d.ts:        jeice: number;
./packages/theme/dist/index.d.ts:        jeice: number;
./packages/theme/dist/tokens/z-indices.d.ts:    jeice: number;
./packages/theme/dist/tokens/index.d.ts:        jeice: number;
./packages/theme/src/tokens/z-indices.ts:  jeice: 110,
どうやら、110のようです。ついでに、サーバーで立ち上がっているSlideのストーリーたちも探しましょう。
grep -r --include=\*.tsx -w "<Slide\s.*>" .
./stories/components/transitions/slide.stories.tsx:      <Slide isOpen={isOpen} placement="bottom">
./stories/components/transitions/slide.stories.tsx:      <Slide isOpen={isOpen} placement="bottom" duration={0.7}>
./stories/components/transitions/slide.stories.tsx:      <Slide isOpen={isOpen} placement="left">
./packages/components/transitions/tests/slide.test.tsx:describe("<Slide />", () => {
./packages/components/transitions/tests/slide.test.tsx:    const { getByText } = render(<Slide isOpen={false}>Test</Slide>)
./packages/components/transitions/tests/slide.test.tsx:    const { getByTestId } = render(<Slide isOpen data-testid="slide" />)
./packages/components/transitions/tests/slide.test.tsx:      <Slide isOpen placement="top" data-testid="slide" />,
./packages/components/transitions/tests/slide.test.tsx:      <Slide isOpen placement="left" data-testid="slide" />,
./packages/components/transitions/tests/slide.test.tsx:      <Slide isOpen placement="right" data-testid="slide" />,
./packages/components/transitions/tests/slide.test.tsx:      <Slide isOpen placement="bottom" data-testid="slide" />,
./stories/components/transitions/slide.stories.tsxに定義されているようです。
修正する。
次に、バグを修正していきます。先ほど、調べた"jeice"を"110"に変更します。
const css: CSSUIObject = {
  position: "fixed",
-  zIndex: "jeice",
+  zIndex: "110",
  ...__css,
  ...position,
}
実際にChromeのDevToolsでzIndexを確認しにいきましょう。

正しく、変更されていますね。次にテストも書いていきましょう。
テストする。
+ test("applies styles `z-index` correctly", async () => {
+   const { getByTestId } = render(<Slide isOpen data-testid="slide" />)
+
+   expect(getByTestId("slide")).toHaveStyle("z-index: 110;")
+ })
pnpm test transitions
...
 RUN  v1.3.1 /Users/hirotomoyamada/GitHub/hirotomoyamada/yamada-ui

 ✓ packages/components/transitions/tests/scale-fade.test.tsx (1)
 ✓ packages/components/transitions/tests/fade.test.tsx (1)
 ✓ packages/components/transitions/tests/collapse.test.tsx (11) 1428ms
 ✓ packages/components/transitions/tests/slide.test.tsx (7) 648ms
 ✓ packages/components/transitions/tests/slide-fade.test.tsx (5) 505ms

 Test Files  5 passed (5)
      Tests  25 passed (25)
   Start at  03:54:37
   Duration  4.82s (transform 986ms, setup 1.03s, collect 10.93s, tests 3.06s, environment 2.87s, prepare 606ms)
これで、作業はおしまいです。次にコミットをしてプッシュしましょう。
【第7話】 コミットのあいうえお
先ほどのCONTRIBUTING.mdに、コミットの前にpnpm changesetを実行してください、と記載されていました。これを実行していきます。
pnpm changesetを実行する。
Make and Run
pnpm changesetto create a detailed description of your changes. This
will be used to generate a changelog when we publish an update.
Learn more about Changeset.Also, if you provide
jsxsnippets to the changeset, please turn off the
live preview by doing the following at the beginning of the snippet:
```jsx live=falseIf you made minor changes like CI config, prettier, etc, you can run
pnpm changeset add --emptyto generate an empty changeset file to document
your changes.
changesetとは、オープンソースでは欠かせないバージョン管理・変更点の内容・タグ付け・リリースを簡単に実装してくれるツールです。
今回は、どのパッケージのバージョンを上げるか、変更点は何か、を記入していきます。
pnpm changeset
🦋  Which packages would you like to include? …
◯ changed packages
  ◯ @yamada-ui/transitions
◯ unchanged packages
  ◯ @yamada-ui/cli
  ◯ @yamada-ui/accordion
  ◯ @yamada-ui/alert
  ...
changed packagesまたは@yamada-ui/transitionsを選択してEnterを押します。
pn changeset
🦋  Which packages would you like to include? …
◉ changed packages
  ◉ @yamada-ui/transitions
◯ unchanged packages
  ◯ @yamada-ui/cli
  ◯ @yamada-ui/accordion
  ◯ @yamada-ui/alert
  ...
次に、バージョンはどうするのか聞かれるので、今回はpatchを上げたいのでEnterを2回押してmajorとminorをスキップします。
セマンティックバージョニングとは
セマンティック バージョニング(Semantic Versioning、略してSemVer)という規則に従っています。
これは、ソフトウェアのバージョンを管理するための一般的な方法で、メジャー.マイナー.パッチの形式で表されます。例えば、1.0.0のようになります。
メジャー: これは最初の数字で、互換性のないAPIの変更があった場合にインクリメントされます。つまり、以前のバージョンのソフトウェアとは異なる方法で動作する大きな変更が加えられたときです。
マイナー: 二番目の数字で、後方互換性が保たれる機能追加があった場合にインクリメントされます。これは、新しい機能が追加されたが、既存の機能に影響を与えない変更です。
パッチ: 最後の数字で、後方互換性が保たれるバグ修正が行われた場合にインクリメントされます。つまり、既存の機能の小さな修正や改善が行われたときです。
例えば、1.0.0からバグ修正が行われた場合、新しいバージョンは1.0.1になります。新機能が追加された場合は1.1.0に、そして互換性のない変更があった場合は2.0.0になります。
このシステムにより、開発者はソフトウェアの更新をより簡単に理解し、互換性の問題を避けながら適切なバージョンを選択できます。
pn changeset
🦋  Which packages would you like to include? · @yamada-ui/transitions
🦋  Which packages should have a major bump? · No items were selected
🦋  Which packages should have a minor bump? · No items were selected
🦋  The following packages will be patch bumped:
🦋  @yamada-ui/transitions@1.0.15
🦋  Please enter a summary for this change (this will be in the changelogs).
🦋    (submit empty line to open external editor)
🦋  Summary ›
Summaryに作業内容(変更点)を記入していきます。
今回は、コンポーネント内でテーマのトークンが使用されていた不具合を修正したので、
Fixed a bug where theme tokens were used in components.と記入していきます。
Is this your desired changeset?と聞かれるのでYesを選択しましょう。
pnpm changeset
🦋  Which packages would you like to include? · @yamada-ui/transitions
🦋  Which packages should have a major bump? · No items were selected
🦋  Which packages should have a minor bump? · No items were selected
🦋  The following packages will be patch bumped:
🦋  @yamada-ui/transitions@1.0.15
🦋  Please enter a summary for this change (this will be in the changelogs).
🦋    (submit empty line to open external editor)
🦋  Summary · Fixed a bug where theme tokens were used in components.
🦋
🦋  === Summary of changesets ===
🦋  patch:  @yamada-ui/transitions
🦋
🦋  Note: All dependents of these packages that will be incompatible with
🦋  the new version will be patch bumped when this changeset is applied.
🦋
🦋  Is this your desired changeset? (Y/n) · true
🦋  Changeset added! - you can now commit it
🦋
🦋  If you want to modify or expand on the changeset summary, you can find it here
🦋  info .changeset/mean-mangos-promise.md
.changesetにmean-mangos-promise.mdというファイルが作成されたようです。
コミットする。
作業したファイルや先ほど作成したchangesetのファイルをステージに上げて、確認しましょう。
git status -s
A  .changeset/mean-mangos-promise.md
 M packages/components/transitions/src/slide.tsx
 M packages/components/transitions/tests/slide.test.tsx
次にコミットですが、CONTRIBUTING.mdの中にConventional Commitsのルールに従うように、とありました。
Before you create a Pull Request, please check whether your commits comply with
the commit conventions used in this repository.When you create a commit we kindly ask you to follow the convention
category(scope or module): messagein your commit message while using one of
the following categories:
feat / feature: all changes that introduce completely new code or new featuresfix: changes that fix a bug (ideally you will additionally reference an issue if present)refactor: any code related change that is not a fix nor a featuredocs: changing existing or creating new documentation (i.e. README, docs for usage of a lib or cli usage)build: all changes regarding the build of the software, changes to dependencies or the addition of new dependenciestest: all changes regarding tests (adding new tests or changing existing ones)ci: all changes regarding the configuration of continuous integration (i.e. github actions, ci system)chore: all changes to the repository that do not fit into any of the above categories[!TIP]
If you are interested in the detailed specification you can visit Conventional Commits or check out the Angular Commit Message Guidelines.
今回の場合は、バグを修正したのでfixをプレフィックスにつけてメッセージを書いていきます。
git commit -m "fix: fixed zIndex value in component"
✔ Preparing lint-staged...
✔ Running tasks for staged files...
✔ Applying modifications from tasks...
✔ Cleaning up temporary files...
[fix/slide-theme-token a68a763ce] fix: fixed zIndex value in component
 3 files changed, 12 insertions(+), 1 deletion(-)
 create mode 100644 .changeset/mean-mangos-promise.md
それでは、プッシュしていきましょう。
git push --set-upstream origin fix/slide-theme-token
【第8話】 つくれ!プルリクエスト
先ほど、プッシュしたものでプルリクエストを作成していきます。プルリクエストもテンプレートが用意されており、質問形式で記入していくだけです。但し、内容によってはプルリクエストがマージされないこともあるので、しっかりと先ほどのイシュー番号も含めて、記入しましょう。
【第9話】 レビューとうじょう!
は、今回ありません。なぜなら、内容が簡単のためレビューするものがないからです。もし、フィードバックがあれば、それに従って修正しましょう。
【第10話】 マージ…そして、たびだち!
レビューされたようです。
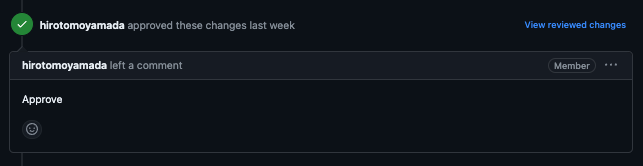
念願のマージが完了しました。おめでとうございます。🎉

【最終話】 オープンソースとのわかれ…!
以上が、OSSのより実践的な貢献のフローでした。いかがだったでしょうか?😎
これで、あなたもマサラタウンから1番道路に冒険に出たプログラマーです。🎉
これからも、どんどんOSSに貢献してプロフィールを充実させていきましょう。

もし、困ったことがあればYamada UIコミュニティで聞いてください!
おしまい。
P.S.
にスターを忘れずにつけてください。😎
日本人の力で、日本の力を世界に広げていきましょう。
Discussion