【Argo Workflows】workflow を webhook で発火する / WorkflowEventBinding

本記事の目的
Argo Workflowsの導入から進め、上記documentで記載されていることを実践します。
私のk8s力の低さが原因か、単純にdocument通りに進めることすら苦戦したので、そういった方の助けになればと💪
環境
minikubeを利用して進めます。
% minikube version
minikube version: v1.27.0
commit: 4243041b7a72319b9be7842a7d34b6767bbdac2b
Argo Workflows は v3.4.1 を利用します。
Argo Workflowsの導入
Quick Start を進めていきます。
To install Argo Workflows, navigate to the releases page and find the release you wish to use (the latest full release is preferred).
Scroll down to the Controller and Server section and execute the kubectl commands.
v3.4.1のリリースページにいき、Controller and Server に 記載されているコマンドを実行します。
kubectl create namespace argo
kubectl apply -n argo -f https://github.com/argoproj/argo-workflows/releases/download/v3.4.1/install.yaml
no matches for kind "Certificate" in version "cert-manager.io/v1" ensure CRDs are installed first と怒られた場合
cert-managerがインストールされていない場合、下記のように怒られるのでインストールします。
怒られなかった方には関係ないので、本節は飛ばしてOKです🙆♂️
kubectl apply -n argo -f https://github.com/argoproj/argo-workflows/releases/download/v3.4.1/install.yaml
namespace/argo created
.....(略).....
resource mapping not found for name: "argo-server-cert" namespace: "argo" from "https://github.com/argoproj/argo-workflows/releases/download/v3.4.1/install.yaml": no matches for kind "Certificate" in version "cert-manager.io/v1"
ensure CRDs are installed first
resource mapping not found for name: "argo-workflows-issuer" namespace: "argo" from "https://github.com/argoproj/argo-workflows/releases/download/v3.4.1/install.yaml": no matches for kind "Issuer" in version "cert-manager.io/v1"
下記コマンドを実行してインストールします。 https://cert-manager.io/docs/installation/
kubectl apply -f https://github.com/cert-manager/cert-manager/releases/download/v1.9.1/cert-manager.yaml
Auth Mode を server に変更します。
kubectl patch deployment \
  argo-server \
  --namespace argo \
  --type='json' \
  -p='[{"op": "replace", "path": "/spec/template/spec/containers/0/args", "value": [
  "server",
  "--auth-mode=server"
]}]'
port-forward して UIを見てみます。
kubectl -n argo port-forward deployment/argo-server 2746:2746
https://localhost:2746 をブラウザでひらけば、Argo Workflows の UI が確認できます😎

WorkflowTemplate, WorkflowEventBinding を作成して、webhook で発火
本記事冒頭に挙げたページの内容を進めます。
WorkflowTemplate の作成
WorkflowTemplate を作成します。
apiVersion: argoproj.io/v1alpha1
kind: WorkflowTemplate
metadata:
  name: my-wf-tmple
  namespace: argo
spec:
  templates:
    - name: main
      inputs:
        parameters:
          - name: message
            value: "{{workflow.parameters.message}}"
      container:
        image: docker/whalesay:latest
        command: [cowsay]
        args: ["{{inputs.parameters.message}}"]
  entrypoint: main
workflow-template-sample.yaml というファイル名で上記を保存して apply します。
kubectl apply -f workflow-template-sample.yaml -n argo
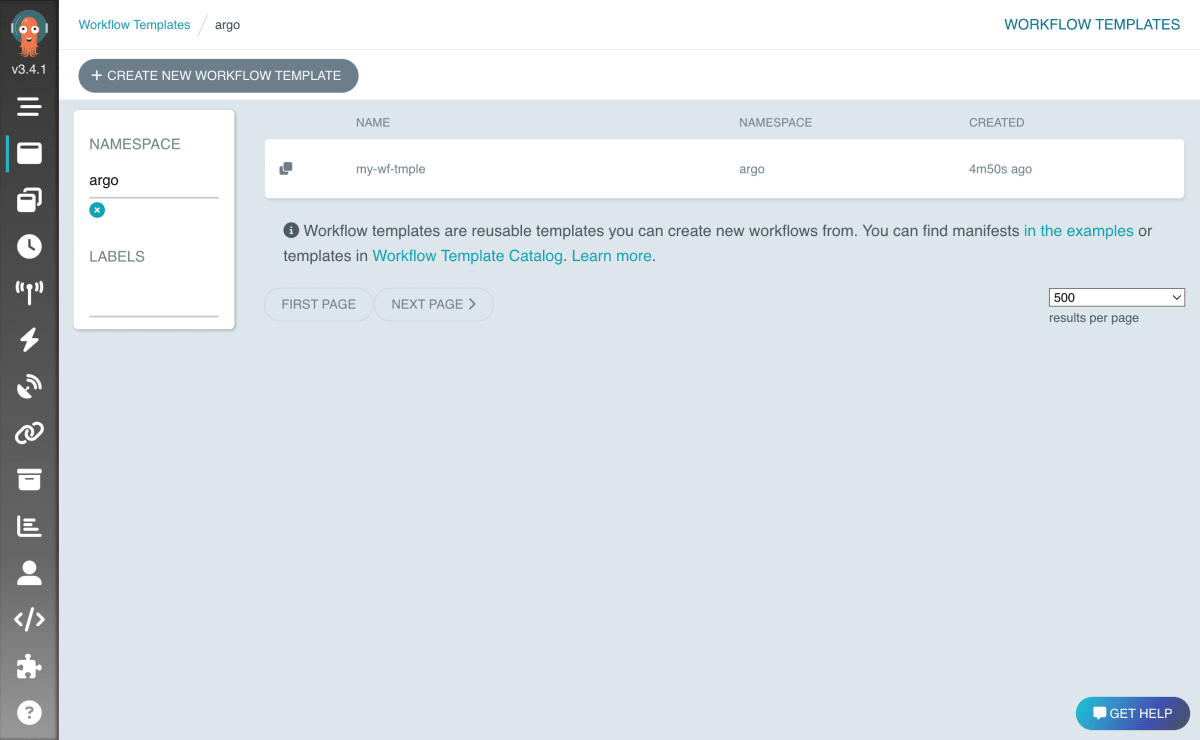
https://localhost:2746/workflow-templates/argo にアクセスして、作成されたことを確認します😎
WorkflowEventBindingの作成
WorkflowEventBindingを作成します。
apiVersion: argoproj.io/v1alpha1
kind: WorkflowEventBinding
metadata:
  name: event-consumer
spec:
  event:
    # metadata header name must be lowercase to match in selector
    selector: payload.message != "" && metadata["x-argo-e2e"] == ["true"] && discriminator == "my-discriminator"
  submit:
    workflowTemplateRef:
      name: my-wf-tmple
    arguments:
      parameters:
      - name: message
        valueFrom:
          event: payload.message
workflow-event-binding-sample.yaml というファイル名で上記を保存して apply します。
kubectl apply -f workflow-event-binding-sample.yaml -n argo
https://localhost:2746/workflow-event-bindings/argo にアクセスして、作成されたことを確認します😎

event と template が紐づけられたことが直感的に理解できます。
アクセストークンを作成して、webhookで発火
さて、webhookですぐに発火したいところですが、そのためにアクセストークンを作成する必要があります。
アクセストークンの作成
こちらの内容を進めます。
Role, ServiceAccount を作成して、ServiceAccountとRoleを紐づけます。
Service account token Secrets を作成します。
# Just enough permissions to submit a workflow template.
# You could tighten this further (but perhaps impractically) by using `resourceNames`
apiVersion: rbac.authorization.k8s.io/v1
kind: Role
metadata:
  name: submit-workflow-template
rules:
  - apiGroups:
      - argoproj.io
    resources:
      - workfloweventbindings
    verbs:
      - list
  - apiGroups:
      - argoproj.io
    resources:
      - workflowtemplates
    verbs:
      - get
  - apiGroups:
      - argoproj.io
    resources:
      - workflows
    verbs:
      - create
---
apiVersion: v1
kind: ServiceAccount
metadata:
  name: webhook-client
---
apiVersion: rbac.authorization.k8s.io/v1
kind: RoleBinding
metadata:
  name:  webhook-client
roleRef:
  apiGroup: rbac.authorization.k8s.io
  kind: Role
  name: submit-workflow-template
subjects:
  - kind: ServiceAccount
    name:  webhook-client
    namespace: argo
---
apiVersion: v1
kind: Secret
metadata:
  name: webhook-client-token
  namespace: argo
  annotations:
    kubernetes.io/service-account.name: "webhook-client"
type: kubernetes.io/service-account-token
account-role-token-sample.yaml というファイル名で上記を保存して apply します。
kubectl apply -f account-role-token-sample.yaml -n argo
作成したトークンを、変数 $ARGO_TOKEN に保存します。
ARGO_TOKEN="Bearer $(kubectl get secret -n argo webhook-client-token -o jsonpath='{.data.token}' | base64 --decode)"
$ARGO_TOKEN を確認します😎
% echo $ARGO_TOKEN
Bearer eyJhbGciOiJSUzI1NiIs....
webhookで発火
トークンが作成できたので発火します。
下記を実行します。
curl -k https://localhost:2746/api/v1/events/argo/my-discriminator \
    -H "Authorization: $ARGO_TOKEN" \
    -H "X-Argo-E2E: true" \
    -d '{"message": "hello events"}'
UIからログを確認します😎
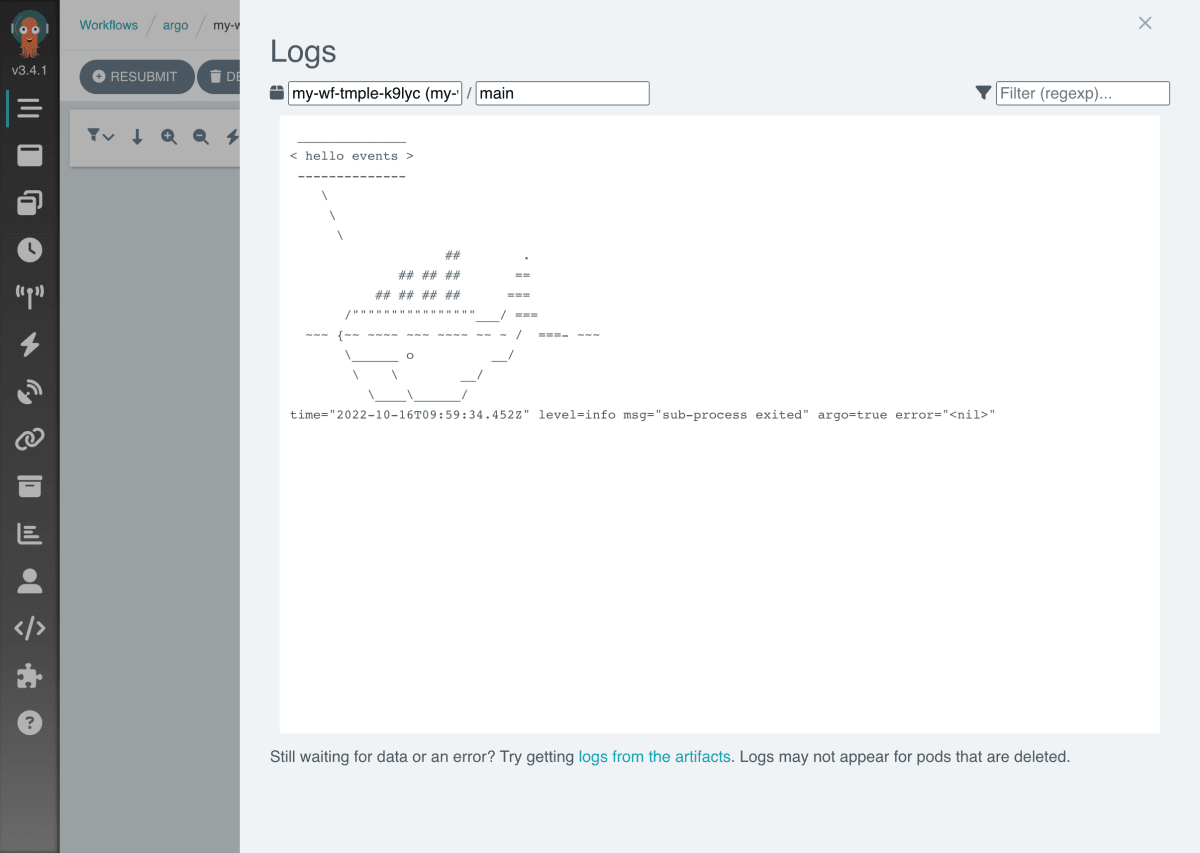
message で指定した、hello events が変数で渡されて workflowが実行されたことが確認できます。
お疲れ様でした〜。
Discussion