create-react-app直後にやる環境構築の備忘録
はじめに
毎回何をやったか忘れてしまうので私のCreate React App直後に毎回やっている環境構築の備忘録になります。覚え書きのため時期によって内容がころころ変わるかもしれません。。。
- React
- TypeScript
をベースに、プロジェクトによって下記を追加しています。
- Redux Tool kit
- Storybook
- Jest
- CSS modules
- emotion
- styled-components
ESlintについてはCRAデフォルトのままの利用。(プロジェクトにより調整)
StylelintについてはCRA、emotion、styled-componentsとVSCodeのそれぞれの兼ね合いなのか、利用するバージョンによって色々とエラーが出ること多いのでプロジェクトにより。。
0.GitHubで新規リポジトリの作成
プロジェクトのルールによって作成。
1.create-react-app
まずはプロジェクト作成。
基本的にTypeScriptで構築するので--template typescript必須で作成。
$ yarn create react-app project-name --template typescript
or
$ npx create-react-app project-name --template typescript
Reduxを使うときは、Redux Took Kitを用意してくれるredux-typescriptテンプレートが便利です。
最近のアップデートでcreateAsyncThunkのサンプルやテストコードも入ってますし、型を扱うのに便利なusAppSelectorとuseAppDispatchも用意してくれています。
$ yarn create react-app project-name --template redux-typescript
or
$ npx create-react-app project-name --template redux-typescript
パッケージのアップデート
テンプレートに利用されているパッケージ類が古い場合もあるので、一通り最新にアップデートします。
デフォルトのcreate-react-appのものに比べて外部のtemplateはちょっと古めのパッケージのことが多いです。
# yarn upgrade-interactive --latest
2.tsconfig.jsonの設定追加
個人的な好みですが、tsconfig.jsonにbaseUrlを設定しています。
baseUrlを設定することで、相対パスではなくルート相対パス風に記載ができるようになります。
"compilerOptions": {
  "baseUrl": "." // 追加
}
上記の場合はプロジェクトルートからからsrc/ファイル名というように記載できます。
import { Hoge } from 'src/components/atoms/Button;
3.Storybookのセットアップ
Storybookをインストールします。
$ npx -p @storybook/cli sb init
create-react-appの利用しているbabelとStorybookの利用するbabelとの兼ね合い?なのかjestやstorybook起動時にエラーが出るので、メッセージの指示にしたがって.envファイルに下記を追記します。
SKIP_PREFLIGHT_CHECK=true
4.package.jsonの編集
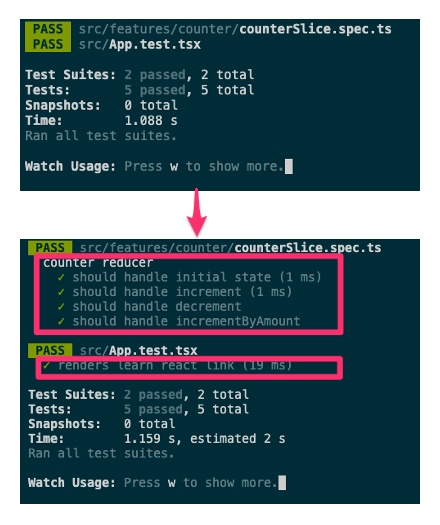
起動スクリプトにeslintを追加、jestのオプションを追加します。
--verboseを付けるとターミナル表示にテスト項目のdescribeやtestの名称も表示されるようになります。
  "scripts": {
    "start": "react-scripts start",
    "build": "react-scripts build",
    "test": "react-scripts test --env=jsdom --verbose",  // オプション変更
    "eject": "react-scripts eject",
    "lint": "eslint 'src/**/*.{js,jsx,ts,tsx}'", // 追加
    "lint:fix": "eslint --fix 'src/**/*.{js,jsx,ts,tsx}'",  // 追加
    "storybook": "start-storybook -p 6006 -s public",
    "build-storybook": "build-storybook -s public"
  },
5.テスト用ツールの追加
カスタムフックのテスト用にreact-hooks-testing-libraryを追加します。
$ yarn add -D @testing-library/react-hooks react-test-renderer
プロジェクトによってはAPIテスト用にmswやaxiosもインストール。
6.CSS環境の構築
CSS modulesを利用の場合
css modulesでSASSを利用したいためsass環境をインストールします。
$ yarn add -D sass
リセットCSS
Create React Appには、normalize.cssが付いてくるのでそちらを利用。
emotionを利用の場合
$ yarn add @emotion/react
Create React App、TypeScript環境で利用するにはひと手間必要で、css Prop利用の場合は、ソースの先頭に下記1行を追記する必要があります。
/** @jsxImportSource @emotion/react */
リセットCSS
emotion-resetを利用。
$ yarn add emotion-reset
emotion-resetでは、box-sizing: border-box;が設定されていないので好みで下記のようにGlobalに設定しておく。
/** @jsxImportSource @emotion/react */
import emotionReset from 'emotion-reset';
import { Global, css } from '@emotion/react';
import HomeContainer from 'src/components/pages/HomeContainer';

const App: React.VFC = () => {
  return (
    <>
      <Global styles={css`
        ${emotionReset}

        *, *::after, *::before {
          box-sizing: border-box;
          -moz-osx-font-smoothing: grayscale;
          -webkit-font-smoothing: antialiased;
          font-smoothing: antialiased;
        }
      `} />
      <HomeContainer />
    </>
  );
};

export default App;
自分のvscode環境でシンタックスハイライトがおかしくなる。。。
...WIP
styled-componentsを利用の場合
パッケージのインストール
$ yarn add styled-components
$ yarn add -D @types/styled-components
リセットCSS
styled-resetでは、box-sizing: border-box;が設定されていないので好みで下記のようにGlobalStyleに設定しておく。
import React from 'react';
import { createGlobalStyle } from 'styled-components';
import reset from 'styled-reset';

const GlobalStyle = createGlobalStyle`
  ${reset}
  /* other styles */
  *, *::after, *::before {
    box-sizing: border-box;
    -moz-osx-font-smoothing: grayscale;
    -webkit-font-smoothing: antialiased;
    font-smoothing: antialiased;
  }
`;

const App: React.VFC = () => {
  return (
    <>
      <GlobalStyle />
      <div>App</div>
    </>
  );
};

export default App;
...WIP
7.index.htmlなどpublicディレクトリ下のファイル修正
デフォルトで同梱されている静的なファイルたちを忘れないうちに最低限な部分だけ書き換えておきます。
<!DOCTYPE html>
<html lang="ja">
  <head>
    <meta charset="utf-8" />
    <link rel="icon" href="%PUBLIC_URL%/favicon.svg" type="image/svg+xml" />
    <meta name="viewport" content="width=device-width, initial-scale=1" />
    <meta name="theme-color" content="#000000" />
    <meta name="description" content="Web site created using create-react-app" />
    <link rel="apple-touch-icon" href="%PUBLIC_URL%/logo192.png" />
    <link rel="manifest" href="%PUBLIC_URL%/manifest.json" />
    <title>Weather App</title>
  </head>
  <body>
    <noscript>You need to enable JavaScript to run this app.</noscript>
    <div id="root"></div>
  </body>
</html>
下記はそれぞれ用意するサイトに合わせて作成、差し替え。
- logo.192.png
- logo.512.png
- favicon.svg
- ogp.ong
faviconについてはIE非対応ですが、ダークテーマに対応できるsvg画像を用意しています。
さいごに
プロジェクトによって環境も多少は異なりますが、最近の自分環境のご紹介と備忘録でした。
Discussion