Auth0 はじめました #0
前回
Auth0 はじめました #0
2024年6月のAWS Summitのパートナーセッション[1]にてOkta社による Auth0 のプレゼンを拝見して興味があったので、 同サービスによるログイン画面の設置をしてみたいと思います。
当時どんなことを学んだかについては、まとめられた良い記事があったので貼っておきます。
今回の目標
これまでの記事で使ってきたプロジェクト(Vite + React on docker)にAuth0のログイン画面を設置してみます。
0. Auth0ざっくり理解
- ログイン画面って実は色々考えることがあって実装が大変
- 様々な認証方式が選択可能
- サービスの入り口で効率的なセキュリティ対策ができる
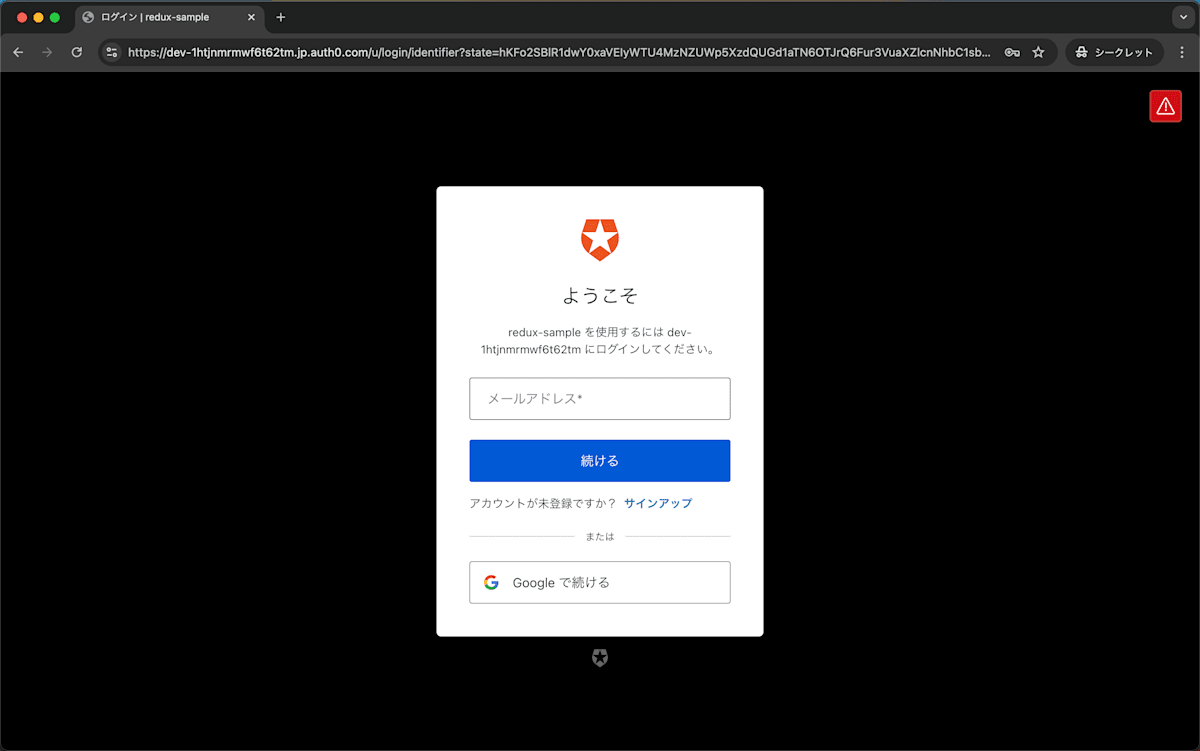
- Auth0を設置すればリダイレクトでいい感じのログイン画面を表示して認証認可の機能を肩代わりできる
参考にしたもの
↑今回はこの記事に沿って設置作業を進めました
↑Auth0公式のドキュメント(頑張って熟読するべし)
1. Auth0に登録
ドメインとクライアントIDの発行が確認できたらOK
(ドメインは任意の値も入力できたけど使い勝手がわからんのでデフォルト値にした)
備忘録では後の動作の確認のために、この段階ではあえて動作に必要な入力を省きます。
2. Reactプロジェクトに設置
docker compose run frontend npm i @auth0/auth-react
import { StrictMode } from 'react'
import { createRoot } from 'react-dom/client'
import App from './App.tsx'
import './index.css'
import { store } from './app/store'
import { Provider } from 'react-redux'
+import { Auth0Provider } from '@auth0/auth0-react'

+const domain = import.meta.env.VITE_AUTH0_DOMAIN
+const clientId = import.meta.env.VITE_AUTH0_CLIENT_ID

createRoot(document.getElementById('root')!).render(
  <StrictMode>
+    <Auth0Provider
+      domain={domain}
+      clientId={clientId}
+      authorizationParams={{
+        redirect_uri: window.location.origin
+      }}
+    >
      <Provider store={store}>
        <App />
      </Provider>
+    </Auth0Provider>
  </StrictMode>
)
ここで環境変数への参照をしてますが
const domain = import.meta.env.VITE_AUTH0_DOMAIN
const clientId = import.meta.env.VITE_AUTH0_CLIENT_ID
このプロジェクトは Vite を使っているのでこういう書きっぷりになってます。
環境変数の設置もここでやっておきます。
VITE_AUTH0_DOMAIN=Auth0から発行されたドメイン
VITE_AUTH0_CLIENT_ID=Auth0から発行されたクライアントID
import React from 'react'
import { useAuth0 } from '@auth0/auth0-react'
import styled from 'styled-components'

const LoginButton: React.VFC = () => {
  const { loginWithRedirect } = useAuth0()

  return <Button onClick={() => loginWithRedirect()}>ログイン</Button>
}

const Button = styled.button`
  width: 150px;
  height: 50px;
  border-radius: 25px;
  background-color: #3bcee2;
`

export default LoginButton
import React from 'react'
import { useAuth0 } from '@auth0/auth0-react'
import styled from 'styled-components'

const LogoutButton: React.VFC = () => {
  const { logout } = useAuth0()

  return (
    <Button
      onClick={() => {
        logout({ logoutParams: { returnTo: window.location.origin } })
      }}
    >
      ログアウト
    </Button>
  )
}

export default LogoutButton

const Button = styled.button`
  width: 150px;
  height: 50px;
  border-radius: 25px;
  background-color: #db5c8d;
`
引用したソースによって styled-components が本プロジェクト上では初登場となりました。
docker compose run frontend npm i styled-components
import { useState } from 'react'
import reactLogo from './assets/react.svg'
import viteLogo from '/vite.svg'
import './App.css'
import { Counter } from './features/counter/Counter.tsx'
+import { useEffect } from 'react'
+import { useAuth0 } from '@auth0/auth0-react'
+import LoginButton from './components/login-button.tsx'
+import LogoutButton from './components/logout-button.tsx'


function App() {
  const [count, setCount] = useState(0)
+  const { isAuthenticated, user, isLoading } = useAuth0()
+
+  useEffect(() => {
+    console.log(JSON.stringify({isAuthenticated, user, isLoading}, null, 2))
+  }, [isAuthenticated, user, isLoading])
+
+  if (isLoading) {
+    return <div>Loading ...</div>
+  }

  return (
    <>
+      { isAuthenticated ? (
+        <>
+          <div>認証後</div>
+          <LogoutButton />
+          { user && <div>
+            <img src={user.picture} alt={user.name} />
+            <h2>{user.name}</h2>
+            <p>{user.email}</p>
+          </div> }
+        </>
+      ) : (
+        <>
+          <div>認証前</div>
+          <LoginButton />
+        </>
+      ) }
      <div>
        <a href="https://vitejs.dev" target="_blank">
          <img src={viteLogo} className="logo" alt="Vite logo" />
        </a>
        <a href="https://react.dev" target="_blank">
          <img src={reactLogo} className="logo react" alt="React logo" />
        </a>
      </div>
3. ローカルサーバーのHTTPS化
Auth0上に設定するURLはHTTPSじゃないといけませんでした。
このタイミングでローカルサーバーのHTTPS化を実施します。
brew install mkcert
mkcert -install
mkcert localhost
mkdir ./frontend/https
mv localhost.pem ./frontend/https/
mv localhost-key.pem ./frontend/https/
import { defineConfig } from 'vite'
import react from '@vitejs/plugin-react-swc'
+import fs from 'fs'

// https://vitejs.dev/config/
export default defineConfig({
  plugins: [react()],
+  server: {
+    https: {
+      key: fs.readFileSync('./https/localhost-key.pem'),
+      cert: fs.readFileSync('./https/localhost.pem'),
+    }
+  },
})
docker compose run frontend npm i -D @types/node
4. 動作確認およびトラブルシューティング

ログインボタンを押してみます

おおっと?
これはAuth0の Allowed Callback URLs の項目を設定することでこの挙動は直りました。

いい感じです
ところで、下記のおかげでAuth0の情報の読み込み中には Loading ... という表示が出るようになっているのですが、この状態が長すぎました。
  if (isLoading) {
    return <div>Loading ...</div>
  }

1分以上はこの状態。長いぞ?
これはAuth0の Allowed Web Origins の項目を設定することで爆速になりました。
まとめ
無事にAuth0のログイン画面を設置することができました。
Auth0のダッシュボードの日本語化ができず必要項目を読み飛ばしてトラブルシューティングに時間を食ってしまいましたが、公式情報をきちんと読み直して最後にはちゃんとできたのでよかったです。
軽く触ってみた感じ、2段階認証やスパム対策のCAPTCHAなどもAuth0側に設定すれば利用できました。
イケてるログイン画面をお手軽に利用できるのは本当にありがたいです。
-
AWSを活用している企業によるセミナー ↩︎
Discussion