Next.js + Playwrightでログインのテスト実装


概要
Playwrightを使用してログインのテストを実装するのが今回の目的です。
使用ツール
- Next.js(ver13, app router)
- Firebase auth
- Playwright
- react-hook-form
Firebaseの設定
Firebaseのプロジェクト作成


どのようなプロジェクト名は任意の名前で
Firebaseのアプリ作成

今回はwebアプリにします。

アプリ名は任意の名前で
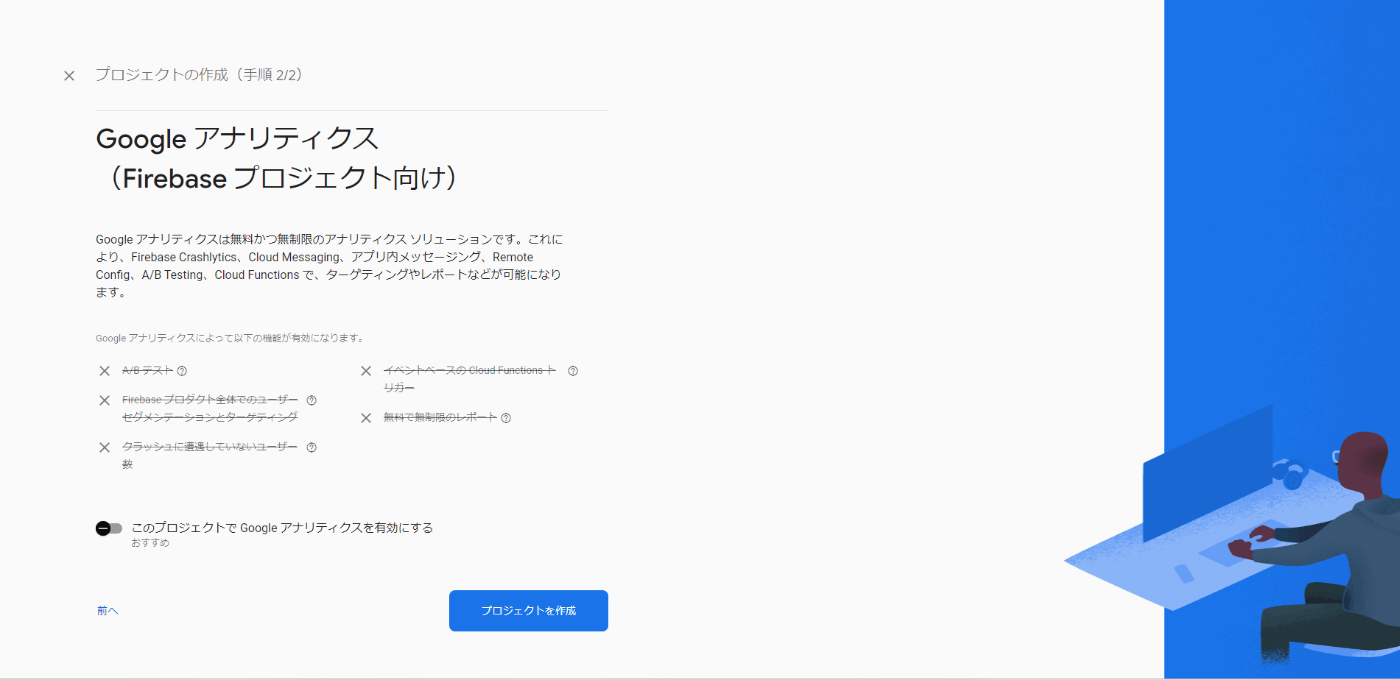
FirebaseAuthの設定

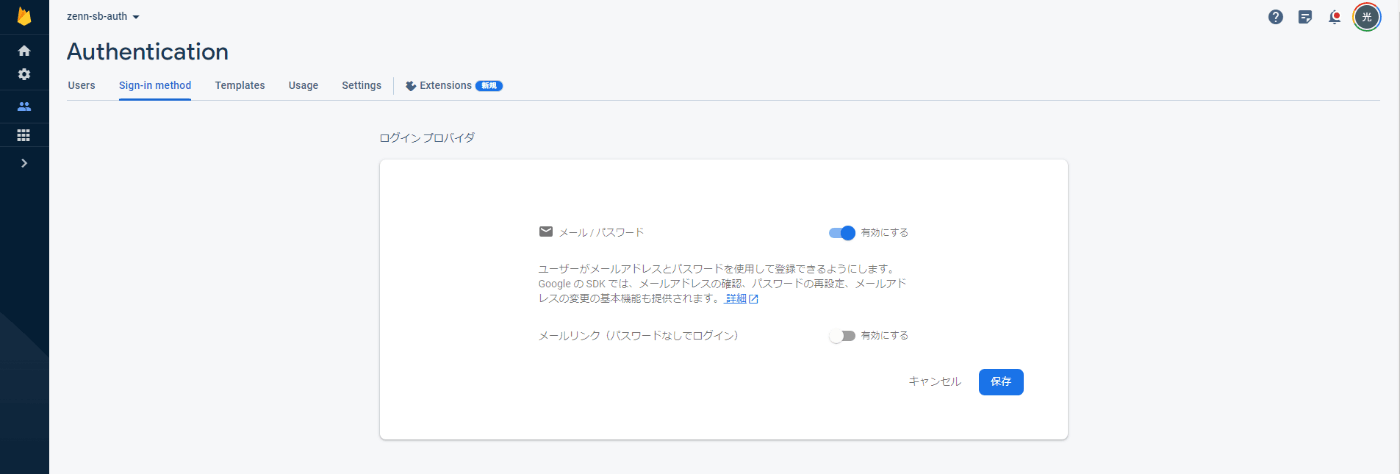
今回はメールアドレス/パスワードのみ設定していきます。
UIの構築
Nextの環境構築
npx create-next-app@latest
What is your project named? >> zenn_auth_playwright
Would you like to use TypeScript? >> Yes
Would you like to use ESLint? >> Yes
Would you like to use Tailwind CSS? >> Yes
Would you like to use `src/` directory? >> No
Would you like to use App Router? (recommended) >> Yes
Would you like to customize the default import alias? >> No
npx create-next-app@latestの後プロジェクト名やTypescriptを使うのか等聞かれます。
UIに関わるフォルダ構成
- 📁zenn_auth_playwright(root)
- 📁app
- 📁about
- 📄page.tsx
- 📄globals.css
- 📄layout.tsx
- 📄page.tsx
- 📁about
- 📁lib
- 📄firebaseConfig.ts
- 📄.env.local
- 📁app
app/globals.css
@tailwind base;
@tailwind components;
@tailwind utilities;
app/layout.tsx
import './globals.css'

export default function RootLayout({
  children,
}: {
  children: React.ReactNode
}) {
  return (
    <html lang="en">
      <body>{children}</body>
    </html>
  )
}
app/page.tsx
"use client";

import { useState, useEffect } from "react";

import { useForm } from "react-hook-form";
import { useRouter } from "next/navigation";
import {
  createUserWithEmailAndPassword as signUp,
  signInWithEmailAndPassword as signIn,
} from "firebase/auth";
import { auth } from "../lib/firebaseConfig";

interface Auth {
  email: string;
  password: string;
}

export default function Home() {
  const { register, handleSubmit, reset } = useForm<Auth>();

  const [isDisplay, setIsDisplay] = useState(false);
  const [isError, setIsError] = useState(false);

  const router = useRouter();
  const submitAuth = async (event: Auth) => {
    const { email, password } = event;
    try {
      isDisplay
        ? await signUp(auth, email, password)
        : await signIn(auth, email, password);
      router.push("/about");
    } catch (error) {
      setIsError(!isError);
    }
  };

  useEffect(() => {
    reset();
  }, [isDisplay]);

  return (
    <div className="p-10 max-w-md mx-auto space-y-6">
      <h1 className="text-2xl font-bold text-center">
        {isDisplay ? "Sign up" : "Sign in"}
      </h1>
      <form
        onSubmit={handleSubmit((event) => submitAuth(event))}
        className="space-y-4"
      >
        <div>
          <label htmlFor="email" className="block mb-2 text-sm font-medium">
            Your email
          </label>
          <input
            {...register("email")}
            type="email"
            name="email"
            data-testid="email"
            className="bg-gray-50 border border-gray-300 sm:text-sm rounded-lg focus:ring-blue-600 focus:border-blue-600 focus:outline-none block w-full p-2.5"
            placeholder="name@company.com"
          />
          {isError && (
            <label className="block mt-1 text-xs text-red-600">
              入力値に誤りがあります
            </label>
          )}
        </div>
        <div>
          <label htmlFor="password" className="block mb-2 text-sm font-medium">
            Password
          </label>
          <input
            {...register("password")}
            type="password"
            name="password"
            data-testid="password"
            placeholder="••••••••"
            className="bg-gray-50 border border-gray-300 sm:text-sm rounded-lg focus:ring-blue-600 focus:border-blue-600 focus:outline-none block w-full p-2.5"
          />
          {isError && (
            <label className="block mt-1 text-xs text-red-600">
              入力値に誤りがあります
            </label>
          )}
        </div>

        <button
          type="submit"
          data-testid="authBtn"
          className="w-full text-white bg-blue-600 hover:bg-blue-700 focus:outline-none focus:ring-blue-300 focus:ring-4 font-medium rounded-lg text-sm px-5 py-2.5 text-center"
        >
          {isDisplay ? "SIGNUP" : "SIGNIN"}
        </button>
      </form>
      <p className="text-sm font-light text-gray-500">
        Don’t have an account yet?
        <a
          onClick={() => setIsDisplay(!isDisplay)}
          className="font-medium text-blue-600 hover:underline hover:cursor-pointer"
        >
          {isDisplay ? "Sign in" : "Sign up"}
        </a>
      </p>
    </div>
  );
}
テストコードを記載していくときにDOMの取得をして値を入れていくためにテストでのみ使用するdata-testidという属性を付与しています。data-testidでなくてもDOMの取得はできるのですが、テストで使用していることが明示的にわかるのでこちらを使用しています。
認証成功時のページ
appディレクトリの下にaboutディレクトリを作成します。
"use client"
import React from "react";
import { signOut } from "firebase/auth";
import { auth } from "@/lib/firebaseConfig";
import { useRouter } from "next/navigation";

function AboutPage() {
  const router = useRouter();
  const logOut = () => {
    signOut(auth).then(() => {
      router.push("/");
    });
  };
  return (
    <>
      <div>認証成功</div>
      <button
        onClick={logOut}
        data-testid="authBtn"
        className="text-white bg-blue-600 hover:bg-blue-700 focus:outline-none focus:ring-blue-300 focus:ring-4 font-medium rounded-lg text-sm px-5 py-2.5 text-center"
      >
        Sign out
      </button>
    </>
  );
}

export default AboutPage;
環境変数の設定
firebaseで作成したアプリの構成をここに記述して公開しないようにします。
NEXT_PUBLIC_API_KEY=<Your apiKey>
NEXT_PUBLIC_AUTH_DOMAIN=<Your authDomain>
NEXT_PUBLIC_PROJECT_ID=<Your projectId>
NEXT_PUBLIC_STORAGE_BUCKET=<Your storageBucket>
NEXT_PUBLIC_MESSAGING_SENDERID=<Your messagingSenderId>
NEXT_PUBLIC_APP_ID=<Your appId>
firebaseConfig.ts
import { initializeApp } from "firebase/app";
import { getAuth } from "firebase/auth";

const firebaseConfig = {
  apiKey: process.env.NEXT_PUBLIC_API_KEY!,
  authDomain: process.env.NEXT_PUBLIC_AUTH_DOMAIN!,
  projectId: process.env.NEXT_PUBLIC_PROJECT_ID!,
  storageBucket: process.env.NEXT_PUBLIC_STORAGE_BUCKET!,
  messagingSenderId: process.env.NEXT_PUBLIC_MESSAGING_SENDERID!,
  appId: process.env.NEXT_PUBLIC_APP_ID!,
};

const app = initializeApp(firebaseConfig);
export const auth = getAuth(app);
動作確認
npm run dev
ローカルサーバーを立ち上げると以下のようになります。
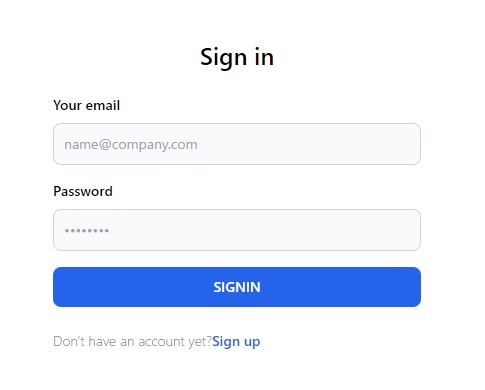
firebaseの設定がうまくできているかの確認も含めてサインアップやサインイン、ログインなど試してみてください。
テストコード実装の準備
npm install -D @playwright/test
rootフォルダ直下にテストファイルをまとめるフォルダ作成
testコードをまとめるためのフォルダ作成(命名はなんでもよい)
package.jsonにscriptの追加をする
  "scripts": {
    "dev": "next dev",
    "build": "next build",
    "start": "next start",
    "lint": "next lint",
+   "test": "playwright test"
  },
playwright.config.tsファイルの作成
import type { PlaywrightTestConfig } from "@playwright/test";
import { devices } from "@playwright/test";

const config: PlaywrightTestConfig = {
  testDir: "./tests",
  use: {
    baseURL: "http://localhost:3000",
  },
  projects: [
    {
      name: 'chromium',
      use: { ...devices['Desktop Chrome'] },
    },
  ],
};

export default config;
今回はChromeでのみテスト行います。ほかにもfirefoxや、safariでもテストを行うことができます。
ログインのテストコードを実装
testのファイル名は<ファイル名>.spec.tsと命名する必要があります。
import { test, expect } from "@playwright/test";

// describeはtestを一度に2つ以上実行するときに使用する
test.describe("beforeEachを使用", () => {
  // beforeEachを使用する理由としては、ページ遷移が正しくできているか確認するため
  // 今回はユーザーの新規作成のテストのため、値が入力されてサブミットされた後の状態がどのようになっているかのデータが欲しい。
  // beforeEachを使用することでpageが移ったことを再現できる

  test.beforeEach(async ({ page }) => {
    await page.goto("http://localhost:3000");
    // goto ページ移動
    await page.getByTestId("email").fill("test@test.com");
    // getByTestId() data-testid="email"
    // fill() 入力する値
    await page.getByTestId("password").fill("zenntest");

    await page.getByTestId("authBtn").click();
  // screenshot() 現在のページをスクリーンショット
    await page.screenshot({
      fullPage: true,
      path: "./tests/exsample_test/email_input.png",
      // フォルダがなければ作成される。任意の場所で問題ない
    });
  });

  // Sign inに成功していたらpageに入ってくるのはsign in後のページ
  test("login結果", async ({ page }) => {
    // sign inに成功したら、aboutページに遷移する。aboutページにはh1でsuccessと書かれたものが存在しているので、これが取得できていればSign inできたとして認識できる
    const result = page.getByTestId("success");
    await expect(result).toHaveText("認証成功");

    await page.screenshot({
        fullPage: true,
        path: "./tests/exsample_test/login_success.png",
      });
  });
});
テスト動作を確認しよう
npm run test

Running 1 test using 1 worker

  ✓  1 [chromium] › auth.spec.ts:27:7 › beforeEachを使用 › login結果 (3.3s)

  1 passed (4.9s)
上記結果となれば問題なくテストが終了したことを示します。
またtestsフォルダ内にexsample_testというフォルダが作成され、email_input.pngとlogin_success.pngが作成されていると思われます。
その2つを確認すると以下のようになっていると思います。
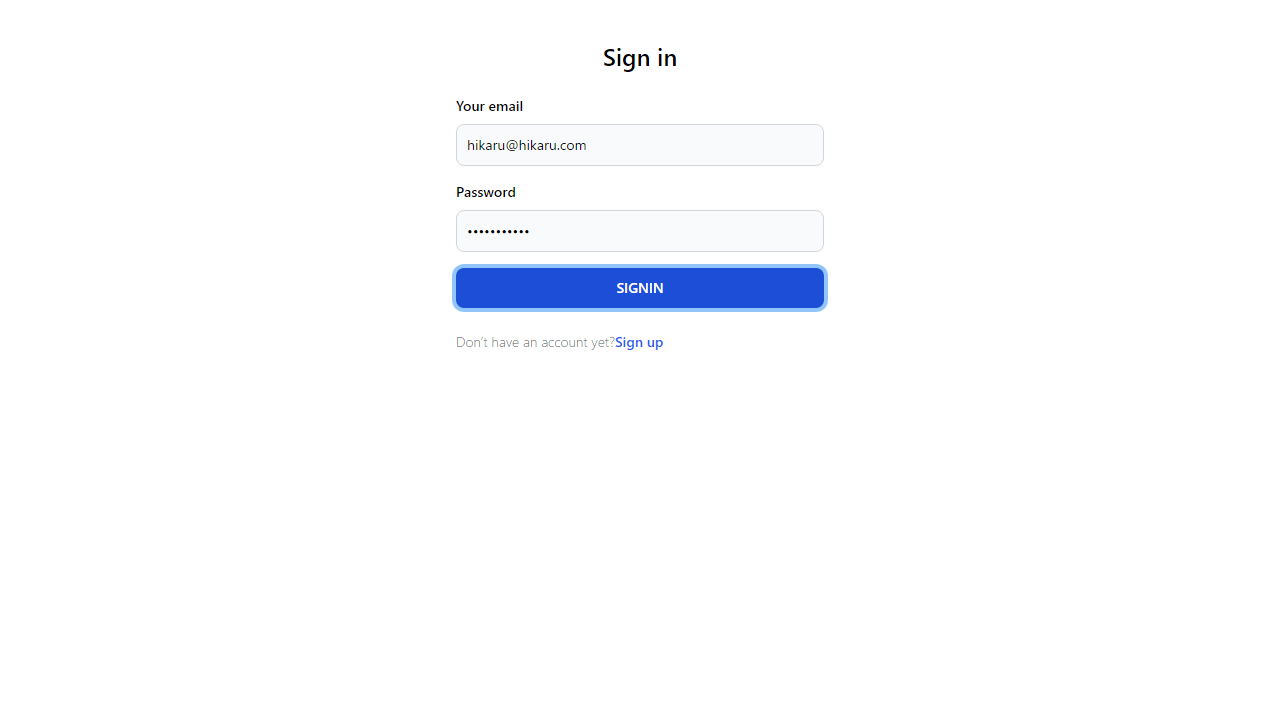

今回テストコードで試しているのは、サインインになるので、サインアップしたemailとpasswordに置き換えて実装してください。
これができたら、ぜひサインアップでは同じemailだとエラーが出るのかや、ページ遷移後にログアウトしたら認証ページに戻るかなども試してみると面白いと思います。
Discussion