【Flutter】Flutteristの為のMaestro入門
Maestroとは?
以下のような特徴を持つモバイル用のE2Eテストフレームワークです。
- 2022年9月にリリース
- yamlベースでテストケースを記述
- Flutterに対応
- CI/CDへの組み込みもローカルでの実行も可能
2022年9月にリリースされたばかりでまだ未成熟な部分も多いかもしれませんが、Flutterにも対応されており、非常に開発体験が良いので、今後に期待も込めて使い方を整理していきたいと思います。
以下にサンプルコードも用意したので参考になれば幸いです
💫 始め方
1. Maestroをcurlでダウンロード&インストール
curl -Ls "https://get.maestro.mobile.dev" | bash
※ 以前はbrew経由でインストール出来たが、現在(2023.10時点)は非推奨。
2. パスを通す
インストール出来たら以下コマンドでパスを通します
export PATH="$PATH":"$HOME/.maestro/bin"
3. Facebook IDBツールをインストール(iOS用)
iOS simulatorで動作させるには Facebook IDB ツールが必要になるのでそちらをインストールします
brew tap facebook/fb
brew install facebook/fb/idb-companion
4. XcodeとCommand Line Toolsをインストール
インストールしていない方はXcodeとCommand Line Toolsをインストールしましょう。Xcodeは14以上が推奨です。
5. iOS simulator, Android emulatorでデバッグビルドしておく
テストを実行するバイナリを作成しておく必要があります。シミュレーター/エミュレーターを起動し、flutter runしておくか、以下のコマンドでデバッグビルドしておきましょう。
# iOS
flutter build ios --debug --simulator
# Android
flutter build apk --debug
6. Javaをインストール
Javaがインストールされていない方はインストールしましょう。 Maestroのドキュメントに特に記載はありませんでしたが、自分はJavaがないと実行が出来なかったので、入れておく必要があるようです。
📝 テストフローの作成
テストフローを記述するyamlファイルは設定(flow configuration)とテストフローの2パートに分かれ、---の区切り線で分けて記述 します。
# 設定
appId: my.app # 必須
name: Custom Flow name
tags:
  - tag-build
  - pull-request
env:
    USERNAME: user@example.com
    PASSWORD: 123
onFlowStart:
  - runFlow: setup.yaml
  - runScript: setup.js
  - <any other command>
onFlowComplete:
  - runFlow: teardown.yaml
  - runScript: teardown.js
  - <any other command>
--- # 区切り線
# テストフロー
- launchApp
appIdのみ必須項目 となり、それ以外は全て任意項目です。任意項目について知りたい方は以下ご参照ください。
🧑💻 コマンドの紹介
テストフローでは数多くのコマンドが用意されています。ここでは代表的なコマンドだけピックアップしてご紹介します。
launchApp
アプリの起動を行うコマンド。appIdを指定することでシミュレーター内のどんなアプリも起動可能です。
- launchApp: appId
またいくつかのオプションパラメータが存在し、特にclearState, clearKeychain, permissionsは使う事が多いかと思います。
- launchApp:
    appId: "com.example.app"
    clearState: true
    clearKeychain: true   # optional: clear *entire* iOS keychain
    stopApp: false # optional (true by default): stop the app before launching it
    permissions:
        notifications: unset # notification permission is unset
        android.permission.ACCESS_FINE_LOCATION: deny # Android fine location permission is denied
tapOn
特定の位置もしくはエレメントをタップするコマンドです。最もよく使うコマンドでオプションも豊富です。
- tapOn: "My text" # 簡易的な記述

- tapOn:
    text: "Text"     # (optional) Finds text or accessibility text that matches regexp.
    id: "id"         # (optional) Finds id that matches regexp
    index: 0         # (optional) 0-based index of the view to select among those that match all other criteria
    point: 50%,50%.  # (optional) Relative position on screen. 50%,50%: Middle of screen
    point: 50, 50    # (optional) Exact coordinates on screen, x:50 y:50, in pixels.
    width: 100       # (optional) Finds element of a given width
    height: 100      # (optional) Finds element of a given height
    tolerance: 10    # (optional) Tolerance to apply when comparing width and height
    enabled: true    # (optional) Searches for view with a given "enabled" state
    checked: true    # (optional) Searches for view with a given "checked" state
    focused: true    # (optional) Searches for view with a given "focused" state
    selected: true   # (optional) Searches for view with a given "selected" state
    optional: false  # (default: false) If set to true, test won't fail if view can't be found
タップ対象の特定について詳しくは後述しますが、文字列、セマンティクスラベル、位置のいずれかで特定する事ができます。
また対象が複数ある場合は画面上部から何個目かを指定することで対象を特定する事が可能です。
scrollUntilVisible
特定のエレメントが表示されるまで特定方向にスクロールするコマンドです
- scrollUntilVisible:
    element:
      text: "Number 6" # or any other selector
    direction: DOWN # DOWN|UP|LEFT|RIGHT (optional, default: DOWN)
    timeout: 50000 # (optional, default: 20000) ms
    speed: 40 # 0-100 (optional, default: 40) Scroll speed. Higher values scroll faster.
    visibilityPercentage: 100 # 0-100 (optional, default: 100) Percentage of element visible in viewport
    centerElement: false # true|false (optional, default: false)
使う可能性が高いのはdirection, visibilityPercentage, centerElementの3つくらいでしょうか。
swipe
特定の位置から特定の位置までのスワイプ操作を行うコマンドです
- swipe:
   from:
     id: "feeditem_identifier" # From (x, y) center of element
   direction: UP # To (50% of width, 10% of height)

- swipe:
    start: 90%, 50% # From (90% of width, 50% of height)
    end: 10%, 50% # To (10% of width, 50% of height)
inputText
選択されたテキストフィールドに対し、テキスト入力を行うコマンドです。実行する際にはテキストフィールドをtapOnコマンドで選択してから実行することになります。
- inputText: "Hello World"
任意のテキスト以外にもテスト用のコマンドとしてプリセットメソッドが用意されています
- inputRandomEmail       # Enters a random Email address
- inputRandomPersonName  # Enters a random person name
- inputRandomNumber      # Enters a random integer number
- inputRandomText        # Enters random unstructured text
assertVisible,assertNotVisible
特定の要素が表示もしくは非表示かを判定するコマンド。表示非表示の判定だけでなく、活性非活性などいくつかの状態を指定することも可能です。
- assertVisible:
    text: "My Button"
    enabled: true

- assertNotVisible:
    text: "My Button"
    enabled: true
extendedWaitUntil
特定の要素が表示もしくは非表示されるまで待機するコマンド
- extendedWaitUntil:
    visible: "My text that should be visible" # or any other selector
    timeout: 10000      # Timeout in milliseconds

- extendedWaitUntil:
    notVisible:
        id: "elementId" # or any other selector
    timeout: 10000
waitForAnimationToEnd
アニメーションや動画が終了するのを待つコマンド
- waitForAnimationToEnd

- waitForAnimationToEnd:
    timeout: 5000
ここまでに紹介したコマンド以外にもスクリーンショットや撮影を行うコマンドもあります。興味のある方は公式ドキュメントを覗いてみてください。
⭐️ 対象の特定
対象の特定は基本的に「文字列」「Semantics」のどちらかで行われる。
文字列で特定
例えば下記のようなボタンがあったとして
InkWell(
    child: const Text('Open Browser'),
    onTap: () => launch('')
)
ボタンタップしたい場合は以下のような記述となる
- tapOn: "Open Browser"
Semanticsで特定
本来はアクセシビリティ対応の為のWidgetであるSemanticswidgetで操作対象のWidgetをラップしておくとSemanticswidgetに設定したラベルを指定することで特定し、操作することが可能。
例えば下記のような特定のwidgetをタップしたい場合、以下のようにSemanticsでラップ
Semantics(
    label: "My Label",
    child: SomeView()
)
すると下記のようにアクセスすることができる
- tapOn: ".*My Label.*"
同じ文字列が複数存在する場合
文字列で特定する場合、複数存在していると操作対象を正しく選択できない。その場合はtapOnの index プロパティを指定することで複数ある文字列から対象を正しく指定することができる。
- tapOn:
    text: Hello
    index: 2
🕹️ テストフローの実例
サンプルとして以下のような架空のECアプリのテストフローを作成してみました。

テストケースはログイン、お気に入り追加、カート追加、支払いの4つです。それぞれのテストフローをサブフローとして定義し、それらをiOS、Android向けにまとめて実行するメインフローを定義しています。
├── .maestro
│   ├── config.yaml
│   ├── ios
│   │   ├── add_cart.yaml # カート追加
│   │   ├── add_favorite.yaml # お気に入り追加
│   │   ├── login_flow.yaml # ログイン
│   │   └── make_payment.yaml # 支払い
│   ├── android
│   │   ├── add_cart.yaml # カート追加
│   │   ├── add_favorite.yaml # お気に入り追加
│   │   ├── login_flow.yaml # ログイン
│   │   └── make_payment.yaml # 支払い
│   ├── test_android.yaml # Android向けメインフロー
│   └── test_ios.yaml # iOS向けメインフロー
プロジェクトのルートに.maestroディレクトリを作成し、その中に作成していきます。サブフロー用にディレクトリを作成し、サブフローをまとめて入れておきます。
メインフロー
appId: com.example.flutterMaestroSample
---
- launchApp:
    clearState: true
- runFlow: "ios/login_flow.yaml"
- runFlow: "ios/add_favorite.yaml"
- runFlow: "ios/add_cart.yaml"
- runFlow: "ios/make_payment.yaml"
appId: com.example.flutter_maestro_sample
---
- launchApp:
    clearState: true
- runFlow: "android/login_flow.yaml"
- runFlow: "android/add_favorite.yaml"
- runFlow: "android/add_cart.yaml"
- runFlow: "android/make_payment.yaml"
サブフロー
ログイン:
サインインボタンを押下→バリデーションエラーを確認→ランダムなメールアドレスを記入→ランダムなパスワードを記入→ログインを実行→ホーム画面が表示されることを確認
appId: com.example.flutterMaestroSample
---
- tapOn:
    text: "Sign in"
- tapOn:
    text: "Continue"
- assertVisible:
    text: "Email address is required"
- assertVisible:
    text: "Password is required"
- tapOn:
    text: "Email address"
- inputRandomEmail
- tapOn:
    text: "Password"
- inputRandomText
- tapOn:
    text: "Continue"
- extendedWaitUntil:
    visible: ".*navigation root.*"
お気に入り追加:
id012の商品までスクロール→商品012をお気に入り→別カテゴリーへ移動→商品をお気に入り→お気に入り画面に遷移→お気に入り登録されていることを確認
appId: com.example.flutterMaestroSample
---
- scrollUntilVisible:
    element:
      text: ".*fav_012.*"
    direction: DOWN
    visibilityPercentage: 100
- tapOn: ".*fav_012.*"
- tapOn: "sticker\nTab 2 of 4"
- tapOn: ".*fav_014.*"
- tapOn: "tshirt\nTab 3 of 4"
- tapOn: ".*fav_025.*"
- tapOn: "like\nTab 2 of 4"
- assertVisible:
    text: ".*card012.*"
- assertVisible:
    text: ".*card014.*"
- assertVisible:
    text: ".*card025.*"
カート追加:
お気に入り追加した商品をカートに追加→カート画面に遷移→カート追加されていることを確認
appId: com.example.flutterMaestroSample
---
- tapOn: ".*add012.*"
- tapOn: ".*add014.*"
- tapOn: ".*add025.*"
- tapOn: "cart\nTab 3 of 4"
- assertVisible:
    text: ".*cart012.*"
- assertVisible:
    text: ".*cart014.*"
- assertVisible:
    text: ".*cart025.*"
支払い:
支払い画面へ遷移→想定された金額が表示されていることを確認→購入ボタンをスワイプ→アニメーション終了を待機→ホーム画面へ遷移していることを確認
appId: com.example.flutterMaestroSample
---
- tapOn: "BUY"
- assertVisible:
    text: "300000"
- swipe:
    start: 15%,82%
    end: 91%,83%
- waitForAnimationToEnd
- assertVisible:
    text: ".*home page.*"
テストフローのローカル実行
以下ステップでテストフローをローカル実行する事ができます
- iOS simulatorもしくはAndroid emulatorを起動しておく
-
maestro test [Flowのパスを指定]をコマンドラインから実行
今回の場合は以下コマンドでiosのテストを走らせてみます
maestro test .maestro/test_ios.yaml
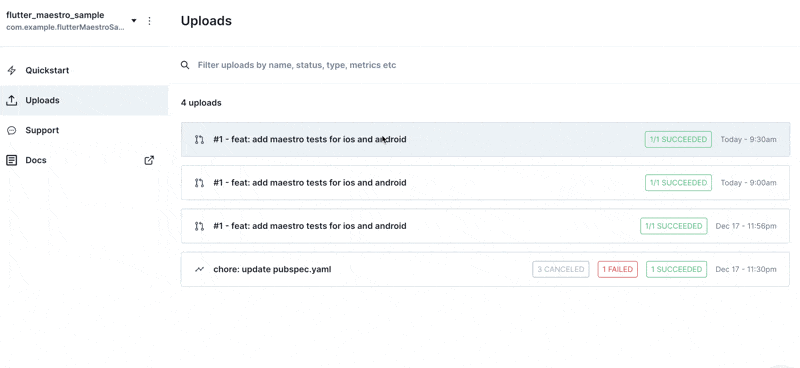
すると以下のように自動テストが走りました。やったね🥳
🛠️ CI/CDに組み込む
Maestroはローカルの実行だけでなく、CI/CDに組み込むことも可能です。その場合はMaestro Cloudというサービスと連携し、仮想マシン上で定義したテストフローを実行し、レポートまで作成してくれます。導入も非常にシンプルです。
本書ではgithub actionsを使った導入手順を紹介します。
-
.maestroディレクトリを作成し、テストフローを定義 - Maestro Cloudにアカウントを作成
- Maestro CloudのAPIキーをgithubシークレットに登録
- レポジトリにMaestro Cloudアプリをインストール
- Maestro用のワークフローを追加
1. .maestroディレクトリを作成し、テストフローを定義
前述の通り、プロジェクトのルートに.maestroの名前でディレクトリを作成し、テストフローを定義します。
├── .maestro
│   ├── config.yaml
│   ├── sub_flow
│   │   └── sub_flow_a.yaml
│   └── main_flow.yaml # 最上位そうのテストフローのみ実行される
この際に最上位階層にあるテストフローが自動的に実行される為、サブフローはディレクトリを作成して、その中に保存しておきましょう。
テスト実行時の設定を定義する config.yaml を使って、実行するテストの順番などを指定することも可能です。
2. Maestro Cloudにアカウントを作成
次にこちらのサイトの「Get Started」からアカウント作成します
3. Maestro CloudのAPIキーをActionsのsecretに登録
ログイン後、画面下部の設定からAPIキーを取得し、Actionsのsecretとして登録
Maestro Cloud

Github Actions secret

4. レポジトリにMaestro Cloudアプリをインストール
次にワークフロー上で使うMaestro Cloudアプリをインストールします。レポジトリを指定してインストールしましょう。
5. Maestro用のワークフローを追加
プロジェクトのルートに.github/workflowsディレクトリを追加し、以下のワークフローを定義しましょう。サンプルとしてPR更新の度に発火していますが、タイミングはお好みで。
# iOS用のワークフロー
name: Build and upload to Maestro Cloud (Flutter iOS)

on:
  workflow_dispatch:
  push:
    branches: [main]
  pull_request:
    branches: [main]

jobs:
  ios:
    runs-on: macos-13
    steps:
      - uses: actions/checkout@v3
      - uses: subosito/flutter-action@v2
        with:
          channel: "stable"
      - run: flutter build ios --debug --simulator
      - uses: mobile-dev-inc/action-maestro-cloud@v1
        with:
          api-key: ${{ secrets.MAESTRO_CLOUD_API_KEY }}
          app-file: build/ios/iphonesimulator/Runner.app
# Androidy用のワークフロー
name: Build and upload to Maestro Cloud (Flutter Android)

on:
  workflow_dispatch:
  push:
    branches: [main]
  pull_request:
    branches: [main]

jobs:
  upload:
    runs-on: ubuntu-latest
    steps:
      - uses: actions/checkout@v3
      - uses: subosito/flutter-action@v2
        with:
          channel: "stable"
      - run: flutter build apk --debug
      - uses: mobile-dev-inc/action-maestro-cloud@v1
        with:
          api-key: ${{ secrets.MAESTRO_CLOUD_API_KEY }}
          app-file: build/app/outputs/flutter-apk/app-debug.apk
完了!
以上で連携完了です🙌 非常に簡単ですね。テストが実行されるとMaestro Cloud側で動画付きでレポートが作成されるので、失敗理由も分かりやすくなっています。
🚨 注意点
価格が高い
CI/CDに組み込む場合、1つのテストフローの実行毎に10円かかり結構高価です。またテスト結果が出るまでActionsも走り続けるので、その分の金額も掛かってきます。テストを行うタイミングやテストするべきケースを絞って運用するのが良さそうです。またローカルで実行する分には無料なので、開発の補助に活躍しそうです。
iOSとAndroidで若干異なる動作をする
一部タップの挙動などでiOSとAndroidで挙動が異なる事象が存在しました。全ては確認出来ていませんが、タップ以外でも発生している可能性はあるので、iOSとAndroidで分けてテストフローを作成しておくことをお勧めします。
うまく検知できない時はMaestro Studioを活用しよう
タップ対象や表示判定を文字列で指定している場合やボトムナビゲーションタブの指定が思っていた文字列とは違うことが度々ありました。そんな時はテストフロー開発用のGUI「Maestro Studio」を活用することをお勧めします。本記事では紹介しませんでしたが、maestro cliを使って起動する事ができ、実際の画面を触りながらテストフローを作成していく事ができる為、効率的に開発する事が可能です。
以上
以上Maestroの紹介でした。まだリリースされてから日が浅く、未成熟な部分もありますが、記述の簡単さと導入のしやすさに感動し、今回取り上げてみました。価格面など考慮する部分はありますが、ローカルで実行することが可能な為、活躍の場は多いと感じているので、ローカル実行から少しずつ範囲を広げて導入してみようと思います。
参考記事
Discussion
E2EといえばGherkinですがたいおうしてるのでしょうか?