Nuxt.js のアプリケーションを Firebase Hosting でホスティングする
環境
- node v18.15.0
- npm 9.5.0
- Nuxt.js v2 / static spa
- MicroCMS
- Firebase Hosting
- Github Actions
事前準備
- Google アカウントと Firebase の準備
- デプロイ先の準備
- デプロイしたい静的サイトを用意し、ディレクトリを準備しておきます。
- 今回は Nuxt.js 環境を用意しました。
https://zenn.dev/helmikuusininen/articles/200a50ac0a4694
- Firebase Hosting プロジェクトの作成
https://firebase.google.com/- プロジェクトの作成には、以下2つの方法があります。
- Firebase Hosting 管理画面からプロジェクトを作成する
- 次の
npm firebase initで初期設定をする時に一緒に作成する
- プロジェクトの作成には、以下2つの方法があります。
以上を終えたら、作成したFirebase Hosting プロジェクトの管理画面から以下の順番で設定を進めていきます。
アプリケーションへ Firebase を追加する
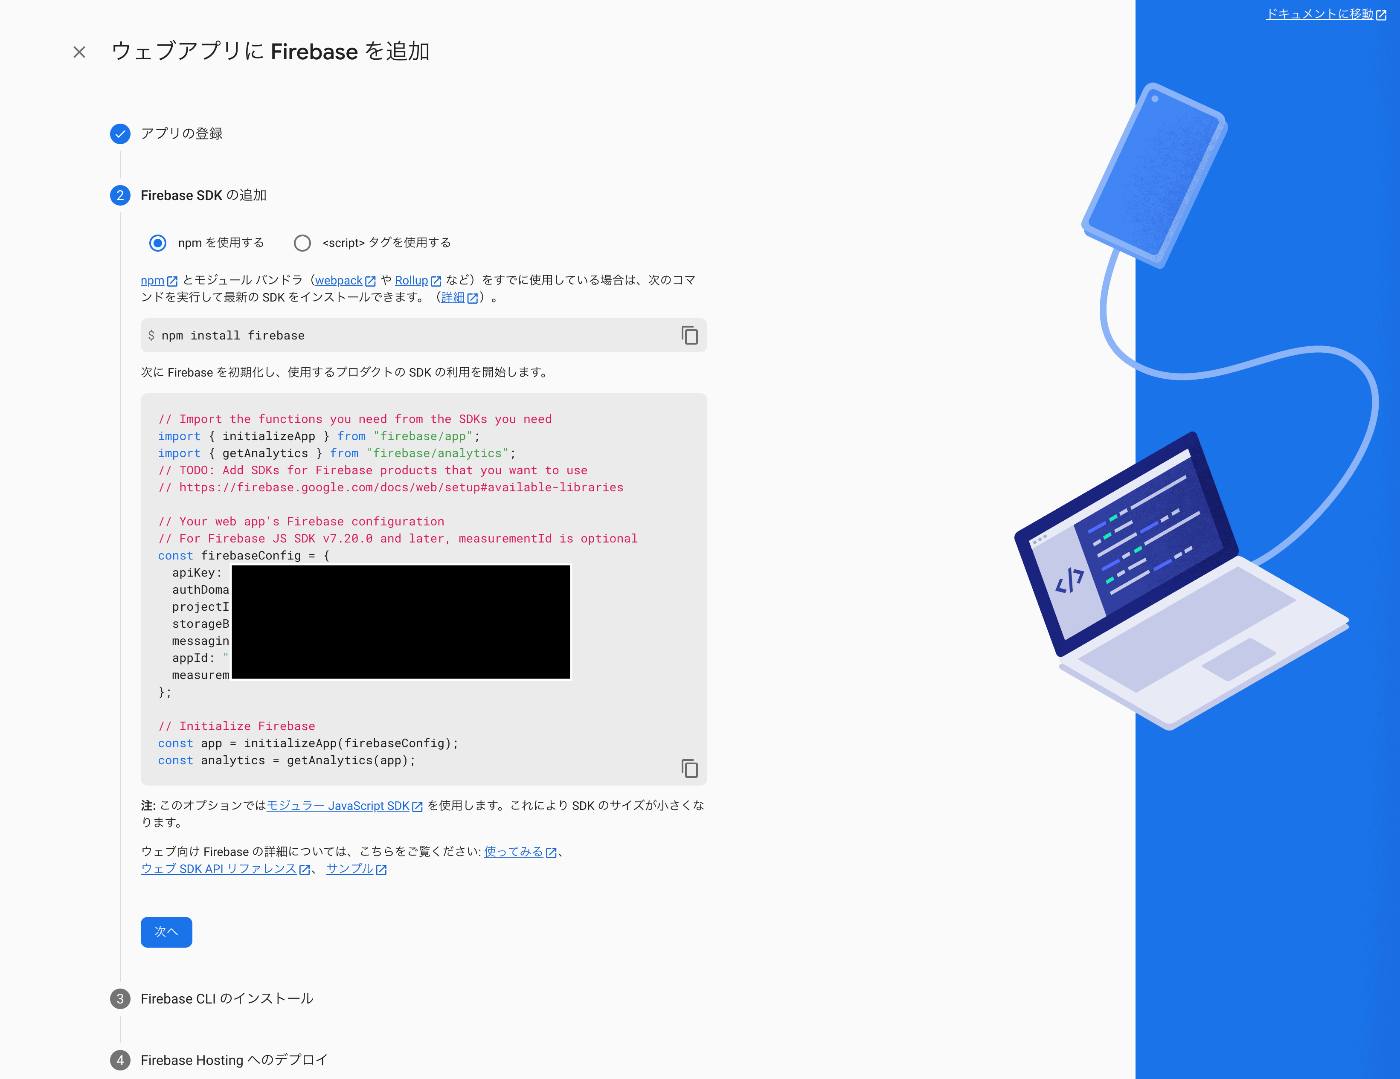
Firebase管理画面から「ウェブアプリに Firebase を追加」をし、
プロジェクトに登録するアプリの追加設定をしていきます。
以下のコマンドで、プロジェクトでFirebaseを扱うためのパッケージをインストールします。
$ npm install firebase
Firebase SDKの追加
次にFirebase SDK を追加します。
今回は、プラグインとして実装していくので、plugins/firebase.js を準備し、
画面に表示されるスクリプトをそのままペーストします。
// Import the functions you need from the SDKs you need
import { initializeApp } from "firebase/app";
import { getAnalytics } from "firebase/analytics";
// TODO: Add SDKs for Firebase products that you want to use
// https://firebase.google.com/docs/web/setup#available-libraries

// Your web app's Firebase configuration
// For Firebase JS SDK v7.20.0 and later, measurementId is optional
const firebaseConfig = {
  apiKey: "<replace this>",
  authDomain: "<replace this>",
  projectId: "<replace this>",
  storageBucket: "<replace this>",
  messagingSenderId: "<replace this>",
  appId: "<replace this>",
  measurementId: "<replace this>"
};

// Initialize Firebase
const app = initializeApp(firebaseConfig);
const analytics = getAnalytics(app);
プラグインを利用するために、
nuxt.config.js の plugins セクションに以下のようにファイルを追加しておきます。
  plugins: [
    { src: "~/plugins/firebase.js", ssr: false }
  ],
Firebase CLI のインストール
以下のコマンドで、Firebase CLI をインストールします。
$ npm install -g firebase-tools
firebase-tools とは?
- Firebaseをコマンドラインから操作するためのコマンド
- Web画面での操作が不要になる
- セキュリティルール等をテキストファイルとしてバージョン管理できるようになる
Firebase Hosting へのデプロイ
以下のコマンドを叩くと、ブラウザが立ち上がり、
Googleアカウントへのアクセスの要求され、Firebaseへログインすることができます。
$ firebase login
$ firebase logout
以下のコマンドを叩いて、対話式でプロジェクトの設定をしていきます。
$ firebase init
今回は ? に対して、 => に続く内容を選択しました。
同時に、firebase.json等のファイルが生成されます。
$ firebase init

     ######## #### ########  ######## ########     ###     ######  ########
     ##        ##  ##     ## ##       ##     ##  ##   ##  ##       ##
     ######    ##  ########  ######   ########  #########  ######  ######
     ##        ##  ##    ##  ##       ##     ## ##     ##       ## ##
     ##       #### ##     ## ######## ########  ##     ##  ######  ########

You're about to initialize a Firebase project in this directory:

  XXX

? Which Firebase features do you want to set up for this directory?
Press Space to select features, then Enter to confirm your choices.
=> Hosting:
Configure files for Firebase Hosting and (optionally) set up GitHub Action deploys

=== Project Setup

First, let's associate this project directory with a Firebase project.
You can create multiple project aliases by running firebase use --add,
but for now we'll just set up a default project.

? Please select an option:
=> Use an existing project
? Select a default Firebase project for this directory:
=> XXX

=== Hosting Setup

Your public directory is the folder (relative to your project directory) that
will contain Hosting assets to be uploaded with firebase deploy. If you
have a build process for your assets, use your build's output directory.

? What do you want to use as your public directory?
=> public
? Configure as a single-page app (rewrite all urls to /index.html)?
=> Yes
? Set up automatic builds and deploys with GitHub?
=> No
✔  Wrote public/index.html

i  Writing configuration info to firebase.json...
i  Writing project information to .firebaserc...

✔  Firebase initialization complete!
するとルートに firebase.jsonが作成されます。
{
  "hosting": {
    "public": "public",
    "ignore": [
      "firebase.json",
      "**/.*",
      "**/node_modules/**"
    ],
    // 以下、spa用
    "rewrites": [
      {
        "source": "**",
        "destination": "/index.html"
      }
    ]
  }
}
以下のコマンドでビルドし、Firebase にデプロイします。
静的ファイル(HTML、CSS、JS など)をアプリのデプロイディレクトリ(デフォルトは「public」)に配置します。
続いて、アプリのルート ディレクトリから次のコマンドを実行します。
$ npm run generate
$ firebase deploy
サンプルURLにアクセスすると表示される!やったー!

デプロイのキャンセル
以下のコマンドで、ホスティングのキャンセルをすることもできます。
$ firebase hosting:disable
参考
おまけ
今回は Nuxt のプラグイン機能を使って実装しましたが、nuxtjs/firebaseを使った実装方法もあるみたいでした。
Discussion