Flutterでネイティブコード(Swift)を実行する方法
やりたいこと
Swiftじゃないと実行できないSDKがあったので、Flutterで開発しているアプリ上からSwiftのメソッドを実行させたいです。
Flutter側の実装
1. UIを作成
Swiftから返ってくる文字列を格納する変数と関数を実行するボタンを配置します。
String result = 'Swiftにデータを送ってみよう';
Widget build(BuildContext context) {
return Scaffold(
appBar: AppBar(
title: Text("Swiftのコードを呼び出し"),
),
body: Center(
child: Column(
mainAxisAlignment: MainAxisAlignment.center,
children: <Widget>[
Container(
padding: EdgeInsets.only(top: 20),
child: Text(result),
)
],
),
),
floatingActionButton: FloatingActionButton(
onPressed: () {
sendMessageBySwift();
},
backgroundColor: Colors.green,
child: const Icon(Icons.navigation),
),
);
}
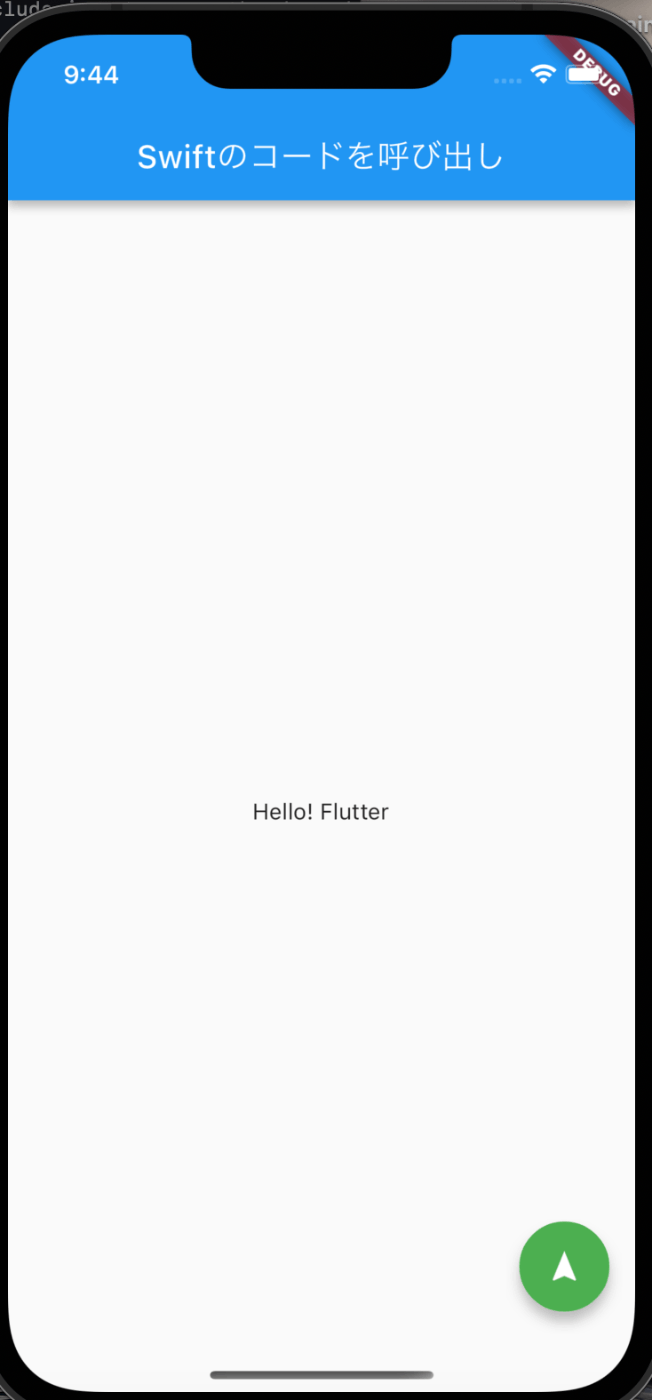
UIはこんな感じ

2. Swift側の処理を呼び出させるための関数を用意
FlutterとSwiftを紐づけるメソッドチャネルの定義とSwift側のコードを実行させるための呼び出し関数を作成します。
 // Swift側のメソッドチャンネルと紐付ける
 MethodChannel _methodChannel = MethodChannel('com.example.show');

 Future sendMessageBySwift() async {
    try {
      print('Swiftを呼び出す');
      var response = await _methodChannel.invokeMethod('helloSwift');
      setState(() {
        result = response;
      });
    } on PlatformException catch (e) {
      print(e);
    }
  }
Swift側の実装
1. Flutterからの呼び出しを受け取れるようにする
Swift側でもFlutterから呼び出しされた時に受け取れるように処理を設定する必要があります。
/ios/Runner/AppDelegate.swiftに記述していきます。
setMethodCallHandlerでFlutterからの実行を検知することができます。
import UIKit
import Flutter

@UIApplicationMain
@objc class AppDelegate: FlutterAppDelegate {

  var eventSink: FlutterEventSink?
  // メソッドチャネルの定義
  private let methodChannelName = "com.example.show"
  public var result: FlutterResult?

  override func application(_ application: UIApplication, didFinishLaunchingWithOptions launchOptions: [UIApplication.LaunchOptionsKey: Any]?
  ) -> Bool {

    let methodChannel = FlutterMethodChannel(name: methodChannelName, binaryMessenger: flutterViewController.binaryMessenger)
    methodChannel.setMethodCallHandler { [weak self] methodCall, result  in
        //Flutterで実行したinvokedMethodを受け取る処理
        if methodCall.method == "helloSwift" {
            result("Hello! Flutter")
        } else {
            result(FlutterError(code: "ErrorCode", message: "ErrorMessage",details: nil))
        }
    }

    GeneratedPluginRegistrant.register(with: self)
    return super.application(application, didFinishLaunchingWithOptions: launchOptions)
  }

}
検証
うまくいきました。
Swift側でhelloSwift関数を受け取って「Hello! Flutter」を返して、Flutter側でUIに反映ができています。

応用:Swiftからのレスポンスを任意のタイミングで受け取れるようにする
先ほどのは実行したらすぐレスポンスが返ってきましたが、ケースによっては任意のタイミング(閉じるボタンを押した時や一つの処理が非同期で長く続く時など)にレスポンスが欲しい時もあります。
今回はSwift側で作成したページ(UI)を立ち上げて、送信ボタンを送ることでFlutter側のUIに戻れるようにしてみます。
Flutter側ではいつでも受け取れる状態にしておく
initState内で、Swiftからレスポンスが来た時に受け取る用の関数を実行しておきます。
関数も新しく作成して、ボタンを押した時の実行する関数も変更します。
// 新しい関数を用意
Future startSwiftLogic() async {
try {
await _methodChannel.invokeMethod('launchSwiftLogic');
} on PlatformException catch (e) {
print(e);
}
}
void responseDataFromSwift() {
//Swiftからデータが送られてきたときはここで処理をする
_methodChannel.setMethodCallHandler((MethodCall call) async {
switch (call.method) {
case "closeSwiftLogic":
setState(() {
response = call.arguments;
});
break;
default:
print('何も起きてない');
}
});
}
void initState() {
super.initState();
responseDataFromSwift();
}
...
// ボタンをクリックした時の関数をstartSwiftLogiに変更
floatingActionButton: FloatingActionButton(
onPressed: () {
startSwiftLogic();
},
backgroundColor: Colors.green,
child: const Icon(Icons.navigation),
),
...
Swift側のAppDelegateを更新
画面遷移をするのでViewControllerの定義をします。
setMethodCallHandler内にはFlutter側で新しく定義したlaunchSwiftLogicを条件に追加します。
  // 追加
   var flutterViewController: FlutterViewController {
      return self.window.rootViewController as! FlutterViewController
  }

  override func application(_ application: UIApplication, didFinishLaunchingWithOptions launchOptions: [UIApplication.LaunchOptionsKey: Any]?
  ) -> Bool {

    // 追加
    let controller:FlutterViewController = window?.rootViewController as! FlutterViewController
    let methodChannel = FlutterMethodChannel(name: methodChannelName, binaryMessenger: flutterViewController.binaryMessenger)
    methodChannel.setMethodCallHandler { [weak self] methodCall, result  in
        if methodCall.method == "launchSwiftLogic" {
            ///もし引数がlaunchSwiftLogicだったらCaptureViewControllerに遷移する
            let captureController = controller.storyboard?.instantiateViewController(withIdentifier: "CaptureViewController")
            controller.present(captureController!, animated: true, completion: nil)
        } else if methodCall.method == "helloSwift" {
            result("Hello! Flutter")
        }
        else {
            result(FlutterError(code: "ErrorCode", message: "ErrorMessage",details: nil))
        }
    }

    GeneratedPluginRegistrant.register(with: self)
    return super.application(application, didFinishLaunchingWithOptions: launchOptions)
  }
画面遷移先のViewControllerを作成
画面遷移先のCaptureViewController.swiftを作成します。
検証なのでUIはシンプルなものにします。
※ SwiftはVScodeではなくてXCodeで実装することをお勧めします。
import UIKit
import AVFoundation
import Flutter

class CaptureViewController: UIViewController {
    @IBOutlet weak var imageView: UIImageView!
    @IBOutlet weak var fpsDate: UILabel!
    @IBOutlet weak var count: UILabel!

    override func viewDidLoad() {
        super.viewDidLoad()
    }

    //戻るボタンの処理
    @IBAction func backButton(_ sender: Any) {
        self.dismiss(animated: true, completion: nil)
    }

    @IBAction func stopButton(_ sender: Any) {
        // capture.stop()
    }

    @IBAction func startButton(_ sender: Any) {
        // capture.start()
    }

    //データをFlutter側に送信
    @IBAction func sendButton(_ sender: Any) {
        //AppDelegateから引っ張ってmethodChannelを使えるようにする
        let appDelegate = UIApplication.shared.delegate as! AppDelegate
        let methodChannel = FlutterMethodChannel(name: "com.example.show", binaryMessenger: appDelegate.flutterViewController.binaryMessenger)


        //Flutterにデータを送る処理
        methodChannel.invokeMethod("closeSwiftLogic", arguments: "Return From Swift")
        // Flutterの画面に戻る処理
        self.dismiss(animated: true, completion: nil)
    }

}
応用:検証
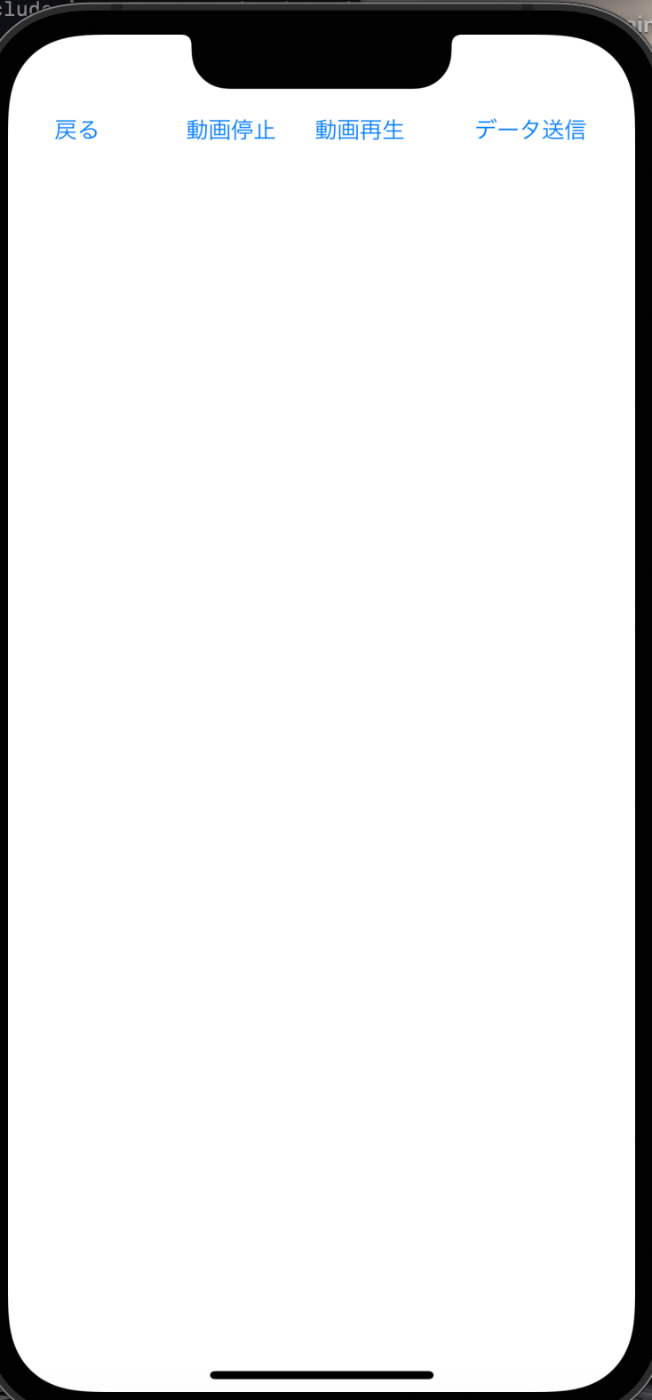
関数を実行するとSwiftで作成したページが表示されました。

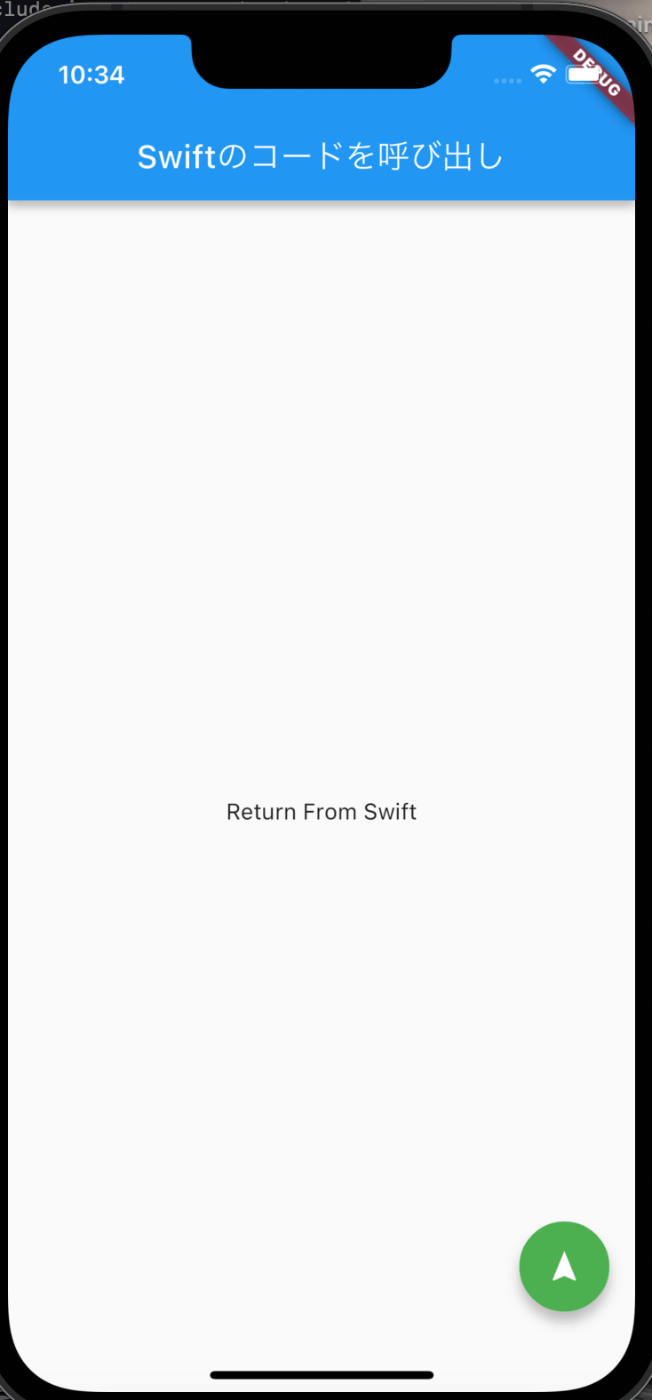
データ送信ボタンを押すとFlutterのもともとのUIに戻ってメッセージも受け取れて画面に反映できてます!

Discussion