執筆日
2025/6/25
ざっくり手順
- Azure AI Speechをデプロイ
- モデルを学習
- モデルのデプロイ
1. Azure AI Speechをデプロイ
- Azure Portalを開く
-
AI Foundry>音声サービスをクリックする

-
+作成をクリックする

- 価格レベル:S0でデプロイする
2. Azure Speech Studioから学習をする
- 以下のURLを開く
-
Custom Voiceをクリックする

-
+プロジェクト作成をクリックする

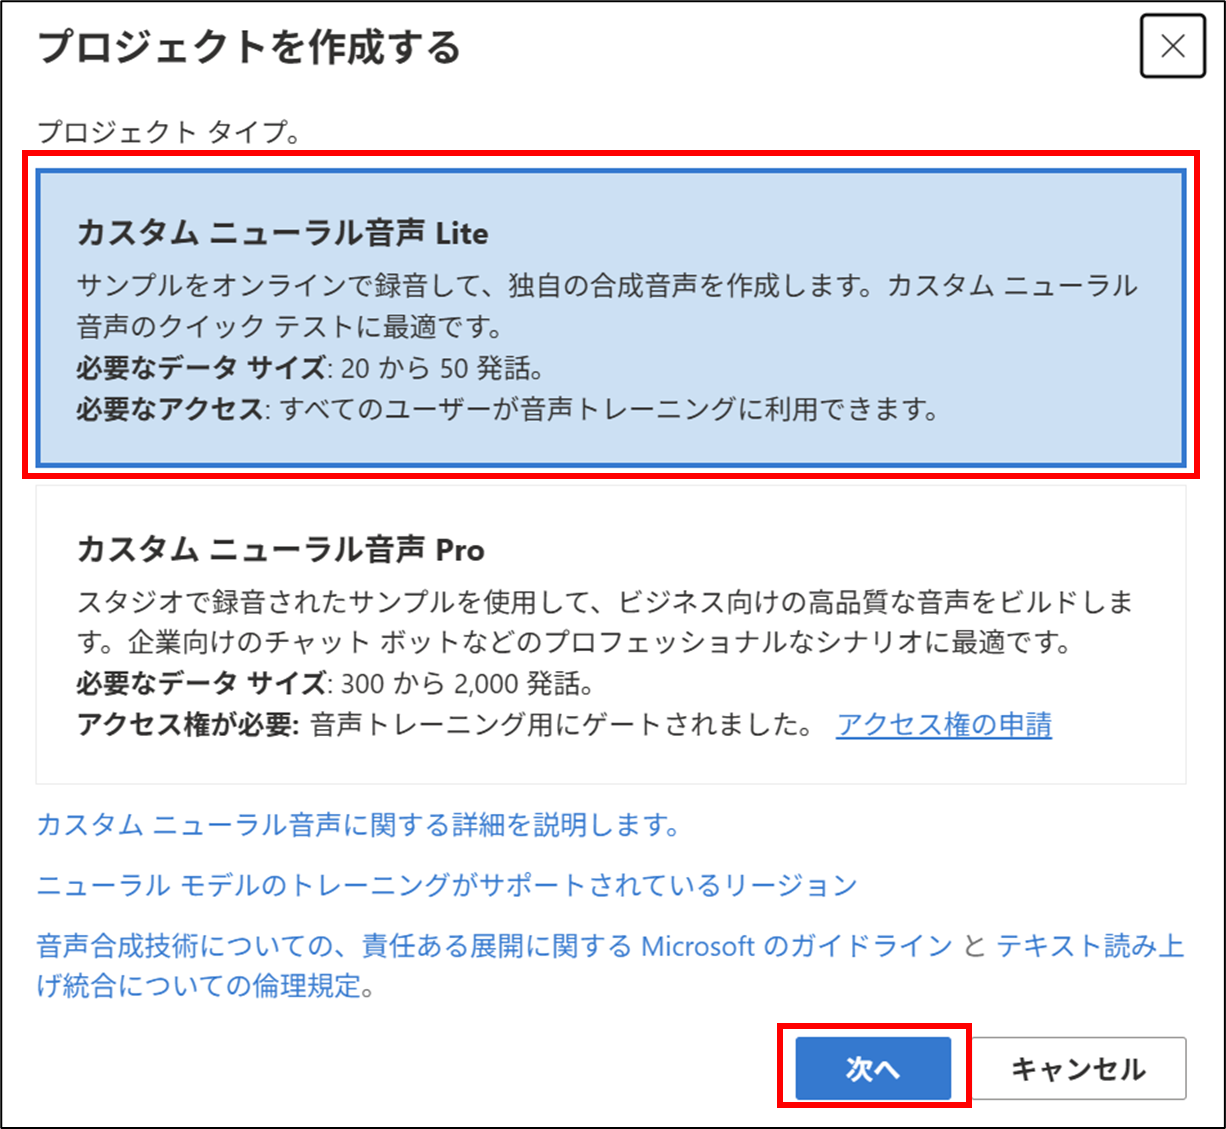
-
カスタムニューラルネットLiteをクリックする
-
次へをクリックする
-
記録とビルドをクリックする
-
作業を開始をクリックする

-
ノイズのチェックを行う

-
マイクボタンをクリックし、音声の入力を行う
※20文以上録音を行うと、モデルの学習を行うことができます

-
学習を行う
- 学習が完了したことを確認する

- 出力サンプルで動作確認をする

3. モデルのデプロイ
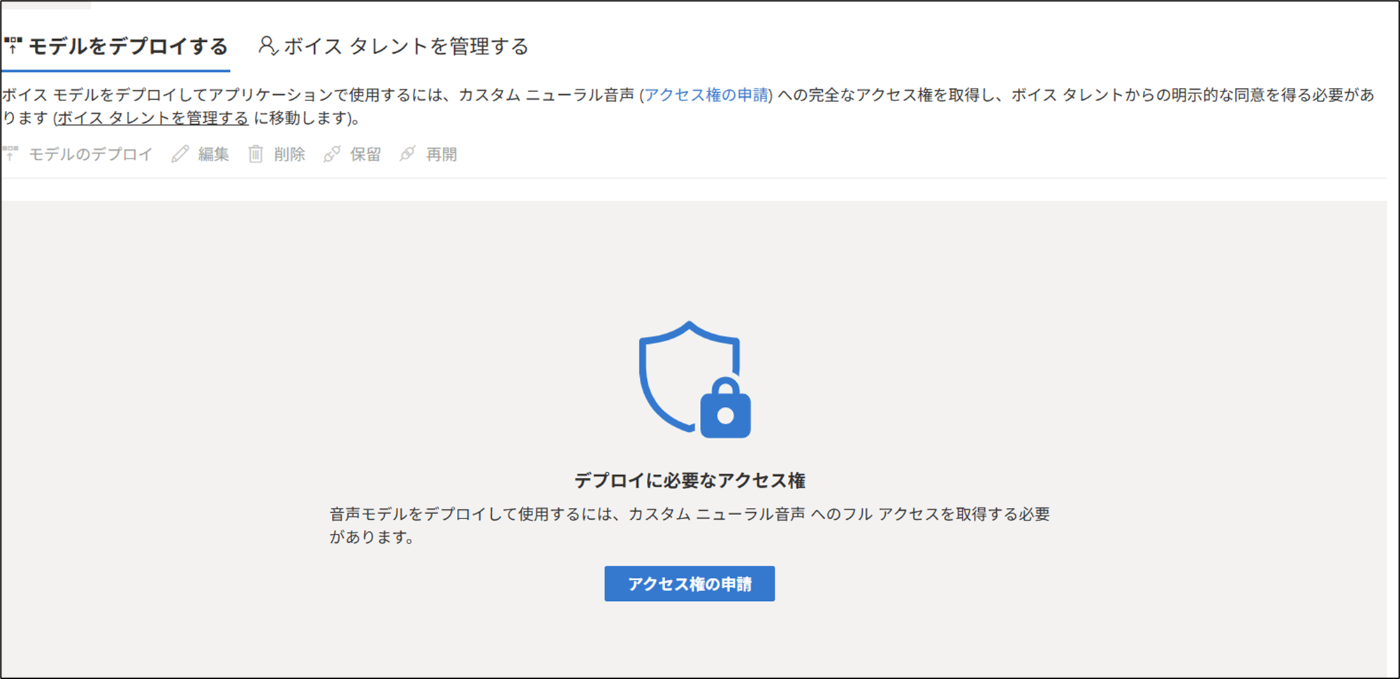
- モデルのデプロイには申請が必要です。申請を行ってください!
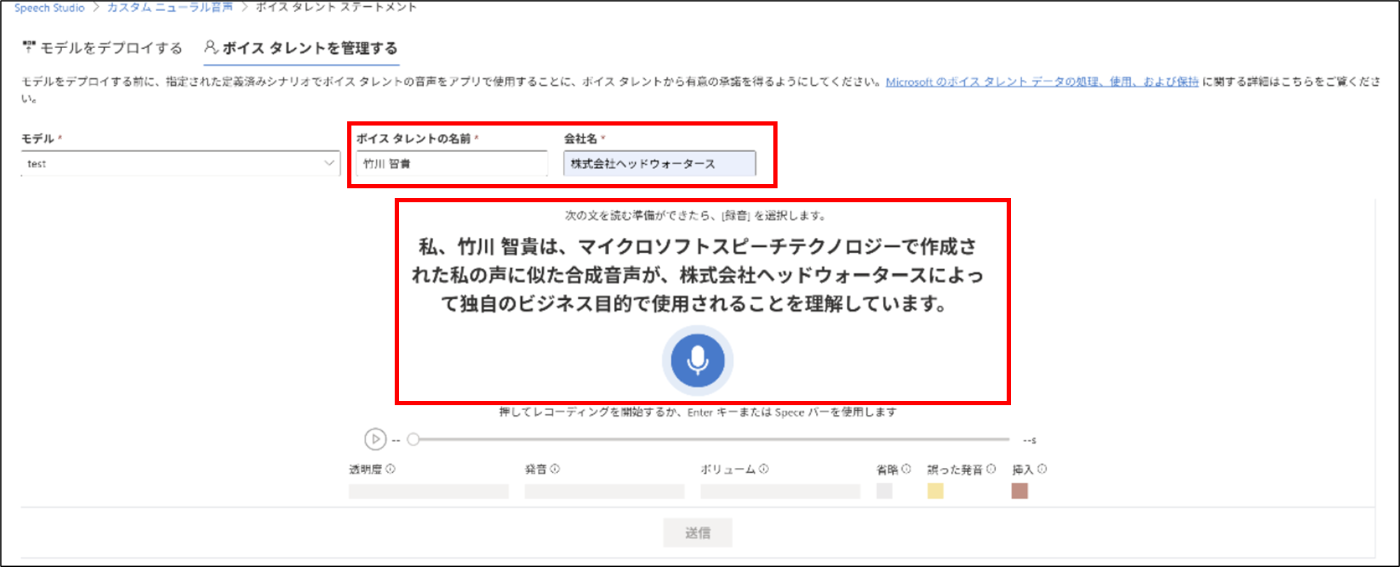
- 申請が通り次第、ボイスタレントを管理するタブから、タレント名,会社名を入力し、音声を録音する
-
録音後、デプロイをすることでモデルを使うことができます。
-
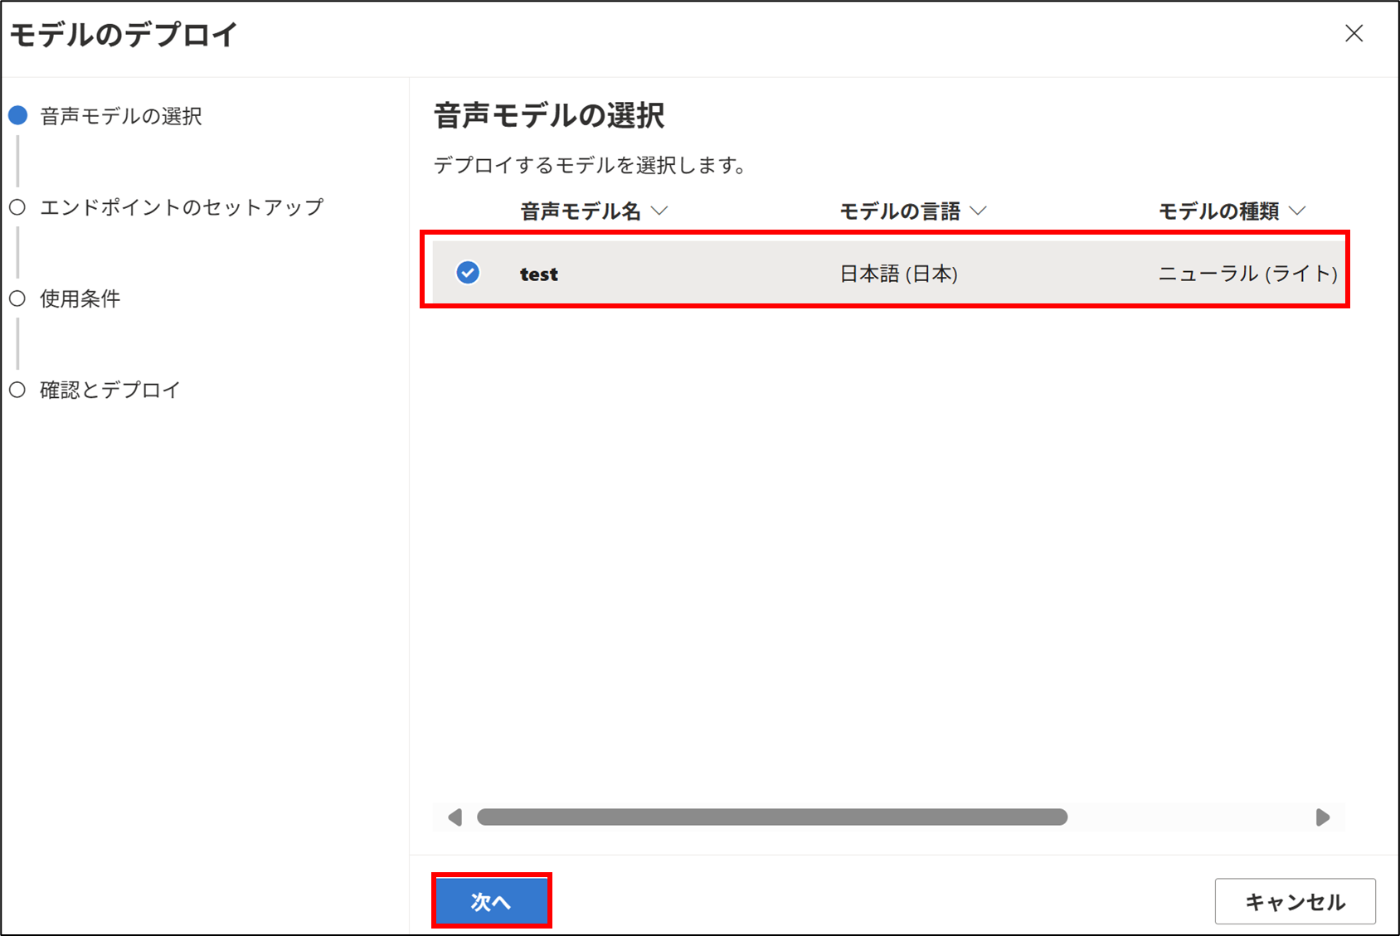
モデルのデプロイをクリックする。

-
該当のモデルを選択し、次へをクリックする。
-
名前とエンドポイントの種類を入力/選択し、次へをクリックする。

-
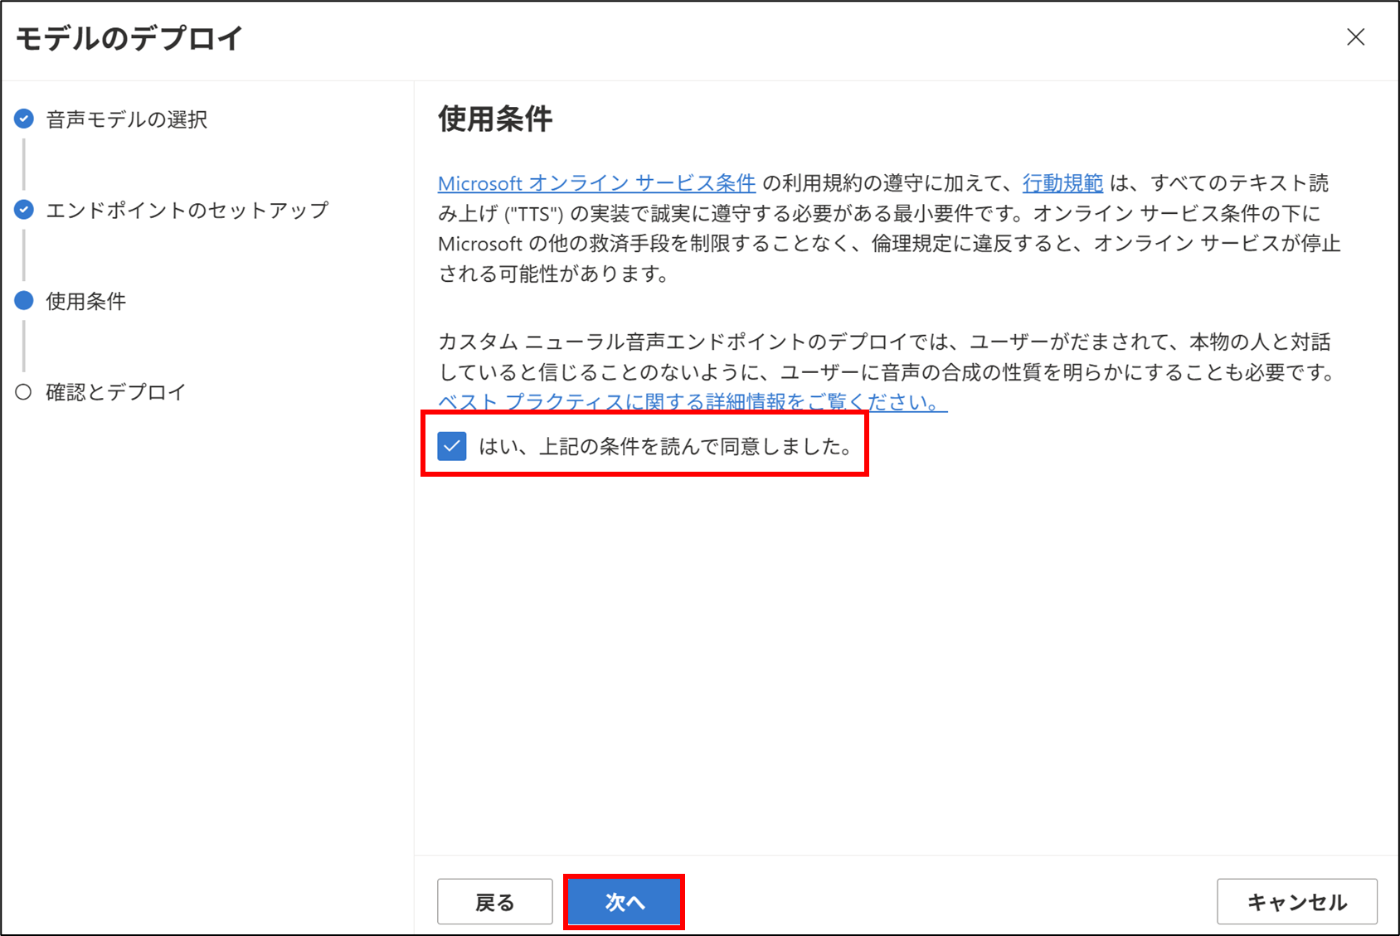
使用条件を読んで同意語、次へをクリックする。
-
チェックを行い、デプロイをクリックする。

-
デプロイ後、コード経由でモデルを呼ぶことができます。

sample.py
'''
  For more samples please visit https://github.com/Azure-Samples/cognitive-services-speech-sdk
'''

import azure.cognitiveservices.speech as speechsdk

# Creates an instance of a speech config with specified subscription key and service region.
speech_key = "Key"
service_region = "southeastasia"

speech_config = speechsdk.SpeechConfig(subscription=speech_key, region=service_region)
speech_config.endpoint_id = "endpoint_id"
speech_config.speech_synthesis_voice_name = "test"
speech_config.set_speech_synthesis_output_format(speechsdk.SpeechSynthesisOutputFormat.Audio24Khz160KBitRateMonoMp3)

text = "Hi, this is my custom voice."
file_name = "sample.wav"

# using the default speaker as audio output.
file_config = speechsdk.audio.AudioOutputConfig(filename=file_name)
speech_synthesizer = speechsdk.SpeechSynthesizer(speech_config=speech_config, audio_config=file_config)

result = speech_synthesizer.speak_text_async(text).get()
# Check result
if result.reason == speechsdk.ResultReason.SynthesizingAudioCompleted:
    print("Speech synthesized for text [{}], and the audio was saved to [{}]".format(text, file_name))
elif result.reason == speechsdk.ResultReason.Canceled:
    cancellation_details = result.cancellation_details
    print("Speech synthesis canceled: {}".format(cancellation_details.reason))
    if cancellation_details.reason == speechsdk.CancellationReason.Error:
        print("Error details: {}".format(cancellation_details.error_details))
料金
Custom Voiceには次の3つの料金がかかります。
- 訓練(Training):$52/1時間
- 音声生成(Synthesis):$24/100万文字
- エンドポイントホスティング:$4.04/時間

Discussion