🔮
vwでフォントサイズを画面サイズにあわせて変更 (Tailwind Tips)
はじめに
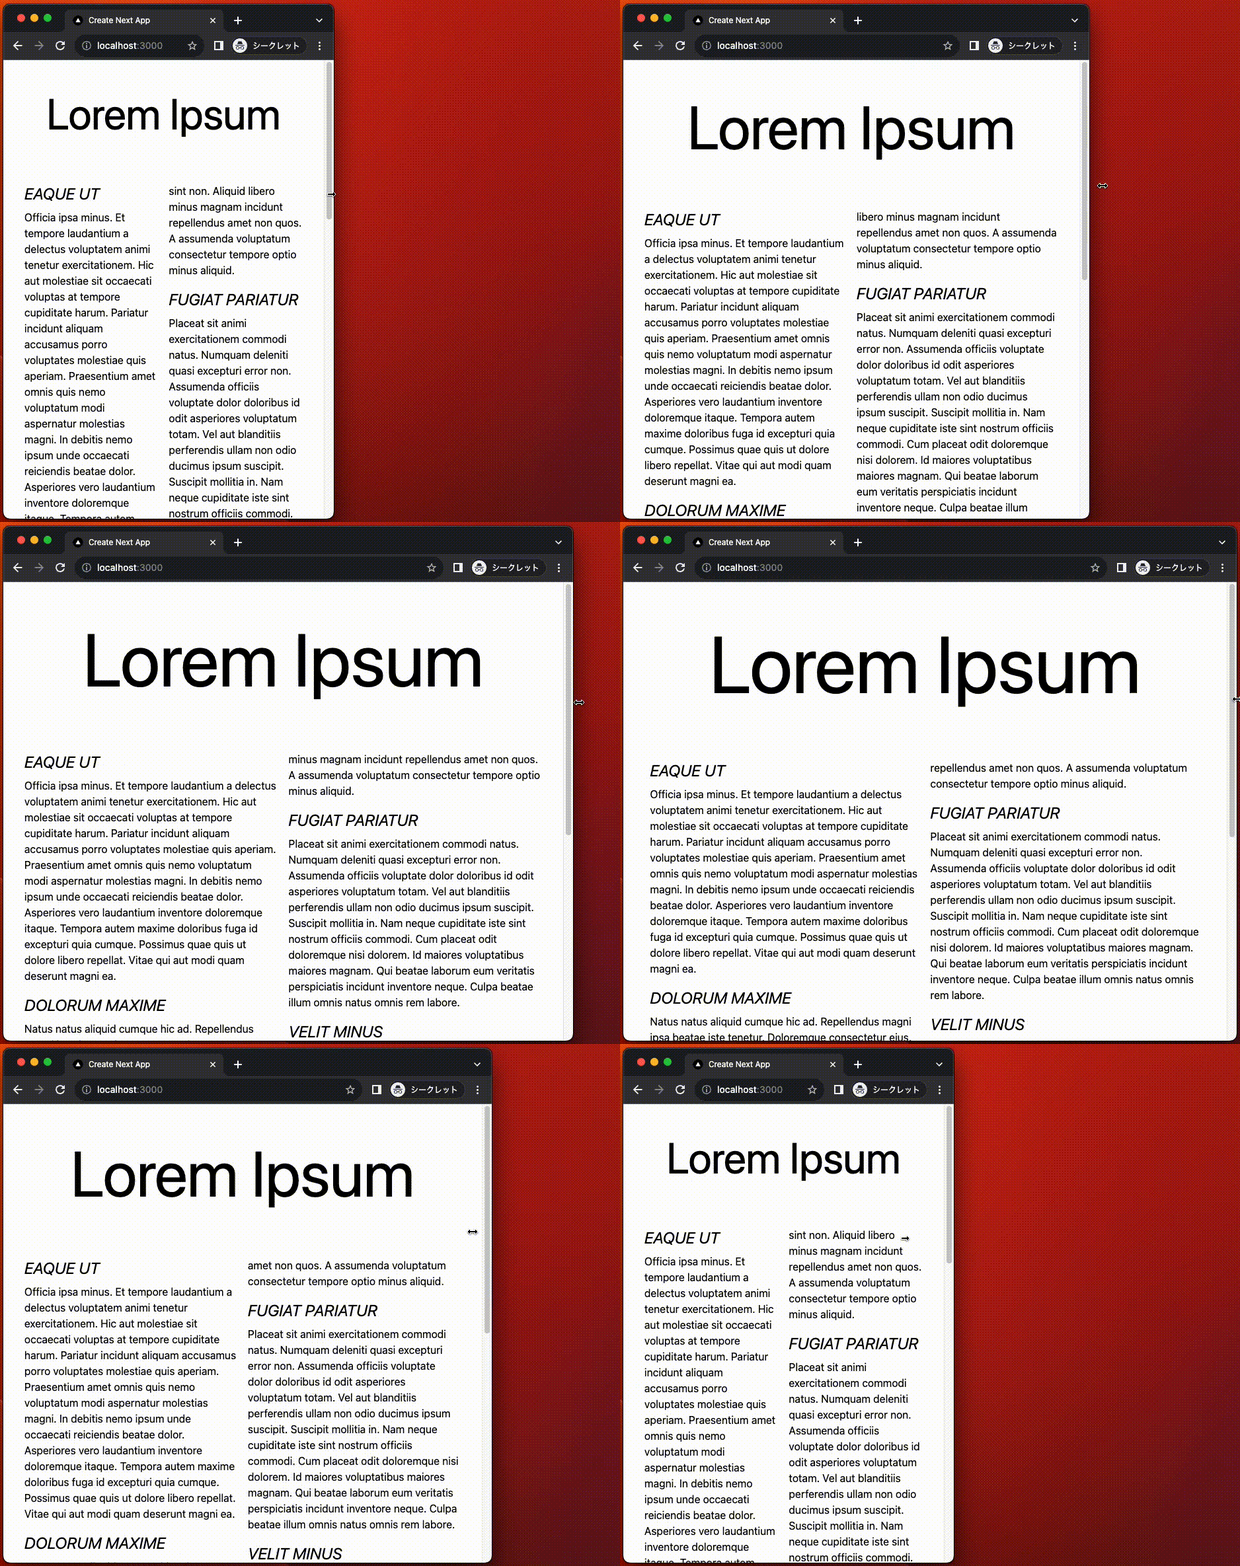
タイトルなどのフォントサイズを vw で指定し、画面サイズにあわせてフォントサイズを変更する方法を紹介します。

この記事は、Tailwind Connect 2023 で紹介されていた Tailwind のデモを参考にしています。
作業したコードは以下にあります。
結論
-
text-[13vw]のように指定すると、画面幅に応じてフォントサイズが変更されます。 - さらに
min()を使って、最大値を指定します。
<h1 className="text-[min(13vw,130px)]">Lorem Ipsum</h1>
Next.jsプロジェクトの新規作成
作業するプロジェクトを新規に作成していきます。
長いので、折りたたんでおきます。
新規プロジェクト作成と初期環境構築の手順詳細
$ pnpm create next-app@latest nextjs-tailwind-title-vw-sample --typescript --eslint --import-alias "@/*" --src-dir --use-pnpm --tailwind --app
$ cd nextjs-tailwind-title-vw-sample
以下の通り不要な設定を削除し、プロジェクトの初期環境を構築します。
$ mkdir src/styles
$ mv src/app/globals.css src/styles/globals.css
src/styles/globals.css
@tailwind base;
@tailwind components;
@tailwind utilities;
src/app/page.tsx
export default function Home() {
  return (
    <main className="text-lg">
      テストページ
    </main>
  )
}
src/app/layout.tsx
import '@/styles/globals.css'

export const metadata = {
  title: "Create Next App",
  description: "Generated by create next app",
};

export default function RootLayout({
  children,
}: {
  children: React.ReactNode;
}) {
  return (
    <html lang="ja">
      <body className="">{children}</body>
    </html>
  );
}
tailwind.config.js
/** @type {import('tailwindcss').Config} */
module.exports = {
  content: [
    "./src/components/**/*.{js,ts,jsx,tsx,mdx}",
    "./src/app/**/*.{js,ts,jsx,tsx,mdx}",
  ],
  plugins: [],
};
tsconfig.json
{
  "compilerOptions": {
    "target": "es5",
    "lib": ["dom", "dom.iterable", "esnext"],
    "allowJs": true,
    "skipLibCheck": true,
    "strict": true,
    "forceConsistentCasingInFileNames": true,
    "noEmit": true,
    "esModuleInterop": true,
    "module": "esnext",
    "moduleResolution": "node",
    "resolveJsonModule": true,
    "isolatedModules": true,
    "jsx": "preserve",
    "incremental": true,
    "plugins": [
      {
        "name": "next"
      }
    ],
+   "baseUrl": ".",
    "paths": {
      "@/*": ["./src/*"],
    }
  },
  "include": ["next-env.d.ts", "**/*.ts", "**/*.tsx", ".next/types/**/*.ts"],
  "exclude": ["node_modules"]
}
コミットします。
$ pnpm build
$ git add .
$ git commit -m "新規にプロジェクトを作成し, 作業環境を構築"
パッケージ
疑似データを生成するために、faker をインストールします。
$ pnpm add -D @faker-js/faker
ニュース記事のようなページを作成
page.tsx
import { faker } from "@faker-js/faker"

export default function Home() {
  return (
    <main className="mx-auto max-w-4xl p-8">
      <h1 className="text-center text-7xl">Lorem Ipsum</h1>
      {/* <h1 className="text-center text-5xl sm:text-7xl lg:text-9xl">Lorem Ipsum</h1> */}
      {/* <h1 className="text-center text-[60px]">Lorem Ipsum</h1> */}
      {/* <h1 className="text-center text-[13vw]">Lorem Ipsum</h1> */}
      {/* <h1 className="text-center text-[min(13vw,130px)]">Lorem Ipsum</h1> */}

      <div className="mt-14 columns-2">
        <div>
          <h2 className="text-2xl uppercase italic">{faker.lorem.words({min:2, max:2})}</h2>
          <p className="mt-2">{faker.lorem.sentences({min:7, max:15})}</p>
        </div>
        <div>
          <h2 className="text-2xl uppercase italic mt-4">{faker.lorem.words({min:2, max:2})}</h2>
          <p className="mt-2">{faker.lorem.sentences({min:7, max:15})}</p>
          <p className="mt-2">{faker.lorem.sentences({min:7, max:15})}</p>
        </div>
        <div>
          <h2 className="text-2xl uppercase italic mt-4">{faker.lorem.words({min:2, max:2})}</h2>
          <p className="mt-2">{faker.lorem.sentences({min:7, max:15})}</p>
        </div>
        <div>
          <h2 className="text-2xl uppercase italic mt-4">{faker.lorem.words({min:2, max:2})}</h2>
          <p className="mt-2">{faker.lorem.sentences({min:7, max:15})}</p>
        </div>
        <div>
          <h2 className="text-2xl uppercase italic mt-4">{faker.lorem.words({min:2, max:2})}</h2>
          <p className="mt-2">{faker.lorem.sentences({min:7, max:15})}</p>
        </div>
      </div>
    </main>
  );
}
コミットします。
$ pnpm build
$ git add .
$ git commit -m "記事を追加"
フォントサイズを指定
フォントサイズを変更する方法は様々です。
固定値で固定する方法
<h1 className="text-center text-7xl">Lorem Ipsum</h1>

ブレークポイントを指定して、フォントサイズを変更
page.tsx
export default function Home() {
  return (
    <main className="mx-auto max-w-4xl p-8">
-     <h1 className="text-center text-7xl">Lorem Ipsum</h1>
+     <h1 className="text-center text-5xl sm:text-7xl lg:text-9xl">Lorem Ipsum</h1>
      ...
    </main>
  );
}

フォントサイズを値を直接指定する方法
page.tsx
export default function Home() {
  return (
    <main className="mx-auto max-w-4xl p-8">
-     <h1 className="text-center text-5xl sm:text-7xl lg:text-9xl">Lorem Ipsum</h1>
+     <h1 className="text-center text-[60px]">Lorem Ipsum</h1>
      ...
    </main>
  );
}

vwを使って、画面幅に応じてフォントサイズを変更する方法
page.tsx
export default function Home() {
  return (
    <main className="mx-auto max-w-4xl p-8">
-     <h1 className="text-center text-[60px]">Lorem Ipsum</h1>
+     <h1 className="text-center text-[13vw]">Lorem Ipsum</h1>
      ...
    </main>
  );
}

画面サイズに応じてフォントサイズは変更できましたが、大きくなりすぎる問題があります。
さらに min() を使って、最大値を指定する方法
min() を使うことで最大値を指定できます。
page.tsx
export default function Home() {
  return (
    <main className="mx-auto max-w-4xl p-8">
-     <h1 className="text-center text-[13vw]">Lorem Ipsum</h1>
+     <h1 className="text-center text-[min(13vw,130px)]">Lorem Ipsum</h1>
      ...
    </main>
  );
}

まとめ
- タイトルなどのフォントサイズを
vwで指定し、画面サイズにあわせてフォントサイズを変更する方法を紹介しました。 -
text-[13vw]のように指定すると、画面幅に応じてフォントサイズが変更されます。 - さらに
min()を使って、最大値を指定します。 - 作業したコードは以下にあります。
参考


Discussion