gitmojiを使ってみる
概要
本記事では gitmoji を紹介します。
結論
gitmojiとは、git のコミットメッセージに絵文字を使って装飾できるツールです。
メリットは絵文字の見た目から、どのようなコミットがされたかパッと見て分かります。何より、絵文字が可愛いので使っていて楽しいです。

デメリットは絵文字であるがために、ターミナル上で見たときに、文字からだと何のコミットか分かりにくいです。
:construction: Welcomeメッセージを変更
本記事の作業内容は以下のリポジトリーで公開しています。
この記事の対象者
- gitmoji を使ってみたい人
- 可愛いコミットメッセージ書きたい人
gitmojiとは
gitmoji とは、git のコミットメッセージに絵文字を使うことで、コミットの種類を分かりやすくするためのものです。
サービスサイトです。
GitHub です。
Next.jsで作業環境を構築
作業するための Next.js プロジェクトを新規に作成します。長いので、折り畳んでおきます。
新規プロジェクト作成と初期環境構築の手順詳細
プロジェクトを作成
create next-app@latestでプロジェクトを作成します。
$ pnpm create next-app@latest next-gitmoji-tutorial --typescript --eslint --import-alias "@/*" --src-dir --use-pnpm --tailwind --app
$ cd next-gitmoji-tutorial
Peer Dependenciesの警告を解消
Peer dependenciesの警告が出ている場合は、pnpm installを実行し、警告を解消します。
 WARN  Issues with peer dependencies found
.
├─┬ autoprefixer 10.0.1
│ └── ✕ unmet peer postcss@^8.1.0: found 8.0.0
├─┬ tailwindcss 3.3.0
│ ├── ✕ unmet peer postcss@^8.0.9: found 8.0.0
│ ├─┬ postcss-js 4.0.1
│ │ └── ✕ unmet peer postcss@^8.4.21: found 8.0.0
│ ├─┬ postcss-load-config 3.1.4
│ │ └── ✕ unmet peer postcss@>=8.0.9: found 8.0.0
│ └─┬ postcss-nested 6.0.0
│   └── ✕ unmet peer postcss@^8.2.14: found 8.0.0
└─┬ next 14.0.4
  ├── ✕ unmet peer react@^18.2.0: found 18.0.0
  └── ✕ unmet peer react-dom@^18.2.0: found 18.0.0
以下を実行することで警告が解消されます。
$ pnpm i postcss@latest react@^18.2.0 react-dom@^18.2.0
クリーンアップ
不要な設定を削除し、プロジェクトを初期化します。
styles
CSSなどを管理するstylesディレクトリを作成します。globals.cssを移動します。
$ mkdir src/styles
$ mv src/app/globals.css src/styles/globals.css
globals.cssの内容を以下のように上書きします。
@tailwind base;
@tailwind components;
@tailwind utilities;
初期ページ
app/page.tsxを上書きします。
import { type FC } from "react";

const Home: FC = () => {
  return (
    <div className="">
      <div className="text-lg font-bold">Home</div>
      <div>
        <span className="text-blue-500">Hello</span>
        <span className="text-red-500">World</span>
      </div>
    </div>
  );
};

export default Home;
レイアウト
app/layout.tsxを上書きします。
import "@/styles/globals.css";
import { type FC } from "react";
type RootLayoutProps = {
  children: React.ReactNode;
};

export const metadata = {
  title: "Sample",
  description: "Generated by create next app",
};

const RootLayout: FC<RootLayoutProps> = (props) => {
  return (
    <html lang="ja">
      <body className="">{props.children}</body>
    </html>
  );
};

export default RootLayout;
TailwindCSSの設定
TailwindCSSの設定を上書きします。
import type { Config } from 'tailwindcss'

const config: Config = {
  content: [
    './src/pages/**/*.{js,ts,jsx,tsx,mdx}',
    './src/components/**/*.{js,ts,jsx,tsx,mdx}',
    './src/app/**/*.{js,ts,jsx,tsx,mdx}',
  ],
  plugins: [],
}
export default config
TypeScriptの設定
baseUrlを追加します。
{
  "compilerOptions": {
    "target": "es5",
    "lib": ["dom", "dom.iterable", "esnext"],
    "allowJs": true,
    "skipLibCheck": true,
    "strict": true,
    "forceConsistentCasingInFileNames": true,
    "noEmit": true,
    "esModuleInterop": true,
    "module": "esnext",
    "moduleResolution": "node",
    "resolveJsonModule": true,
    "isolatedModules": true,
    "jsx": "preserve",
    "incremental": true,
    "plugins": [
      {
        "name": "next"
      }
    ],
+   "baseUrl": ".",
    "paths": {
      "@/*": ["./src/*"],
    }
  },
  "include": ["next-env.d.ts", "**/*.ts", "**/*.tsx", ".next/types/**/*.ts"],
  "exclude": ["node_modules"]
}
動作確認
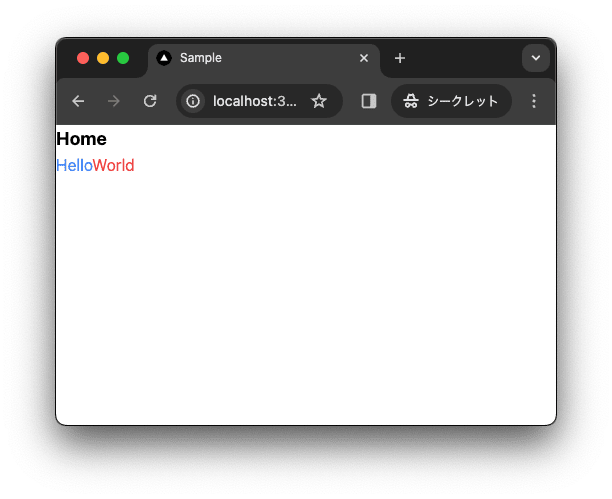
ローカルで動作確認します。
$ pnpm dev

コミットして作業結果を保存しておきます。
$ pnpm build
$ git add .
$ git commit -m "feat:新規にプロジェクトを作成し, 作業環境を構築"
gitmoji-cliをインストール
gitmoji を利用するにあたり、gitmoji-cli を利用すると、プロンプトから絵文字を選択してコミットメッセージを作成できるので、便利です。
公式サイトに沿ってインストールします。
$ npm i -g gitmoji-cli
gitmojiの利用の流れ
gitmoji を利用してコミットする流れは以下です。
- コードを書く
-
git add .でステージングに上げる -
gitmoji -cでコミットする -
git pushで commit を反映
gitmojiを利用する
1. コードを書く
page.tsx を一部変更します。
import { type FC } from "react";

const Home: FC = () => {
  return (
    <div className="">
      <div className="text-lg font-bold">Home</div>
      <div>
        <span className="text-blue-500">Hello</span>
-       <span className="text-red-500">World</span>
+       <span className="text-red-500">Universe</span>
      </div>
    </div>
  );
};

export default Home;
2. git add . でステージングに上げる
作業結果をステージングに上げます。
$ git add .
3. gitmoji -c でコミットする
gitmoji -c でコミットを作成します。これは、git commit 相当の処理です。gitmoji -c と入力すると、プロンプトが表示されます。変更点にあったコミットを選択します。今回はまだ作業中なので、🚧 Work in progress. を選択します。
$ git add .
$ gitmoji -c

✔ Gitmojis fetched successfully, these are the new emojis:
? Choose a gitmoji:
  🔖  - Release / Version tags.
  🚨  - Fix compiler / linter warnings.
❯ 🚧  - Work in progress.
  💚  - Fix CI Build.
  ⬇️  - Downgrade dependencies.
  ⬆️  - Upgrade dependencies.
  📌  - Pin dependencies to specific versions.
(Move up and down to reveal more choices)
続いて、コミットメッセージを入力します。Enter the commit title には、コミットのタイトルを入力します。Enter the commit message には、コミットの詳細を入力します。
$ git add .
$ gitmoji -c

✔ Gitmojis fetched successfully, these are the new emojis:
? Choose a gitmoji: 🚧  - Work in progress.
? Enter the commit title [15/48]: Welcomeメッセージを変更
? Enter the commit message: WorldからUniverseに変更
[main b694600] :construction: Welcomeメッセージを変更
 1 file changed, 1 insertion(+), 1 deletion(-)
4. git push でcommitを反映
git push で作業結果をリモートリポジトリに反映します。
$ git push origin main
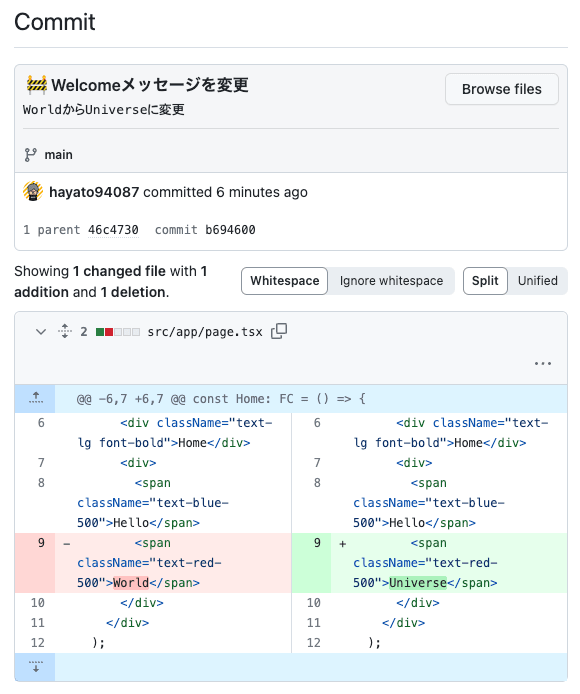
コミットメッセージは GitHub では下記のように表示されます。

VSCodeの拡張機能を使ってgitmojiを利用
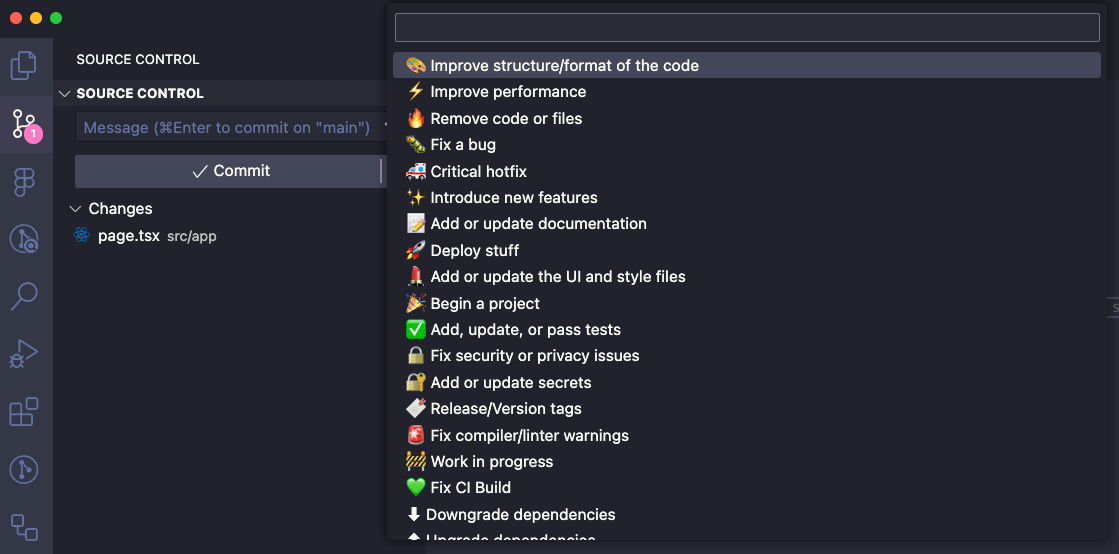
VSCode の拡張機能として gitmoji を利用できます。

gimojiを使うべきなのか
gitmoji を使うべきなのかどうかについて記述します。こちらの記事で、ターミナル上で見ると見ずらいということが書かれています。
git log で見ると、確かに見ずらいです。
$ git log --oneline
b694600 (HEAD -> main, origin/main) :construction: Welcomeメッセージを変更
46c4730 feat:新規にプロジェクトを作成し, 作業環境を構築
565e900 Initial commit from Create Next App
:construction: Welcomeメッセージを変更 をみると、:construction: が何か不明です。gitmoji はブラウザ上で見る文には見た目が可愛くて良いですが、ターミナル上ではわかりにくいのが欠点です。
:construction: Welcomeメッセージを変更
まとめ
本記事では、gitmoji を使ってみました。gitmoji を使うと、コミットの種類を分かりやすくできます。ただ、ターミナル上で見ると見ずらいので、利用する場合は、メリット・デメリットを考慮して使うのが良いです。
作業結果は以下のリポジトリーで公開しています。
参考
Discussion