🦔
Next.jsをVercelにデプロイするまでの簡易手順
はじめに
Next.js のプロジェクト作成から Vercel へのデプロイまでの手順を紹介します。
新規にNext.js プロジェクトを作成
プロジェクトを新規に作成します。next-app@latest で、最新のバージョンを利用します。App Router を利用するため、--app を指定しています。
$ pnpm create next-app@latest nextjs-vercel-sample --typescript --eslint --import-alias "@/*" --src-dir --use-pnpm --tailwind --app
プロジェクトディレクトリーに移動します。
$ cd nextjs-vercel-sample
以下の通り修正し、テストページを作っておきます。
src/app/globals.css
@tailwind base;
@tailwind components;
@tailwind utilities;
src/app/layout.tsx
import './globals.css'

export const metadata = {
  title: 'Create Next App',
  description: 'Generated by create next app',
}

export default function RootLayout({
  children,
}: {
  children: React.ReactNode
}) {
  return (
    <html lang="ja">
      <body className="bg-white">{children}</body>
    </html>
  )
}
src/app/page.tsx
export default function Home() {
  return (
    <main>
      <h1>テストページ</h1>
    </main>
  )
}
ローカルで実行します。
$ pnpm dev

コミットします。
$ git checkout main
$ pnpm build
$ git add .
$ git commit -m "create test page"
GitHubのリポジトリを作成
後の GitHub のリポジトリを Vercel に連携させるため、ソースを GitHub リポジトリで管理します。
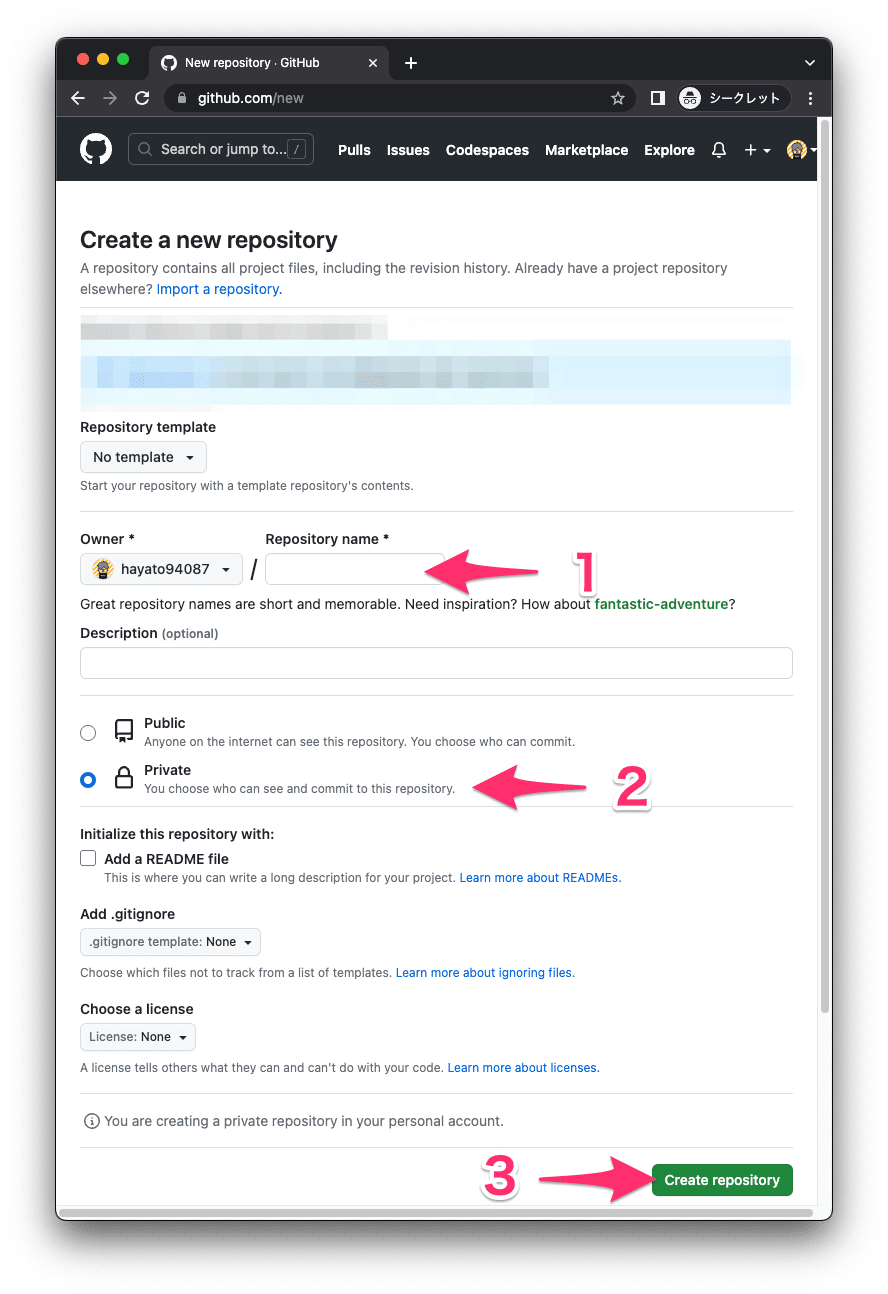
GitHub にログインし、リポジトリを作成します。
- リポジトリ名を入力(例:nextjs-vercel-sample)
- Public か、Private かを選択
- Create repository をクリック
作成が完了しました。

リポジトリにコードをプッシュします。
$ git remote add origin https://github.com/hayato94087/nextjs-vercel-sample.git
$ git branch -M main
$ git push -u origin main
Vercelにデプロイ
GitHub のリポジトリを連携させ、Vercel にデプロイします。
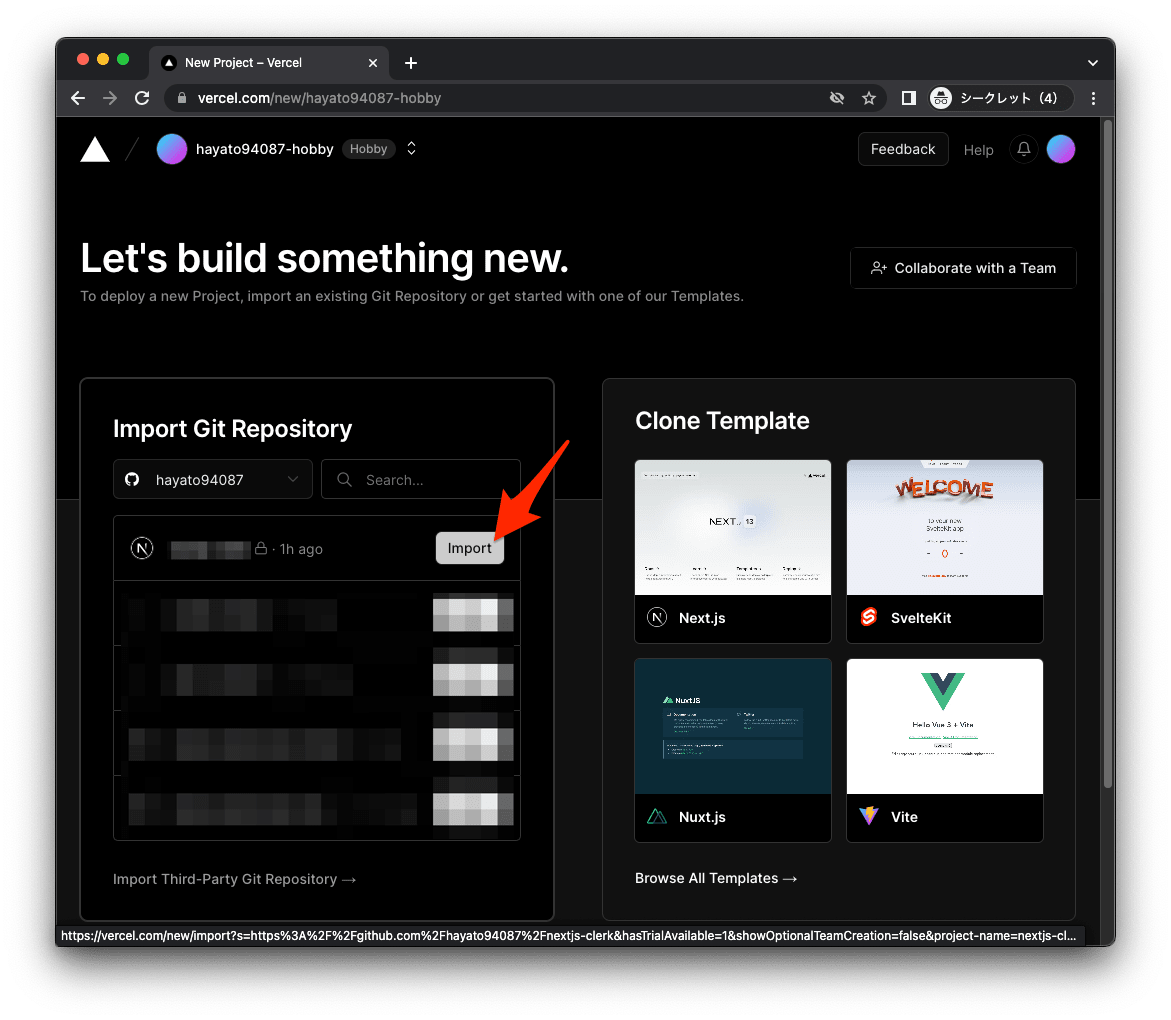
Vercel にログインし、「Add New」→「Project」をクリックします。

対象となるリポジトリを選択し、「Import」をクリックします。
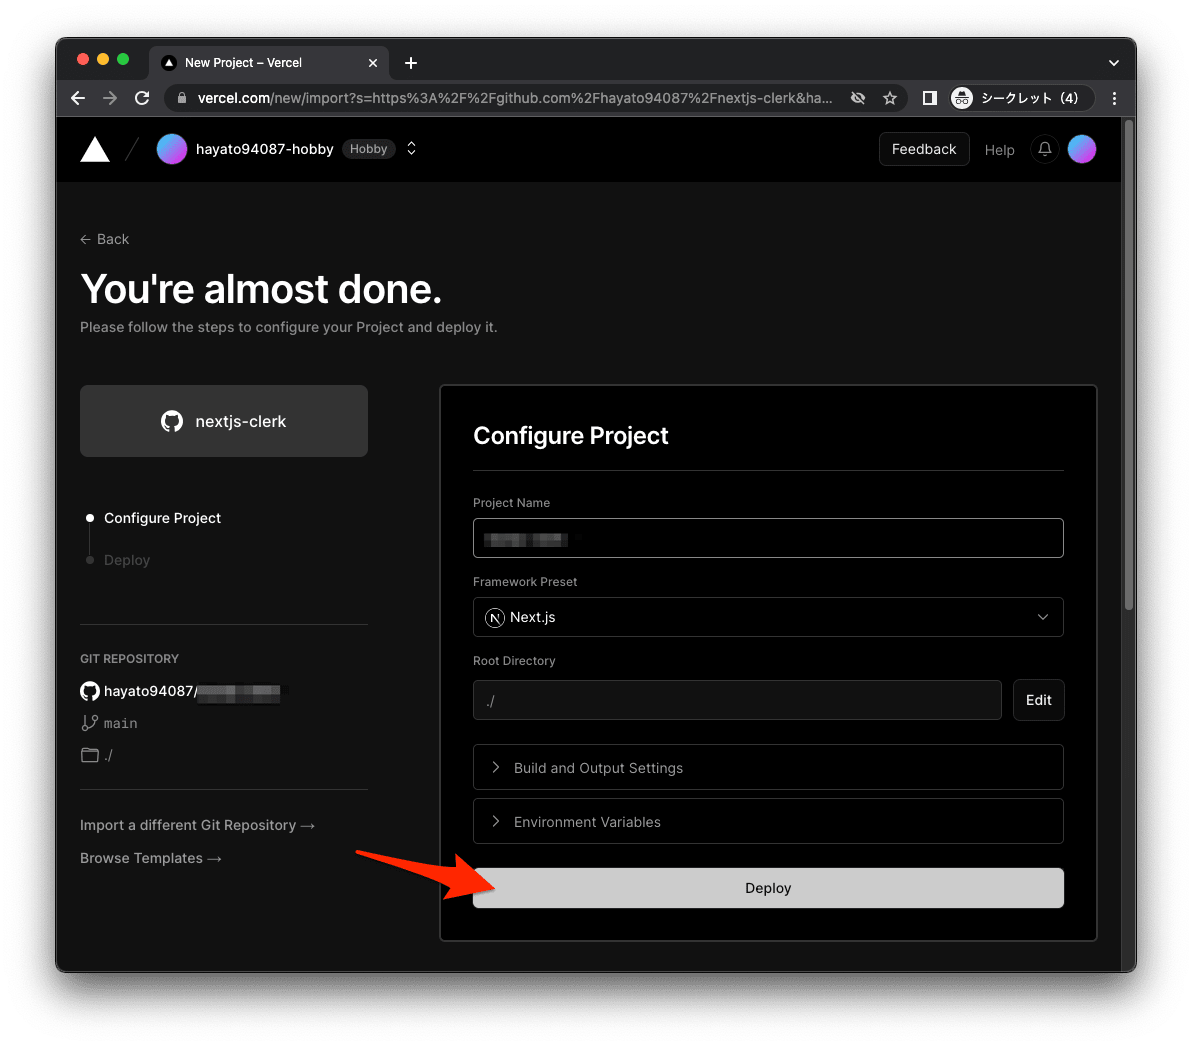
「Deploy」をクリックします。
デプロイが完了しました。ダッシュボードにアクセスします。

念のためデプロイされた環境にアクセスするため、「Visit」をクリックします。

無事、デプロイできました。

さいごに
最後に、以下が作成した GitHub リポジトリです。
まとめ
Next.js のプロジェクト作成から Vercel へのデプロイまでの手順を紹介しました。
Discussion