Next.js App Router で MDX を利用
はじめに
Next.js の App Router で MDX を管理する方法を紹介します。MDX をただ使うだけではなく、Markdown の表現を拡張する remarkとrehypeを利用する方法も紹介します。
ソースコードは以下にあります。コミットは、この記事の各セクションごとに分けてあります。
ハマったポイント
まず、はじめに、今回はまったポイント 2 つを紹介します。
MDX とは
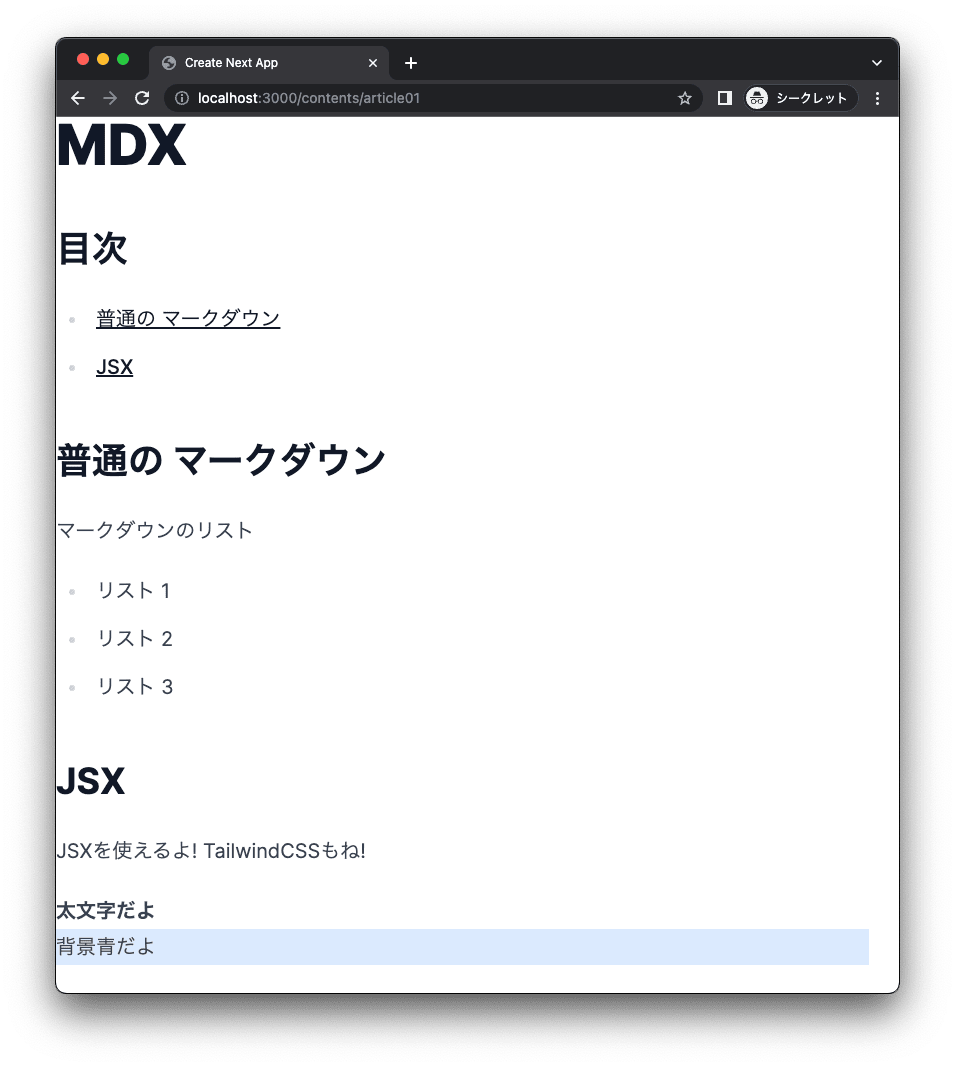
MDXはマークダウンを拡張したもので、JSX を埋め込むことができます。MDX とは例えばこういうドキュメントです。
# MDX

## 目次

## 普通の マークダウン

マークダウンのリスト

- リスト 1
- リスト 2
- リスト 3

## JSX

JSXを使えるよ! TailwindCSSもね!

<div className="font-bold">太文字だよ</div>
<div className="bg-blue-100">背景青だよ</div>
以下が実際にブラウザで表示されるものです。

使用技術
それでは、これから実際に実装していきます。以下が使用技術です。
| 技術 | 説明 |
|---|---|
| Next.js App Router | Next.js フレームワーク。今回はApp Routerを利用 |
| @next/mdx | Next.jsでMDXを使えるようにする |
| TailwindCSS | HTMLのスタイリングに利用 |
| remark-gfm | MDXでGitHub Flavored Markdownを利用できるようにするremarkプラグイン |
| remark-math | MDXでTeXを利用できるようにするremarkプラグイン |
| rehype-katex | MDXでTeXを利用できるようにするrehypeプラグイン |
| @mapbox/rehype-prism | MDXでコードブロックのシンタックスをハイライト(色付け)できるようにするrehypeプラグイン |
| rehype-slug | MDXで目次を作成するためにheadingにidを付与するrehypeプラグイン |
| remark-toc | MDXで目次を作成するるremarkププラグイン |
| remark-breaks | MDXで改行をサポートするremarkプラグイン |
MDX の環境を構築
プロジェクトを新規に作成します。
$ pnpm create next-app@latest nextjs-mdx-sample --typescript --eslint --import-alias "@/*" --src-dir --use-pnpm --tailwind --app
$ cd nextjs-mdx-sample
@next/mdx パッケージをインストールします。
$ pnpm add @next/mdx @mdx-js/loader @mdx-js/react @types/mdx
Next.js で MDX ファイルをサポートするために、mdx-components.tsx を作成します。
$ touch src/mdx-components.tsx
import type { MDXComponents } from 'mdx/types'

// This file allows you to provide custom React components
// to be used in MDX files. You can import and use any
// React component you want, including components from
// other libraries.

// This file is required to use MDX in `app` directory.
export function useMDXComponents(components: MDXComponents): MDXComponents {
  return {
    // Allows customizing built-in components, e.g. to add styling.
    // h1: ({ children }) => <h1 style={{ fontSize: "100px" }}>{children}</h1>,
    ...components,
  }
}
MDX を利用できるように next.config.js を修正します。
// next.config.js

const withMDX = require('@next/mdx')({
  extension: /\.mdx?$/,
  options: {
    // If you use remark-gfm, you'll need to use next.config.mjs
    // as the package is ESM only
    // https://github.com/remarkjs/remark-gfm#install
    remarkPlugins: [],
    rehypePlugins: [],
    // If you use `MDXProvider`, uncomment the following line.
    // providerImportSource: "@mdx-js/react",
  },
})

/** @type {import('next').NextConfig} */
const nextConfig = {
  // Configure pageExtensions to include md and mdx
  pageExtensions: ['ts', 'tsx', 'js', 'jsx', 'md', 'mdx'],
  // Optionally, add any other Next.js config below
  reactStrictMode: true,
}

// Merge MDX config with Next.js config
module.exports = withMDX(nextConfig)
不要なスタイリングを削除するために globals.css は以下の通りに修正しておきます。
@tailwind base;
@tailwind components;
@tailwind utilities;
コミット
$ git add .
$ git commit -m "complete initial mdx setup"
標準仕様のMD
標準仕様の MD を含む MDX ファイルを作成します。
$ mkdir -p src/app/contents/article01/
$ touch src/app/contents/article01/page.mdx
# MDX

## 普通の マークダウン

マークダウンのリスト

- リスト 1
- リスト 2
- リスト 3
ローカルサーバを起動して確認します。
$ pnpm dev
テキストは表示されましたが、スタイリングがされていないことが分かります。これは、TailwindCSS を導入していることで既存のスタイリングが無効化されているためです。

コミット
$ git add .
$ git commit -m "add normal markdown"
スタイリングを追加
TailwindCSS でスタイルは無効化されているので、HTML タグにあわせたスタイルを追加する必要があります。
TailwindCSS にはマークダウンを簡単にスタイリングできる Typography の@tailwindcss/typographyがあります。こちらを利用しマークダウンをスタイリングします。
インストールします。
$ pnpm add -D @tailwindcss/typography
tailwind.config.js を修正します。
/** @type {import('tailwindcss').Config} */
module.exports = {
  content: [
    './src/pages/**/*.{js,ts,jsx,tsx,mdx}',
    './src/components/**/*.{js,ts,jsx,tsx,mdx}',
    './src/app/**/*.{js,ts,jsx,tsx,mdx}',
  ],
-  theme: {
-    extend: {
-      backgroundImage: {
-        'gradient-radial': 'radial-gradient(var(--tw-gradient-stops))',
-        'gradient-conic':
-          'conic-gradient(from 180deg at 50% 50%, var(--tw-gradient-stops))',
-      },
-    },
-  },
-  plugins: [],
+  plugins: [require("@tailwindcss/typography")],
}
src/app/contents に layout.tsx を追加します。これで、src/app/contents 配下の MDX ファイルに設定できます。className="prose prose-xl" の部分で Tailwind のスタイリングが適用されます。
$ touch src/app/contents/layout.tsx
$ tree src/app/contents

src/app/contents
├── article01
│   └── page.mdx
└── layout.tsx

2 directories, 2 files
export default function Layout({ children }: { children: React.ReactNode }) {
  return <article className="prose prose-xl">{children}</article>;
}
ローカルで確認します。無事、スタイリングが反映されています。

コミット
$ git add .
$ git commit -m "add markdown styling"
JSXを追加
JSX を含んだ MDX ファイルを作成します。
$ mkdir -p src/app/contents/article02
$ touch src/app/contents/article02/page.mdx
# MDX

## JSX

JSXを使えるよ! TailwindCSSもね!

<div className="font-bold">太文字だよ</div>
<div className="bg-blue-100">背景青だよ</div>
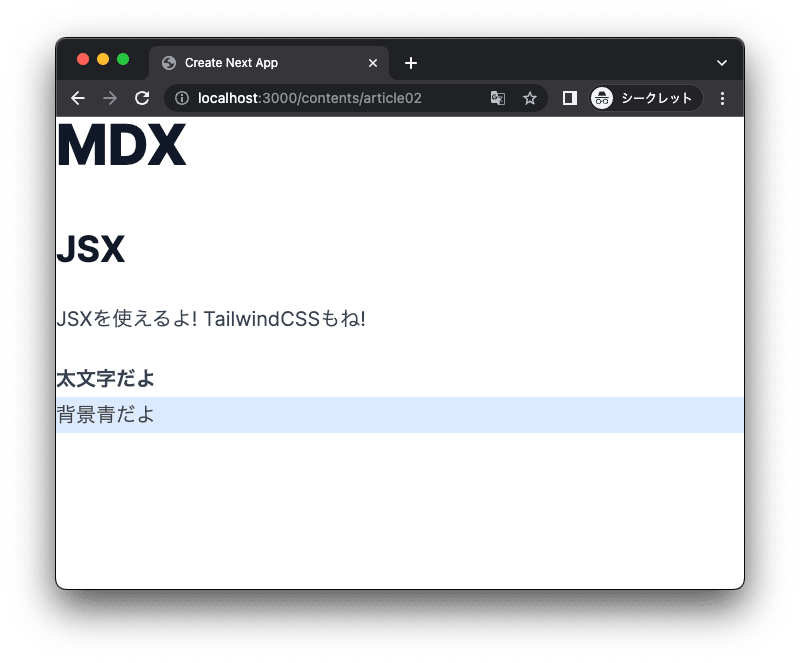
ローカルで確認します。<div> での記述、className での TailwindCSS の記述も無事反映されています。

コミット
$ git add .
$ git commit -m "add jsx code in mdx"
カスタムコンポーネントを追加
React のカスタムコンポーネントを作成します。
$ mkdir src/components
$ touch src/components/Button.tsx
import { FC } from "react";

interface ButtonProps {
  children: React.ReactNode;
}

const Button: FC<ButtonProps> = (props) => {
  return (
    <button className="bg-blue-400 w-[90px] py-1 px-1 rounded-md flex items-center justify-center">
      {props.children}
    </button>
  );
};

export default Button;
React のカスタムコンポーネントを含んだ MDX ファイルを作成します。
$ mkdir -p src/app/contents/article03
$ touch src/app/contents/article03/page.mdx
# MDX

## Reactのカスタムコンポーネント

Reactのカスタムコンポーネントも使えるよ!

<Button>Hello</Button>
ローカルで確認します。ボタンが表示されました。

コミット
$ git add .
$ git commit -m "add react custom component"
GitHub Flavored Markdown
GitHub Flavored Markdown(GFM)をサポートするためにremark-gfmを追加します。
GFMとは標準のマークダウンの仕様をGitHubが拡張したものです。GFMを使うと以下のように記述できます。
# GFM

## Autolink literals

www.example.com, https://example.com, and contact@example.com.

## Footnote

A note[^1]

[^1]: Big note.

## Strikethrough

~one~ or ~~two~~ tildes.

## Table

| a | b  |  c |  d  |
| - | :- | -: | :-: |

## Tasklist

* [ ] to do
* [x] done
パッケージをインストールします。
$ pnpm add remark-gfm
GFM を利用するには、ためには、remark-gfmをimportを利用する必要があるため、ECMAScript Modules(ESM)に対応していないnext.config.js を 対応している next.config.mjs に変更します。
$ mv next.config.js next.config.mjs
さらに、remark-gfmをimportして使えるようにします。
// next.config.mjs

import nextMDX from "@next/mdx";
import remarkGfm from "remark-gfm";

const withMDX = nextMDX({
  extensions: /\.mdx?$/,
  options: {
    // If you use remark-gfm, you'll need to use next.config.mjs
    // as the package is ESM only
    // https://github.com/remarkjs/remark-gfm#install
    remarkPlugins: [remarkGfm],
    rehypePlugins: [],
    // If you use `MDXProvider`, uncomment the following line.
    // providerImportSource: "@mdx-js/react",
  },
});

/** @type {import('next').NextConfig} */
const nextConfig = {
  // Configure pageExtensions to include md and mdx
  pageExtensions: ["ts", "tsx", "js", "jsx", "md", "mdx"],
  // Optionally, add any other Next.js config below
  reactStrictMode: true,
};

// Merge MDX config with Next.js config
export default withMDX(nextConfig);
GFM を含んだ MDX ファイルを作成します。
$ mkdir -p src/app/contents/article04
$ touch src/app/contents/article04/page.mdx
# MDX

## GFM

### Autolink literals

www.example.com, https://example.com, and contact@example.com.

### Footnote

A note[^1]

[^1]: Big note.

### Strikethrough

~one~ or ~~two~~ tildes.

### Table

| a   | b   |   c |  d  |
| --- | :-- | --: | :-: |

### Tasklist

- [ ] to do
- [x] done
ローカルで確認します。無事設定が反映されています。

コミット
$ git add .
$ git commit -m "add gfm"
TeX を有効化
数式をMDXで使えるようにします。数式をドキュメントで使う場合はTeXを使います。TeXを使う場合は、remark-mathと組み合わせてrehype-katexかrehype-mathjaxのいずれかを組み合わせて利用します。今回は、rehype-katexを利用します。
$ pnpm add remark-math rehype-katex
// next.config.mjs

import nextMDX from "@next/mdx";
import remarkGfm from "remark-gfm";
+import remarkMath from "remark-math";
+import rehypeKatex from "rehype-katex";

const withMDX = nextMDX({
  extensions: /\.mdx?$/,
  options: {
    // If you use remark-gfm, you'll need to use next.config.mjs
    // as the package is ESM only
    // https://github.com/remarkjs/remark-gfm#install
-    remarkPlugins: [remarkGfm],
+    remarkPlugins: [remarkGfm, remarkMath],
-    rehypePlugins: [],
+    rehypePlugins: [rehypeKatex],
    // If you use `MDXProvider`, uncomment the following line.
    // providerImportSource: "@mdx-js/react",
  },
});

/** @type {import('next').NextConfig} */
const nextConfig = {
  // Configure pageExtensions to include md and mdx
  pageExtensions: ["ts", "tsx", "js", "jsx", "md", "mdx"],
  // Optionally, add any other Next.js config below
  reactStrictMode: true,
};

// Merge MDX config with Next.js config
export default withMDX(nextConfig);
KaTeXの公式ドキュメントに記載されているとおり、TeXのデザインを適応させるため<link>を追加する必要があります。
export default function Layout({ children }: { children: React.ReactNode }) {
  return (
+    <>
+      <link
+        rel="stylesheet"
+        href="https://cdn.jsdelivr.net/npm/katex@0.15.3/dist/katex.min.css"
+        integrity="sha384-KiWOvVjnN8qwAZbuQyWDIbfCLFhLXNETzBQjA/92pIowpC0d2O3nppDGQVgwd2nB"
+        crossOrigin="anonymous"
+      />
      <article className="prose prose-xl">{children}</article>
+    </>
  );
}
TeXを含んだMDXファイルを作成します。
$ mkdir -p src/app/contents/article05
$ touch src/app/contents/article05/page.mdx
# MDX

## TeX

$\TeX$ も使えるよ

$$
  \frac{\pi}{2} =
  \left( \int_{0}^{\infty} \frac{\sin x}{\sqrt{x}} dx \right)^2 =
  \sum_{k=0}^{\infty} \frac{(2k)!}{2^{2k}(k!)^2} \frac{1}{2k+1} =
  \prod_{k=1}^{\infty} \frac{4k^2}{4k^2 - 1}
$$
ローカルで確認します。

コミット
$ git add .
$ git commit -m "add TeX"
シンタックスハイライト(コードの色付け)
コードブロックでシンタックスハイライトを適応させます。
まず、コードブロックを含んだMDXファイルを作成します。
$ mkdir -p src/app/contents/article06
$ touch src/app/contents/article06/page.mdx
コードブロックを含んだMDXファイルを作成します。
ちなみに、実際はバッククォートですが、文章に記載することができないため全角のバッククォートで記載しています。
コピペする場合は、半角のバッククォートに変換してください。
# MDX

## シンタックスハイライト

コードブロックにシンタックスハイライトで色をつけれます!

実際はバッククォートですが、文章に記載することができないため全角のバッククォートで記載しています。
コピペする場合は、半角のバッククォートに変換してください。

```css
p { color: red; }
```
ローカルで確認します。シンタックスハイライトはまだ導入していないため、色がついていません。

シンタックスハイライトを実現するには、以下のようなパッケージで実現できます。
今回は、rehype-prismを利用します。
$ pnpm add @mapbox/rehype-prism
シンタックスハイライトを利用したいページのヘッダーの中でCDNを呼び出して色付けします。
export default function Layout({ children }: { children: React.ReactNode }) {
  return (
    <>
      <link
        rel="stylesheet"
        href="https://cdn.jsdelivr.net/npm/katex@0.15.3/dist/katex.min.css"
        integrity="sha384-KiWOvVjnN8qwAZbuQyWDIbfCLFhLXNETzBQjA/92pIowpC0d2O3nppDGQVgwd2nB"
        crossOrigin="anonymous"
      />
+      <link
+        href="https://cdnjs.cloudflare.com/ajax/libs/prism/1.9.0/themes/prism-tomorrow.min.css"
+        rel="stylesheet"
+      />
      <article className="prose prose-xl">{children}</article>
    </>
  );
}
ローカルで確認します。

コミット
$ git add .
$ git commit -m "add syntax highlight"
目次の追加
MDXに目次を追加します。
目次を追加する方法はいくつかあります。rehype-slugでheadingにidを付与し、remark-tocあるいはrehype-tocを利用し、目次が作成できます。今回は、、remark-tocを利用します。
$ pnpm add rehype-slug remark-toc
// next.config.mjs
import nextMDX from "@next/mdx";
import remarkGfm from "remark-gfm";
import remarkMath from "remark-math";
import rehypeKatex from "rehype-katex";
import rehypePrism from "@mapbox/rehype-prism";
+import rehypeSlug from "rehype-slug";
+import remarkToc from "remark-toc";

const withMDX = nextMDX({
  extensions: /\.mdx?$/,
  options: {
    // If you use remark-gfm, you'll need to use next.config.mjs
    // as the package is ESM only
    // https://github.com/remarkjs/remark-gfm#install
-    remarkPlugins: [remarkGfm, remarkMath],
+    remarkPlugins: [
+      remarkGfm,
+      remarkMath,
+      [remarkToc, { maxDepth: 3, heading: "目次" }],
+    ],
-    rehypePlugins: [rehypeKatex, rehypePrism],
+    rehypePlugins: [rehypeKatex, rehypePrism, rehypeSlug],
    // If you use `MDXProvider`, uncomment the following line.
    // providerImportSource: "@mdx-js/react",
  },
});

/** @type {import('next').NextConfig} */
const nextConfig = {
  // Configure pageExtensions to include md and mdx
  pageExtensions: ["ts", "tsx", "js", "jsx", "md", "mdx"],
  // Optionally, add any other Next.js config below
  reactStrictMode: true,
};

// Merge MDX config with Next.js config
export default withMDX(nextConfig);
MDXファイルを作成します。目次が挿入されました。
$ mkdir -p src/app/contents/article07
$ touch src/app/contents/article07/page.mdx
# MDX

## 目次

## こんにちは

lorem ipsum dolor sit amet, consectetur adipiscing elit, sed do eiusmod tempor incididunt ut labore et dolore magna aliqua.

## おはよう

lorem ipsum dolor sit amet, consectetur adipiscing elit, sed do eiusmod tempor incididunt ut
ローカルで確認します。目次が追加されました。

コミット
$ git add .
$ git commit -m "add toc"
改行の追加
MDXに改行を追加します。
文章だと説明が厳しいので実装しながら理解しましょう。
改行を含んだMDXファイルを作成します。
$ mkdir -p src/app/contents/article08
$ touch src/app/contents/article08/page.mdx
# MDX

## 改行

改行テスト1
改行テスト2

改行テスト3


改行テスト4


改行テスト5
ローカルで確認します。「改行テスト1」と「改行テスト2」の間の改行が反映されていません。

改行を反映するためにremark-breaksをインストールします。
$ pnpm add remark-breaks
// next.config.mjs
import nextMDX from "@next/mdx";
import remarkGfm from "remark-gfm";
import remarkMath from "remark-math";
import rehypeKatex from "rehype-katex";
import rehypePrism from "@mapbox/rehype-prism";
import rehypeSlug from "rehype-slug";
import remarkToc from "remark-toc";
+import remarkBreaks from "remark-breaks";

const withMDX = nextMDX({
  extensions: /\.mdx?$/,
  options: {
    // If you use remark-gfm, you'll need to use next.config.mjs
    // as the package is ESM only
    // https://github.com/remarkjs/remark-gfm#install
    remarkPlugins: [
      remarkGfm,
      remarkMath,
      [remarkToc, { maxDepth: 3, heading: "目次" }],
+      remarkBreaks,
    ],
    rehypePlugins: [rehypeKatex, rehypePrism, rehypeSlug],
    // If you use `MDXProvider`, uncomment the following line.
    // providerImportSource: "@mdx-js/react",
  },
});

/** @type {import('next').NextConfig} */
const nextConfig = {
  // Configure pageExtensions to include md and mdx
  pageExtensions: ["ts", "tsx", "js", "jsx", "md", "mdx"],
  // Optionally, add any other Next.js config below
  reactStrictMode: true,
};

// Merge MDX config with Next.js config
export default withMDX(nextConfig);
ローカルで確認します。無事改行が反映されました。

コミット
$ git add .
$ git commit -m "add breaks"
画像の追加
もちろん画像も追加することができます。
画像を含んだMDXファイルを作成します。目次が挿入されました。
$ mkdir -p src/app/contents/article09
$ touch src/app/contents/article09/page.mdx
# MDX
## 画像の追加

ローカルで確認します。

コミット
$ git add .
$ git commit -m "add image"
まとめ
- Next.js の App Router で MDX を管理する方法を紹介しました。
- MDX をただ使うだけではなく、Markdown の表現を拡張する remarkとrehypeを利用する方法も紹介しました。
- 今回は、Custom Elementの利用、あと今回とは異なりダイナミックにMDXファイルが読み込めるRemote MDXの2点は紹介していません。時間あれば別記事で記載したいと思います。
Discussion