user installable app(ユーザーアプリ)を試す
Discordに、BOTをサーバーに導入するのではなくユーザーに紐づけて、アプリケーションコマンド(スラッシュコマンドとコンテキストメニュー)が使えるようになる機能が出ました。個人的に使う翻訳機能を載せたら便利なんじゃないかということで試した記録です。
対象
自分が説明する事柄を減らすために、以下を前提にします。
- discord.pyのv2.0以降を使っている
- すでにスラッシュコマンドやコンテキストメニューを実装したことがある
TLDR
とりあえずこうすればうまくいくと思いますというリストです。
- v2.4以上のdiscord.pyを使ってください。本記事はv2.4.0で動作確認をしています。
-
discord.app_commandsからallowed_contextsとallowed_installsをコマンドやコンテキストメニューを実装する関数にデコレータとして指定してください。 - ポータルでパブリックボットになっていることを確認し、
Installationタブでユーザーインストールを許可して公式インストールURLのユーザーインストールの権限にapplications.commandsを指定してください -
Install Linkでユーザーにインストールして、使えるか試してみてください。 - 詳細は以下のURLを参照してください。本記事の以下の内容はこれらのページの和訳と解説でできています。
- 公式docのchange log
- 公式docのチュートリアル
- discord.pyで実装されたPR
- discord.pyの最新版のDocのallowed_contextsやallowed_installs
新しい概念
BOTがサーバーではなくユーザーに紐づくようになったことでコマンドに以下のような概念が増えました。この記事では以下の題となっている表現で統一します。
インストールコンテキスト
どこに導入できるか。
サーバーとユーザーのそれぞれについて決められます。
discord apiのコマンドオブジェクトでは、integration_typesと書かれます。
discord.pyではallowed_installsなどを使います。
デフォルトでは、サーバーにのみ導入できます。(つまり、ユーザーにインストールしたい場合は指定が必須です。)
インタラクションコンテキスト
どこで使えるか。
サーバー内、BOTとのDM、プライベートチャンネル(すべてのDMやグループDM)のそれぞれについて決められます。
プライベートチャンネルで使うためには、ユーザーにインストールされている必要があります。
discord apiのコマンドオブジェクトでは、contextsと書かれます。
discord.pyではallowed_contextsなどを使います。
デフォルトでは、使えるすべての場所で使えます。
使い分け
簡単な使い分け表です。それぞれ指定した場合の組み合わせごとの結果を表にしています(多分間違いが含まれています)。
| →インタラクションコンテキスト↓インストールコンテキスト | BOTとのDM | プライベートチャンネル | サーバー |
|---|---|---|---|
| サーバー | 導入されているサーバーに参加しているとき使える | 使えない | 導入されているサーバー内でのみ使える |
| ユーザー | 使える | 全てのDM、グループDMで使える | 全てのサーバーで使える |
試す
discord.pyでは、ユーザーアプリはPRで作業中の機能です(記事の時点)。
ここは、記事を書いている時点で最新の 0c35354 を用います。
以下のコード辺で省略している前後は、以下の通りです。実装と書いてある部分に当てはめるつもりで書いています。
from os import getenv
from discord import Client, Intents, Interaction
from discord.app_commands import (
    CommandTree,
    allowed_installs, guild_install, user_install,
    allowed_contexts, dm_only, guild_only, private_channel_only,
)

class MyClient(Client):
    def __init__(self):
        super().__init__(intents=Intents.default())
        self.tree = CommandTree(self)

    async def setup_hook(self) -> None:
        await self.tree.sync()

    async def on_ready(self):
        print(f'Logged on as {self.user}')

client = MyClient()

# 実装

TOKEN = getenv('DISCORD_BOT_TOKEN', '')
client.run(TOKEN)
参考に、今までの通常のアプリケーションコマンドです。
@client.tree.command()
async def test(interaction: Interaction):
    await interaction.response.send_message('test')
インストールコンテキスト
インストールコンテキストで決められる導入先は二つですが、デコレータは三つあります。
サーバーに導入されたとき
サーバーに導入されているときを指定するには@guild_installを用います。
@client.tree.command()
@guild_install
async def test_install_to_guild(interaction: Interaction):
    await interaction.response.send_message('test install to guild')
ユーザーに導入されたとき
ユーザーに導入されているときを指定するには@user_installを用います。
@client.tree.command()
@user_install
async def test_install_to_user(interaction: Interaction):
    await interaction.response.send_message('test install to user')
両方の場合を指定したいとき
ここまでの二つのデコレータは同時に使用できます。
@client.tree.command()
@guild_install
@user_install
async def test_install_to_guild_and_user(interaction: Interaction):
    await interaction.response.send_message('test install to guild and user')
一つのデコレータで指定する
なお、インストールコンテキストの指定は、@allowed_install()デコレータだけでできます。
両方を指定する場合はこっちの方がすっきりするかもしれません。
サーバーに。
@client.tree.command()
@allowed_installs(guilds=True, users=False)
async def test_install_to_guild_2(interaction: Interaction):
    await interaction.response.send_message('test install to guild (2)')
ユーザーに。
@client.tree.command()
@allowed_installs(guilds=False, users=True)
async def test_install_to_user_2(interaction: Interaction):
    await interaction.response.send_message('test install to user (2)')
両方に。
@client.tree.command()
@allowed_installs(guilds=True, users=True)
async def test_install_to_guild_and_user_2(interaction: Interaction):
    await interaction.response.send_message('test install to guild and user (2)')
インタラクションコンテキスト
インストールコンテキストと同じく、三つの指定に四つのデコレータがあります。
サーバーで使える
@guild_onlyでサーバーで使えることを指定できます。以前からあるものと同じです。
@client.tree.command()
@guild_only
async def test_guild_only(interaction: Interaction):
    await interaction.response.send_message('test guild only')
BOTとのDMで使える
@dm_onlyでBOTとのDMで使えることを指定できます。以前からあるものと同じです。
@client.tree.command()
@dm_only
async def test_dm_only(interaction: Interaction):
    await interaction.response.send_message('test dm only')
DMやグループDMで使える
@private_channel_onlyですべてのDMやグループDMで使えることを指定できます。ただしユーザーに導入されているコマンドに限ります。
@client.tree.command()
@user_install
@private_channel_only
async def test_private_channel_only(interaction: Interaction):
    await interaction.response.send_message('test private channel only')
一つのデコレータで指定する
@allowed_contexts()を使います。(同時に複数使える点も含めて、)インストールコンテキストの方の物と大体同じです。
@client.tree.command()
@user_install
@allowed_contexts(guilds=False, dms=True, private_channels=True)
async def test_dm_or_private_channel_only(interaction: Interaction):
    await interaction.response.send_message('test private channel only (2)')
discord developper portalでの準備
まず、discord developper portalでユーザーアプリを使いたいApplicationのページに移動します。
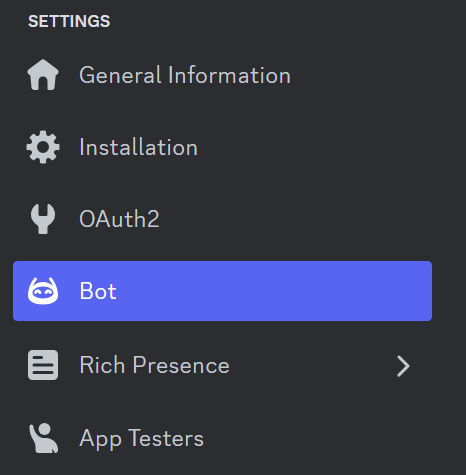
左側にこのsettingsが見えている状態で

Botタブで、BOTがパブリックになっていることを確認します(少なくともユーザーにインストールするまではパブリックボットである必要があります)。

次にInstallationタブで、Authorization MethodsのUser Installにチェックを付けます。

Install LinkをDiscord Provided Linkに設定して、Default Install Settingsは適切に決めてください。
(Guild Installのscopeのbotの権限は以前と同じものです)

見えているInstall Linkに飛んでください。
「今すぐ試す」の方がユーザーにインストールするほうです。

これでクライアントをリロードすると使えるはずです。
終わりに
大部分がカバーできていると思います。
もし質問等あればTwitterかdiscordで聞いてください。私以外に聞く場合にはこの記事のURLを貼ってください。
この記事内のコード片のライセンスは0BSDとします。
Discussion