ASP.NET Core OData + Blazor WebAssembly + Kiota でCookie認証を実装する
概要
ASP.NET Core OData + Blazor WebAssembly + Kiota を使用して、Cookie認証を実装する方法を紹介します。
Blazor WebAssemblyの認証状態管理とKiotaの認証状態管理を統合し、Cookieを使用してASP.NET Core OData APIへ認証済みリクエストを行うところがポイントとなります。
- Blazor WebAssemblyの認証状態を管理する
Microsoft.AspNetCore.Components.Authorization.AuthenticationStateProvider - Kiotaの認証状態を管理する
Microsoft.Kiota.Abstractions.Authentication.IAuthenticationProvider
ASP.NET Core OData や Kiota の基本的な使い方を理解している前提で紹介します。
開発環境
主な開発環境は以下の通りです。
- .NET 9.0
- Microsoft Visual Studio 2022 Community (64ビット) Version 17.14.7
- C# 13.0
- Windows 11 Pro 64bit 24H2 (OSビルド 26100.4652)
- Asp.Versioning.OData 8.2.0
- Asp.Versioning.OData.ApiExplorer 8.2.0
- Microsoft.AspNetCore.OData 9.3.2
- Microsoft.Kiota.Bundle 1.19.0
プロジェクトの構成
デモアプリをGitHubに公開しています。
プロジェクト構成は以下の通りです。
- ProductsApi:
- ASP.NET Core OData で構築したAPIプロジェクトです
- ASP.NET Core Identityを使用して、Cookie認証を実装しています
- BlazorWasm:
- Blazor WebAssembly アプリケーションです
- Kiota を使用して ProductsApi を呼び出します
それでは、解説してきます。
ProductsApi の実装
認証用のエンドポイントをProductsApi.Routing.IdentityApiEndpointRouteBuilderExtensionsに実装しています。ASP.NET Core Identityの個別認証を実装して、Cookie認証を有効にしています。
ODataの実装として、製品のCRUD操作を行うコントローラーであるProductsApi.Controllers.V1.ProductsControllerを実装しました。Asp.Versioning.ODataを使用して、ODataのバージョン管理を行っています。
using Asp.Versioning;
using Asp.Versioning.OData;
using Microsoft.AspNetCore.Authorization;
using Microsoft.AspNetCore.Mvc;
using Microsoft.AspNetCore.OData.Deltas;
using Microsoft.AspNetCore.OData.Query;
using Microsoft.AspNetCore.OData.Results;
using Microsoft.AspNetCore.OData.Routing.Controllers;
using ProductsApi.Data;
using ProductsApi.Models;

namespace ProductsApi.Controllers.V1
{
    /// <summary>
    /// 製品情報を管理する OData API コントローラー (API バージョン 1.0)。
    /// 製品の取得、追加、更新、削除を提供します。
    /// </summary>
    [ApiVersion("1.0")]
    [Authorize]
    public class ProductsController : ODataController
    {
        private readonly ApplicationDbContext _context;

        /// <summary>
        /// <see cref="ProductsController"/> の新しいインスタンスを初期化します。
        /// </summary>
        /// <param name="context">アプリケーションのデータベースコンテキスト。</param>
        public ProductsController(ApplicationDbContext context)
        {
            _context = context;
        }

        /// <summary>
        /// 製品一覧を取得します。
        /// </summary>
        /// <returns>製品のコレクション</returns>
        [HttpGet]
        [EnableQuery]
        [Produces("application/json")]
        [ProducesResponseType<ODataValue<IEnumerable<Product>>>(StatusCodes.Status200OK)]
        public ActionResult<IEnumerable<Product>> Get() => Ok(_context.Products);

        /// <summary>
        /// 指定したキーの製品を取得します。
        /// </summary>
        /// <param name="key">製品ID</param>
        /// <returns>製品情報</returns>
        [HttpGet]
        [EnableQuery]
        [Produces("application/json")]
        [ProducesResponseType<Product>(StatusCodes.Status200OK)]
        [ProducesResponseType(StatusCodes.Status404NotFound)]
        public SingleResult<Product> Get(int key)
            => SingleResult.Create(_context.Products.Where(p => p.Id == key));

        /// <summary>
        /// 新しい製品を追加します。
        /// </summary>
        /// <param name="product">追加する製品情報</param>
        /// <returns>追加結果</returns>
        [HttpPost]
        [Produces("application/json")]
        [ProducesResponseType<Product>(StatusCodes.Status201Created)]
        [ProducesResponseType(StatusCodes.Status400BadRequest)]
        [ProducesResponseType(StatusCodes.Status401Unauthorized)]
        public IActionResult Post([FromBody] Product product)
        {
            if (!ModelState.IsValid)
            {
                return BadRequest(ModelState);
            }

            _context.Products.Add(product);
            _context.SaveChanges();

            var createdProduct = _context.Products.FirstOrDefault(p => p.Id == product.Id);
            return CreatedAtAction(nameof(Get), new { key = createdProduct.Id }, createdProduct);
        }

        /// <summary>
        /// 指定した製品情報を部分更新します。
        /// </summary>
        /// <param name="key">製品ID</param>
        /// <param name="delta">更新内容</param>
        /// <returns>更新結果</returns>
        [HttpPatch]
        [Authorize]
        [Produces("application/json")]
        [ProducesResponseType<Product>(StatusCodes.Status204NoContent)]
        [ProducesResponseType(StatusCodes.Status404NotFound)]
        public IActionResult Patch(int key, [FromBody] Delta<Product> delta)
        {
            var existingProduct = _context.Products.FirstOrDefault(p => p.Id == key);
            if (existingProduct == null)
            {
                return NotFound();
            }

            delta.Patch(existingProduct);

            if (!TryValidateModel(existingProduct))
            {
                return BadRequest(ModelState);
            }

            delta.Patch(existingProduct);
            _context.SaveChanges();

            return NoContent();
        }

        /// <summary>
        /// 指定した製品を削除します。
        /// </summary>
        /// <param name="key">製品ID</param>
        /// <returns>削除結果</returns>
        [HttpDelete]
        [Authorize]
        [Produces("application/json")]
        [ProducesResponseType(StatusCodes.Status204NoContent)]
        [ProducesResponseType(StatusCodes.Status404NotFound)]
        public IActionResult Delete(int key)
        {
            var product = _context.Products.FirstOrDefault(p => p.Id == key);
            if (product == null)
            {
                return NotFound();
            }
            _context.Products.Remove(product);
            _context.SaveChanges();
            return NoContent();
        }
    }
}
Kiotaクライアントの作成
ProductsApiをデバッグ実行します。OpenAPIドキュメントがhttps://localhost:7130/swagger/v1/swagger.jsonで公開されます。
Kiotaを使用してクライアントコードを生成します。以下のコマンドを実行します。
kiota generate -l csharp -c ApiClient -n BlazorWasm.Client -d https://localhost:7130/swagger/v1/swagger.json
生成されたクライアントコードは、BlazorWasmプロジェクトのClientフォルダ内にあります。
Blazor WebAssembly の AuthenticationStateProvider を実装する
Blazor WebAssemblyのAuthenticationStateProviderおよびKiotaのIAuthenticationProviderを実装したCookieAuthenticationStateProviderを作成します。このクラスは、ASP.NET Core IdentityのCookie認証を使用して、ユーザーの認証状態を管理します。
AuthenticationStateProviderの実装では、GetAuthenticationStateAsyncメソッドでProdutsApiで実装したエンドポイントへアクセスし、ユーザー情報を取得します。認証済みのユーザーであればClaimsPrincipalを返します。未認証の場合は、匿名のユーザーを返します。
public override async Task<AuthenticationState> GetAuthenticationStateAsync()
{
    authenticated = false;

    // default to not authenticated
    var user = unauthenticated;

    try
    {
        // the user info endpoint is secured, so if the user isn't logged in this will fail
        using var userResponse = await _httpClient.GetAsync("manage/info");

        // throw if user info wasn't retrieved
        userResponse.EnsureSuccessStatusCode();

        // user is authenticated,so let's build their authenticated identity
        var userJson = await userResponse.Content.ReadAsStringAsync();
        var userInfo = JsonSerializer.Deserialize<UserInfo>(userJson, jsonSerializerOptions);

        if (userInfo != null)
        {
            // in this example app, name and email are the same
            var claims = new List<Claim>
            {
                new(ClaimTypes.Name, userInfo.Email),
                new(ClaimTypes.Email, userInfo.Email),
            };

            // add any additional claims
            claims.AddRange(
                userInfo.Claims.Where(c => c.Key != ClaimTypes.Name && c.Key != ClaimTypes.Email)
                    .Select(c => new Claim(c.Key, c.Value)));

            // set the principal
            var id = new ClaimsIdentity(claims, nameof(CookieAuthenticationStateProvider));
            user = new ClaimsPrincipal(id);
            authenticated = true;
        }
    }
    catch (Exception ex) when (ex is HttpRequestException exception)
    {
        if (exception.StatusCode != HttpStatusCode.Unauthorized)
        {
            logger.LogError(ex, "App error");
        }
    }
    catch (Exception ex)
    {
        logger.LogError(ex, "App error");
    }

    // return the state
    return new AuthenticationState(user);
}
KiotaのIAuthenticationProviderの実装においては、Blazor WebAssemblyの認証状態を確認し、未認証であればUnauthorizedAccessExceptionをスローする実装としています。
public async Task AuthenticateRequestAsync(RequestInformation request, Dictionary<string, object>? additionalAuthenticationContext = null, CancellationToken cancellationToken = default)
{
    var authenticated = await CheckAuthenticatedAsync();
    if (!authenticated)
    {
        throw new UnauthorizedAccessException("User is not authenticated.");
    }
}
CookieAuthenticationStateProvider と ApiClient で使用する HttpClient にてCookieの認証情報を送信するようにする
BlazorWasmプロジェクトのProgram.csにて、Authと名前を付けたHttpClientにCookieHandlerを設定します。これにより、ASP.NET Core IdentityのCookie認証情報が自動的にリクエストに含まれるようになります。また、AttachKiotaHandlers拡張メソッドを使用してKiotaに必要なハンドラーをIHttpClientBuilderに追加します。
// configure client for auth interactions
builder.Services.AddHttpClient(
    "Auth",
    opt => opt.BaseAddress = new Uri(builder.Configuration["BackendUrl"] ?? "https://localhost:5001"))
    .AddHttpMessageHandler<CookieHandler>()
    .AttachKiotaHandlers();
CookieAuthenticationStateProviderではAuthという名前のHttpClientをIHttpClientFactoryから取得します。本HttpClientを使用することで認証情報をリクエストに含めるようになります。
public class CookieAuthenticationStateProvider(IHttpClientFactory httpClientFactory, ILogger<CookieAuthenticationStateProvider> logger)
    : AuthenticationStateProvider, IAccountManagement, IAuthenticationProvider
{

    private readonly HttpClient _httpClient = httpClientFactory.CreateClient("Auth");
}
ApiClientを生成するApiClientFactoryクラスでも、Authという名前のHttpClientをIHttpClientFactoryから取得します。同じく本HttpClientを使用することで認証情報をリクエストに含めるようになります。
public class ApiClientFactory
{
    private readonly IAuthenticationProvider _authenticationProvider;
    private readonly HttpClient _httpClient;

    public ApiClientFactory(IHttpClientFactory httpClientFactory, IAuthenticationProvider authenticationProvider)
    {
        _authenticationProvider = authenticationProvider;
        _httpClient = httpClientFactory.CreateClient("Auth");
    }
}
URLを指定して認証が必要なページにアクセスする場合に対応する
Blazor WebAssemblyでは、Authorize属性はルーティングによるページ遷移のみ機能します。その為、URLを直接入力して認証が必要なページにアクセスしようとする場合に備えてProducts.razorを実装します。
IAuthenticationProviderの実装では未認証の場合はUnauthorizedAccessExceptionをスローするように実装しましたので、Kiotaクライアントを使用する箇所でUnauthorizedAccessException例外をキャッチした場合はログインページへ遷移するようにしています。
@code {
    private List<Product>? _products;

    [CascadingParameter]
    private Task<AuthenticationState> AuthenticationState { get; set; } = null!;

    protected override async Task OnInitializedAsync()
    {
        var authState = await AuthenticationState;
        var user = authState.User;
        if (!user.Identity?.IsAuthenticated ?? true) return;

        try
        {
            var response = await ApiClient.Odata.Products.GetAsync();
            _products = response?.Value ?? new List<Product>();
        }
        catch (UnauthorizedAccessException)
        {
            Navigation.NavigateTo("login");
        }
    }
}
動作確認
マルチスタートアッププロジェクトtestをデバッグ実行して、ProductsApiとBlazorWasmを起動します。同時にSwagger UIが起動しますので、各エンドポイントから予め適当なユーザーとデータを登録しておきます。
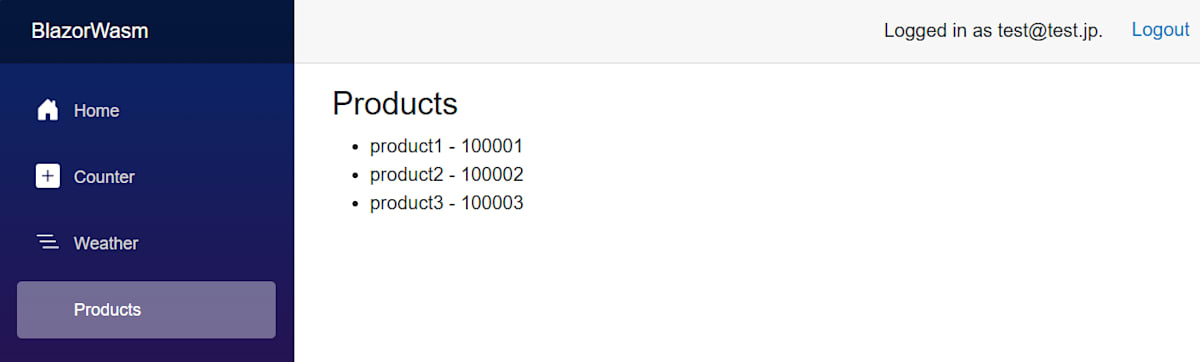
BlazorWasmの画面右上のLoginをクリックして、登録したユーザーでログインします。

左側のメニューにProductsが表示されます。クリックすると、ApiClientがCookieの認証情報と一緒にhttps://localhost:7130/odata/productsエンドポイントへリクエストを送信し、製品一覧を取得します。
今度はLogoutをクリックして、ログアウトします。その後、https://localhost:7258/productsのURLを直接入力してしてProductsページへアクセスしようとすると、KiotaクライアントはUnauthorizedAccessExceptionをスローし、例外処理によりログインページへリダイレクトします。

Discussion