Next.jsを静的htmlにして、GitHub ActionsからS3にデプロイする
静的サイトをGithub ActionsからS3にデプロイするやり方を調べて実装した際の備忘録です。
Next.jsの設定
静的htmlのデプロイを試したいだけだったので今回TypeScriptは使っていません。
create-next-appをします。
npx create-next-app@latest
next buildした後にnext exportというコマンドを実行して、静的htmlをエクスポートすることができます。
package.jsonにスクリプトを書いておきます。
{
  "name": "my-app",
  "version": "0.1.0",
  "private": true,
  "scripts": {
    "dev": "next dev",
    "build": "next build",
+   "export": "next build && next export",
    "start": "next start",
    "lint": "next lint"
  },
  "dependencies": {
    "eslint": "8.29.0",
    "eslint-config-next": "13.0.6",
    "next": "13.0.6",
    "react": "18.2.0",
    "react-dom": "18.2.0"
  }
}
次にpages/index.jsに最低限の修正を加えます。
next exportではサーバー側で画像の最適化を行うnext/imageは使えないため削除します。
import Head from 'next/head'
- import Image from 'next/image'
import styles from '../styles/Home.module.css'
export default function Home() {
return (
<div className={styles.container}>
<Head>
<title>Create Next App</title>
<meta name="description" content="Generated by create next app" />
<link rel="icon" href="/favicon.ico" />
</Head>
<main className={styles.main}>
<h1 className={styles.title}>
Welcome to <a href="https://nextjs.org">Next.js!</a>
</h1>
<p className={styles.description}>
Get started by editing{' '}
<code className={styles.code}>pages/index.js</code>
</p>
<div className={styles.grid}>
<a href="https://nextjs.org/docs" className={styles.card}>
<h2>Documentation →</h2>
<p>Find in-depth information about Next.js features and API.</p>
</a>
<a href="https://nextjs.org/learn" className={styles.card}>
<h2>Learn →</h2>
<p>Learn about Next.js in an interactive course with quizzes!</p>
</a>
<a
href="https://github.com/vercel/next.js/tree/canary/examples"
className={styles.card}
>
<h2>Examples →</h2>
<p>Discover and deploy boilerplate example Next.js projects.</p>
</a>
<a
href="https://vercel.com/new?utm_source=create-next-app&utm_medium=default-template&utm_campaign=create-next-app"
target="_blank"
rel="noopener noreferrer"
className={styles.card}
>
<h2>Deploy →</h2>
<p>
Instantly deploy your Next.js site to a public URL with Vercel.
</p>
</a>
</div>
</main>
<footer className={styles.footer}>
<a
href="https://vercel.com?utm_source=create-next-app&utm_medium=default-template&utm_campaign=create-next-app"
target="_blank"
rel="noopener noreferrer"
>
Powered by{' '}
<span className={styles.logo}>
- <Image src="/vercel.svg" alt="Vercel Logo" width={72} height={16} />
+ <img src="/vercel.svg" alt="Vercel Logo" width={72} height={16} />
</span>
</a>
</footer>
</div>
)
}
また、他のページも追加してみます。ここでは中身は雑ですがAboutページを追加しました。
mkdir pages/about
touch pages/about/index.js
import Head from "next/head";
import styles from "../../styles/Home.module.css";

export default function About() {
  return (
    <div className={styles.container}>
      <Head>
        <title>About Page</title>
        <meta name="description" content="Generated by create next app" />
        <link rel="icon" href="/favicon.ico" />
      </Head>

      <main className={styles.main}>
        <h1 className={styles.title}>About Page</h1>
      </main>

      <footer className={styles.footer}>
        <a
          href="https://vercel.com?utm_source=create-next-app&utm_medium=default-template&utm_campaign=create-next-app"
          target="_blank"
          rel="noopener noreferrer"
        >
          Powered by{" "}
          <span className={styles.logo}>
            <img src="/vercel.svg" alt="Vercel Logo" width={72} height={16} />
          </span>
        </a>
      </footer>
    </div>
  );
}
このままnext exportすると、/pages/about/index.jsはabout.htmlになってしまいます。
/about/index.htmlにするためには、next.config.jsにtrailingSlash:trueを追加します。
/** @type {import('next').NextConfig} */
const nextConfig = {
  reactStrictMode: true,
+ trailingSlash: true,
};

module.exports = nextConfig;
以上でNext.jsのセットアップは終わりです。
S3の設定
まずS3バケットを作成します。
とりあえずS3に置いた静的htmlを公開してアクセスできるようにしたかったので、「パブリックアクセスを全てブロック」はオフにしました。
バケットポリシーはポリシージェネレータで作っており、Resourceは公開するバケット配下を指定し、ActionはS3へのGETを指定しました。
{
    "Version": "2012-10-17",
    "Id": "dummyId",
    "Statement": [
        {
            "Sid": "dummySid",
            "Effect": "Allow",
            "Principal": "*",
            "Action": "s3:GetObject",
            "Resource": "arn:aws:s3:::dummyBucket/*"
        }
    ]
}
そして、静的ウェブサイトホスティングを設定します。
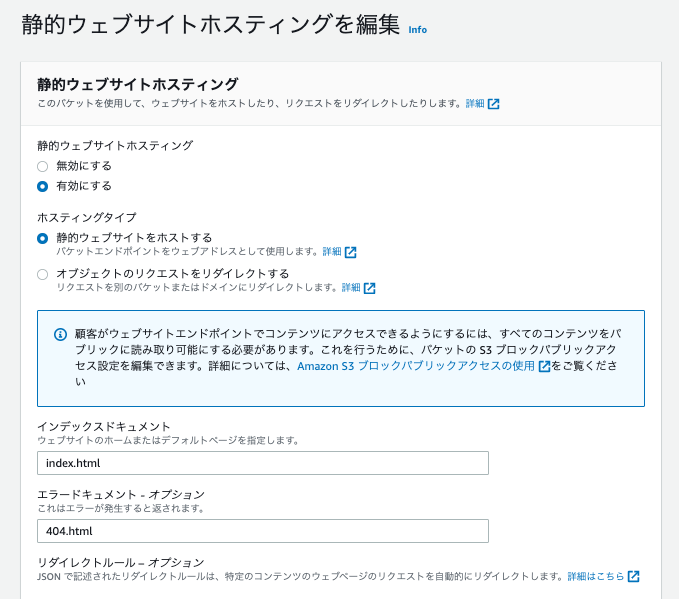
エラードキュメントはnext exportした際にデフォルトで生成される404.htmlを指定しました。
IAMユーザーの設定
次にIAMユーザーを作成します。
Github Actionsから使用するため、AWS 認証情報タイプはアクセスキー - プログラムによるアクセスを選択します。
アクセス許可の設定では既存のポリシーを直接アタッチから、AmazonS3FullAccessを選択しました。
ACCESS_KEY_IDとSECRET_ACCESS_KEYが払い出されるので保管します。
GitHub Actionsの設定
GitHub ActionsからS3にデプロイできるようにします。
github/workflows/deploy.ymlを作成し、以下のように設定することでデプロイできると思います。
なお、ACCESS_KEY_ID,SECRET_ACCESS_KEYはGitHubのsecretsから登録してください。
必要であればバケット名もsecretsで管理すると良いと思います。
name: Build Next And Deploy S3
on:
  push:
    branches:
      - main
jobs:
  deploy:
    runs-on: ubuntu-latest
    steps:
      - name: Checkout
        uses: actions/checkout@master

      - name: Install Dependencies
        run: npm install

      - name: Build And Export
        run: npm run export

      - name: Deploy
        env:
          AWS_ACCESS_KEY_ID: ${{ secrets.AWS_ACCESS_KEY_ID }}
          AWS_SECRET_ACCESS_KEY: ${{ secrets.AWS_SECRET_ACCESS_KEY }}
        run:
          aws s3 sync --region ap-northeast-1 ./out s3://dummy-bucket --delete
※syncコマンドのdeleteオプションを付けておくと、sync先に存在して、sync元では存在しないファイルを消してくれます。
これでmainブランチにpushされるとGitHub ActionsからS3にデプロイされます。
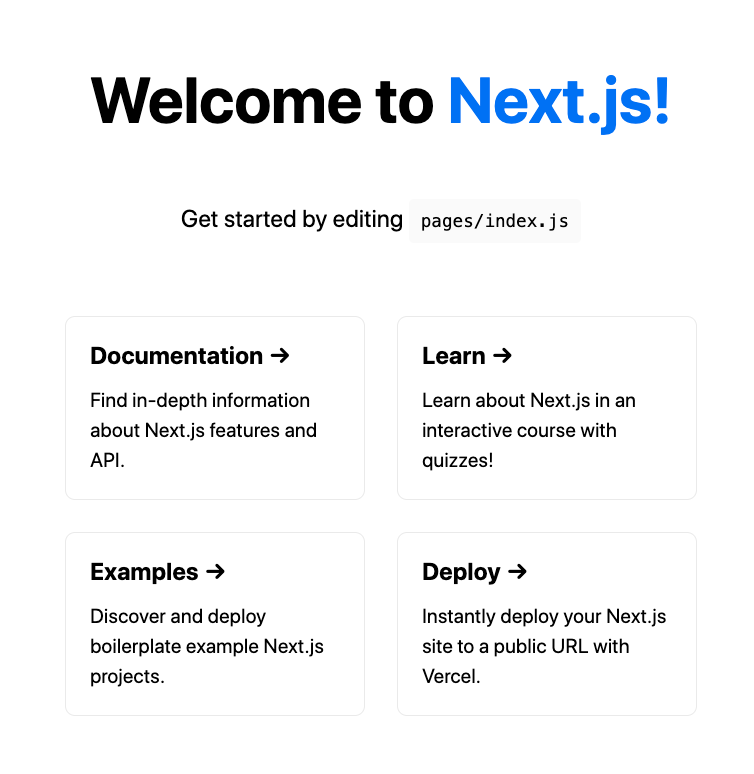
実際にS3にアクセスするとお馴染みの画面が表示されました。
よりセキュアにする
上の設定ではIAMユーザーのクレデンシャルを使用していますが、このクレデンシャルは永続的なものになります。GitHubでsecretsを使って秘匿化しているものの、セキュリティや運用で課題になりやすいとのことです。
そこで、IAMロールの一時的なクレデンシャルを利用することで課題を解決します。
OIDCプロバイダの追加
IAMのアクセス管理のIDプロバイダから以下の設定で追加します。
- プロバイダのタイプ
OpenID Connect - プロバイダ
token.actions.githubusercontent.com - 対象者
sts.amazonaws.com
IAMロールの作成
IAMのアクセス管理のロールからロールを作成します。信頼されたエンティティタイプはAWSのサービスで、ユースケースはS3を選択。
許可ポリシーはAmazonS3FullAccessを選択しました。そしてロールを作成します。
ロール作成後に信頼されたエンティティを編集します。
{
    "Version": "2012-10-17",
    "Statement": [
        {
            "Effect": "Allow",
            "Principal": {
                "Federated": "arn:aws:iam::{AWSアカウントID}:oidc-provider/token.actions.githubusercontent.com"
            },
            "Action": "sts:AssumeRoleWithWebIdentity",
            "Condition": {
                "StringLike": {
                    "token.actions.githubusercontent.com:sub": "repo:{GitHubユーザー名}/{GitHubリポジトリ名}:*"
                }
            }
        }
    ]
}
GitHub Actionsの修正
name: Build Next And Deploy S3
on:
  push:
    branches:
      - main
jobs:
  deploy:
    runs-on: ubuntu-latest
+   permissions:
+     id-token: write
+     contents: read
    steps:
      - name: Checkout
        uses: actions/checkout@master

      - name: Install Dependencies
        run: npm install

      - name: Build And Export
        run: npm run export

+     - name: Configure AWS credentials from IAM Role
+       uses: aws-actions/configure-aws-credentials@v1
+       with:
+         role-to-assume: arn:aws:iam::${{ secrets.AWS_ACCOUNT_ID }}:role/dummy-iam-role
+         aws-region: ap-northeast-1

      - name: Deploy
-       env:
-         AWS_ACCESS_KEY_ID: ${{ secrets.AWS_ACCESS_KEY_ID }}
-         AWS_SECRET_ACCESS_KEY: ${{ secrets.AWS_SECRET_ACCESS_KEY }}
        run:
          aws s3 sync --region ap-northeast-1 ./out s3://dummy-bucket --delete
role-to-assumeはGitHub Actions用に作成したIAMロールのARNを指定します。AWSアカウントIDはセキュリティの観点から秘匿化しています。
以上です。
Discussion