Internet Identity認証の利用
はじめに
分散型クラウド環境『Internet Computer』が提供する『Internet Identity(II)』と呼ばれるユーザー認証システムを、Frontendアプリケーションから利用する方法について解説します。
Internet Identityとは…
Internet Identitityは、Internet Computer上で動作する各Dappsにユーザー認証機能を提供します。WebAuthnに対応しており、パスワードを使わずにノートパソコンやスマートフォンでの生体認証やYubiKeyなどのデバイスを利用したユーザー認証ができます。
ユーザーごとに『Identity Anchor』と呼ばれる一意の数値が割り当てられ、各Dappからは『Principal』という識別子で取り扱われます。同一ユーザーでもDappごとにPrincipalが変わるため、Dappをまたいでユーザーをトラッキングしにくいという特徴があります。
サンプルの概要
以下のCanisterを開発します。
| Canister | 概要 |
|---|---|
| Backend | 呼び出し元のPrincipalを返します。 |
| Frontend | Internet Identityを使ってユーザー認証を行い、Backendを呼び出します。 |
開発
1. プロジェクトの作成
dfx newコマンドで、ひな型プロジェクトを用意します。
(1) Backend language
本記事では、Backend開発にRustを使用します。
$ dfx new iitest
? Select a backend language: ›
  Motoko
❯ Rust
  TypeScript (Azle)
  Python (Kybra)
(2) Frontend framework
本記事では、なるべくシンプルな解説とするためVanilla JSを選択します。
? Select a frontend framework: ›
  SvelteKit
  React
  Vue
❯ Vanilla JS
  No JS template
  No frontend canister
(3) Extra features
Internet Identityをチェックします。
? Add extra features (space to select, enter to confirm) ›
✔ Internet Identity
⬚ Bitcoin (Regtest)
⬚ Frontend tests
2. ディレクトリ構造
dfx newコマンドの実行が終わると、以下のディレクトリとファイルが作成されます。
iitest
├── .git
│   ︙
├── .gitignore
├── Cargo.lock
├── Cargo.toml
├── README.md
├── dfx.json
├── node_modules
│   ︙
├── package-lock.json
├── package.json
├── src
│   ├── iitest_backend
│   │   ├── Cargo.toml
│   │   ├── iitest_backend.did
│   │   └── src
│   │       └── lib.rs
│   └── iitest_frontend
│       ├── assets
│       │   ├── .ic-assets.json5
│       │   └── favicon.ico
│       ├── index.html
│       ├── package.json
│       ├── src
│       │   ├── App.js
│       │   ├── index.scss
│       │   ├── logo2.svg
│       │   ├── main.js
│       │   └── vite-env.d.ts
│       ├── tsconfig.json
│       └── vite.config.js
└── tsconfig.json
開発のために、プロジェクトディレクトリに移動しましょう。
$ cd iitest
3. Backendの修正
呼び出し元のPrincipalを返すだけのqueryメソッドを用意します。
(1) src/iitest_backend/iitest_backend.did
Canisterが提供するqueryメソッドを定義します。
service : {
    "whoami": () -> (text) query;
}
(2) src/iitest_backend/src/lib.rs
ic_cdk::caller()で呼び出し元のPrincipalが取得できますので文字列に変換して返します。
#[ic_cdk::query]
fn whoami() -> String {
    ic_cdk::caller().to_string()
}
4. Frontendの修正
FrontendでInternet Identityを利用するには、@dfinity/auth-clientパッケージのインストールが必要です。
npmコマンドなどでインストールします。
$ npm install -w src/iitest_frontend --save @dfinity/auth-client
パッケージを最新化する場合
dfx newコマンドで出力された内容が古い場合、パッケージの依存関係の問題で@dfinity/auth-clientパッケージのインストールに失敗する場合があります。
そのような場合には、ncu (npm-check-updates)などを使って各パッケージを最新化しておくとよいでしょう。
$ ncu -ws -u
Upgrading /home/toshio/workspace/hello/iitest/src/iitest_frontend/package.json
[====================] 12/12 100%

 @dfinity/agent             ^0.20.0  →   ^1.3.0
 @dfinity/candid            ^0.20.0  →   ^1.3.0
 @dfinity/principal         ^0.20.0  →   ^1.3.0
 @testing-library/jest-dom  ^5.16.5  →   ^6.4.6
 cross-fetch                 ^3.1.6  →   ^4.0.0
 dotenv                     ^16.3.1  →  ^16.4.5
 lit-html                    ^2.8.0  →   ^3.1.4
 sass                       ^1.63.6  →  ^1.77.5
 typescript                  ^5.1.3  →   ^5.4.5
 vite                        ^4.3.9  →   ^5.3.0
 vitest                     ^0.32.2  →   ^1.6.0

Run npm install to install new versions.
$ npm install
src/iitest_frontend/src/App.js
テンプレート出力されたFrontendソースファイルのうち、メインページの部分を以下に差し替えます。
あくまでも一例にすぎませんので、本格的に開発する際には使用するFrontend frameworkに適した形で実装してください。
import { html, render } from 'lit-html';
import { Actor } from "@dfinity/agent";
import { AuthClient } from "@dfinity/auth-client";
import { iitest_backend } from 'declarations/iitest_backend';

class App {
  message = '';
  authClient = null;

  constructor() {
    this.checkAuth();
  }

  async checkAuth() {
    try {
      this.authClient = await AuthClient.create();
    } finally {
      this.render();
    }
  }

  async render() {
    const principal = this.authClient?.getIdentity().getPrincipal();
    const isAuthenticated = await this.authClient?.isAuthenticated();

    let body = html`
      <main>
        <h2>Welcome, ${principal}</h2>
        <button id="buttonLogin" ?disabled=${isAuthenticated}>Login</button>
        <button id="buttonLogout" ?disabled=${!isAuthenticated}>Logout</button>
        <br/>
        <button id="buttonWhoami">whoami</button>
        <section>${this.message}</section>
      </main>
    `;
    render(body, document.getElementById('root'));
    document.getElementById('buttonLogin').onclick  = ()=>this.buttonLogin();
    document.getElementById('buttonLogout').onclick = ()=>this.buttonLogout();
    document.getElementById('buttonWhoami').onclick = ()=>this.buttonWhoami();
  }

  async buttonLogin() {
    try {
      await new Promise((resolve, reject)=>{
        this.authClient?.login({
          identityProvider: process.env.DFX_NETWORK === 'ic' ?
            'https://identity.ic0.app/#authorize' :
            `http://${process.env.CANISTER_ID_INTERNET_IDENTITY}.localhost:4943/#authorize`,
          maxTimeToLive: BigInt(7 * 24 * 60 * 60 * 1000 * 1000 * 1000),
          onSuccess: resolve,
          onError: reject
        });
      });
    } catch (e) {
      alert(e);
    } finally {
      this.render();
    }
  }

  async buttonLogout() {
    await this.authClient?.logout();
    this.render();
  }

  async buttonWhoami() {
    if (this.authClient) {
      // Change identity
      const agent = Actor.agentOf(iitest_backend);
      agent.replaceIdentity(this.authClient.getIdentity());

      // Invoke backend
      const whoami = await iitest_backend.whoami();
      this.message = `${whoami}`;
      this.render();
    }
  }
}

export default App;
プログラム解説
AuthClient.create()で生成したAuthClientインスタンスのlogin()関数、logout()関数、isAuthenticated()関数、getIdentity()関数などを用いてユーザー認証制御を行います。
dfx deployコマンド実行時にdeclarationsディレクトリ配下に出力されるBackend Canisterの呼び出し処理iitest_backend.whoami()は通常匿名ユーザーで実行されますが、以下のようにauthClient.getIdentity()関数で取得したIdentityを割り当てることによって、認証したユーザーでBackend canisterを呼び出すことができます。
const agent = Actor.agentOf(iitest_backend);
agent.replaceIdentity(this.authClient.getIdentity());
5. Local Canister実行環境の起動
dfx startコマンドでLocal Canister実行環境を起動します。
$ dfx start --background --clean
6. Deploy
dfx deployコマンドでLocal Canister実行環境にCanisterをDeployします。
$ dfx deploy
Deploying all canisters.
Creating canisters...
︙
Deployed canisters.
URLs:
  Frontend canister via browser
    iitest_frontend:
      - http://127.0.0.1:4943/?canisterId=bd3sg-teaaa-aaaaa-qaaba-cai
      - http://bd3sg-teaaa-aaaaa-qaaba-cai.localhost:4943/
    internet_identity:
      - http://127.0.0.1:4943/?canisterId=be2us-64aaa-aaaaa-qaabq-cai
      - http://be2us-64aaa-aaaaa-qaabq-cai.localhost:4943/
  Backend canister via Candid interface:
    iitest_backend: http://127.0.0.1:4943/?canisterId=br5f7-7uaaa-aaaaa-qaaca-cai&id=bkyz2-fmaaa-aaaaa-qaaaq-cai
    internet_identity: http://127.0.0.1:4943/?canisterId=br5f7-7uaaa-aaaaa-qaaca-cai&id=be2us-64aaa-aaaaa-qaabq-cai
7. 実行
dfx deployコマンド実行時に表示される、iitest_frontendのURLをブラウザから開きます。
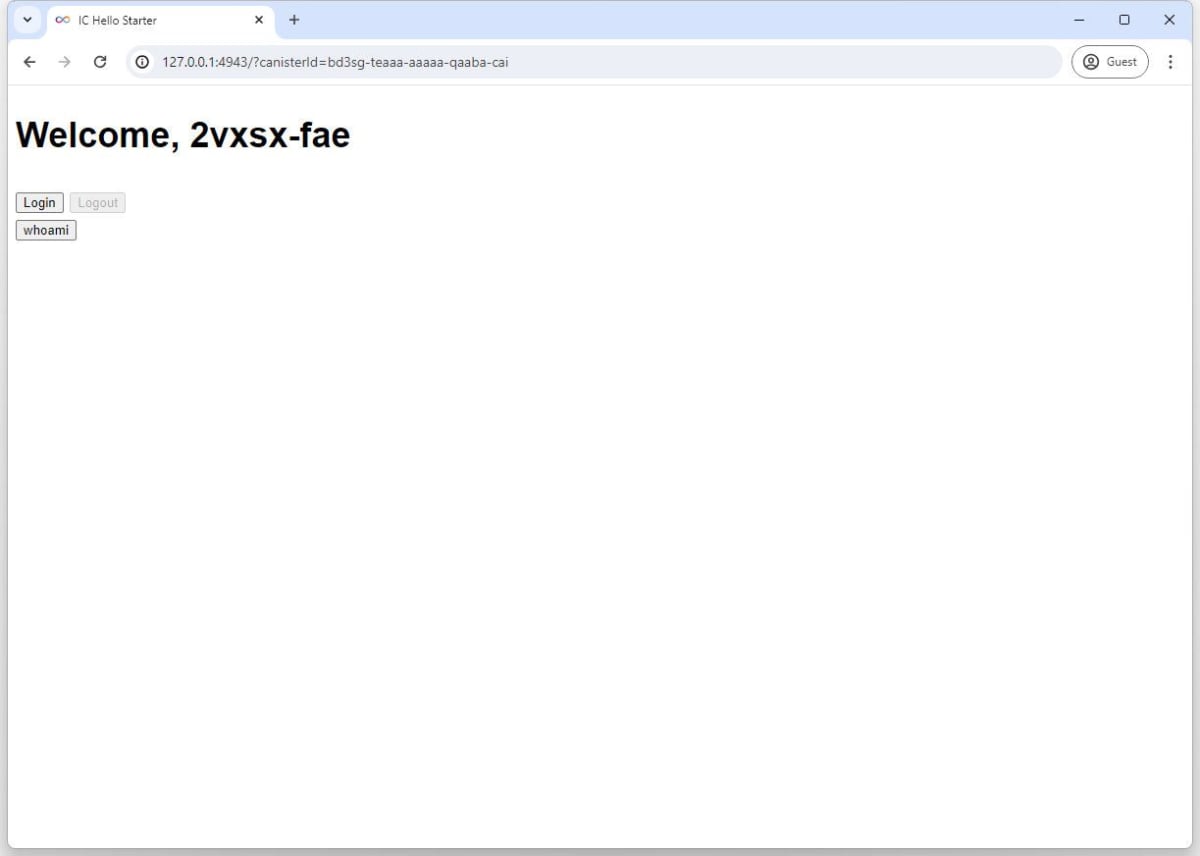
(1) ログイン前のBackend呼び出し
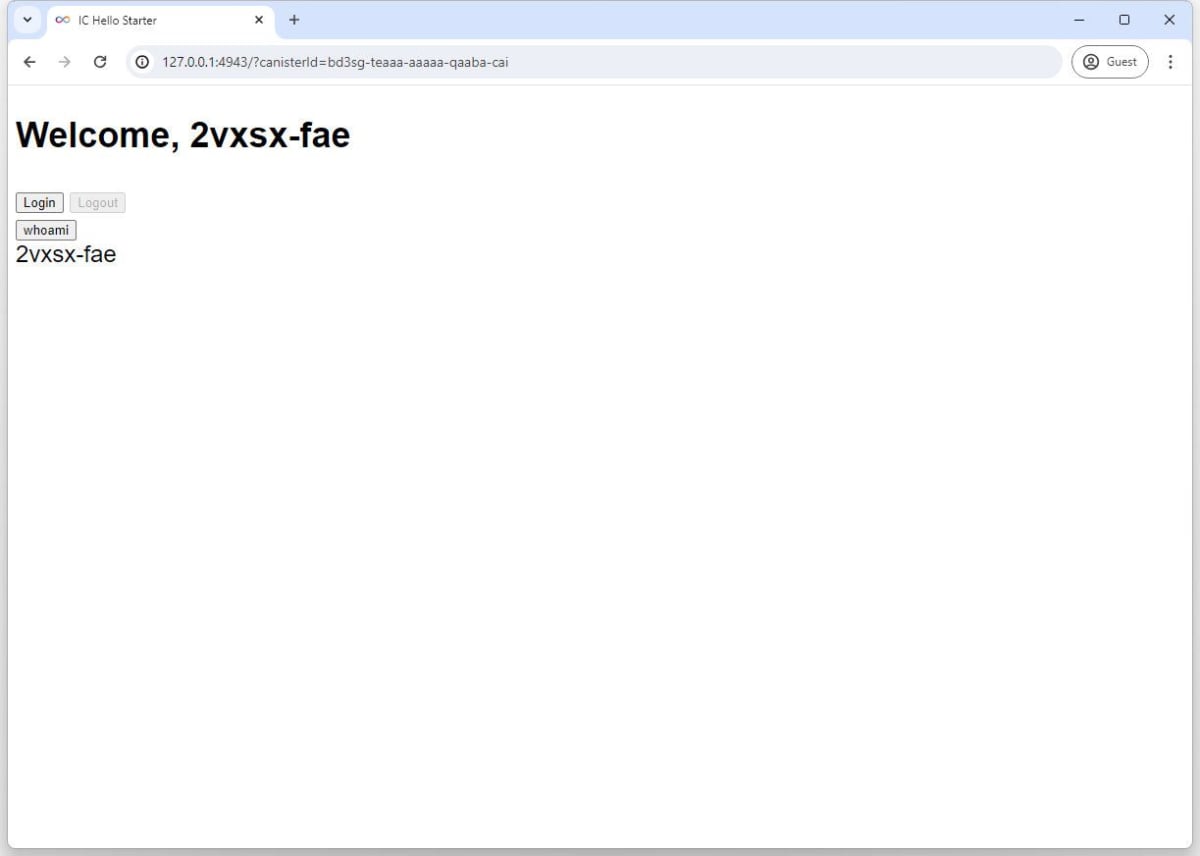
[whoami]ボタンをクリックすると、Backendから匿名のPrincipalを示す『2vxsx-fae』が返ってきます。
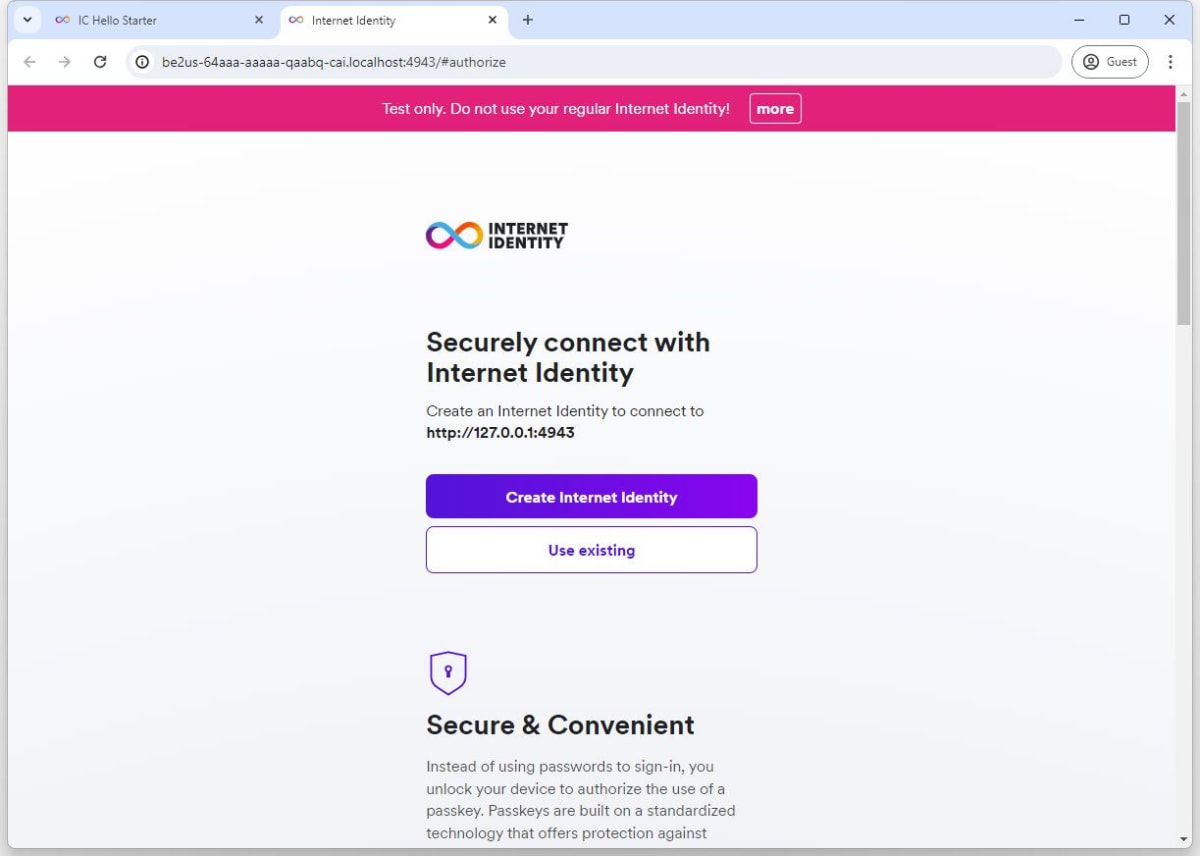
(2) Internet Identityユーザー作成
[login]ボタンをクリックすると、新しいタブにLocal Canister実行環境にDeployしたテスト用のInternet Identity認証画面が表示されます。
初回起動時はまだ何のユーザーも登録されていませんので、
[Create Internet Identity]ボタンをクリックして、新しいユーザーを作成します。
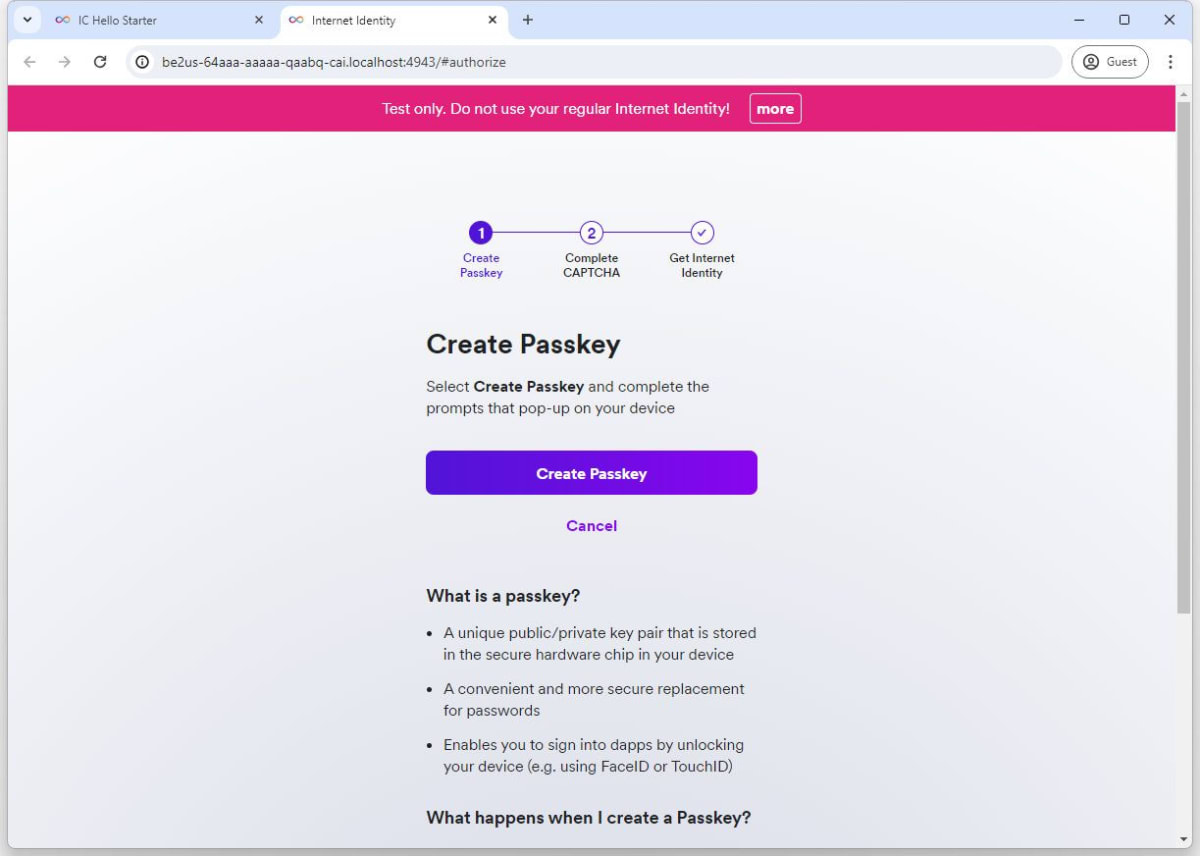
(3) Passkey作成
[Create Passkey]ボタンをクリックします。
テスト用のInternet Identityですのでデバイス登録は不要です。
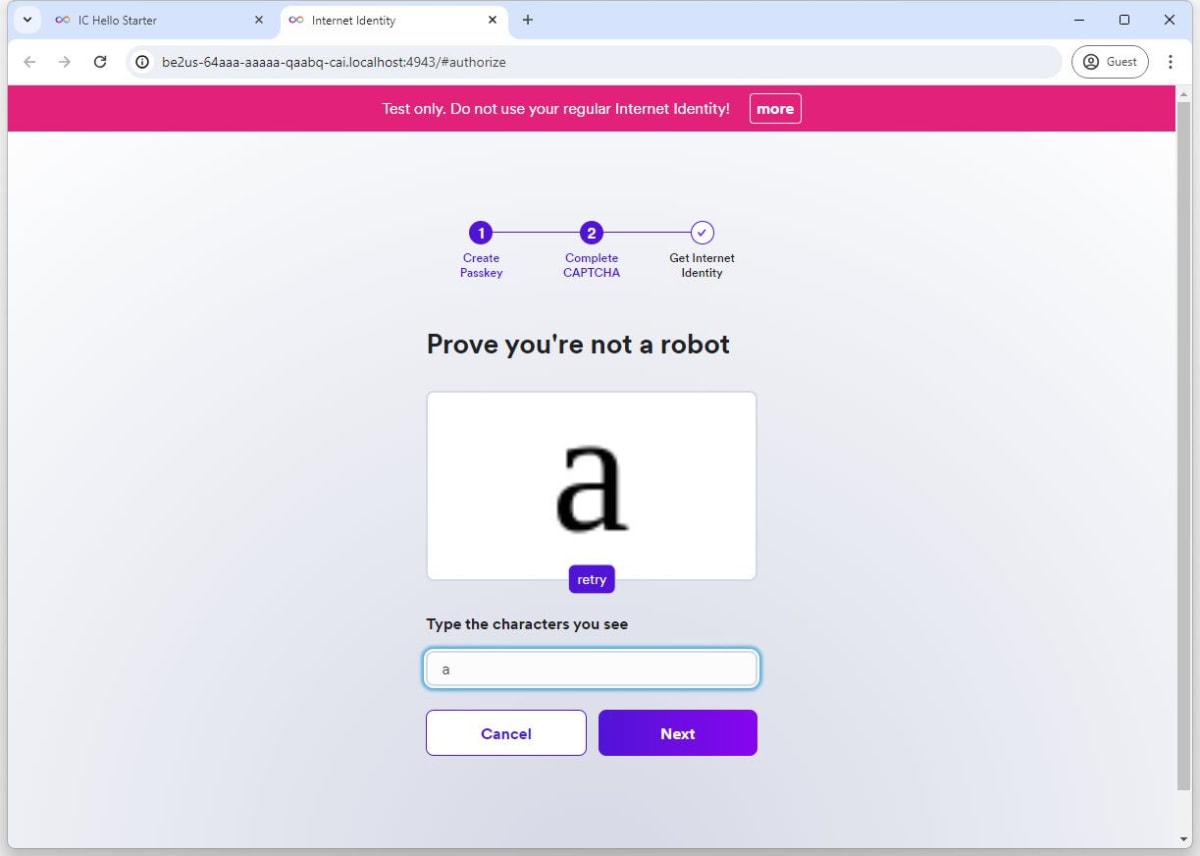
(4) CAPTCHA画面
Botでないことの確認をします。
テスト用ですので、aと入力して[Next]をクリックします。
(5) テスト用のユーザー作成完了
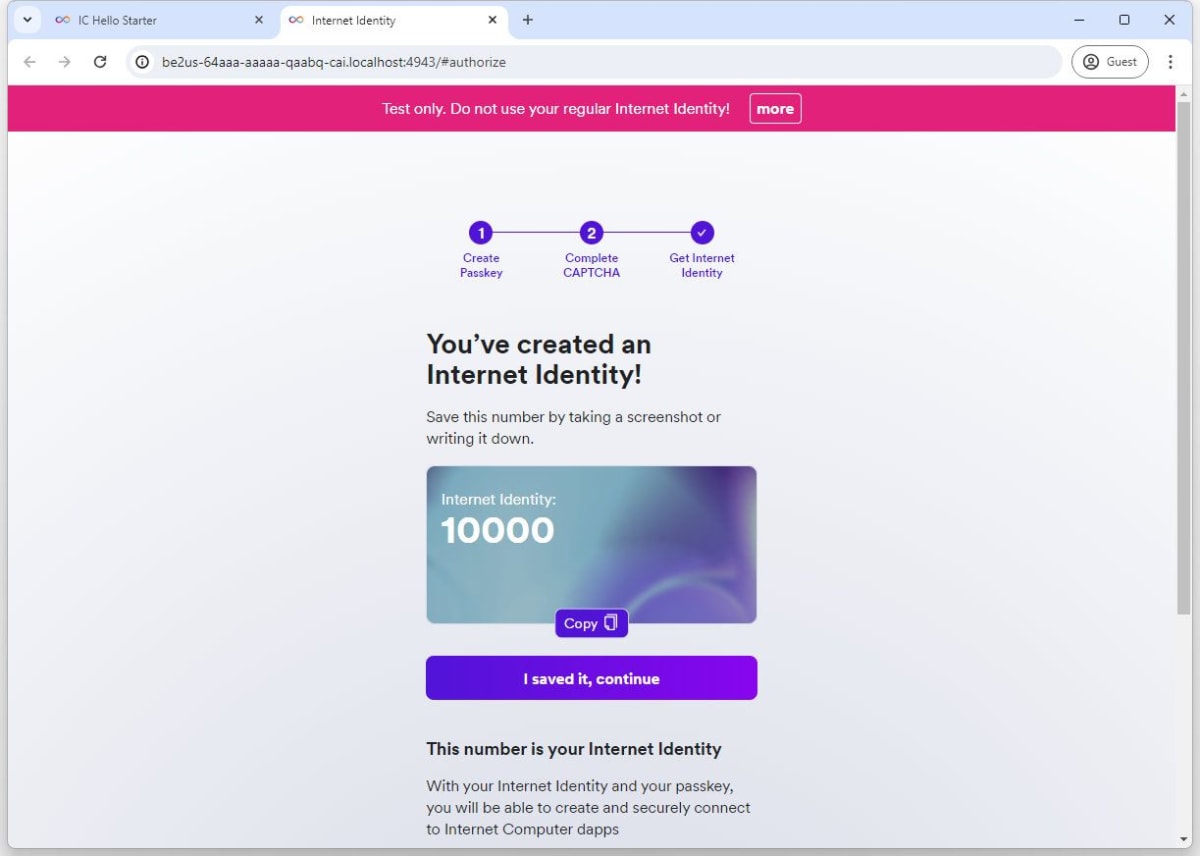
Identity Anchorが 10000のユーザーが作成されます。
[I saved it, continue]ボタンをクリックすると認証が完了してタブがクローズします。
(6) ユーザー認証済画面
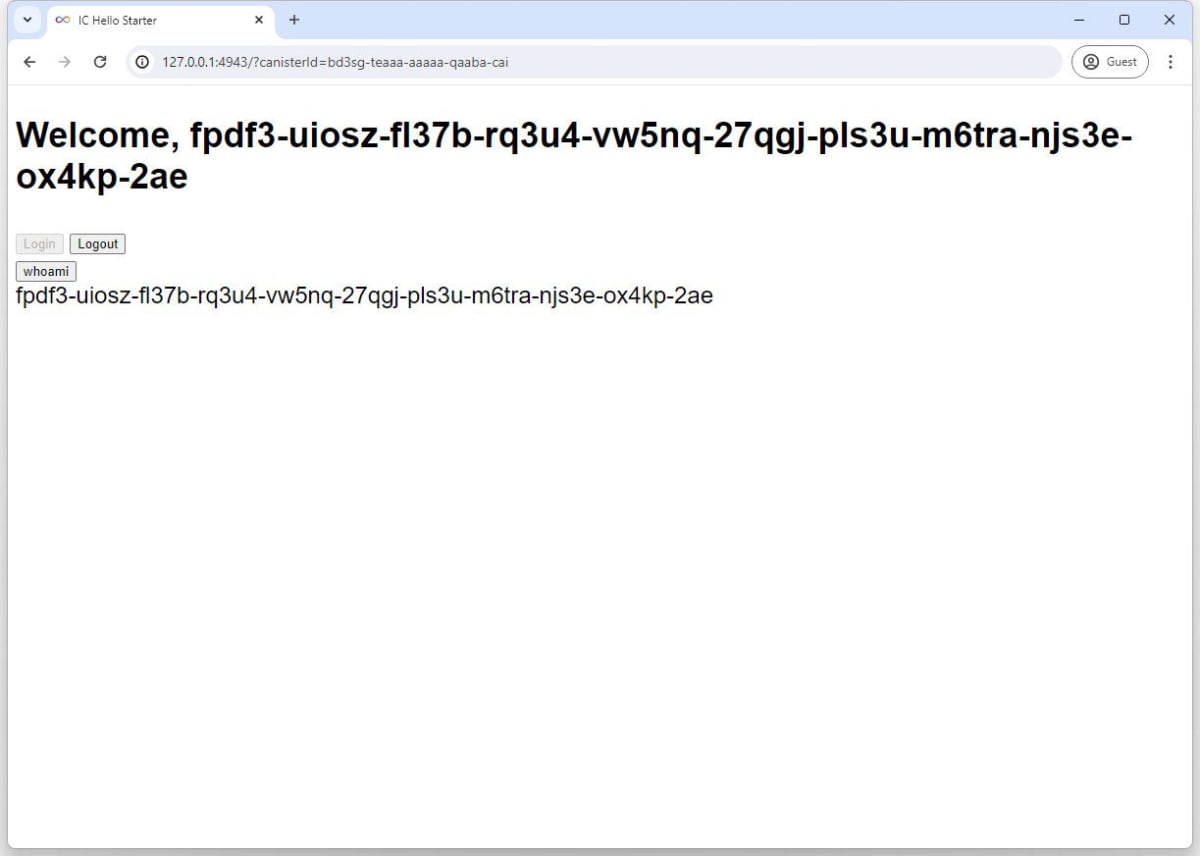
元のタブに戻るとユーザー認証が完了し、一意のPrincipalが割り当てられます。
『Welcome, xxxx-xxxx-…』と表示されているのがFrontend側で取得したPrincipalになります。
また、[whoami]ボタンをクリックすると、Backend Canisterが呼び出され、戻り値である呼び出し元Principalと一致していることも確認できます。
公式リファレンス
Discussion