🙆♀️
STM32でZephyrRTOS入門~Windows+PlatformIOで環境構築~
はじめに
前回記事ではWindowsのWSL上にZephyr RTOS環境を構築し、NucleoF103RBボードを使って学習を試みた。しかし、Windows->WSLへのUSB制御権の取り回しが煩雑で非効率だったため、環境を見直すこととした。
過去にWindows上のVSCode+PlatformIOでZephyrRTOS環境を動かした経験があることから、今回もこの構成で進める。
前提
- ホストOS: Windows11
- 使用するボード: NucleoF103RB Rev.C-03
- VSCode: ver.1.104.1
- PlatformIO: ver.6.1.18
※ 筆者環境には上記の他STM32CubeIDE, STLinkDriverなどSTM32の開発ツールがインストール済み。PlatformIOで環境構築するにあたり必須か否かは不明。
手順
- PlatformIOでNewProjectを作成。
- FrameworkにZephyr RTOSを選択。
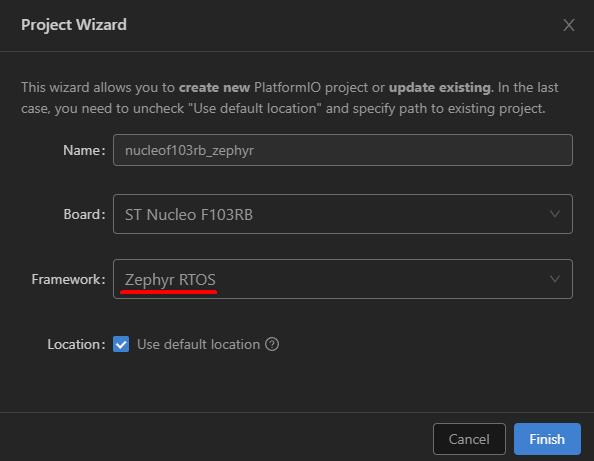
※初回セットアップには10分程度かかる。
サンプルコードのビルド、書き込み
C:\Users{ユーザ名}.platformio\packages\framework-zephyr\samples\basic\blinky\src
のmain.cを拝借。
main.c
#include <stdio.h>
#include <zephyr/kernel.h>
#include <zephyr/drivers/gpio.h>

/* 1000 msec = 1 sec */
#define SLEEP_TIME_MS   1000

/* The devicetree node identifier for the "led0" alias. */
#define LED0_NODE DT_ALIAS(led0)

/*
 * A build error on this line means your board is unsupported.
 * See the sample documentation for information on how to fix this.
 */
static const struct gpio_dt_spec led = GPIO_DT_SPEC_GET(LED0_NODE, gpios);

int main(void)
{
	int ret;
	bool led_state = true;

	if (!gpio_is_ready_dt(&led)) {
		return 0;
	}

	ret = gpio_pin_configure_dt(&led, GPIO_OUTPUT_ACTIVE);
	if (ret < 0) {
		return 0;
	}

	while (1) {
		ret = gpio_pin_toggle_dt(&led);
		if (ret < 0) {
			return 0;
		}

		led_state = !led_state;
		printf("LED state: %s\n", led_state ? "ON" : "OFF");
		k_msleep(SLEEP_TIME_MS);
	}
	return 0;
}
VSCode画面下の→アイコンで書き込み実行。

書き込みが成功するとNucleoF103RBオンボードのLEDが1秒間隔でチカチカする。
おわりに
非常に少ない手数で環境を構築でき、サンプルコードもすぐに動かすことができた。
引き続きペリフェラルの制御やZephyrのAPIを使った学習を進めたい。
Discussion