AWS Amplify で Next.js App Router を利用する
はじめに
上記ブログでもあるように、 Amplify で Next.js App Router を利用することができるようになりました。
今回は Amplify で Next.js App Router を利用する方法に加え、Amplify Backend で Auth (Cognite) と API (GraphQL + DynamoDB) を追加し、簡易的な CRUD アプリケーションを作成します。
対象読者
- AWS Amplify で Next.js App Router を利用したい方
- AWS アカウントをお持ちの方
- AWS の基本的な知識をお持ちの方
- Next.js の基本的な知識をお持ちの方
- TypeScript の基本的な知識をお持ちの方
事前準備
上記の docs に沿って、事前準備を行います。
※ Node.js と Git がインストールされていることを前提とします。
AWS アカウントの作成
AWS アカウントを持っていない方は、上記の docs から「Create AWS Account」のリンクをクリックして、AWS アカウントを作成します。
※ admin 権限を持った IAM ユーザーを作成し、その IAM ユーザーでログインすることをおすすめします。
Amplify CLI のインストール
Amplify CLI をインストールします。
npm install -g @aws-amplify/cli
Amplify CLI の初期化
Amplify CLI を初期化します。
amplify configure
上記コマンドを叩くと、ブラウザが開きますので、AWS アカウントでログインしてください。
ログイン後、以下のような画面が表示されるので、「Continue」をクリックしてください。
❯ amplify configure
Follow these steps to set up access to your AWS account:

Sign in to your AWS administrator account:
https://console.aws.amazon.com/
Press Enter to continue
次にターミナルで region を選択します。
※ 今回は ap-northeast-1 を選択します。
Specify the AWS Region
? region:  ap-northeast-1
次にブラウザで Amplify 用の IAM ユーザーを作成します。
詳細は docs の Enter a User name and select Next. You can name the user anything but we'll call it "amplify-dev". から始まるを参照してください。
docs ではユーザを amplify-dev で、ポリシーを AdministratorAccess-Amplify で作成しています。
ユーザを作成したら、アクセストークンを発行します。
amplify-dev をクリックし、「セキュリティ認証情報」のタブをクリックし、「アクセストークン」のセクションからアクセスキーを発行します。
docs に沿って進めていくと、ターミナルに戻り、Enterを押すと、Access key と Secret access key を求められるので、コピペして入力します。
※ AWS Profile を求められるので、利用している端末で初めて設定するのであれば default 、もしすでに default が設定してある場合は amplify-dev など、わかりやすい名称が良いと思います。
Enter the access key of the newly created user:
? accessKeyId:  # YOUR_ACCESS_KEY_ID
? secretAccessKey:  # YOUR_SECRET_ACCESS_KEY
This would update/create the AWS Profile in your local machine
? Profile Name:  # (default)

Successfully set up the new user.
設定が終了すると以下に設定が追加されます。(アクセスキー等は第三者に漏れないように気をつけましょう)
cat ~/.aws/profile
cat ~/.aws/credentials
これで Amplify CLI の初期化は完了です。
Next.js プロジェクトの作成
Next.js プロジェクトを作成します。
ここでは docs に習って、--no-eslint と --no-tailwind を指定しています。
プロジェクト名は next-amplified としています。
npm create next-app@14 -- next-amplified --ts --no-eslint --src-dir --import-alias '@/*' --no-tailwind --app
cd next-amplified
localhost で動作確認します。
npm run dev
Next.js のデフォルトのページが表示されれば OK です。
Amplify Backend の準備
Amplify プロジェクトの初期化
Amplify プロジェクトを初期化します。
amplify init
各種設定が求められるので、必要に応じて選択します。お試しであれば、基本デフォルトで良いと思います。以下はデフォルトで回答しています。
? Enter a name for the project (nextamplified)
The following configuration will be applied:

Project information
| Name: next-amplified
| Environment: dev
| Default editor: Visual Studio Code
| App type: javascript
| Javascript framework: react
| Source Directory Path: src
| Distribution Directory Path: build
| Build Command: npm run-script build
| Start Command: npm run-script start

? Initialize the project with the above configuration? Yes
Using default provider  awscloudformation
? Select the authentication method you want to use: AWS profile

For more information on AWS Profiles, see:
https://docs.aws.amazon.com/cli/latest/userguide/cli-configure-profiles.html

? Please choose the profile you want to use: default
※ AWS Profile を amplify-dev で登録している場合は、default ではなく amplify-dev を選択してください。
上記設定が終わると、以下が追加されます
- プロジェクトルートに
amplifyディレクトリが追加される- amplify に関連するファイル郡
-
srcディレクトリにamplifyconfiguration.jsonとaws-exports.jsファイルが追加される- frontend アプリケーションから amplify backend にアクセスするためのファイル
- これら2つのファイルは自動更新されるため、直接編集しない。また .gitignore の対象なので、取り扱いに気をつける
Amplify ライブラリの追加
次に Amplify ライブラリを追加します。 Next.js を利用するため、専用の adapter も合わせて追加します。
npm install aws-amplify @aws-amplify/adapter-nextjs
これは後ほど追加する Auth や API などの Amplify Backend に、React や React Server Components から接続するためのライブラリです。
以上で Amplify Backend の準備が整いました。
Amplify Backend の追加
続いて、Amplify Backend を追加していきます。
API を追加
amplify add api
ここでは GraphQL を選択し、テンプレートは Single object with fields (e.g., “Todo” with ID, name, description) を選択します。
? Select from one of the below mentioned services:
> GraphQL
? Here is the GraphQL API that we will create. Select a setting to edit or continue
> Continue
? Choose a schema template:
> Single object with fields (e.g., “Todo” with ID, name, description)
...
Edit your schema at <...>/schema.graphql or place .graphql files in a directory at <...>/schema
✔ Do you want to edit the schema now? (Y/n)
> yes
Edit the file in your editor: <...>/schema.graphql
✅ Successfully added resource new locally
上記テンプレートを利用すると、以下のように認証なしのフルアクセスでスキーマが生成されので、取り扱いにご注意ください。
# This "input" configures a global authorization rule to enable public access to
# all models in this schema. Learn more about authorization rules here: https://docs.amplify.aws/react/build-a-backend/graphqlapi/customize-authorization-rules/

input AMPLIFY {
  globalAuthRule: AuthRule = { allow: public }
} # FOR TESTING ONLY!
type Todo @model {
  id: ID!
  name: String!
  description: String
}
デフォルトだと JavaScript で GraphQL を利用することになるので、次のコマンドを実行し、 TypeScript に変更します。
typescript を選択後、すべてデフォルトを選択しました。
amplify configure codegen

? Choose the code generation language target typescript
? Enter the file name pattern of graphql queries, mutations and subscriptions src/graphql/**/*.ts
? Enter the file name for the generated code src/API.ts
? Enter maximum statement depth [increase from default if your schema is deeply nested] 2
Codegen configured. Remember to run "amplify codegen" to generate your types and statements.
以下で型定義やクエリなどのコードが生成されます。
amplify codegen

✔ Downloaded the schema
✔ Generated GraphQL operations successfully and saved at src/graphql
✔ Code generated successfully and saved in file src/API.ts
Amplify Backend に反映します。
amplify push
Auth を追加
続いて Auth を追加します。デフォルトで進めています。
amplify add auth

? Do you want to use the default authentication and security configuration? Default configuration
? How do you want users to be able to sign in? Username
? Do you want to configure advanced settings?  No, I am done.
続いて、 Amplify UI コンポーネントを利用するため、以下のライブラリを追加します。
npm install @aws-amplify/ui-react
2023/12/10 現在、新規登録やログインについては Client Component でのライブラリ利用が必要です。以下の画像は Amplify UI で提供している Authenticator コンポーネントで、後ほど hooks で利用します。
API を Auth で保護する
ここまでの設定だと schema が allow: public になっていることに加え、 API の認可が API key になっているので、どのユーザが登録しても、すべてのユーザで登録したデータがCRUDできてしまいます。
これを Amazon Cognito User Pool を利用して、ログインユーザごとで認可を分けるように変更します。
まずは schema に @auth ディレクティブを追加します。
※ 詳細は docs の Customize authorization rules を参照してください。
type Todo @model @auth(rules: [{ allow: owner }]) {
  id: ID!
  name: String!
  description: String
}
次に型やクエリなどのコードを再生成します。
amplify codegen
続いて amplify update api で API key から Amazon Cognito User Pool に変更します。
amplify update api

? Select from one of the below mentioned services: GraphQL
? Select a setting to edit Authorization modes
? Choose the default authorization type for the API (Use arrow keys)
  API key
❯ Amazon Cognito User Pool
  IAM
  OpenID Connect
  Lambda
? Configure additional auth types? No
最後に Amplify Backend に反映します。
amplify push
これで API key ではなく、 Amazon Cognito User Pool で認可されたユーザのみが CRUD できるようになりました。
アプリケーション実装
前回までで、Amplify Backend (Auth, API) の設定ができました。
ここからは、実際にアプリケーションを実装していきます。
仕様
以下のような仕様で実装していきます。
- 未ログイン時はルートにリダイレクト
- ログイン状態で
/todosにリダイレクト - ログイン状態で
/todosにアクセスすると、ログインユーザのユーザ情報が表示される - ログイン状態で
/todosにアクセスすると、ログインユーザの Todo 一覧が表示される - ログイン状態で
/todosにアクセスすると、ログインユーザの Todo を追加、変更、削除ができる
ディレクトリ構成
最終的なディレクトリ構成は以下のとおりです。
コンポーネントの名付けや配置などは、 docs のサンプルコードを元にしています。
.
├── README.md
├── amplify
│   ├── backend
│   │   ├── api
│   │   │   └── nextamplified
│   │   │       ├── schema.graphql
│   │   (省略)   (省略)
│   (省略)
├── next-env.d.ts
├── next.config.js
├── package-lock.json
├── package.json
├── public
│   ├── next.svg
│   └── vercel.svg
├── src
│   ├── API.ts (自動生成)
│   ├── amplifyconfiguration.json (自動生成)
│   ├── app
│   │   ├── favicon.ico
│   │   ├── layout.tsx
│   │   ├── page.tsx
│   │   └── todos
│   │       └── page.tsx
│   ├── aws-exports.js (自動生成)
│   ├── components
│   │   ├── AuthGetCurrentUserServer.tsx
│   │   ├── AuthProvider.tsx
│   │   ├── AuthenticatorClient.tsx
│   │   ├── ConfigureAmplifyClientSide.ts
│   │   ├── SignOutButton.tsx
│   │   ├── Todo.tsx
│   │   ├── TodoNew.tsx
│   │   ├── TodosServer.tsx
│   │   └── useAuthRedirect.ts
│   ├── graphql (自動生成)
│   │   ├── mutations.ts
│   │   ├── queries.ts
│   │   ├── schema.json
│   │   └── subscriptions.ts
│   ├── middleware.ts
│   └── utils
│       └── amplifyServerUtils.ts
└── tsconfig.json
Amplify ライブラリの読み込み
今回は Next.js を App Router で利用します。
React Server Components、 Client Component で Amplify ライブラリを利用するため、異なる方法で Amplify ライブラリを読み込みます。
まずは Client Component 側です。
Amplify.configure を Client Component として実行し、 Client から Amplify Backend にアクセスできるようにします。
Amplify.configure は一度だけ呼び出したいので、ルートレイアウトに設置します。
AuthProvider は後ほど説明します。
'use client';

import { Amplify } from 'aws-amplify';
import { generateClient } from 'aws-amplify/api';
import config from '@/amplifyconfiguration.json';

Amplify.configure(config, { ssr: true });

export const client = generateClient();

export default function ConfigureAmplifyClientSide() {
  return null;
}
import ConfigureAmplifyClientSide from '@/components/ConfigureAmplifyClientSide';
import AuthProvider from '@/components/AuthProvider';

export const dynamic = 'force-dynamic';

const RootLayout = async ({ children }: { children: React.ReactNode }) => {
  return (
    <html lang="en">
      <head>
        <link rel="icon" href="/favicon.png" />
      </head>
      <body>
        <ConfigureAmplifyClientSide />
        <AuthProvider>{children}</AuthProvider>
      </body>
    </html>
  );
};

export default RootLayout;
続いて React Server Components 側です。
こちらは createServerRunner を実行し、 server-side runtimes の context を生成します。
getAuthenticated は React Server Components や middleware など server-side runtimes の文脈でログイン可否を判定する関数です。
cookieBasedClient は server-side runtimes で GraphQL の通信を行うためのクライアントです。
import { createServerRunner } from '@aws-amplify/adapter-nextjs';
import { fetchAuthSession } from 'aws-amplify/auth/server';
import { generateServerClientUsingCookies } from '@aws-amplify/adapter-nextjs/api';
import config from '~/amplifyconfiguration.json';
import { cookies } from 'next/headers';

export const { runWithAmplifyServerContext } = createServerRunner({
  config,
});

type NextServerContext = Parameters<
  typeof runWithAmplifyServerContext
>[0]['nextServerContext'];

export const getAuthenticated = async (
  nextServerContext: NextServerContext
) => {
  return await runWithAmplifyServerContext({
    nextServerContext,
    operation: async (contextSpec) => {
      try {
        const session = await fetchAuthSession(contextSpec);
        return session.tokens !== undefined;
      } catch (error) {
        console.log(error);
        return false;
      }
    },
  });
};

export const cookieBasedClient = generateServerClientUsingCookies({
  config,
  cookies,
});
import { cookies } from 'next/headers';
import { getCurrentUser } from '@aws-amplify/auth/server';
import { runWithAmplifyServerContext } from '@/utils/amplifyServerUtils';

// This component is used to render the result of the API call
const AuthFetchResult = ({ description, data }: any) => {
  return (
    <div>
      <p>{description}</p>
      <pre>{JSON.stringify(data, null, 2)}</pre>
    </div>
  );
};

// This page always dynamically renders per request
export const dynamic = 'force-dynamic';

export default async function AuthGetCurrentUserServer() {
  try {
    const currentUser = await runWithAmplifyServerContext({
      nextServerContext: { cookies },
      operation: (contextSpec) => getCurrentUser(contextSpec),
    });

    return (
      <AuthFetchResult
        description="The API is called on the server side."
        data={currentUser}
      />
    );
  } catch (error) {
    console.error(error);
  }
}
また server-side runtimes として、 Edge Middleware でも利用でき、認証によるアクセス制御も可能です。 ※ Edge Middleware は 2023/12/10 現在 Auth のみで利用できるようです。
ここでは、未ログインユーザが /todos にアクセスした場合は、 / にリダイレクトするようにしています。
import { NextRequest, NextResponse } from 'next/server';
import { getAuthenticated } from '@/utils/amplifyServerUtils';

export async function middleware(request: NextRequest) {
  const url = new URL(request.url);
  const response = NextResponse.next();

  if (url.pathname === '/') {
    return response;
  }

  const authenticated = await getAuthenticated({
    request,
    response,
  });

  if (authenticated) {
    return response;
  }

  return NextResponse.redirect(new URL('/', request.url));
}

export const config = {
  matcher: [
    /*
     * Match all request paths except for the ones starting with:
     * - api (API routes)
     * - _next/static (static files)
     * - _next/image (image optimization files)
     * - favicon.ico (favicon file)
     */
    '/((?!api|_next/static|_next/image|favicon.ico|todos).*)',
  ],
};
続いて、先程 src/app/layout.tsx で出てきた AuthProvider です。Amplify UI の Authenticator を利用するための Provider で、ルートレイアウトにマウントし、 Client Component で Authenticator の context を useAuthenticator hook で参照できるようになります。
'use client';

import { Authenticator, View } from '@aws-amplify/ui-react';

export default function AuthProvider({
  children,
}: {
  children: React.ReactNode;
}) {
  return (
    <Authenticator.Provider>
      <View>{children}</View>
    </Authenticator.Provider>
  );
}
これで基本的な Amplify ライブラリの読み込みは完了です。
アプリケーション本体の実装
では、アプリケーション本体の実装に入っていきます。
トップページ
まずはトップページからです。
RSC としての初回レンダリング時に、認証状態を取得し、ログイン済みであれば /todos にリダイレクト、未ログインであれば AuthenticatorClient を表示します。
import { cookies } from 'next/headers';
import { redirect } from 'next/navigation';
import { getAuthenticated } from '@/utils/amplifyServerUtils';
import AuthenticatorClient from '@/components/AuthenticatorClient';

export default async function Home() {
  const authenticated = await getAuthenticated({ cookies });

  if (authenticated) {
    redirect('/todos');
  }

  return (
    <main>
      <h1>Hello, Next.js App Router with AWS Amplify JavaScript Library v6!</h1>

      <AuthenticatorClient />
    </main>
  );
}
Authenticator を利用するので、 AuthenticatorClient は Client Component として実装します。 Client 側でもリダイレクト処理あるのは、 Authenticator が SPA で動作するため、ログイン後に /todos にリダイレクトするために、追加しています。
'use client';

import { Authenticator } from '@aws-amplify/ui-react';
import useAuthRedirect from '@/components/useAuthRedirect';
import '@aws-amplify/ui-react/styles.css';

export default function AuthenticatorClient() {
  useAuthRedirect({
    authhStatus: 'authenticated',
    redirectPath: '/todos',
  });

  return <Authenticator />;
}
続いて useAuthRedirect です。
useAuthRedirect は Authenticator の authStatus が指定した状態になったら、指定したパスにリダイレクトする hooks です。
'use client';

import { useEffect } from 'react';
import { useRouter } from 'next/navigation';
import { useAuthenticator } from '@aws-amplify/ui-react';

// NOTE: type AuthStatus = "authenticated" | "configuring" | "unauthenticated"
type AuthStatus = ReturnType<typeof useAuthenticator>['authStatus'];

export default function useAuthRedirect(args: {
  authhStatus: AuthStatus;
  redirectPath: string;
}) {
  const router = useRouter();
  const { authStatus } = useAuthenticator();

  useEffect(() => {
    if (authStatus === args.authhStatus) {
      router.push(args.redirectPath);
      router.refresh();
    }
  }, [router, authStatus, args.authhStatus, args.redirectPath]);
}
Todo ページ
次に Todo ページです。このページに未ログインでアクセスすると、先程の middleware で / にリダイレクトされます。
AuthGetCurrentUserServer は既出ですが、ログインユーザの情報を表示するためのコンポーネントです。
import AuthGetCurrentUserServer from '@/components/AuthGetCurrentUserServer';
import SignOutButton from '@/components/SignOutButton';
import TodosServer from '@/components/TodosServer';

export default async function Todos() {
  return (
    <main>
      <AuthGetCurrentUserServer />
      <SignOutButton />
      <TodosServer />
    </main>
  );
}
SignOutButton は Autheticator の signOut メソッドを利用するため、 Client Component として実装しています。リダイレクトはトップページと同様の理由です。
'use client';

import { useAuthenticator } from '@aws-amplify/ui-react';
import useAuthRedirect from '@/components/useAuthRedirect';

export default function SignOutButton() {
  useAuthRedirect({
    authhStatus: 'unauthenticated',
    redirectPath: '/',
  });

  const { signOut } = useAuthenticator();

  const handleClick = () => {
    signOut();
  };

  return <button onClick={handleClick}>Sign Out</button>;
}
TodosServer は RSC で、ログインユーザの Todo 一覧と、新規登録フォームを表示します。
import { cookieBasedClient } from '@/utils/amplifyServerUtils';
import { listTodos } from '@/graphql/queries';
import TodoNew from '@/components/TodoNew';
import Todo from '@/components/Todo';

export default async function TodosServer() {
  const { data, errors } = await cookieBasedClient.graphql({
    query: listTodos,
  });

  if (errors) {
    console.log('errors', errors);
  }

  return (
    <div>
      <TodoNew />

      {data.listTodos.items.length === 0 ? (
        <p>You have no todos. Add one above.</p>
      ) : (
        <ul>
          {data.listTodos.items.map((item) => (
            <Todo key={item.id} item={item} />
          ))}
        </ul>
      )}
    </div>
  );
}
先に Todo を見ていきます。Todo はログインユーザの Todo を表示するコンポーネントです。これは編集、削除も含まれているので Client Component として実装しています。
'use client';

import { useState } from 'react';
import { useRouter } from 'next/navigation';
import type { Todo } from '@/API';
import { client } from '@/components/ConfigureAmplifyClientSide';
import { updateTodo, deleteTodo } from '@/graphql/mutations';

export default function Todo({ item }: { item: Todo }) {
  const router = useRouter();
  const [isEditing, setIsEditing] = useState(false);

  const [name, setName] = useState(item.name);
  const [description, setDescription] = useState(item.description);

  const handleSubmit = (e: React.FormEvent<HTMLFormElement>) => {
    e.preventDefault();

    client
      .graphql({
        query: updateTodo,
        variables: { input: { id: item.id, name, description } },
      })
      .then((result) => {
        router.refresh();

        setIsEditing(false);
        setName('');
        setDescription('');
      })
      .catch((error) => {
        console.log('error', error);
      });
  };

  const handleEditClick = () => {
    setIsEditing(true);
  };

  const handleDeleteClick = () => {
    if (confirm('Are you sure?')) {
      client
        .graphql({
          query: deleteTodo,
          variables: { input: { id: item.id } },
        })
        .then((result) => {
          console.log('result', result);

          router.refresh();
        })
        .catch((error) => {
          console.log('error', error);
        });
    }
  };

  const handleChange = (e: React.ChangeEvent<HTMLInputElement>) => {
    e.preventDefault();

    const { name, value } = e.currentTarget;

    if (name === 'name') {
      setName(value);
    } else if (name === 'description') {
      setDescription(value);
    }
  };

  return (
    <li>
      {isEditing ? (
        <form onSubmit={handleSubmit}>
          <label>
            Name:
            <input name="name" onChange={handleChange} value={name} />
          </label>
          <label>
            Description:
            <input
              name="description"
              onChange={handleChange}
              value={description ?? ''}
            />
          </label>
          CreatedAt:
          {item.createdAt} UpdatedAt: {item.updatedAt}
          <button type="submit">Update Todo</button>
        </form>
      ) : (
        <div>
          Name: {item.name} Description: {item.description} CreatedAt:
          {item.createdAt} UpdatedAt: {item.updatedAt}
          <button type="button" onClick={handleEditClick}>
            Edit
          </button>
          <button type="button" onClick={handleDeleteClick}>
            Delete
          </button>
        </div>
      )}
    </li>
  );
}
最後に TodoNew です。これは新規登録フォームを表示するコンポーネントです。これも Client Component として実装しています。
'use client';

import { useRouter } from 'next/navigation';
import { useState } from 'react';
import { createTodo } from '@/graphql/mutations';
import { client } from '@/components/ConfigureAmplifyClientSide';

export default function TodoNew() {
  const router = useRouter();

  const [name, setName] = useState('');
  const [description, setDescription] = useState('');

  const handleSubmit = (e: React.FormEvent<HTMLFormElement>) => {
    e.preventDefault();

    client
      .graphql({
        query: createTodo,
        variables: { input: { name, description } },
      })
      .then((result) => {
        console.log('result', result);

        router.refresh();

        setName('');
        setDescription('');
      })
      .catch((error) => {
        console.log('error', error);
      });
  };

  const handleChange = (e: React.ChangeEvent<HTMLInputElement>) => {
    e.preventDefault();

    const { name, value } = e.currentTarget;

    if (name === 'name') {
      setName(value);
    } else if (name === 'description') {
      setDescription(value);
    }
  };

  return (
    <div>
      <form onSubmit={handleSubmit}>
        <label>
          Name:
          <input name="name" onChange={handleChange} value={name} />
        </label>

        <label>
          Description:
          <input
            name="description"
            onChange={handleChange}
            value={description}
          />
        </label>

        <button type="submit">Create Todo</button>
      </form>
    </div>
  );
}
以上でアプリケーションの実装は完了です。
動作確認
ローカルでの動作確認
まずはローカルで動作確認します。
npm run dev
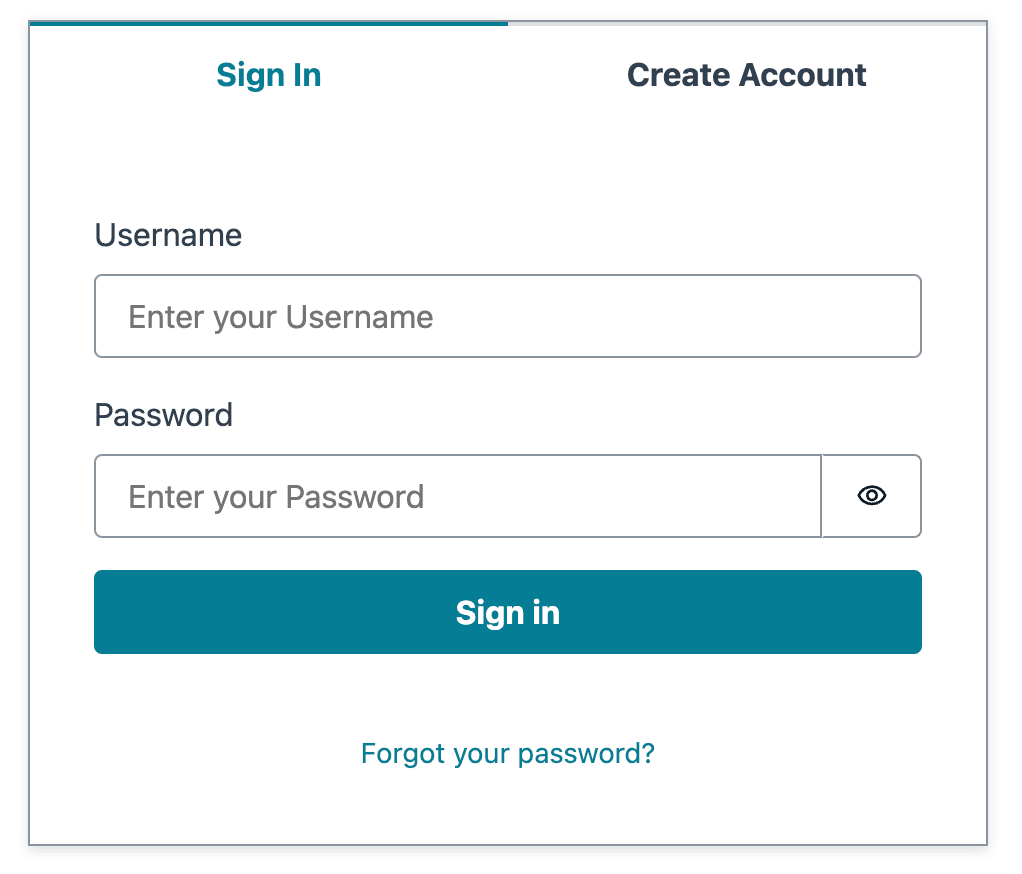
http://localhost:3000/ にアクセスすると、ログイン画面が表示されます。
Create Account でユーザを作成すると、登録したメールアドレスに確認コードが送信されます。確認コードを入力すると、ログインできます。
Next.js を Amplify Hosting にデプロイ
これは docs そのままなので、割愛します。
私は Project を GitHub に push して、AWS Amplify hosting にホストするように、AWS コンソールから設定しました。
デプロイが完了すると https://<ホスト名>.amplifyapp.com/ のような形式でアクセスできるようになります。
まとめ
今回は Next.js を App Router で利用し、 AWS Amplify JavaScript Library v6 を利用して、 Amplify Backend (Auth, API) を追加し、アプリケーションを実装しました。今回は Server Actions は実装しなかったので、今後の課題にしたいと思います。
AWS 自体が不得手な筆者ですが、 Amplify は AWS のサービスを簡単に利用でき、とても便利だと感じました。 Amplify が Next.js の機能を今後も追従することを期待して、引き続きチェックしていきたいと思います。
Discussion
素晴らしい記事ありがとうございます!
記事内容に従って実装していったところ、
import { client } from '@/components/ConfigureAmplifyClientSide'; でエラーになりました。
src/components/ConfigureAmplifyClientSide.tsにexport const client = generateClient();を追加したところなんとなく動作しました。ご報告まで🙏
ご指摘ありがとうございます!
本文修正いたしました 🙏