Amplify×lambda×SESでメールを送信する


Amplifyとは
AWS Amplifyは、Webおよびモバイルアプリケーションの開発を効率的に行うための開発フレームワークおよびツールチェーンです。バックエンドサービスの作成と管理、フロントエンドコードの生成、アプリケーションのデプロイとホスティングを助けます。これにより、開発者はアプリケーションの構築とテストに集中することができます。
↓ 詳細については公式サイトを参照ください
行いたいこと
AppsyncのGraphQL経由でDynamoDBにデータが登録された際、データ内のメールアドレスに向けてメールを送信したいです。今回は予約システムの想定で、予約情報が追加された際に別のテーブルからユーザー情報を取ってきて、メールを送信するような形にしてみました。

前提
・ReactとTypescriptを使用してフロントエンドの実装を行う
・Amplifyの環境構築とamplify add apiを使用したGraphQL APIの作成が完了している
・作成したソースはGit hub上に格納しています。よかったらご覧ください!
実装① DynamoDBの設定
schema.graphqlの定義
amplify add apiを実行後にschema.graphqlを以下の内容に変更し、amplify pushでリモートに反映させます。
input AMPLIFY {
  globalAuthRule: AuthRule = { allow: public }
} # FOR TESTING ONLY!
type Reservation @model {
  id: ID!
  user: User @hasOne
  date: String!
  comments: String
}
type User @model {
  id: ID!
  name: String!
  email: String!
}
監視を行うDynamoDBのStreamを有効にする
schema.graphqlの定義後、マネジメントコンソールで予約テーブルが作成されたことが確認出来たら、予約テーブルのStreamを有効にします。
↓ Amplifyのアプリから辿るとわかりやすいです
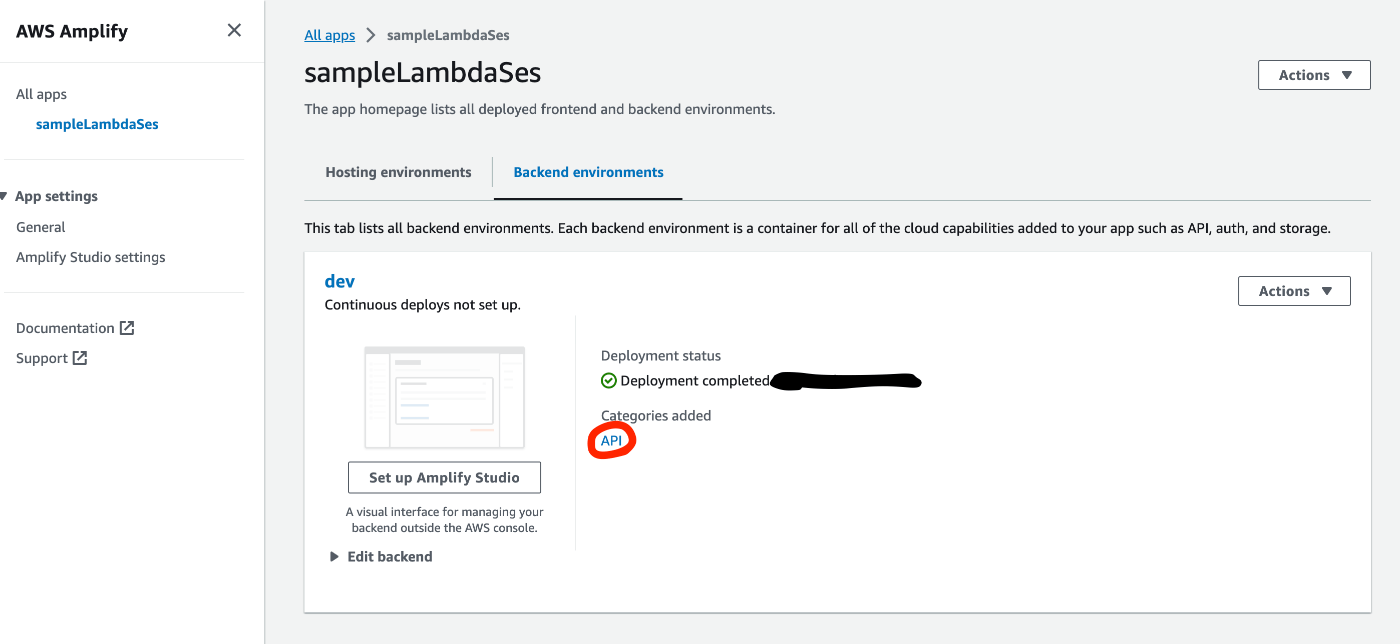
↓ 予約テーブルへ
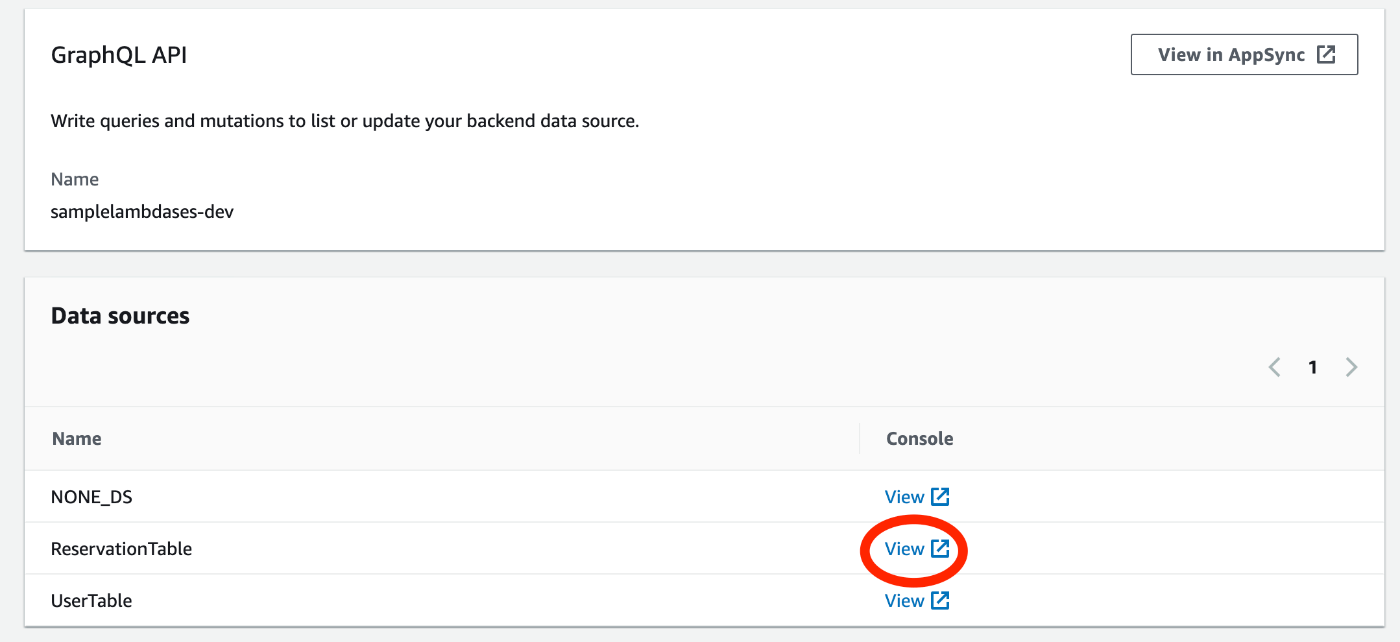
↓ 予約テーブルのStreamを有効化

以上でDynamoDBの変更をStreamで検知できるようになりました。
実装② Amplify CLIを使用したFunction の作成
次にDynamoDB Streamのイベントをトリガーとするlambda関数を作成します。
lambda関数の中で行いたい処理としては以下の3ステップです。
- DynamoDB Streamから受信した予約情報からユーザーIDを取り出す
- ユーザーIDをもとにユーザーテーブルからユーザー情報を取得(Amplifyで自動生成のクエリを使用)
→ AppsyncのAPIを使用するための権限付与が必要! - ユーザー情報内のメールアドレスに向けてSESのAPIを使用してメールを送信
→ SESを使用するための権限付与が必要!
前提
DynamoDBのStreamをトリガーとして実行されるlambdaをAmplify CLIで設定する際は以下の二つの選択肢があります。
- Storage categoryの一部として設定する
- @modelのディレクティブで作成されたDynamoDBに対する関数として設定する
今回は2の方法で実装を進めていきます。詳細は公式ページを参照してください。
Functionの追加
Amplify CLIを使用してlambda関数を追加します。
amplify add function
↓ 対話解答例
? Provide a friendly name for your resource to be used as a label for this category in the project: testtrigger (プロジェクト内で使用される名前)

? Provide the AWS Lambda function name: mytrigger (lambdaの関数名)

? Choose the runtime that you want to use: NodeJS (使用する言語)

? Choose the function template that you want to use:
  Hello world function
  CRUD function for Amazon DynamoDB table (Integration with Amazon API Gateway and Amazon DynamoDB)
  Serverless express function (Integration with Amazon API Gateway)
❯ Lambda Trigger
↓ イベントの選択
? What event source do you want to associate with Lambda trigger (Use arrow keys)
❯ Amazon DynamoDB Stream
  Amazon Kinesis Stream
↓ 「@modelで作成されたテーブルの使用」を選択
? Choose a DynamoDB event source option
> Use API category graphql @model backed DynamoDB table(s) in the current Amplify project
  Use storage category DynamoDB table configured in the current Amplify project
  Provide the ARN of DynamoDB stream directly

? Choose the graphql @model(s) (Press <space> to select, <a> to toggle all, <i> to invert selection)
❯● Reservation (スペースで選択して決定)
 ◯ User
✅ Available advanced settings:
- Resource access permissions
- Scheduled recurring invocation
- Lambda layers configuration
- Environment variables configuration
- Secret values configuration

? Do you want to configure advanced settings? **No**
? Do you want to edit the local lambda function now? **No**
✅ Successfully added resource sampleLambdaSes locally.

✅ Next steps:
Check out sample function code generated in <project-dir>/amplify/backend/function/sampleLambdaSes/src
"amplify function build" builds all of your functions currently in the project
"amplify mock function <functionName>" runs your function locally
To access AWS resources outside of this Amplify app, edit the /Users/kaigentarou/Desktop/react/sample-lambda-ses/amplify/backend/function/sampleLambdaSes/custom-policies.json
"amplify push" builds all of your local backend resources and provisions them in the cloud
"amplify publish" builds all of your local backend and front-end resources (if you added hosting category) and provisions them in the cloud
以上で@modelで生成されたDynamoDBのイベントをトリガーとしてlambda関数を実行する準備ができました。
プロジェクトフォルダ/amplify/backend/function配下にlambdaのファイルが作成されていることを確認できたら正常に準備ができています。
実装③ SESの設定
メールの送信元にはSESに認証済みのメールアドレスまたはドメインを登録する必要があります。
以下を参考に認証を行なってください。
実装④ lambdaの実装
ここでは「プロジェクトフォルダ/amplify/backend/function/lambda関数名/src」配下のindex.jsに実際のコードを記載していきます。
必要なライブラリのインストール
プロジェクトフォルダからlambda関数が設置されているフォルダ(上記)にディレクトリを移動してから以下の手順を実行します。
lambda配下のpackage.jsonを以下の内容に変更します。
{
  "name": "samplelambdases",
  "version": "2.0.0",
  "description": "Lambda function generated by Amplify",
  "main": "index.js",
  "license": "Apache-2.0",
  "devDependencies": {
    "@types/aws-lambda": "^8.10.92"
  },
  -----以下を追加------------------------------------------------
  "dependencies": {
    "@aws-sdk/client-s3": "^3.216.0",
    "aws-sdk": "^2.1489.0",
    "aws-appsync": "^4.1.9",
    "graphql-tag": "^2.12.6"
  }
  -------------------------------------------------------------
}
変更が完了したら、以下のコマンドでライブラリをインストールします。
npm install
GraphQLクエリへのアクセス権限付与
以下のコマンドを実行し、lambda関数からAppsyncのAPIを呼び出せるように設定を更新します。
amplify update function
? Select the Lambda function you want to update.
> sampleLambdaSes (lambdaの関数名)
? Which setting do you want to update?
> Resource access permissions
? Select the categories you want this function to have access to.
> API
? Select the operations you want to permit on gql-api.
> Query
You can access the following resource attributes as environment variables from your Lambda function
        API_SAMPLELAMBDASES_GRAPHQLAPIENDPOINTOUTPUT
        API_SAMPLELAMBDASES_GRAPHQLAPIIDOUTPUT
        API_SAMPLELAMBDASES_GRAPHQLAPIKEYOUTPUT
? Do you want to edit the local lambda function now? No
以上の手順でlamdbdaからGraphQLへのアクセス権限が付与されました。
権限を付与したことで次の値が環境変数として自動的に設定されました。
・API_API名_GRAPHQLAPIENDPOINTOUTPUT:GraphQLエンドポイントURL
・API_API名_GRAPHQLAPIIDOUTPUT:APIのID
・API_API名_GRAPHQLAPIKEYOUTPUT:API Key
SESへのアクセス権限付与
lambda関数フォルダ内の<関数名>-cloudformation-template.jsonの「lambdaexecutionpolicy/Properties/PolicyDocument/Statement」に以下の内容を追加してください。
"PolicyDocument": {
    "Version": "2012-10-17",
    "Statement": [
      // ここから
        {
          "Effect": "Allow",
          "Action": [
            "ses:SendEmail",
            "ses:SendRawEmail"
          ],
          "Resource": "*"
        },
      // ここまで
        {
          "Effect": "Allow",
          "Action": [
            "logs:CreateLogGroup",
            "logs:CreateLogStream",
            "logs:PutLogEvents"  →  この下に直接追加すると権限が付与されないので注意!
          ],
	  "Resource": {
		  .
		  .
		  .
	  }
環境変数の追加
設定値
lambda関数内で使用する環境変数を設定します。
設定値としては以下の2つです。
- REGION:アプリを設置しているリージョン
→ プロジェクトフォルダ/src配下のaws-exports.jsから取得できます。 - EMAIL_FROM:SESで認証済みのメールアドレス
→ 認証済みドメインを使用する際は「no-reply@ドメイン名」のように任意のメールアドレスを作成する必要があります。
設定手順
以下の手順で上記4つの環境変数を設定する。
$ amplify update function
? Which setting do you want to update?
  Resource access permissions
  Scheduled recurring invocation
  Lambda layers configuration
> Environment variables configuration
  Secret values configuration

? Select what you want to do with environment variables:
> Add new environment variable
  Update existing environment variables
  Remove existing environment variables
  I'm done

? Enter the environment variable name: REGION
? Enter the environment variable value: アプリのリージョン名
? Select what you want to do with environment variables:
❯ Add new environment variable
? Enter the environment variable name: EMAIL_FROM
? Enter the environment variable value: SESで認証済みのメールアドレスまたはドメイン(アドレス@ドメインの形式)

? Do you want to edit the local lambda function now? No
amplify pushでリモートに反映させます。
マネジメントコンソール上からLambda関数の詳細を確認、環境変数が設定されていることを確認してください。
↓ この時点で、「APIエンドポイント、API KEY、リージョン、メール送信元」の4つが環境変数に設定されていることを確認してください。(<関数名>-cloudformation-template.jsonからも確認できます)

コードの実装
次にindex.jsのコードを変更します。
コードの簡単な内容は以下の通りです。
- DynamoDB Streamから受信した予約情報からユーザーIDを取り出す
- ユーザーIDをもとにユーザーテーブルからユーザー情報を取得(Amplifyで自動生成のクエリを使用)
- ユーザー情報内のメールアドレスに向けてSESのAPIを使用してメールを送信
// ライブラリのインポート
const AWS = require("aws-sdk");
const gql = require("graphql-tag");
const AWSAppSyncClient = require("aws-appsync").default;

// ユーザーIDを使用してユーザー情報を取得するクエリ
// → src/graphql/queries.ts のクエリをコピーしてくる
const query = gql`
  query GetUser($id: ID!) {
    getUser(id: $id) {
      id
      name
      email
      createdAt
      updatedAt
      __typename
    }
  }
`;

// AppSyncのAPIを使用してユーザー情報を取得するメソッド
const getUserQuery = async (userId) => {

  // Appsyncクライアントの作成
  const client = new AWSAppSyncClient({
      // 環境変数:GraphQLのエンドポイントURL(要変更!)
    url: process.env.API_API名_GRAPHQLAPIENDPOINTOUTPUT,
    region: process.env.REGION,  // 環境変数: リージョン
    auth: {
      type: "API_KEY",
      // 環境変数:API KEY(要変更!)
      apiKey: process.env.API_API名_GRAPHQLAPIKEYOUTPUT,
    },
    disableOffline: true,
  });
  // Appsyncのクエリを実行
  const graphqlData = await client.query({
    query: query,
    variables: { id: userId },
    authMode: "API_KEY",
  });

  // ユーザー情報を返却
  return graphqlData.data.getUser;
};

// メール送信ロジック
const sendEmail = async (params) => {
  const ses = new AWS.SES();
  try {
    await ses.sendEmail(params).promise();
    console.log("email sent");
  } catch (err) {
    console.log("error sending email", err);
  }
};

// メインロジック
exports.handler = async (event) => {
  for (const record of event.Records) {
    if (record.eventName === "INSERT") {
      // 予約情報からユーザーIDを取り出す
      const reservation = record.dynamodb.NewImage;
      const userId = reservation.reservationUserId.S;
      // ユーザー情報を取得
      const user = await getUserQuery(userId);
      if (user) {
        const email = user.email;
	// メール内容の作成
        const params = {
          Destination: {
            ToAddresses: [email],
          },
          Message: {
            Body: {
              Text: {
                Data: `Dear ${user.name}, your reservation has been confirmed.`,
              },
            },
            Subject: {
              Data: "Reservation confirmed",
            },
          },
	  // 環境変数:メール送信元
          Source: process.env.EMAIL_FROM,
        };
	// メール送信
        return sendEmail(params);
      }
    }
  }
};
Tips amplify mockを使用したFunction のテスト
lambdaコードの作成時、毎回amplify pushをしていては時間がかかるのでAPIをモック化することでローカル上で関数のテストを行えます。こちらはAPIの動作確認にも使用できるので、気になる方は以下の記事を参考にしてみてください。
結果確認
入力フォームの作成
今回はchakra uiとreact hook formで簡単なフォームを作成して検証を行います。
npmライブラリのインストール
package.jsonのdependenciesに必要なライブラリを記載し、npm installでインストールします。
  "dependencies": {
    "@chakra-ui/react": "^2.8.2",
    "@emotion/react": "^11.11.1",
    "@emotion/styled": "^11.11.0",
    "react": "^18.2.0",
    "react-dom": "^18.2.0",
    "aws-amplify": "^5.3.11",
    "aws-appsync": "^4.1.9",
    "aws-sdk": "^2.1489.0",
    "graphql": "15.3.0",
    "graphql-tag": "^2.12.6",
    "react-hook-form": "^7.47.0"
  },
入力フォームの作成
プロジェクトフォルダのApp.tsxを以下の内容に変更してください
App.tsx
import {
  Box,
  Button,
  ChakraProvider,
  FormControl,
  FormErrorMessage,
  FormLabel,
  Input,
  Stack,
} from "@chakra-ui/react";
import { API, Amplify } from "aws-amplify";
import { createReservation, createUser } from "./graphql/mutations";
import { useForm } from "react-hook-form";
import { CreateReservationMutation, CreateUserMutation } from "./API";
import { GraphQLQuery } from "@aws-amplify/api";
import awsconfig from "./aws-exports";

Amplify.configure(awsconfig);
function App() {
  // フォーム送信時の処理
  const onSubmit = async (input: Inputs) => {
    // ユーザーデータの登録
    const res = await API.graphql<GraphQLQuery<CreateUserMutation>>({
      query: createUser,
      variables: {
        input: {
          name: input.name,
          email: input.email,
        },
      },
      authMode: "API_KEY",
    });
    if (res.data && res.data.createUser) {
      // 予約データの登録
      await API.graphql<GraphQLQuery<CreateReservationMutation>>({
        query: createReservation,
        variables: {
          input: {
            date: input.date,
            comments: input.comments,
            reservationUserId: res.data.createUser.id,
          },
        },
        authMode: "API_KEY",
      });
    }
    console.log(res);
  };

  type Inputs = {
    name: string;
    email: string;
    date: string;
    comments: string;
  };

  const {
    register,
    handleSubmit,
    formState: { errors, isSubmitting },
  } = useForm<Inputs>();
  return (
    <ChakraProvider>
      <Box w="50vh" marginX={50}>
        <Stack spacing={3}>
          {/* <form onSubmit={handleSubmit(onSubmit)}> */}
          <form onSubmit={handleSubmit(onSubmit)}>
            <FormControl>
              <FormLabel htmlFor="name">First name</FormLabel>
              <Input
                id="name"
                placeholder="name"
                {...register("name", {
                  required: "This is required",
                  minLength: {
                    value: 4,
                    message: "Minimum length should be 4",
                  },
                })}
              />
              <FormErrorMessage>
                {errors.name && errors.name.message}
              </FormErrorMessage>
            </FormControl>
            <FormControl>
              <FormLabel htmlFor="email">email</FormLabel>
              <Input
                id="email"
                placeholder="email"
                {...register("email", {
                  required: "This is required",
                  minLength: {
                    value: 4,
                    message: "Minimum length should be 4",
                  },
                })}
              />
              <FormErrorMessage>
                {errors.email && errors.email.message}
              </FormErrorMessage>
            </FormControl>
            <FormControl>
              <FormLabel htmlFor="date">date</FormLabel>
              <Input
                id="date"
                placeholder="date"
                type="datetime-local"
                {...register("date", {
                  required: "This is required",
                  minLength: {
                    value: 4,
                    message: "Minimum length should be 4",
                  },
                })}
              />
              <FormErrorMessage>
                {errors.date && errors.date.message}
              </FormErrorMessage>
            </FormControl>
            <FormControl>
              <FormLabel htmlFor="comments">comments</FormLabel>
              <Input
                id="comments"
                placeholder="comments"
                {...register("comments", {
                  required: "This is required",
                  minLength: {
                    value: 4,
                    message: "Minimum length should be 4",
                  },
                })}
              />
              <FormErrorMessage>
                {errors.comments && errors.comments.message}
              </FormErrorMessage>
            </FormControl>
            <Button
              mt={4}
              colorScheme="teal"
              isLoading={isSubmitting}
              type="submit"
            >
              Submit
            </Button>
          </form>
        </Stack>
      </Box>
    </ChakraProvider>
  );
}

export default App;
検証実行
以下のコマンドでテストを実行します。
npm run dev (npm start)
↓ 入力フォームを入力し、送信します。

結果の確認
↓ まずはDynamoDBに予約情報とユーザー情報が作成されていることを確認します。


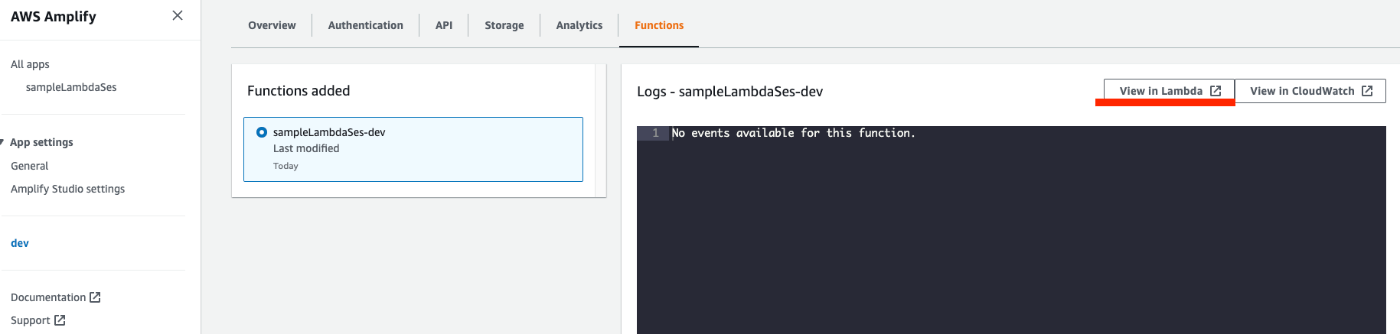
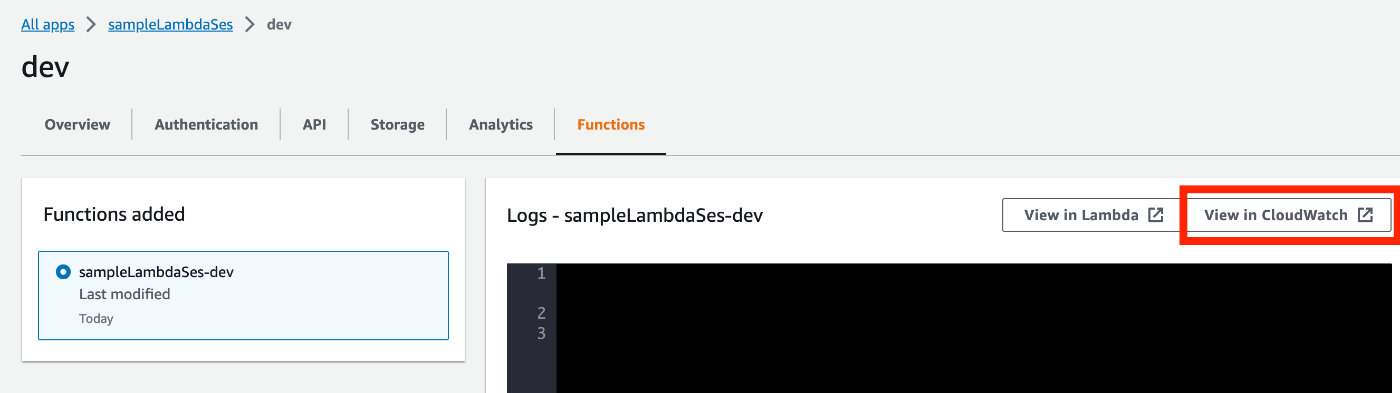
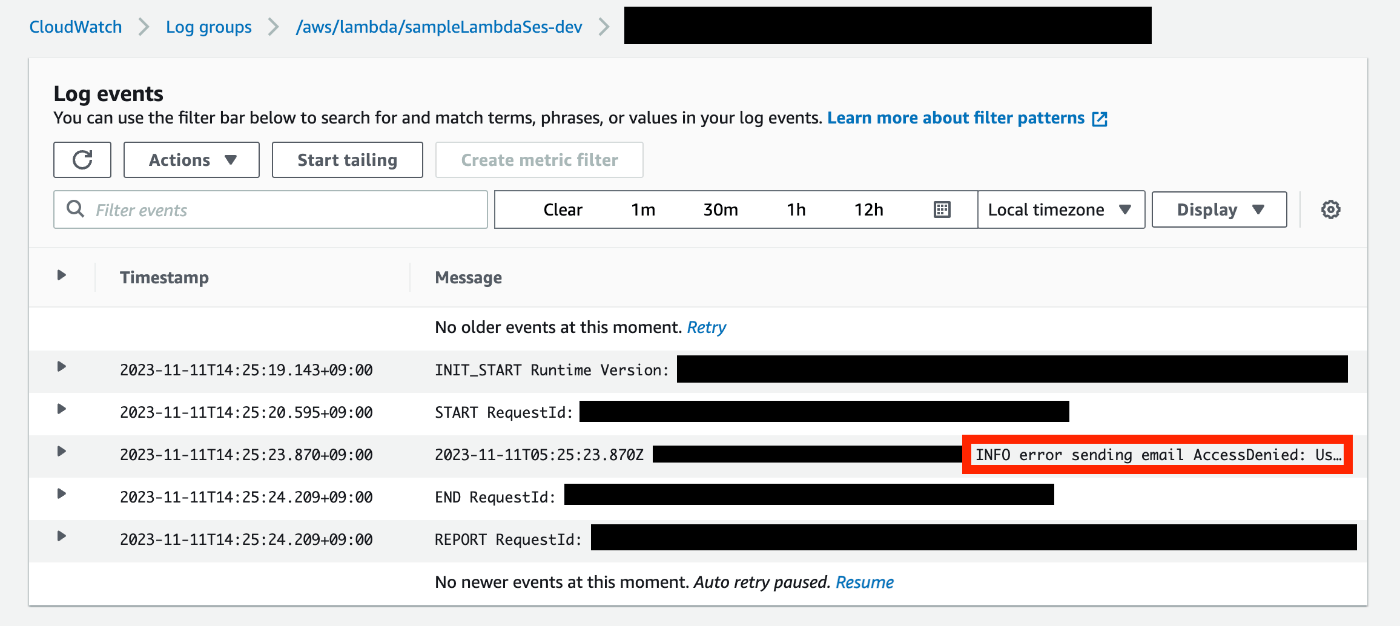
次にDynamoDBをトリガーにlambdaが実行されているかを確認します。
↓ CloudWatchでlambdaのログを確認
↓ エラーが発生している場合はエラー内容に合わせて対応をしてみてください。
(SESの権限付与を忘れていた場合です😅)
↓ 送信成功です。
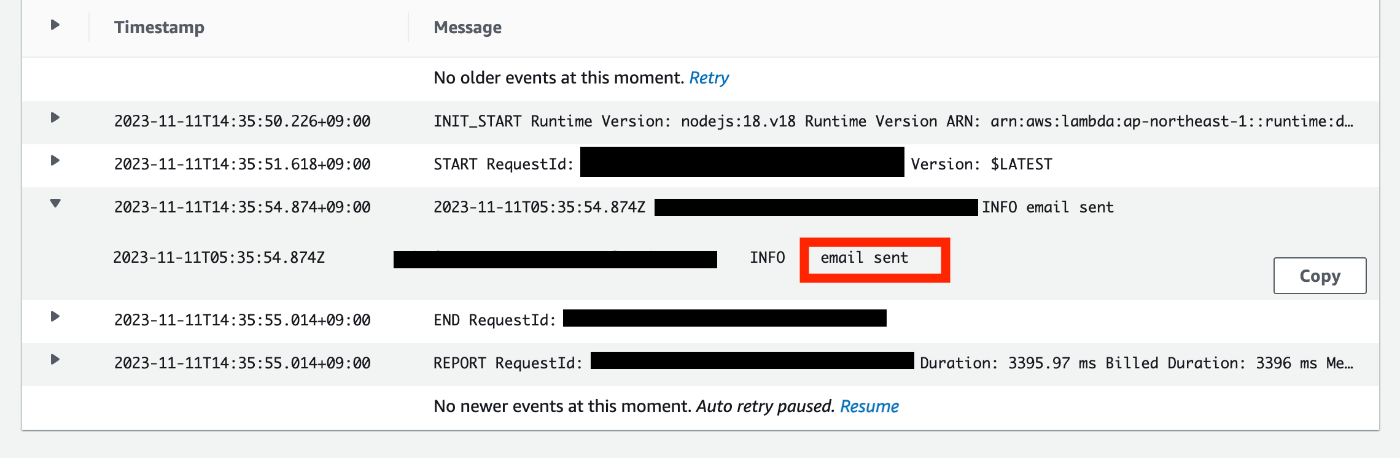
↓ 実際に認証済みのメールアドレスにテストメールが届いていました。

動作確認は以上です。長々とお付き合いいただきありがとうございました!
参考になれば嬉しいです!!
Discussion