EKSでVeleroを使ったリストアを試してみる
この記事は、Fusic Advent Calendar 2024 8日目の記事です。
re:Inventで発表されたハイブリッドノードを試したい今日このごろですが、今回は以下のAWSブログを参考に、EKSにおけるバックアップ・リストアを作成してみたいと思います。
図で表すと以下のような構成を今回の検証では作成します。

環境
AWS CLI: 2.22.12
eksctl: 0.197.0
Kubernetes: 1.31
Velero CLI: 1.15.0
helm: 3.14.2
事前準備
2つのEKSクラスターの作成
マネージメントコンソールからEKSクラスターを作成します。
アドオンでEBS CSIドライバーとCSI スナップショットコントローラを追加して、ノードグループも合わせて作成しておきます。
下記コマンドでkubeconfigの設定も行います。
$ aws eks update-kubeconfig --region ap-northeast-1 --name primary-cluster --alias primary
$ aws eks update-kubeconfig --region ap-northeast-1 --name secondary-cluster --alias secondary
Veleroで使用するリソース作成
- S3
- IAM Policy
- ストレージクラス
$ cat > sc.yaml <<EOF
apiVersion: storage.k8s.io/v1
kind: StorageClass
metadata:
  name: gp3
  annotations:
    storageclass.kubernetes.io/is-default-class: "true"
provisioner: ebs.csi.aws.com
volumeBindingMode: WaitForFirstConsumer
EOF
$ kubectl apply -f sc.yaml
以下のような状態になっていればOKです。
$ kubectl get sc
NAME            PROVISIONER             RECLAIMPOLICY   VOLUMEBINDINGMODE      ALLOWVOLUMEEXPANSION   AGE
gp2             kubernetes.io/aws-ebs   Delete          WaitForFirstConsumer   false                  10m
gp3 (default)   ebs.csi.aws.com         Delete          WaitForFirstConsumer   false                  4s
- Service Account作成
$ eksctl utils associate-iam-oidc-provider --region=ap-northeast-1 --cluster=$CLUSTER_NAME --approve
$ eksctl create iamserviceaccount \
    --cluster=$CLUSTER_NAME \
    --name=velero-server \
    --namespace=velero \
    --role-name=eks-velero-backup \
    --role-only \
    --attach-policy-arn=arn:aws:iam::$ACCOUNT:policy/VeleroAccessPolicy \
    --approve \
    --region ap-northeast-1
$ eksctl create iamserviceaccount \
    --cluster=$RECOVERY_CLUSTER \
    --name=velero-server \
    --namespace=velero \
    --role-name=eks-velero-recovery \
    --role-only \
    --attach-policy-arn=arn:aws:iam::$ACCOUNT:policy/VeleroAccessPolicy \
    --approve \
    --region ap-northeast-1
- helmのインストール
$ helm repo add vmware-tanzu https://vmware-tanzu.github.io/helm-charts
$ cat > values.yaml <<EOF
configuration:
  backupStorageLocation:
  - bucket: $BUCKET
    provider: aws
  volumeSnapshotLocation:
  - config:
      region: $REGION
    provider: aws
initContainers:
- name: velero-plugin-for-aws
  image: velero/velero-plugin-for-aws:v1.11.0
  volumeMounts:
  - mountPath: /target
    name: plugins
credentials:
  useSecret: false
serviceAccount:
  server:
    annotations:
      eks.amazonaws.com/role-arn: "arn:aws:iam::${ACCOUNT}:role/eks-velero-backup"
EOF
$ cat > values_recovery.yaml <<EOF
configuration:
  backupStorageLocation:
  - bucket: $BUCKET
    provider: aws
  volumeSnapshotLocation:
  - config:
      region: $REGION
    provider: aws
initContainers:
- name: velero-plugin-for-aws
  image: velero/velero-plugin-for-aws:v1.11.0
  volumeMounts:
  - mountPath: /target
    name: plugins
credentials:
  useSecret: false
serviceAccount:
  server:
    annotations:
      eks.amazonaws.com/role-arn: "arn:aws:iam::${ACCOUNT}:role/eks-velero-recovery"
EOF
$ helm install velero vmware-tanzu/velero \
    --create-namespace \
    --namespace velero \
    -f values.yaml
$ helm install velero vmware-tanzu/velero \
    --create-namespace \
    --namespace velero \
    -f values_recovery.yaml
Ghostインストール
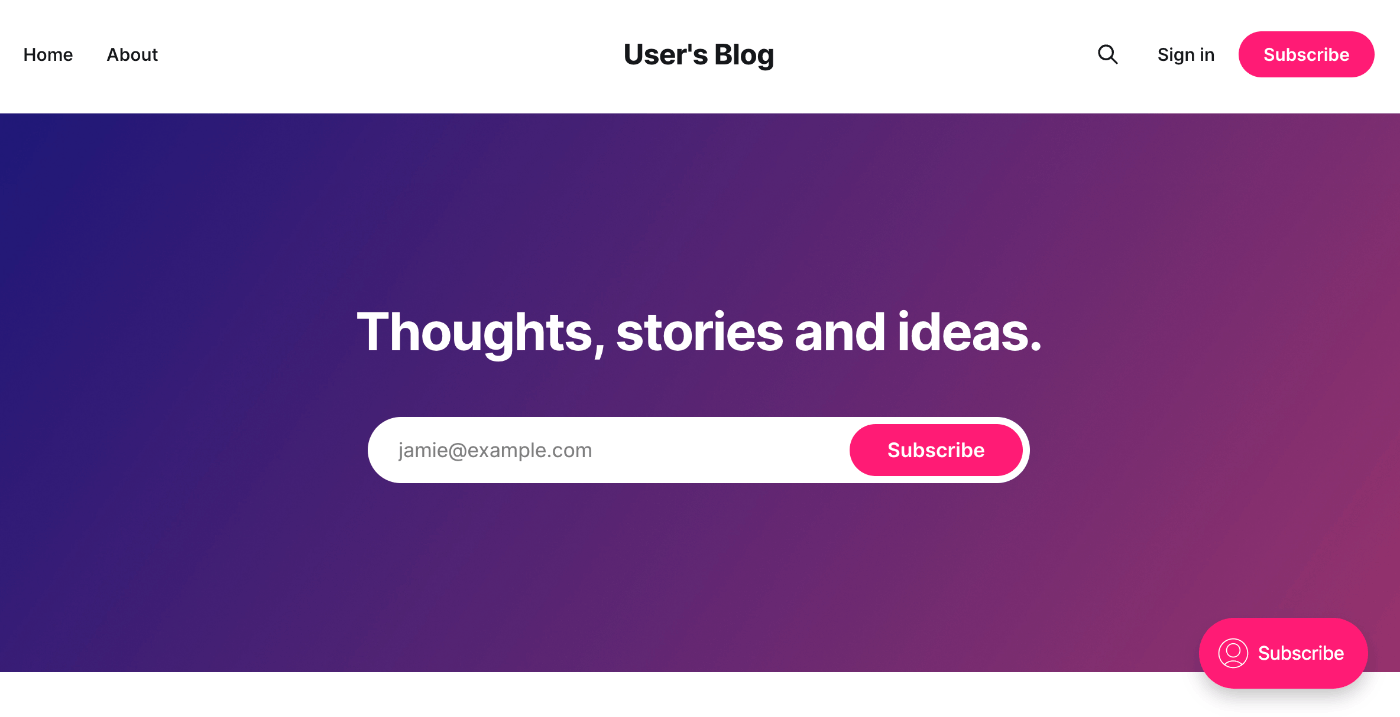
参考サイトの通り仮のサイトとして、Ghostを立ち上げます。
$ kubectl config use-context $PRIMARY_CONTEXT
$ helm install ghost oci://registry-1.docker.io/bitnamicharts/ghost \
    --create-namespace \
    --namespace ghost
$ export APP_HOST=$(kubectl get svc --namespace ghost ghost --template "{{ range (index .status.loadBalancer.ingress 0) }}{{ . }}{{ end }}")
$ export GHOST_PASSWORD=$(kubectl get secret --namespace "ghost" ghost -o jsonpath="{.data.ghost-password}" | base64 -d)
$ export MYSQL_ROOT_PASSWORD=$(kubectl get secret --namespace "ghost" ghost-mysql -o jsonpath="{.data.mysql-root-password}" | base64 -d)
$ export MYSQL_PASSWORD=$(kubectl get secret --namespace "ghost" ghost-mysql -o jsonpath="{.data.mysql-password}" | base64 -d)

$ helm upgrade ghost oci://registry-1.docker.io/bitnamicharts/ghost \
    --namespace ghost \
    --set service.type=LoadBalancer \
    --set ghostHost=$APP_HOST \
    --set ghostPassword=$GHOST_PASSWORD \
    --set mysql.auth.rootPassword=$MYSQL_ROOT_PASSWORD \
    --set mysql.auth.password=$MYSQL_PASSWORD
コマンドでPodが動作していることを確認出来ます。
$ kubectl -n ghost get pods
NAME                     READY   STATUS    RESTARTS   AGE
ghost-6cfd4d76b5-lqrlg   1/1     Running   0          91m
ghost-mysql-0            1/1     Running   0          92m
このタイミングでServiceも作成されるため、Classicロードバランサーが作成され、Ghostのインストールが完了した時に表示されたURLにアクセスしてみると、動作していることをブラウザでも確認できます。
また、パスワードをsecretから取得してadminページにアクセスすることも出来ています。
いくつかPostをしてデータを増やしておきます。


バックアップ設定
手動確認
velero実行
veleroの操作でバックアップを実行してみます。
$ velero backup create ghost-backup
バックアップの状態を確認してみると、完了していることが確認できます。
$ velero backup describe ghost-backup
Name:         ghost-backup
Namespace:    velero
Labels:       velero.io/storage-location=default
Annotations:  velero.io/resource-timeout=10m0s
              velero.io/source-cluster-k8s-gitversion=v1.31.2-eks-7f9249a
              velero.io/source-cluster-k8s-major-version=1
              velero.io/source-cluster-k8s-minor-version=31

Phase:  Completed


Namespaces:
  Included:  *
  Excluded:  <none>

Resources:
  Included:        *
  Excluded:        <none>
  Cluster-scoped:  auto

Label selector:  <none>

Or label selector:  <none>

Storage Location:  default

Velero-Native Snapshot PVs:  auto
Snapshot Move Data:          false
Data Mover:                  velero

TTL:  720h0m0s

CSISnapshotTimeout:    10m0s
ItemOperationTimeout:  4h0m0s

Hooks:  <none>

Backup Format Version:  1.1.0

Started:    2024-12-09 00:43:54 +0900 JST
Completed:  2024-12-09 00:44:01 +0900 JST

Expiration:  2025-01-08 00:43:54 +0900 JST

Total items to be backed up:  762
Items backed up:              762

Backup Volumes:
  Velero-Native Snapshots:
    pvc-c7a1599b-e2e5-4ede-8aa7-fccd026ad673: specify --details for more information
    pvc-bfdc4c5d-09b7-4708-be7b-9fde60ed67b2: specify --details for more information

  CSI Snapshots: <none included>

  Pod Volume Backups: <none included>

HooksAttempted:  0
HooksFailed:     0
S3とEBSを確認してみると、リソースとしてもちゃんと作成されていることが確認できます。


リストア
セカンダリのクラスターに対して、下記コマンドを実行します。
$ velero restore create ghost-restore --from-backup ghost-backup
しばらくしてから下記コマンドで確認してみると、完了していますが、大量にwarningが出ていることが分かります。
$ velero get restore
NAME            BACKUP         STATUS      STARTED                         COMPLETED                       ERRORS   WARNINGS   CREATED                         SELECTOR
ghost-restore   ghost-backup   Completed   2024-12-09 00:53:25 +0900 JST   2024-12-09 00:53:41 +0900 JST   0        329        2024-12-09 00:53:25 +0900 JST   <none>
詳細を見てみると、既存のリソースがあり、リストア出来なかったという旨のエラーのようですので、一旦無視することにします。
今回は検証のため、バックアップ取得の際に何もオプションを設定しませんでしたが、オプションで対象のリソースを指定することも可能ですので、warningに対応するには適切な指定が必要そうです。
$ velero restore describe ghost-restore
Name:         ghost-restore
Namespace:    velero
Labels:       <none>
Annotations:  <none>

Phase:                       Completed
Total items to be restored:  470
Items restored:              470

Started:    2024-12-09 00:53:25 +0900 JST
Completed:  2024-12-09 00:53:41 +0900 JST

Warnings:
  Velero:     <none>
  Cluster:  could not restore, CustomResourceDefinition "backuprepositories.velero.io" already exists. Warning: the in-cluster version is different than the backed-up version
            could not restore, CustomResourceDefinition "backups.velero.io" already exists. Warning: the in-cluster version is different than the backed-up version
            could not restore, CustomResourceDefinition "backupstoragelocations.velero.io" already exists. Warning: the in-cluster version is different than the backed-up version
            could not restore, CustomResourceDefinition "cninodes.vpcresources.k8s.aws" already exists. Warning: the in-cluster version is different than the backed-up version
            could not restore, CustomResourceDefinition "datadownloads.velero.io" already exists. Warning: the in-cluster version is different than the backed-up version
~~~
マネージメントコンソールからロードバランサのページに行き、新しく作成されたロードバランサのDNS名を確認して、ブラウザでアクセスしてみます。

バックアップを取得したページと同一の記事が存在していることが確認できました。
まとめ
AWSブログを参考にし、Veleroを使用した、EKSクラスターにおけるバックアップ・リストアを検証してみました。
EBS内にデータを持たず、ステートレスな状態に出来れば理想なのでしょうが、そうもいかないときもあるかと思いますので、VeleroのようなAWSのマネージドサービス以外でのバックアップ・リストア対応も把握しておき、ベストプラクティスを選択出来るように備えるよう心がけたいと思います。
今回は同一リージョンで検証しましたが、クロスリージョンで実施出来ないか検証し、DRとしての活用も検討したいと思いました。
Discussion