🐾
react-pdfを使って一覧をPDF出力
react,next.js 3ヶ月めの超初心者です。
react-pdfを使ってPDF出力を実装した際に、出たエラーの対策などをざっくりメモしておきます。
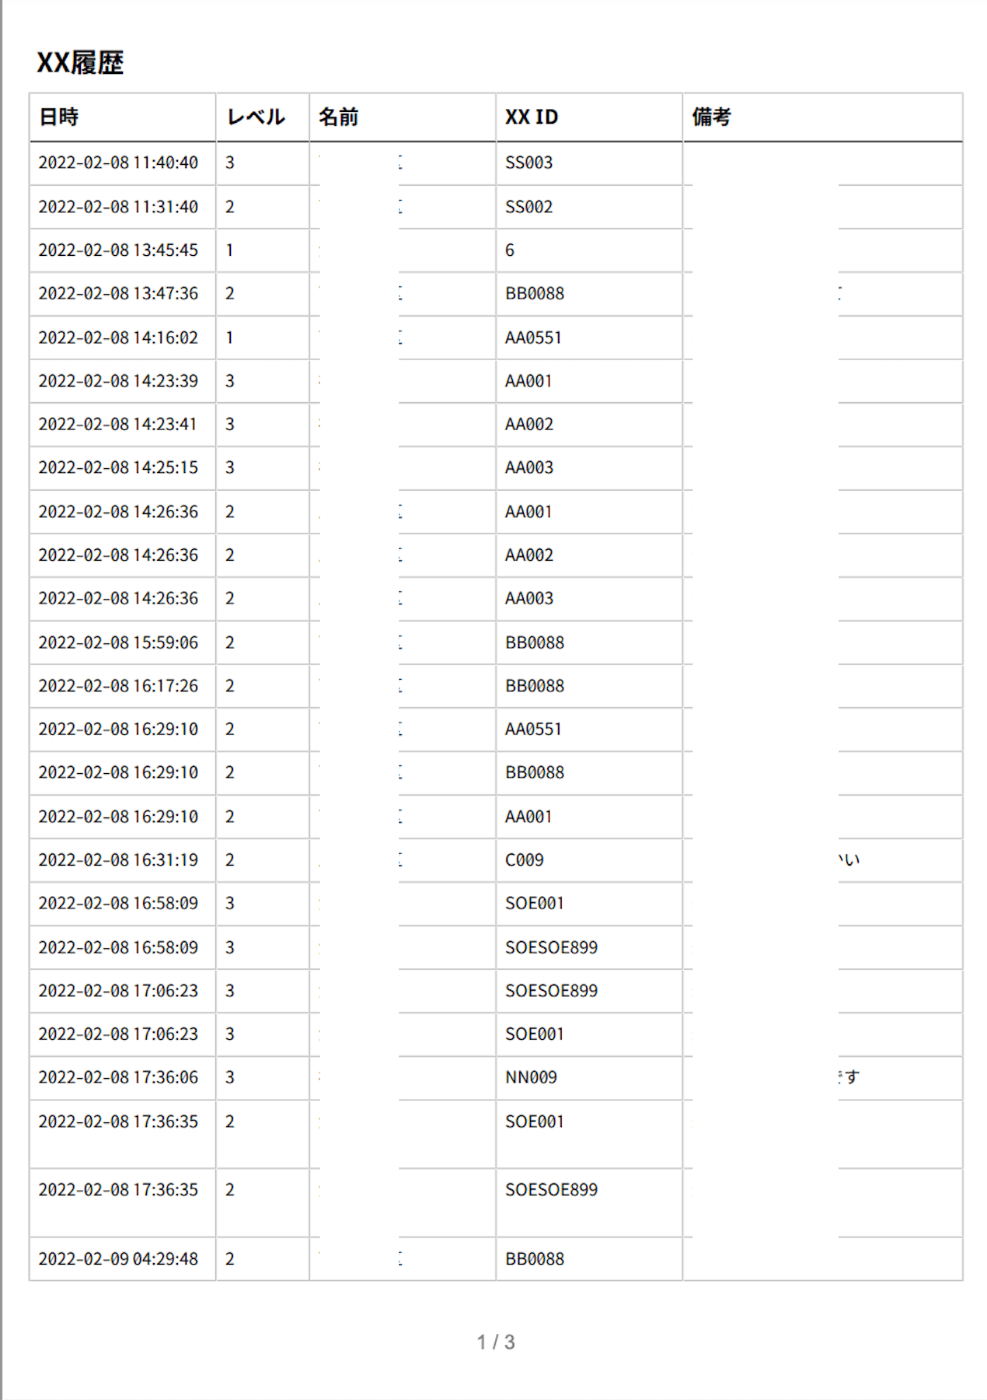
以下のような、普通の一覧表をPDFにする。

①レンダリングエラーが出て何も出ない
エラー内容
Error: PDFDownloadLink is a web specific API. You're either using this component on Node, or your bundler is not loading react-pdf from the appropriate web build
hookを使用して、PDFDownloadLinkがSSRを実行しないようにする
const TestPdf = () => {
// ★hookを使用して、PDFDownloadLinkがSSRを実行しないようにする
  const [isClient, setIsClient] = useState(false)

  useEffect(() => {
    setIsClient(true);
  }, []);

  return (
    <>
      {isClient && (
        <PDFDownloadLink
          document={<MyDoc />}
          fileName="XX履歴.pdf"
          style={{ textDecoration: "none" }}
        >
          <Button
            variant="outlined"
            size="small"
            startIcon={<PrintIcon />}
            sx={{ marginBottom: 1 }}
          >
            PDF出力
          </Button>
        </PDFDownloadLink>
      )}
    </>
  );
参考
②日本語が文字化けする
Nasuフォントを利用するとうまく出た。
Nasuフォントをダウンロード
・public/fonts配下に置く
※publicフォルダ配下じゃないとうまくいかなかった
contTestPdf = ({ exportData }: Props) => {
  // ttfファイルのフォント定義
  // フォント「ナス レギュラー」
  Font.register({
    family: "Nasu-Regular",
    src: "./fonts/Nasu-Regular.ttf",
  });

  // フォント「ナス 太字」
  Font.register({
    family: "Nasu-Bold",
    src: "./fonts/Nasu-Bold.ttf",
  });

const styles = StyleSheet.create({
    tableCellHeader: {
      margin: 5,
      fontSize: 12,
      fontWeight: 500,
      fontFamily: "Nasu-Bold",
    },
    tableCell: {
      margin: 5,
      fontSize: 10,
      fontFamily: "Nasu-Regular",
    },
  });

  const MyDoc = () => {
    return (
      <Document>
        <Page size="A4" style={styles.body}>
          <View style={styles.table}>
            <View style={styles.tableRow}>
              <View style={styles.tableCol1Header}>
                <Text style={styles.tableCellHeader}>日時</Text>
              </View>
    ・・・
参考
③改ページ後にテーブルの上の線が出ない

テーブル本体の上の線を非表示にし、ヘッダーの上の線を表示にすると、うまく出た
 const styles = StyleSheet.create({
    body: {
      paddingTop: 30,
      paddingBottom: 65,
      paddingHorizontal: 20,
    },
    table: {
      width: "auto",
      borderStyle: BORDER_STYLE,
      borderColor: BORDER_COLOR,
      borderWidth: 1,
      borderRightWidth: 0,
      borderBottomWidth: 0,
      borderTopWidth: 0,     // ★テーブル本体の上の線を非表示にする
    },
    tableRow: {
      margin: "auto",
      flexDirection: "row",
    },
    tableCol20Header: {
      width: "20%",
      borderStyle: BORDER_STYLE,
      borderColor: BORDER_COLOR,
      borderBottomColor: "#000",
      borderWidth: 1,
      borderLeftWidth: 0,
      borderTopWidth: 1,    // ★ヘッダーの上の線を表示する
    },
④改ページ、ページ番号の表示
wrap, wrap={false} ・・・1ページに入らなくなったら、自動で改頁してくれる
fixed・・・ヘッダーなど固定で全ページに表示する
break ・・・固定で改ページを入れたいところに。
const MyDoc = () => {
    return (
      <Document>
      // ★pageをwrap
        <Page size="A4" style={styles.body} wrap>
          <Text style={styles.title} fixed>
            XX一覧
          </Text>
          <View style={styles.table}>
	   // ★ヘッダー部分
            <View style={styles.tableRow} fixed>
              <View style={styles.tableCol20Header}>
                <Text style={styles.tableCellHeader}>日時</Text>
              </View>
              <View style={styles.tableCol10Header}>
                <Text style={styles.tableCellHeader}>名前</Text>
              </View>
              <View style={styles.tableCol30Header}>
                <Text style={styles.tableCellHeader}>備考</Text>
              </View>
            </View>
            {exportData &&
              exportData?.map((data) => {
                return (
		// ★ページに入らなくなったら改ページする
                  <View style={styles.tableRow} key={data.id} wrap={false}>
                    <View style={styles.tableCol10}>
                      <Text style={styles.tableCell}>{data.create_dt}</Text>
                    </View>
                    <View style={styles.tableCol10}>
                      <Text style={styles.tableCell}>{data.name}</Text>
                    </View>
                    <View style={styles.tableCol20}>
                      <Text style={styles.tableCell}>{data.remarks}</Text>
                    </View>
                  </View>
                );
              })}
          </View>
	  // ★フッターでページ数を表示
          <Text
            style={styles.pageNumber}
            render={({ pageNumber, totalPages }) =>
              `${pageNumber} / ${totalPages}`
            }
            fixed
          />
        </Page>
      </Document>
参考
Discussion
補足:
同じように日本語の文字化けで困っていたので助かりました!
一応補足で、Nasuフォントを使っている記事が多いですが、日本語表示をできるYuGothicなどのフォントファイルをダウンロードしてくればそれらでも表示できました!🙇♂️