Google Cloud Speech-to-Text APIを使った話者分離(Speaker Diarization)の実装
音声ファイルから複数の話者を識別し、話者ごとの文字起こしを行う「話者分離(Speaker Diarization)」の実装について解説します。今回はGoogle Cloud Speech-to-Text APIを使用した方法を紹介します。
1. はじめに
音声データから誰がいつ何を話したかを自動的に識別する「話者分離」技術は、会議の議事録作成、インタビューの文字起こし、コールセンターの会話分析など、様々な場面で活用できます。今回はGoogle Cloud Speech-to-Text APIを使って、この機能を簡単に実装する方法を紹介します。
出力結果(サンプリングレート最適化時ー文字起こし)
結果 6:  How old are your parents?
  単語数: 5
結果 7:  Yeah, and my parents are my father, the 64 years old on. My mother is a 62 years old.
  単語数: 19
結果 8:  What food do you like to eat?
  単語数: 7
結果 9:  Yeah, I like carry rice. Oh, I don't like Japanese. My favorite food can take away is the Japanese who my favorite Japanese who is curry rice. Is the Barry. Carlos is a lot of input. The vegetable.
  単語数: 38
結果 10:  What do you do at work?
  単語数: 6
結果 11:  Yeah. My my work is a, it consultant IT consulting. And I I belong the IBM Consulting consultant company.
  単語数: 19
結果 12:  And I, I provide the program and system assistant in the file.
  単語数: 12
結果 13:  Tell me what your meeting rooms look like.
  単語数: 8
結果 14:  Yeah. Oh you if you check the meeting room. Oh you have to check the app of the farm or website.
  単語数: 21
出力結果(サンプリングレート最適化時ー話者分離)
話者 0:
Are you are you, are you? How old are your parents?

話者 2
1:
Yeah, and my parents are my father, the 64 years old on. My mother is a 62 years old.
2. 環境構築
必要なライブラリのインストール
まず、必要なライブラリをインストールします。以下の内容でrequirements.txtファイルを作成しましょう。
# Google Cloud APIクライアント
google-cloud-speech>=2.0.0
google-cloud-storage>=2.0.0

# 環境変数管理
python-dotenv>=0.19.0

# 音声ファイル処理
pydub>=0.25.1
インストールは以下のコマンドで行います:
pip install -r requirements.txt
ffmpegのインストール
MP3などの音声ファイルを処理するには、ffmpegが必要です:
- macOS:
brew install ffmpeg - Ubuntu:
sudo apt-get install ffmpeg - Windows: https://ffmpeg.org/download.html からダウンロード
3. Google Cloud Speech-to-Text APIの設定
プロジェクトとAPIの有効化
- Google Cloud Consoleでプロジェクトを作成

2. Speech-to-Text APIを有効化
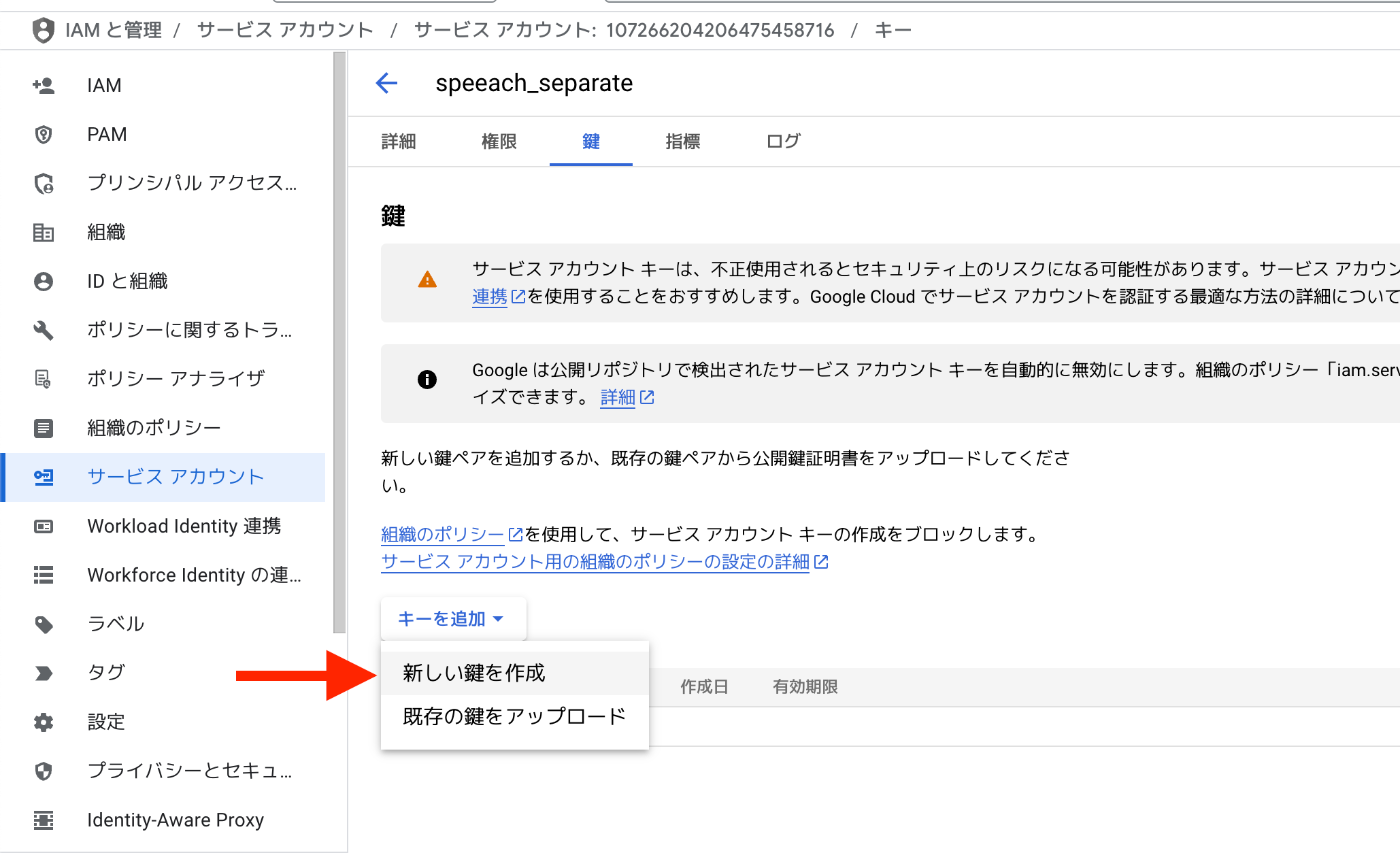
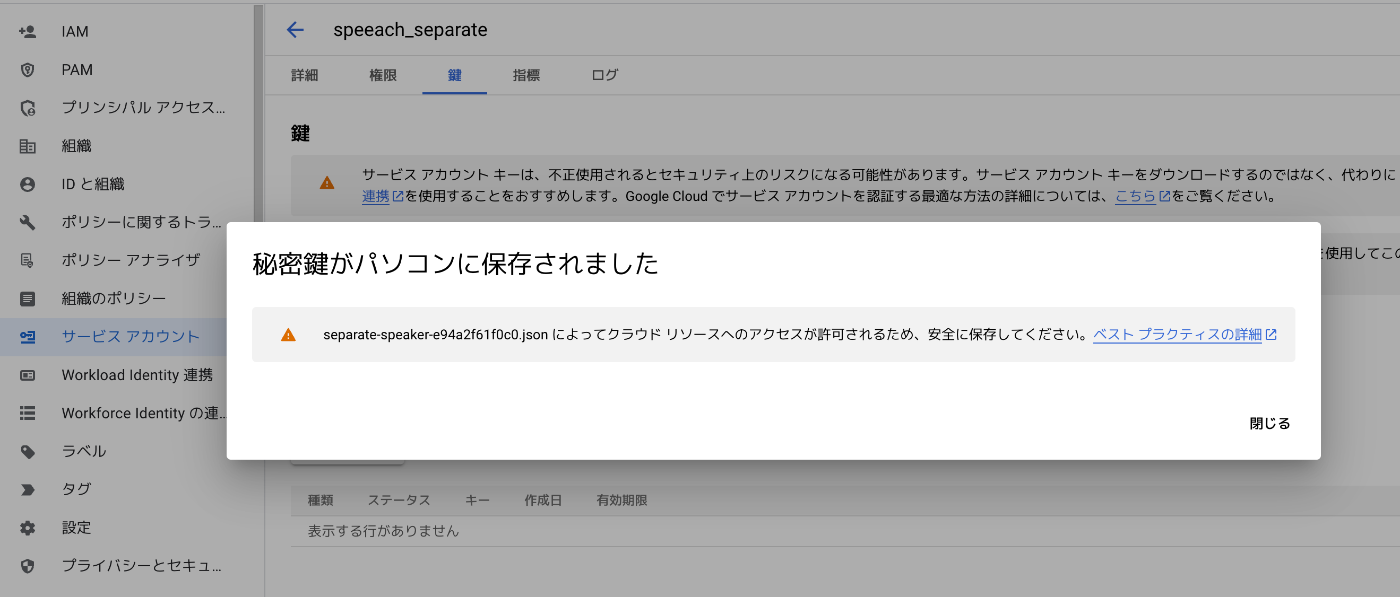
3. サービスアカウントキー(JSON形式)を作成・ダウンロード
 )
)
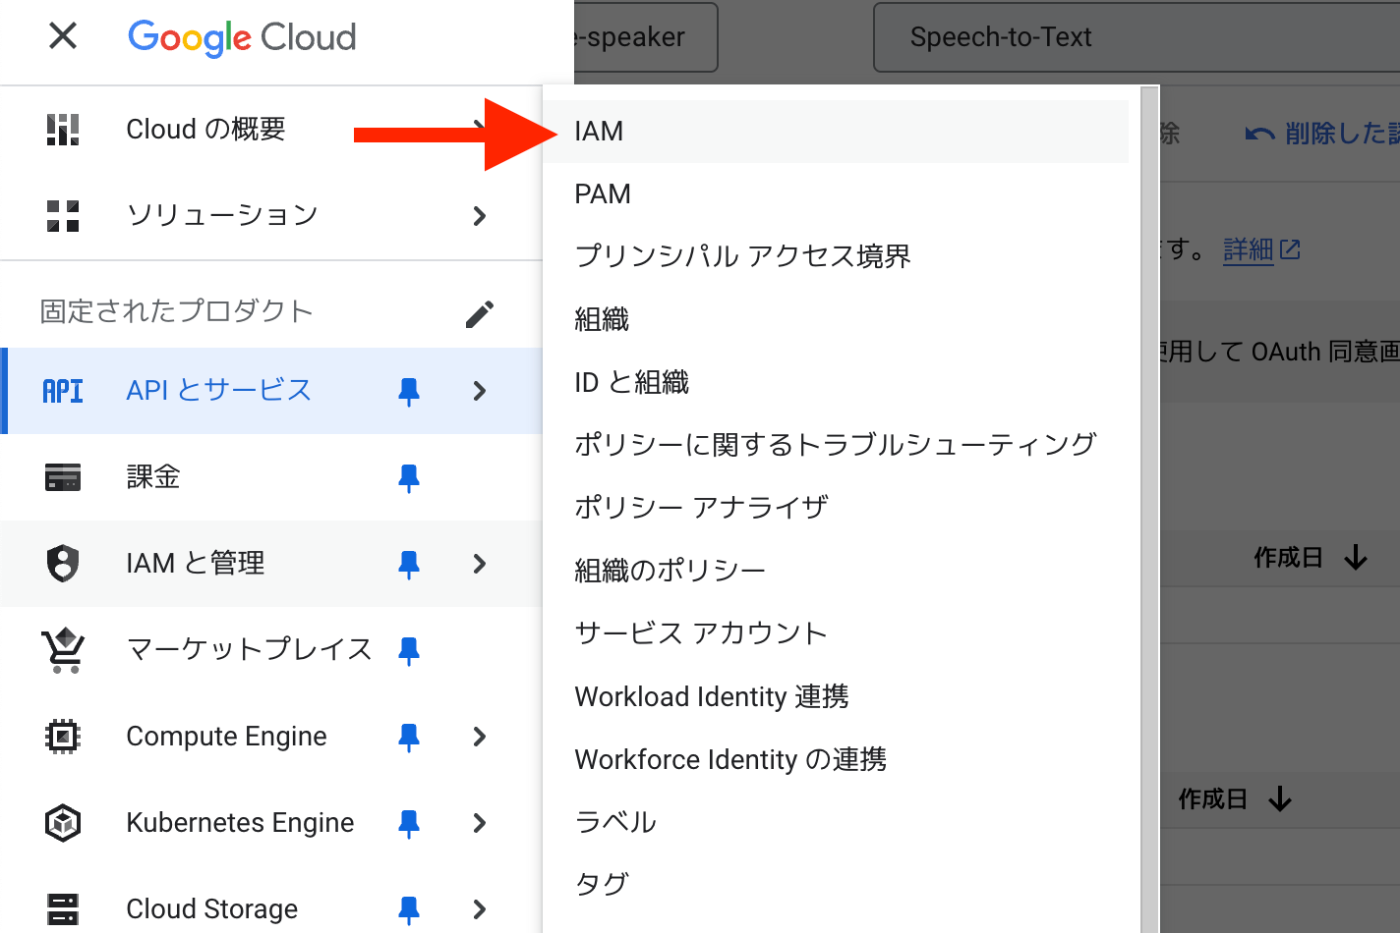
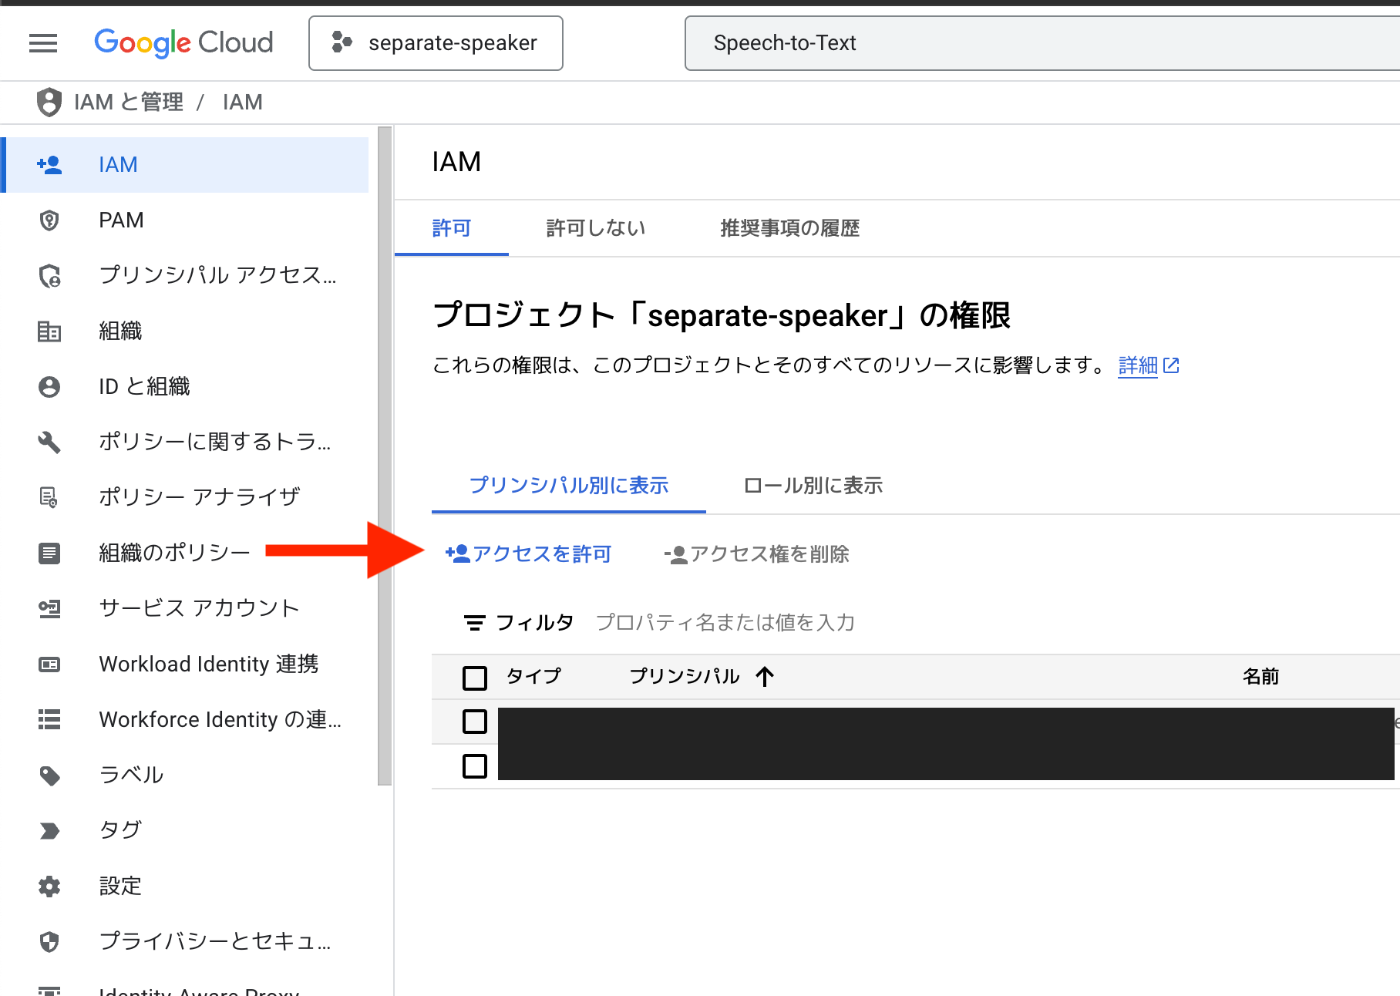
4. IAMのCloud Storageの認証権限の追加(音声ファイルが10MB以上ある場合
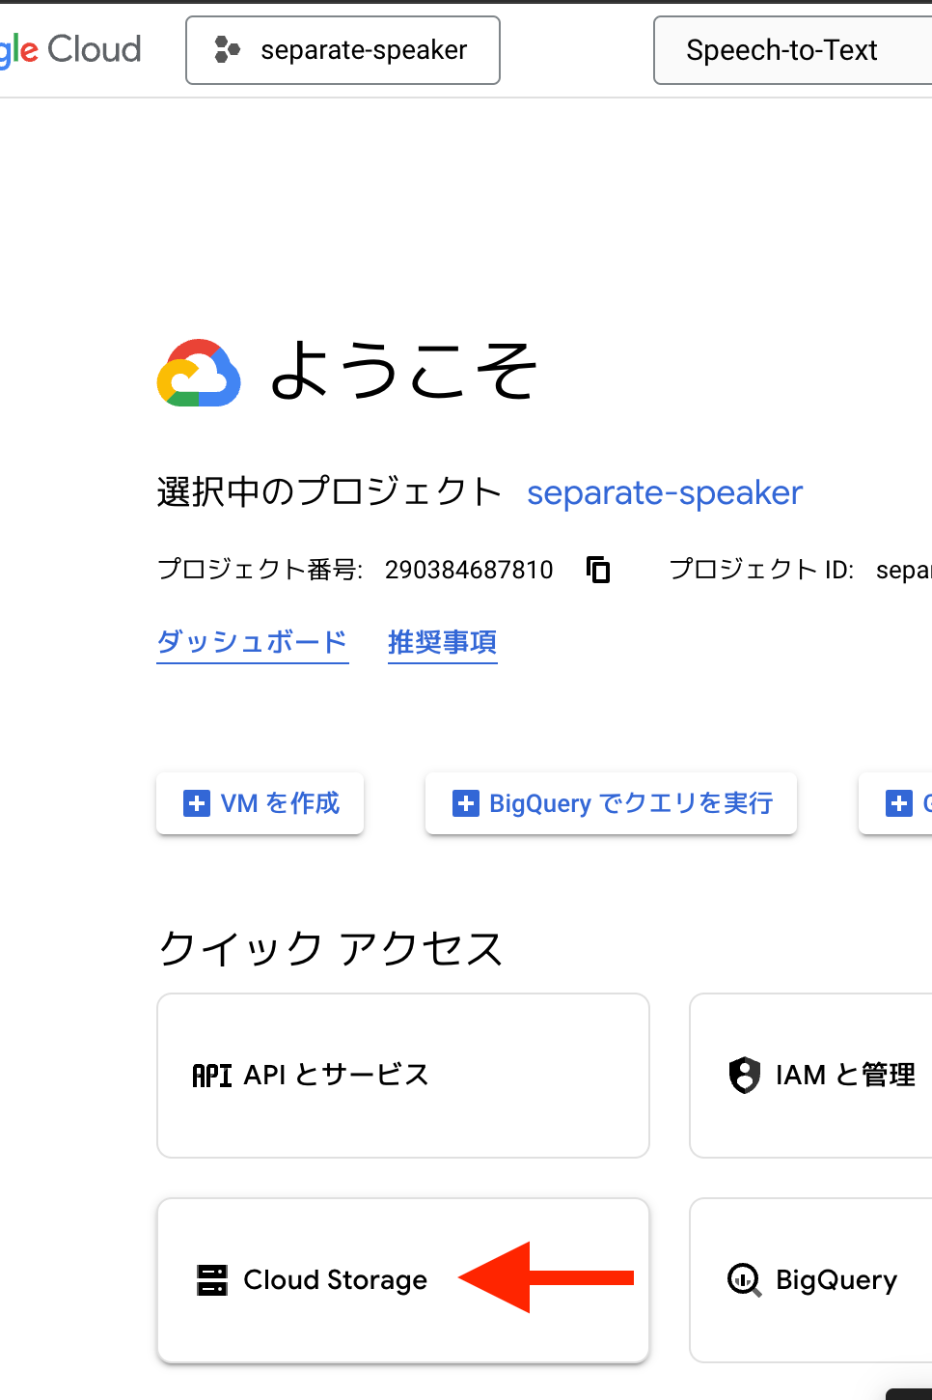
5. Cloud Storageの作成(音声ファイルが10MB以上ある場合)
環境変数の設定
.envファイルを作成して認証情報を設定します:
# Google Cloud Speech-to-Text認証情報
GOOGLE_APPLICATION_CREDENTIALS=/path/to/your-project-credentials.json

# Google Cloud Storage設定(大きなファイル用)
GCS_BUCKET_NAME=your-bucket-name
4. 話者分離の実装
以下に、話者分離を行うPythonコードを示します。
import os
from google.cloud import speech_v1p1beta1 as speech
from dotenv import load_dotenv

# .envファイルから環境変数を読み込む
load_dotenv()

def transcribe_file_with_speaker_diarization(
    audio_file_path, min_speaker_count=2, max_speaker_count=6, timeout=600, language_code="ja-JP"
):
    """
    Google Cloud Speech-to-Text APIを使用して、オーディオファイルの文字起こしと話者分離を行う関数

    Parameters:
        audio_file_path (str): 処理するオーディオファイルのパス
        min_speaker_count (int): 想定される最小話者数
        max_speaker_count (int): 想定される最大話者数
        timeout (int): 処理のタイムアウト時間(秒)
        language_code (str): 言語コード

    Returns:
        dict: 話者ごとに分けられた文字起こし結果
    """
    # Google Cloud SDKの認証
    client = speech.SpeechClient()

    # オーディオファイルの読み込み
    with open(audio_file_path, "rb") as audio_file:
        content = audio_file.read()

    # オーディオファイルの設定
    audio = speech.RecognitionAudio(content=content)

    # 話者分離の設定
    diarization_config = speech.SpeakerDiarizationConfig(
        enable_speaker_diarization=True,
        min_speaker_count=min_speaker_count,
        max_speaker_count=max_speaker_count,
    )

    # 音声認識の設定
    config = speech.RecognitionConfig(
        encoding=speech.RecognitionConfig.AudioEncoding.LINEAR16,
        sample_rate_hertz=16000,
        language_code=language_code,
        enable_automatic_punctuation=True,
        diarization_config=diarization_config,
    )

    # 音声認識の実行
    response = client.recognize(config=config, audio=audio)

    # 話者ごとに分けて保存
    speaker_transcripts = {}

    # 最後の結果を使用(通常、話者分離情報を含む)
    result = response.results[-1]
    words_info = result.alternatives[0].words

    for word_info in words_info:
        speaker_tag = word_info.speaker_tag
        word = word_info.word

        if speaker_tag not in speaker_transcripts:
            speaker_transcripts[speaker_tag] = []

        speaker_transcripts[speaker_tag].append(word)

    # 話者ごとのテキストを結合
    for speaker, words in speaker_transcripts.items():
        speaker_transcripts[speaker] = " ".join(words)

    return speaker_transcripts
5. 大きな音声ファイルの処理
10MB以上の音声ファイルは、Google Cloud Storageを使用して処理する必要があります。
from google.cloud import storage

def transcribe_gcs_with_speaker_diarization(
    audio_file_path, min_speaker_count=2, max_speaker_count=6, bucket_name=None, timeout=600
):
    """
    Google Cloud Storageを使用して大きな音声ファイルの文字起こしと話者分離を行う関数
    """
    # バケット名の取得
    if bucket_name is None:
        bucket_name = os.environ.get("GCS_BUCKET_NAME")
        if not bucket_name:
            raise ValueError("GCS_BUCKET_NAME環境変数が設定されていません")

    # ファイル名の取得
    file_name = os.path.basename(audio_file_path)
    gcs_object_name = f"audio_files/{file_name}"

    # GCSクライアントの初期化
    storage_client = storage.Client()
    bucket = storage_client.get_bucket(bucket_name)

    # ファイルのアップロード
    blob = bucket.blob(gcs_object_name)
    blob.upload_from_filename(audio_file_path)

    # Speech-to-Text APIクライアントの初期化
    client = speech.SpeechClient()

    # GCS上のオーディオファイルを指定
    audio = speech.RecognitionAudio(uri=f"gs://{bucket_name}/{gcs_object_name}")

    # 話者分離の設定
    diarization_config = speech.SpeakerDiarizationConfig(
        enable_speaker_diarization=True,
        min_speaker_count=min_speaker_count,
        max_speaker_count=max_speaker_count,
    )

    # 音声認識の設定
    config = speech.RecognitionConfig(
        encoding=speech.RecognitionConfig.AudioEncoding.LINEAR16,
        sample_rate_hertz=16000,
        language_code="ja-JP",
        enable_automatic_punctuation=True,
        diarization_config=diarization_config,
        model="latest_long",  # 長時間音声向けモデル
    )

    # 長時間音声の場合はLongRunningRecognizeを使用
    operation = client.long_running_recognize(config=config, audio=audio)

    # タイムアウト処理
    import time
    start_time = time.time()

    while not operation.done():
        elapsed_time = time.time() - start_time
        if elapsed_time > timeout:
            raise TimeoutError(f"処理がタイムアウトしました({timeout}秒)")
        time.sleep(10)  # 10秒ごとに確認

    response = operation.result()

    # 結果の解析と話者ごとの整理
    speaker_transcripts = {}

    for result in response.results:
        if not hasattr(result.alternatives[0], 'words'):
            continue

        words_info = result.alternatives[0].words

        for word_info in words_info:
            if not hasattr(word_info, 'speaker_tag'):
                continue

            speaker_tag = word_info.speaker_tag
            word = word_info.word

            if speaker_tag not in speaker_transcripts:
                speaker_transcripts[speaker_tag] = []

            speaker_transcripts[speaker_tag].append(word)

    # 話者ごとのテキストを結合
    for speaker, words in speaker_transcripts.items():
        speaker_transcripts[speaker] = " ".join(words)

    # GCSからファイルを削除(オプション)
    blob.delete()

    return speaker_transcripts
6. 言語設定とサンプルレートの自動検出
より柔軟な処理のために、言語設定とサンプルレートを自動検出する機能を追加します。
サンプルレートの自動検出
def get_sample_rate(audio_file_path):
    """音声ファイルのサンプルレートを取得する関数"""
    try:
        # wavファイルの場合はwaveモジュールを使用
        if audio_file_path.lower().endswith('.wav'):
            import wave
            with wave.open(audio_file_path, 'rb') as wf:
                return wf.getframerate()

        # その他の形式の場合はpydubを使用
        try:
            from pydub import AudioSegment
            audio = AudioSegment.from_file(audio_file_path)
            return audio.frame_rate
        except Exception as e:
            print(f"pydubでのサンプルレート取得に失敗しました: {e}")
            print("ffmpegがインストールされていない可能性があります")
            return 44100  # MP3の一般的なサンプルレート
    except Exception as e:
        print(f"サンプルレートの取得に失敗しました: {e}")
        return 44100  # デフォルト値
言語の自動検出
def detect_language(audio_file_path):
    """音声ファイルの言語を推測する関数"""
    # ファイル名やパスに日本語関連のキーワードが含まれているか確認
    path_lower = audio_file_path.lower()
    japanese_keywords = ['japan', 'japanese', 'jp', 'ja', '日本', '日本語']

    for keyword in japanese_keywords:
        if keyword in path_lower:
            return "ja-JP"

    # デフォルトは英語を返す
    return "en-US"
7. 結果の保存と活用
話者分離の結果をファイルに保存する機能を実装します。
def save_results_to_file(speaker_transcripts, audio_file_path, output_format="txt"):
    """話者分離の結果をファイルに保存する関数"""
    import os
    import json
    from datetime import datetime

    # 元のファイル名から拡張子を除いた部分を取得
    base_name = os.path.basename(audio_file_path)
    file_name_without_ext = os.path.splitext(base_name)[0]

    # 現在の日時を取得
    timestamp = datetime.now().strftime("%Y%m%d_%H%M%S")

    # 出力ディレクトリの作成(存在しない場合)
    output_dir = "speaker_separation_results"
    os.makedirs(output_dir, exist_ok=True)

    if output_format.lower() == "json":
        # JSON形式で保存
        output_file = os.path.join(output_dir, f"{file_name_without_ext}_{timestamp}_results.json")
        with open(output_file, "w", encoding="utf-8") as f:
            json.dump(speaker_transcripts, f, ensure_ascii=False, indent=2)
    else:
        # テキスト形式で保存
        output_file = os.path.join(output_dir, f"{file_name_without_ext}_{timestamp}_results.txt")
        with open(output_file, "w", encoding="utf-8") as f:
            f.write(f"=== 話者分離結果: {base_name} ===\n\n")
            for speaker, transcript in speaker_transcripts.items():
                f.write(f"話者 {speaker}:\n{transcript}\n\n")

    print(f"\n結果を保存しました: {output_file}")
    return output_file
8. トラブルシューティング
話者分離を行う際によくある問題と解決策を紹介します。
1. 音声ファイルの形式とエンコーディング
Google Cloud Speech-to-Text APIは、特定の音声形式とエンコーディングを要求します。ファイル形式に基づいて適切なエンコーディングを設定する必要があります。
# ファイル形式に基づいてエンコーディングを設定
if file_extension == '.wav':
    encoding = speech.RecognitionConfig.AudioEncoding.LINEAR16
elif file_extension == '.flac':
    encoding = speech.RecognitionConfig.AudioEncoding.FLAC
elif file_extension in ['.mp3', '.mp4', '.m4a']:
    encoding = speech.RecognitionConfig.AudioEncoding.MP3
else:
    # デフォルトはLINEAR16
    encoding = speech.RecognitionConfig.AudioEncoding.LINEAR16
2. サンプルレートの問題
音声ファイルのサンプルレートが正しく設定されていないと、認識精度が低下します。自動検出機能を使用することで、この問題を解決できます。
3. タイムアウトエラー
長い音声ファイルを処理する場合、デフォルトのタイムアウト時間では不十分なことがあります。タイムアウト時間を適切に設定しましょう。
# 例: 30分(1800秒)のタイムアウトを設定
transcribe_file_with_speaker_diarization(audio_file_path, timeout=1800)
# または直接GCS関数を使用
transcribe_gcs_with_speaker_diarization(audio_file_path, timeout=1800)
4. ffmpegの問題
MP3などの音声ファイルを処理するには、ffmpegが必要です。インストールされていない場合は、適切にインストールしてください。
9. まとめ
Google Cloud Speech-to-Text APIを使った話者分離の実装について解説しました。この実装により、音声ファイルから複数の話者を識別し、話者ごとの文字起こしを行うことができます。
主な機能:
- 複数話者の識別と文字起こし
- 大きな音声ファイルの処理(Google Cloud Storage経由)
- 言語とサンプルレートの自動検出
- 結果のテキストまたはJSON形式での保存
この実装を活用することで、会議の議事録作成、インタビューの文字起こし、コールセンターの会話分析など、様々な場面で効率化が図れます。
完全なコード例
最後に、すべての機能を統合した完全なコード例を示します。このコードは、google_speaker_diarization.pyとして保存し、実行することができます。
import os
from google.cloud import speech_v1p1beta1 as speech
from dotenv import load_dotenv
from google.cloud import storage

# .envファイルから環境変数を読み込む
load_dotenv()

def get_sample_rate(audio_file_path):
    """
    音声ファイルのサンプルレートを取得する関数

    Parameters:
        audio_file_path (str): 音声ファイルのパス

    Returns:
        int: サンプルレート(Hz)
    """
    try:
        # wavファイルの場合はwaveモジュールを使用
        if audio_file_path.lower().endswith('.wav'):
            import wave
            with wave.open(audio_file_path, 'rb') as wf:
                return wf.getframerate()

        # その他の形式の場合はpydubを使用
        try:
            from pydub import AudioSegment
            audio = AudioSegment.from_file(audio_file_path)
            return audio.frame_rate
        except Exception as e:
            print(f"pydubでのサンプルレート取得に失敗しました: {e}")
            print("ffmpegがインストールされていない可能性があります。")
            print("以下のコマンドでインストールしてください:")
            print("  macOS: brew install ffmpeg")
            print("  Ubuntu: sudo apt-get install ffmpeg")
            print("  Windows: https://ffmpeg.org/download.html からダウンロード")
            print("デフォルトのサンプルレート(44100Hz)を使用します。")
            return 44100  # MP3の一般的なサンプルレート
    except Exception as e:
        print(f"サンプルレートの取得に失敗しました: {e}")
        print("デフォルトのサンプルレート(44100Hz)を使用します。")
        return 44100  # デフォルト値


def detect_language(audio_file_path):
    """
    音声ファイルの言語を推測する関数
    実際には音声から言語を自動検出するのは難しいため、
    ファイル名やパスから推測するか、ユーザーに選択させる

    Parameters:
        audio_file_path (str): 音声ファイルのパス

    Returns:
        str: 言語コード("ja-JP"または"en-US"など)
    """
    # ファイル名やパスに日本語関連のキーワードが含まれているか確認
    path_lower = audio_file_path.lower()
    japanese_keywords = ['japan', 'japanese', 'jp', 'ja', '日本', '日本語']

    for keyword in japanese_keywords:
        if keyword in path_lower:
            return "ja-JP"

    # デフォルトは日本語を返す(必要に応じて変更)
    # return "ja-JP"
    return "en-US"


def transcribe_file_with_speaker_diarization(
    audio_file_path, min_speaker_count=2, max_speaker_count=6, timeout=600, language_code=None
):
    """
    Google Cloud Speech-to-Text APIを使用して、オーディオファイルの文字起こしと話者分離を行う関数

    Parameters:
        audio_file_path (str): 処理するオーディオファイルのパス
        min_speaker_count (int): 想定される最小話者数
        max_speaker_count (int): 想定される最大話者数
        timeout (int): 処理のタイムアウト時間(秒)
        language_code (str): 言語コード(Noneの場合は自動検出)

    Returns:
        dict: 話者ごとに分けられた文字起こし結果
    """

    # ファイルサイズを確認
    file_size = os.path.getsize(audio_file_path)

    # 10MBを超える場合はGCSを使用する方法を使用
    if file_size > 10 * 1024 * 1024:  # 10MB
        print(f"ファイルサイズが大きいため({file_size/1024/1024:.2f}MB)、GCSを使用して処理します")
        return transcribe_gcs_with_speaker_diarization(
            audio_file_path, min_speaker_count, max_speaker_count, timeout=timeout, language_code=language_code
        )

    # Google Cloud SDKの認証(環境変数 GOOGLE_APPLICATION_CREDENTIALS で設定するか、
    # explicit_credentials = service_account.Credentials.from_service_account_file('path/to/key.json')
    # client = speech.SpeechClient(credentials=explicit_credentials) として認証する)
    client = speech.SpeechClient()

    # オーディオファイルの読み込み
    with open(audio_file_path, "rb") as audio_file:
        content = audio_file.read()

    # オーディオファイルの設定
    audio = speech.RecognitionAudio(content=content)

    # 音声認識と話者分離の設定
    diarization_config = speech.SpeakerDiarizationConfig(
        enable_speaker_diarization=True,
        min_speaker_count=min_speaker_count,
        max_speaker_count=max_speaker_count,
    )

    # 音声ファイルの拡張子を取得
    file_extension = os.path.splitext(audio_file_path)[1].lower()

    # ファイル形式に基づいてエンコーディングを設定
    if file_extension == '.wav':
        encoding = speech.RecognitionConfig.AudioEncoding.LINEAR16
    elif file_extension == '.flac':
        encoding = speech.RecognitionConfig.AudioEncoding.FLAC
    elif file_extension in ['.mp3', '.mp4', '.m4a']:
        encoding = speech.RecognitionConfig.AudioEncoding.MP3
    else:
        # デフォルトはLINEAR16
        encoding = speech.RecognitionConfig.AudioEncoding.LINEAR16
        print(f"警告: 未知のファイル形式 '{file_extension}'。LINEAR16エンコーディングを使用します。")

    # サンプルレートを取得
    sample_rate = get_sample_rate(audio_file_path)

    # 言語設定
    if language_code is None:
        language_code = detect_language(audio_file_path)

    print(f"言語設定: {language_code}")

    config = speech.RecognitionConfig(
        encoding=encoding,
        sample_rate_hertz=sample_rate,
        language_code=language_code,
        enable_automatic_punctuation=True,
        diarization_config=diarization_config,
        model="latest_long",  # 長時間音声向けモデル
    )

    print(f"音声認識設定: エンコーディング={encoding}, サンプルレート={sample_rate}Hz, 言語={language_code}, 最小話者数={min_speaker_count}, 最大話者数={max_speaker_count}")

    print("音声認識処理を開始します...")
    response = client.recognize(config=config, audio=audio)

    # デバッグ情報:結果の数を表示
    print(f"認識結果の数: {len(response.results)}")
    if len(response.results) == 0:
        print("警告: 認識結果がありません。音声ファイルを確認してください。")
        return {}

    # 最後の結果を使用(通常、話者分離情報を含む)
    result = response.results[-1]

    if not result.alternatives:
        print("警告: 認識結果に代替案がありません。")
        return {}

    print(f"認識されたテキスト: {result.alternatives[0].transcript}")

    if not hasattr(result.alternatives[0], 'words'):
        print("警告: 認識結果に単語情報がありません。話者分離が有効になっていない可能性があります。")
        return {}

    words_info = result.alternatives[0].words
    print(f"単語数: {len(words_info)}")

    # 話者ごとに分けて保存
    speaker_transcripts = {}

    for word_info in words_info:
        if not hasattr(word_info, 'speaker_tag'):
            print(f"警告: 単語 '{word_info.word}' には speaker_tag 属性がありません")
            continue

        speaker_tag = word_info.speaker_tag
        word = word_info.word

        if speaker_tag not in speaker_transcripts:
            speaker_transcripts[speaker_tag] = []

        speaker_transcripts[speaker_tag].append(word)

    # 話者ごとのテキストを結合
    for speaker, words in speaker_transcripts.items():
        speaker_transcripts[speaker] = " ".join(words)

    # 結果の要約を表示
    print(f"\n話者の数: {len(speaker_transcripts)}")
    for speaker, transcript in speaker_transcripts.items():
        word_count = len(transcript.split())
        print(f"話者 {speaker}: {word_count}単語")

    return speaker_transcripts


def transcribe_gcs_with_speaker_diarization(
    audio_file_path, min_speaker_count=2, max_speaker_count=6, bucket_name=None, timeout=600, language_code=None
):
    """
    Google Cloud Storageを使用して大きな音声ファイルの文字起こしと話者分離を行う関数

    Parameters:
        audio_file_path (str): 処理するオーディオファイルのパス
        min_speaker_count (int): 想定される最小話者数
        max_speaker_count (int): 想定される最大話者数
        bucket_name (str): 使用するGCSバケット名(Noneの場合は環境変数から取得)
        timeout (int): 処理のタイムアウト時間(秒)
        language_code (str): 言語コード(Noneの場合は自動検出)

    Returns:
        dict: 話者ごとに分けられた文字起こし結果
    """
    # バケット名の取得
    if bucket_name is None:
        bucket_name = os.environ.get("GCS_BUCKET_NAME")
        if not bucket_name:
            raise ValueError("GCS_BUCKET_NAME環境変数が設定されていません。バケット名を指定してください。")

    # ファイル名の取得
    file_name = os.path.basename(audio_file_path)
    gcs_object_name = f"audio_files/{file_name}"

    # GCSクライアントの初期化
    storage_client = storage.Client()

    # バケットの取得(バケットが存在しない場合はエラーメッセージを表示)
    try:
        bucket = storage_client.get_bucket(bucket_name)
    except Exception as e:
        raise ValueError(f"バケット '{bucket_name}' へのアクセスに失敗しました: {e}\n"
                         f"1. バケットが存在することを確認してください\n"
                         f"2. サービスアカウントに適切な権限があることを確認してください\n"
                         f"   - Storage オブジェクト管理者 (roles/storage.objectAdmin)\n"
                         f"   - Storage バケット閲覧者 (roles/storage.buckets.get)")

    # ファイルのアップロード
    blob = bucket.blob(gcs_object_name)
    blob.upload_from_filename(audio_file_path)

    print(f"ファイルをGCSにアップロードしました: gs://{bucket_name}/{gcs_object_name}")

    # Speech-to-Text APIクライアントの初期化
    client = speech.SpeechClient()

    # GCS上のオーディオファイルを指定
    audio = speech.RecognitionAudio(uri=f"gs://{bucket_name}/{gcs_object_name}")

    # 音声認識と話者分離の設定
    diarization_config = speech.SpeakerDiarizationConfig(
        enable_speaker_diarization=True,
        min_speaker_count=min_speaker_count,
        max_speaker_count=max_speaker_count,
    )

    # 音声ファイルの拡張子を取得
    file_extension = os.path.splitext(audio_file_path)[1].lower()

    # ファイル形式に基づいてエンコーディングを設定
    if file_extension == '.wav':
        encoding = speech.RecognitionConfig.AudioEncoding.LINEAR16
    elif file_extension == '.flac':
        encoding = speech.RecognitionConfig.AudioEncoding.FLAC
    elif file_extension in ['.mp3', '.mp4', '.m4a']:
        encoding = speech.RecognitionConfig.AudioEncoding.MP3
    else:
        # デフォルトはLINEAR16
        encoding = speech.RecognitionConfig.AudioEncoding.LINEAR16
        print(f"警告: 未知のファイル形式 '{file_extension}'。LINEAR16エンコーディングを使用します。")

    # サンプルレートを取得
    sample_rate = get_sample_rate(audio_file_path)

    # 言語設定
    if language_code is None:
        language_code = detect_language(audio_file_path)

    print(f"言語設定: {language_code}")

    config = speech.RecognitionConfig(
        encoding=encoding,
        sample_rate_hertz=sample_rate,
        language_code=language_code,
        enable_automatic_punctuation=True,
        diarization_config=diarization_config,
        model="latest_long",  # 長時間音声向けモデル
    )

    print(f"音声認識設定: エンコーディング={encoding}, サンプルレート={sample_rate}Hz, 言語={language_code}, 最小話者数={min_speaker_count}, 最大話者数={max_speaker_count}")

    # 長時間音声の場合はLongRunningRecognizeを使用
    print("音声認識処理を開始します(GCS経由)...")
    operation = client.long_running_recognize(config=config, audio=audio)

    import time
    print(f"処理中... タイムアウト: {timeout}秒")
    start_time = time.time()

    # 進捗状況を定期的に表示
    while not operation.done():
        elapsed_time = time.time() - start_time
        if elapsed_time > timeout:
            raise TimeoutError(f"処理がタイムアウトしました({timeout}秒)。より長いタイムアウト時間を指定してください。")

        # 1分ごとに進捗状況を表示
        if int(elapsed_time) % 60 == 0 and int(elapsed_time) > 0:
            print(f"処理中... 経過時間: {int(elapsed_time)}秒")

        time.sleep(10)  # 10秒ごとに確認

    print(f"処理が完了しました。所要時間: {int(time.time() - start_time)}秒")
    response = operation.result()

    # デバッグ情報:結果の数を表示
    print(f"認識結果の数: {len(response.results)}")

    # 結果の解析と話者ごとの整理
    speaker_transcripts = {}

    for i, result in enumerate(response.results):
        if not result.alternatives:
            continue

        print(f"結果 {i+1}: {result.alternatives[0].transcript}")

        if not hasattr(result.alternatives[0], 'words'):
            print(f"警告: 結果 {i+1} には words 属性がありません")
            continue

        words_info = result.alternatives[0].words
        print(f"  単語数: {len(words_info)}")

        for word_info in words_info:
            if not hasattr(word_info, 'speaker_tag'):
                print(f"警告: 単語 '{word_info.word}' には speaker_tag 属性がありません")
                continue

            speaker_tag = word_info.speaker_tag
            word = word_info.word

            if speaker_tag not in speaker_transcripts:
                speaker_transcripts[speaker_tag] = []

            speaker_transcripts[speaker_tag].append(word)

    # 話者ごとのテキストを結合
    for speaker, words in speaker_transcripts.items():
        speaker_transcripts[speaker] = " ".join(words)

    # 結果の要約を表示
    print(f"\n話者の数: {len(speaker_transcripts)}")
    for speaker, transcript in speaker_transcripts.items():
        word_count = len(transcript.split())
        print(f"話者 {speaker}: {word_count}単語")

    # GCSからファイルを削除(オプション)
    try:
        blob.delete()
        print(f"GCSからファイルを削除しました: gs://{bucket_name}/{gcs_object_name}")
    except Exception as e:
        print(f"GCSからのファイル削除に失敗しました: {e}")

    return speaker_transcripts


def main():
    # 使用例
    audio_file_path = "/Users/fumipen/Documents/progress/program/progress/01_test_folder/20250305_progos.mp3"

    try:
        # 言語を指定(日本語の場合は"ja-JP"、英語の場合は"en-US")
        # 指定しない場合は自動検出
        # language_code = "ja-JP"  # 日本語
        language_code = "en-US"  # 英語

        print(f"処理する音声ファイル: {audio_file_path}")
        print(f"指定言語: {language_code}")

        # 大きなファイルの場合は、より長いタイムアウト時間を指定できます
        # 例: 10分(600秒)、20分(1200秒)、30分(1800秒)など
        speaker_transcripts = transcribe_file_with_speaker_diarization(
            audio_file_path,
            min_speaker_count=2,
            max_speaker_count=6,
            language_code=language_code
        )

        if not speaker_transcripts:
            print("警告: 話者分離結果が空です。以下を確認してください:")
            print("1. 音声ファイルの品質(ノイズが少なく、話者の声が明確か)")
            print("2. 言語設定が正しいか(日本語音声には'ja-JP'、英語音声には'en-US')")
            print("3. サンプルレートが正しく検出されているか")
            print("4. ffmpegがインストールされているか")
        else:
            print("\n=== 話者分離結果 ===")
            for speaker, transcript in speaker_transcripts.items():
                print(f"話者 {speaker}: {transcript}")

            # 結果をファイルに保存
            save_results_to_file(speaker_transcripts, audio_file_path)

    except TimeoutError as e:
        print(f"タイムアウトエラー: {e}")
        print("ヒント: 直接GCS関数を呼び出して、より長いタイムアウト時間を指定してください。例:")
        print("transcribe_gcs_with_speaker_diarization(audio_file_path, timeout=1800)  # 30分")
    except Exception as e:
        print(f"エラーが発生しました: {e}")
        import traceback
        traceback.print_exc()  # 詳細なエラー情報を表示


def save_results_to_file(speaker_transcripts, audio_file_path, output_format="txt"):
    """
    話者分離の結果をファイルに保存する関数

    Parameters:
        speaker_transcripts (dict): 話者ごとの文字起こし結果
        audio_file_path (str): 元の音声ファイルのパス
        output_format (str): 出力形式("txt"または"json")
    """
    import os
    import json
    from datetime import datetime

    # 元のファイル名から拡張子を除いた部分を取得
    base_name = os.path.basename(audio_file_path)
    file_name_without_ext = os.path.splitext(base_name)[0]

    # 現在の日時を取得
    timestamp = datetime.now().strftime("%Y%m%d_%H%M%S")

    # 出力ディレクトリの作成(存在しない場合)
    output_dir = "speaker_separation_results"
    os.makedirs(output_dir, exist_ok=True)

    if output_format.lower() == "json":
        # JSON形式で保存
        output_file = os.path.join(output_dir, f"{file_name_without_ext}_{timestamp}_results.json")
        with open(output_file, "w", encoding="utf-8") as f:
            json.dump(speaker_transcripts, f, ensure_ascii=False, indent=2)
    else:
        # テキスト形式で保存
        output_file = os.path.join(output_dir, f"{file_name_without_ext}_{timestamp}_results.txt")
        with open(output_file, "w", encoding="utf-8") as f:
            f.write(f"=== 話者分離結果: {base_name} ===\n\n")
            for speaker, transcript in speaker_transcripts.items():
                f.write(f"話者 {speaker}:\n{transcript}\n\n")

    print(f"\n結果を保存しました: {output_file}")
    return output_file


if __name__ == "__main__":
    main()
以上が、Google Cloud Speech-to-Text APIを使った話者分離の実装についての記事です。この記事を参考に、音声ファイルから複数の話者を識別し、話者ごとの文字起こしを行うシステムを構築してみてください。
実装のポイントとしては以下の点に注意しましょう:
- 適切な認証情報の設定(
.envファイルの活用) - 音声ファイルの形式とエンコーディングの適切な設定
- サンプルレートの自動検出
- 言語設定の自動検出または明示的な指定
- 大きなファイルの処理(Google Cloud Storage経由)
- タイムアウト時間の適切な設定
- 結果の保存と活用
これらの機能を組み合わせることで、より柔軟で堅牢な話者分離システムを構築することができます。
こちらのgithubファイルに今回のコードを記載しているので、よろしければご活用ください。
最後に
私は2つのプラットフォームで生成AIに関する発信を行なっております。
生成AIサービスの考察を見たい方へ
生成AIサービスの動向やや具体的な内容は、noteで詳しく解説しています。
noteプロフィール: @mizupee
日々の生成AI分析を追いたい方へ
毎日1つの生成AIサービスを分析するTwitter投稿「#100DaysofAI」もぜひフォローください。簡潔なポイント分析とアイデア共有を継続中です。
Twitter: @mizupee
Discussion