Open5
UnityでPassthroughを試す
前提
- Meta XR SDKがUnityにImportされている
Desktopで設定を行う
Meta Quest Link
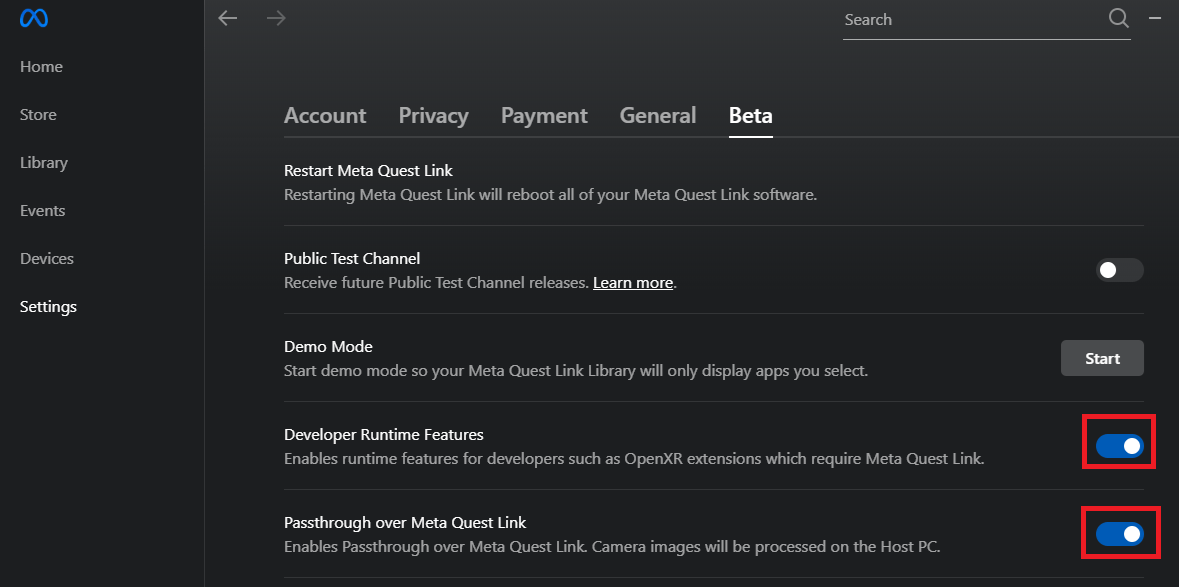
- Settings > Beta
- Developer Runtime Features を有効
- Passthrough over Meta Quest Link を有効
- Developer Runtime Featuresが表示されていない場合は、Settings > General
- OpenXR Runtime で設定
Unityでの設定
-
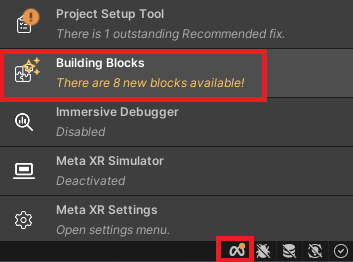
Building Blocksを選択する
-
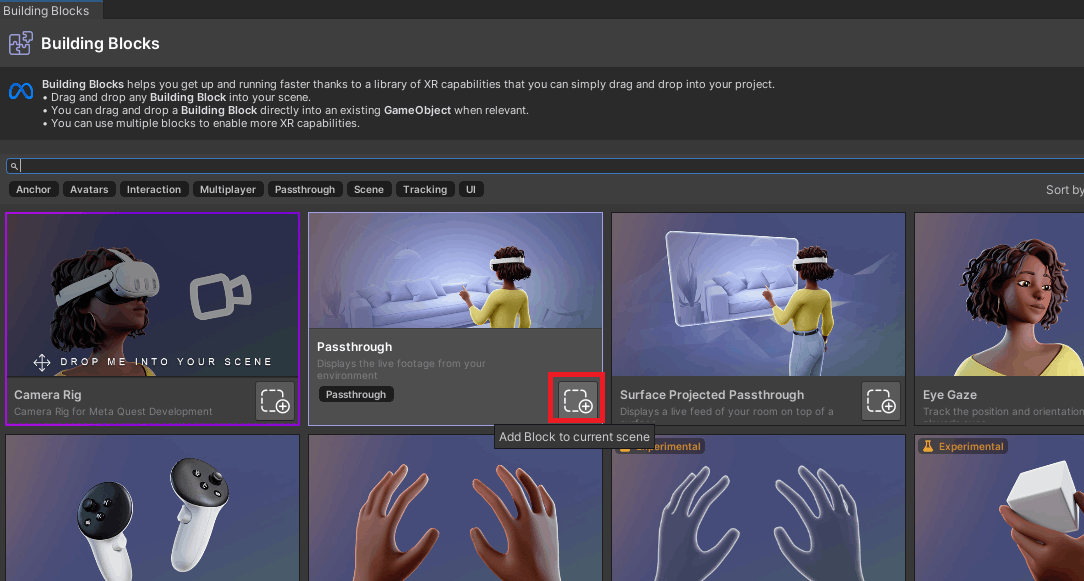
Template的なものが表示されるので、Passthroughを追加する
実行方法
QuestでAir Link起動
UnityでPlayを押す
参考資料
Building Blocksの場合、後から振り返ってみたときに、何が追加されたのか追いにくくなるためPrefabを追加した方が良さそう
Scene
UnityのSceneとはおそらく別物
SceneAnchor
VR Cameraの設定方法
- OVRCameraRig PrefabをSceneに置く
- MainCameraの代わりのもの
- このPrefabの子にあるTrackingSpaceには、左右の目の基準点、左右の手の基準点がある
VR Camera関連のPrefab
- OVRCameraRigInteraction: カメラと頭部トラッキングの管理
- OVRControllerDrivenHands: コントローラで手の動きを再現
- OVRControllerHands: コントローラ入力による手のモデル制御
- OVRControllers: コントローラ全般のトラッキング管理
- OVRControllerVisual: コントローラの視覚的な表示
- OVRHands: ハンドトラッキング機能を提供
- OVRHmd: HMD(ヘッドセット)のトラッキング
- OVRInteraction: 基本的なインタラクション機能
- OVRInteractionComprehensive: 総合的な相互作用セットアップ
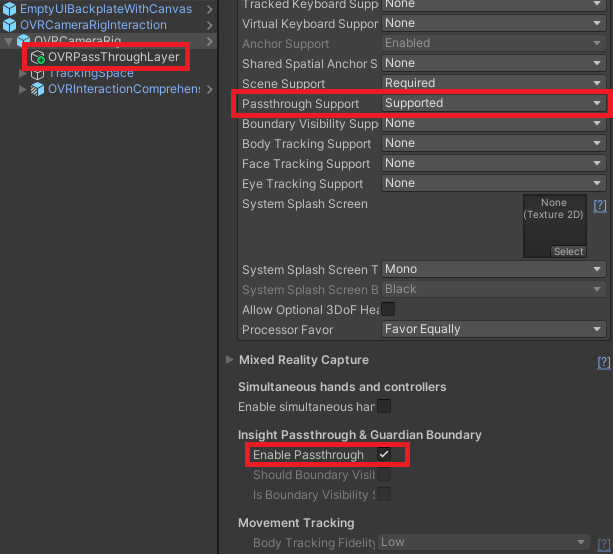
PrefabからPassthroughできるようにする
OVRCameraRigInteraction をSceneに置く
- OVRCameraRig + Interactorも付随していてる
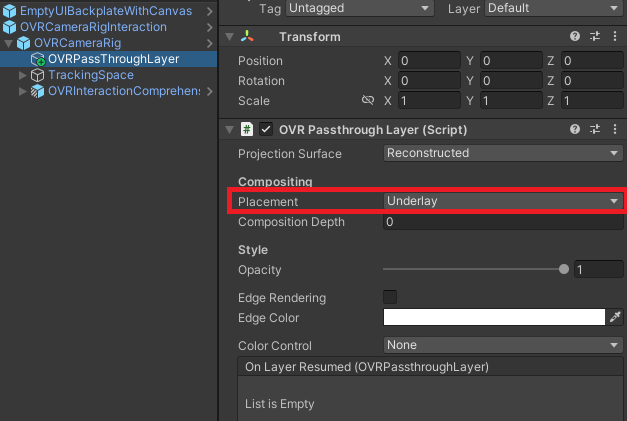
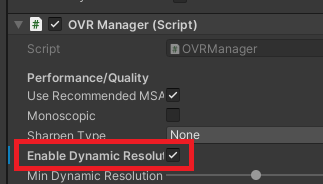
推奨オプション
最適な解像度でレンダリングする

RGBA = (0, 0, 0, 0)