[続] go_routerでBottomNavigationBarの永続化に挑戦する(StatefulShellRoute)
以前書いたgo_routerの記事から月日が流れ、go_routerでも「ボトムナビゲーションバーの永続化」、そして「各タブ内の状態保持」に対応する StatefulShellRoute が導入されたので、そちらについて整理していきたいと思います。
tl;dr
- ボトムナビゲーションバーの永続化には
StatefulShellRouteクラスが使える - ボトムナビゲーションだけでなく、各タブ内の状態保持も可能
-
go_router_builderでも対応 (おまけ参照) - 導入手順
-
GoRouterを作る -
StatefulShellRouteを追加 -
NavigationBarを実装した画面をルート画面として配置 - タブ分の
StatefulShellBranchを追加 - 各ブランチ内のルーティング分、
GoRouteを追加 -
GlobalKey<NavigatorState>を作成→紐付ける
-
- 🚨 課題:保持した状態をリセットする手段がない
StatefulShellRouteをgo_router、go_router_builderで実装したサンプルコード
go_router (Navigator2.0)の利点と課題
簡単にgo_routerおよびNavigator2.0について解説しておきます。
💫 宣言的なルーティングのNavigator2.0
go_routerを代表とするNavigator2.0に分類されるルーティング手法は、従来のNavigatorクラスに対するpushやpopなどの命令的(Imperative)なルーティングと異なり、先に全ての遷移構造を定義し、その構造を元に画面遷移する宣言的(Declarative)なルーティングを行います。パス指定で遷移し、その過程に存在する画面を同時に生成してくれます。
Webサイトのルーティングと類似した手法である事からディープリンクなどとの親和性が高く、ページ構成を崩す事なく、どのページにも簡単に遷移する事が大きな利点です。またリダイレクト処理や遷移アニメーションが書き易いというメリットを挙げる方も多いようです。
🚨 go_routerとボトムナビゲーション
そんなNavigator2.0の代表的なパッケージとしてgo_routerが開発され、Flutter公式のパッケージとなるに至りました。ただ公式から推奨されるもモバイルで頻繁に利用されるボトムナビゲーションのような複数のページに跨り永続化されるべき画面に対応する事が出来ませんでした。またどうにか工夫をして対応しても各タブを切り替える度に画面スタックが初期化されてしまい、モバイルにとって望むような挙動を実現する事が出来ませんでした。
そこで開発されたのが今回のStatefulShellRouteを使った仕組みです。
StatefulShellRouteの使い方
登場人物
主要な登場人物は以下のクラス達です
GoRouter |
画面の遷移構成を宣言するクラス |
StatefulShellRoute |
複数のNavigatorとその状態保持を行うルート |
StatefulShellBranch |
StateShellRouteで管理するNavigatorに対応するクラス |
StatefulNavigationShell |
StatefulShellRouteが管理する複数のブランチ(StatefulShellBranch)とその状態を管理するクラス |
GoRoute |
各画面に対応するルート |
NavigationBar |
Material Design3に対応したBottomNavigationBar。従来のBottomNavigationBarwidgetの後継です。参考
|
導入の流れ
基本の流れは以下の通りです
-
GoRouterを作る -
StatefulShellRouteを追加 -
NavigationBarを実装した画面をルート画面として配置 - タブ分の
StatefulShellBranchを追加 - 各ブランチ内のルーティング分、
GoRouteを追加 -
GlobalKey<NavigatorState>を作成→紐付ける
イメージとしては、ルートに存在するボトムナビゲーションバーを持つページの上に、各タブの分だけそれぞれのNavigatorが配置されるような形です。タブに対応するNavigatorはBranchと呼ばれ、タブをタップすることでこのBranchを切り替えます。その際に各Brach内の状態が保持されているので、タブを切り替えても各タブ内のページの状態が持続します。
図で表すと以下のようなイメージになります。

ルートのNavigatorの上にStatefulShellRouteが乗り、その上にそれぞれのNavigatorを持ったブランチが乗り、そのNavigatorの上にブランチ内のページ(GoRoute)が乗るような形です。
サンプル構成
以下のような構成のサンプルアプリを実装してみます。
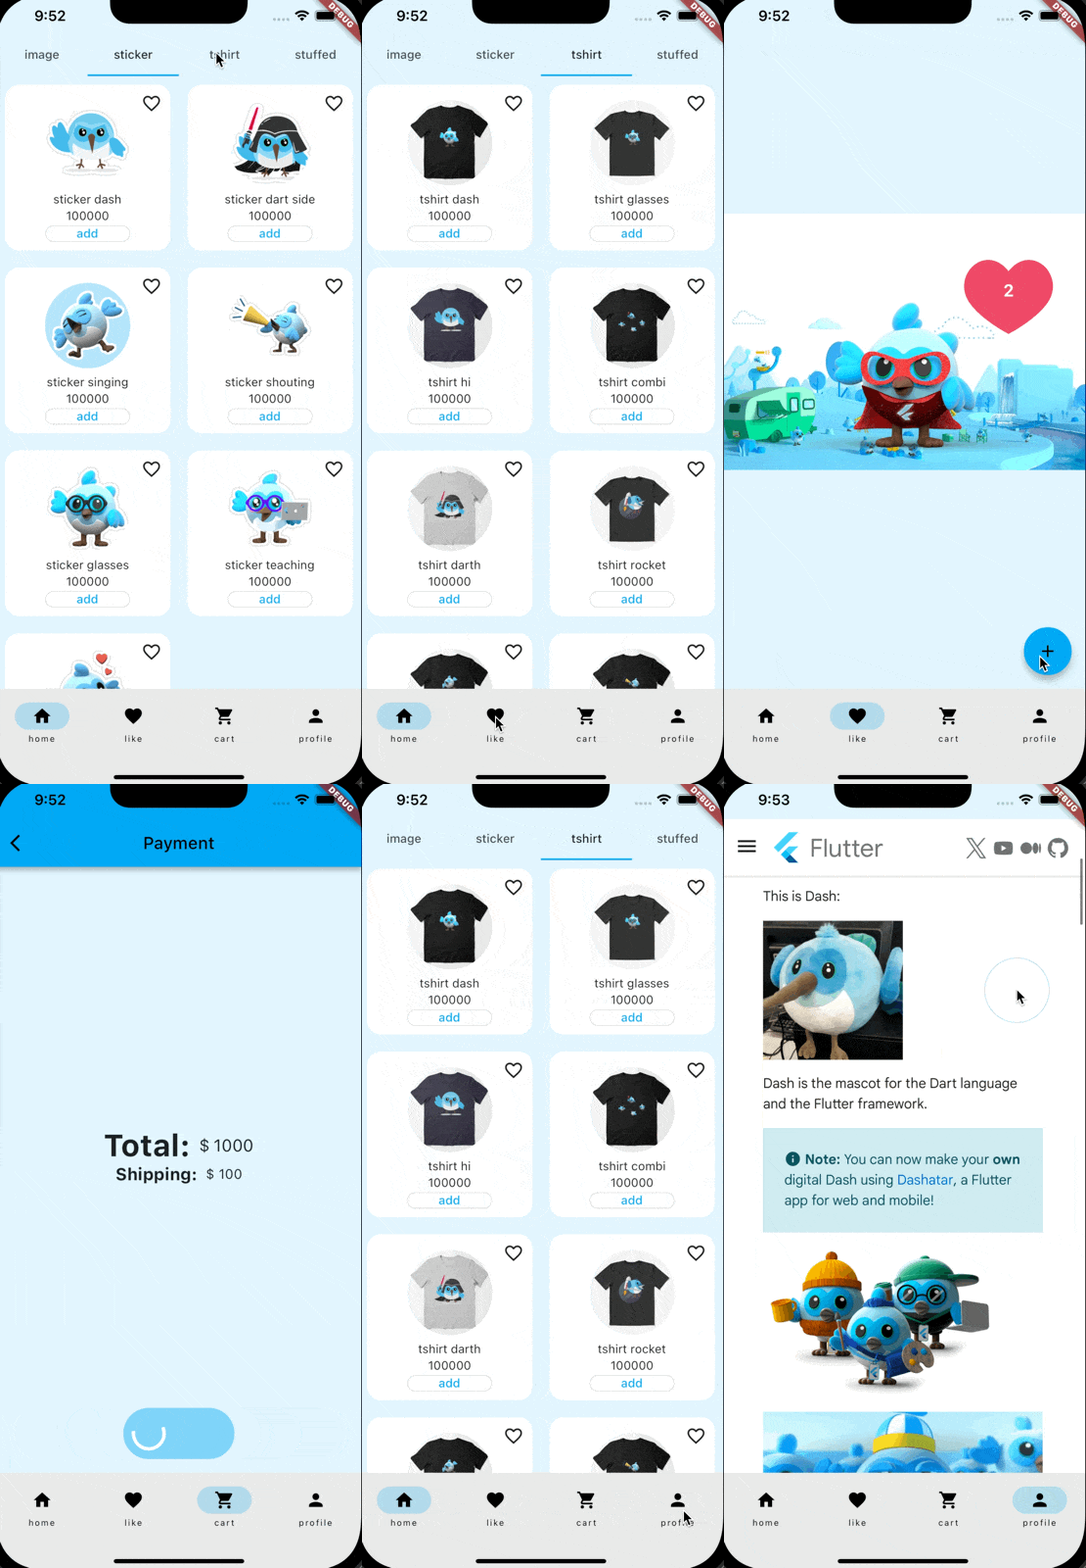
ボトムナビゲーションを有する画面からhome, like, cart, profileの4つのタブを切り替えることができ、それぞれAppBarやスクロール、ページ内遷移など各ブランチで状態を保持する機能を有しています。
| ブランチ | 機能 |
|---|---|
| home | AppBarを使った遷移。商品をタップすると商品詳細へページ内遷移。 |
| like | インクリメントボタンを押すと数字が増加 |
| cart | 決済画面へページ内遷移 |
| profile | webviewの表示。縦スクロール |
遷移構成は以下のような形になります。
└── GoRouter
    └── StatefulShellRoute
        ├── StatefulShellBranch # homeブランチ
        │   └── GoRoute # home page
        │       └── GoRoute # product detail page
        ├── StatefulShellBranch # likeブランチ
        │   └── GoRoute # like page
        ├── StatefulShellBranch # cartブランチ
        │   └── GoRoute # cart page
        │       └── GoRoute # payment page
        └── StatefulShellBranch # profileブランチ
            └── GoRoute # profile page
1. GoRouterを作る
まずGoRouterを定義
final appRouter = GoRouter(
  initialLocation: '/home',
  routes: []
);
2. StatefulShellRouteを追加
次にGoRouterのroutesフィールドに StatefulShellRoute を配置します。ここで少しややこしいのですが、 StatefulShellRoute.indexedStack コンストラクタを使います。
 final appRouter = GoRouter(
  initialLocation: '/home',
  routes: [
+   StatefulShellRoute.indexedStack(
+     builder:(context, state, navigationShell){},
+     branches: []
+   ),
  ]
 );
3. NavigationBarを実装した画面をbuilderに設定
次にbuilderフィールド内のコールバックで受け取るNavigationShellクラスを使って、ボトムナビゲーションバーを実装する画面を作ります。
class AppNavigationBar extends StatelessWidget {
const AppNavigationBar({
super.key,
required this.navigationShell,
});
final StatefulNavigationShell navigationShell;
Widget build(BuildContext context) {
return Scaffold(
body: navigationShell,
bottomNavigationBar: NavigationBar(
selectedIndex: navigationShell.currentIndex,
destinations: const [
NavigationDestination(icon: Icon(Icons.home), label: 'home'),
NavigationDestination(icon: Icon(Icons.favorite), label: 'like'),
NavigationDestination(icon: Icon(Icons.shopping_cart), label: 'cart'),
NavigationDestination(icon: Icon(Icons.person), label: 'profile'),
],
onDestinationSelected: (index) {
navigationShell.goBranch(
index,
initialLocation: index == navigationShell.currentIndex,
);
},
),
);
}
}
この画面をStatefulShellRouteのbuilder内で生成されるように設定。
 final appRouter = GoRouter(
  initialLocation: '/home',
  routes: [
    StatefulShellRoute.indexedStack(
      builder:(context, state, navigationShell){
+       return AppNavigationBar(navigationShell: navigationShell);
      },
      branches: []
    ),
  ]
 );
4. StatefulShellBranchを追加
次にナビゲーションボトムバーで切り替えるブランチを追加します。サンプルではhome, like, cart, profileという4つのブランチを用意しています。

StatefulShellRouteの branches フィールドにタブ分のブランチを配置します。
 final appRouter = GoRouter(
  initialLocation: '/home',
  routes: [
    StatefulShellRoute.indexedStack(
      builder:(context, state, navigationShell){
       return AppNavigationBar(navigationShell: navigationShell);
      },
      branches: [
+       // homeブランチ
+       StatefulShellBranch(
+         routes:[],
+       ),
+       // likeブランチ
+       StatefulShellBranch(
+         routes:[],
+       ),
+       // cartブランチ
+       StatefulShellBranch(
+         routes:[],
+       ),
+       // profileブランチ
+       StatefulShellBranch(
+         routes:[],
+       ),
      ]
    ),
  ]
 );
5. GoRouteを追加
次に各ブランチ内のルーティングをGoRouteを使って定義します。一部省略しますが、それぞれのブランチの最初に定義したGoRouteがそのブランチの初期画面になります。
もしブランチ内で更に画面遷移を入れ子にしたい場合は初期画面のroutesにGoRouteでページ内遷移を定義します。
 final appRouter = GoRouter(
  initialLocation: '/home',
  routes: [
    StatefulShellRoute.indexedStack(
      builder:(context, state, navigationShell){
       return AppNavigationBar(navigationShell: navigationShell);
      },
      branches: [
        // homeブランチ
        StatefulShellBranch(
          routes:[
+           GoRoute(
+             path: '/home',
+             pageBuilder: (context, state) => NoTransitionPage(
+               key: state.pageKey,
+               child: const HomePage(),
+             ),
+             routes: [
+               GoRoute(
+                 path: 'detail',
+                 pageBuilder: (context, state) {
+                   final product = state.extra as Product;
+                   return MaterialPage(child: ProductDetailScreen(product: product));
+                 },
+               )
+             ],
+           ),
          ],
        ),
        // likeブランチ
        StatefulShellBranch(
          routes:[
+          // ...省略
          ],
        ),
        // cartブランチ
        StatefulShellBranch(
          routes:[
+          // ...省略
          ],
        ),
        // profileブランチ
        StatefulShellBranch(
          routes:[
+           // ...省略
          ],
        ),
      ]
    ),
  ]
 );
6. NavigatorStateを追加
最後にそれぞれのルートがどのNavigatorに所属しているのかを区別するために GlobalKey<NavigatorState> を設定します。
Navigatorの分だけNavigatorStateを持ったGlobalKeyを生成し、各ルートおよびブランチに所属するNavigatorのGlobalKeyを紐付けます。
+ final rootNavigatorKey = GlobalKey<NavigatorState>();
+ final homeNavigatorKey = GlobalKey<NavigatorState>(debugLabel: 'home');
+ final likeNavigatorKey = GlobalKey<NavigatorState>(debugLabel: 'like');
+ final cartNavigatorKey = GlobalKey<NavigatorState>(debugLabel: 'cart');
+ final profileNavigatorKey = GlobalKey<NavigatorState>(debugLabel: 'profile');


 final appRouter = GoRouter(
+ navigatorKey: rootNavigatorKey,
  initialLocation: '/home',
  routes: [
    StatefulShellRoute.indexedStack(
+     parentNavigatorKey: rootNavigatorKey,
      builder:(context, state, navigationShell){
       return AppNavigationBar(navigationShell: navigationShell);
      },
      branches: [
        // homeブランチ
        StatefulShellBranch(
+         navigatorKey: homeNavigatorKey,
          routes:[
            GoRoute(
              path: '/home',
              pageBuilder: (context, state) => NoTransitionPage(
                key: state.pageKey,
                child: const HomePage(),
              ),
              routes: [
                GoRoute(
                  path: 'detail',
+                 parentNavigatorKey: rootNavigatorKey,
                  pageBuilder: (context, state) {
                    final product = state.extra as Product;
                    return MaterialPage(child: ProductDetailScreen(product: product));
                  },
                )
              ],
            ),
          ],
        ),
        // likeブランチ
        StatefulShellBranch(
+         navigatorKey: likeNavigatorKey,
          routes:[
           // ...省略
          ],
        ),
        // cartブランチ
        StatefulShellBranch(
+         navigatorKey: cartNavigatorKey,
          routes:[
           // ...省略
          ],
        ),
        // profileブランチ
        StatefulShellBranch(
+         navigatorKey: profileNavigatorKey,
          routes:[
            // ...省略
          ],
        ),
      ]
    ),
  ]
 );
完成!
これで完成です。
これによりTabBarを使用した時も、
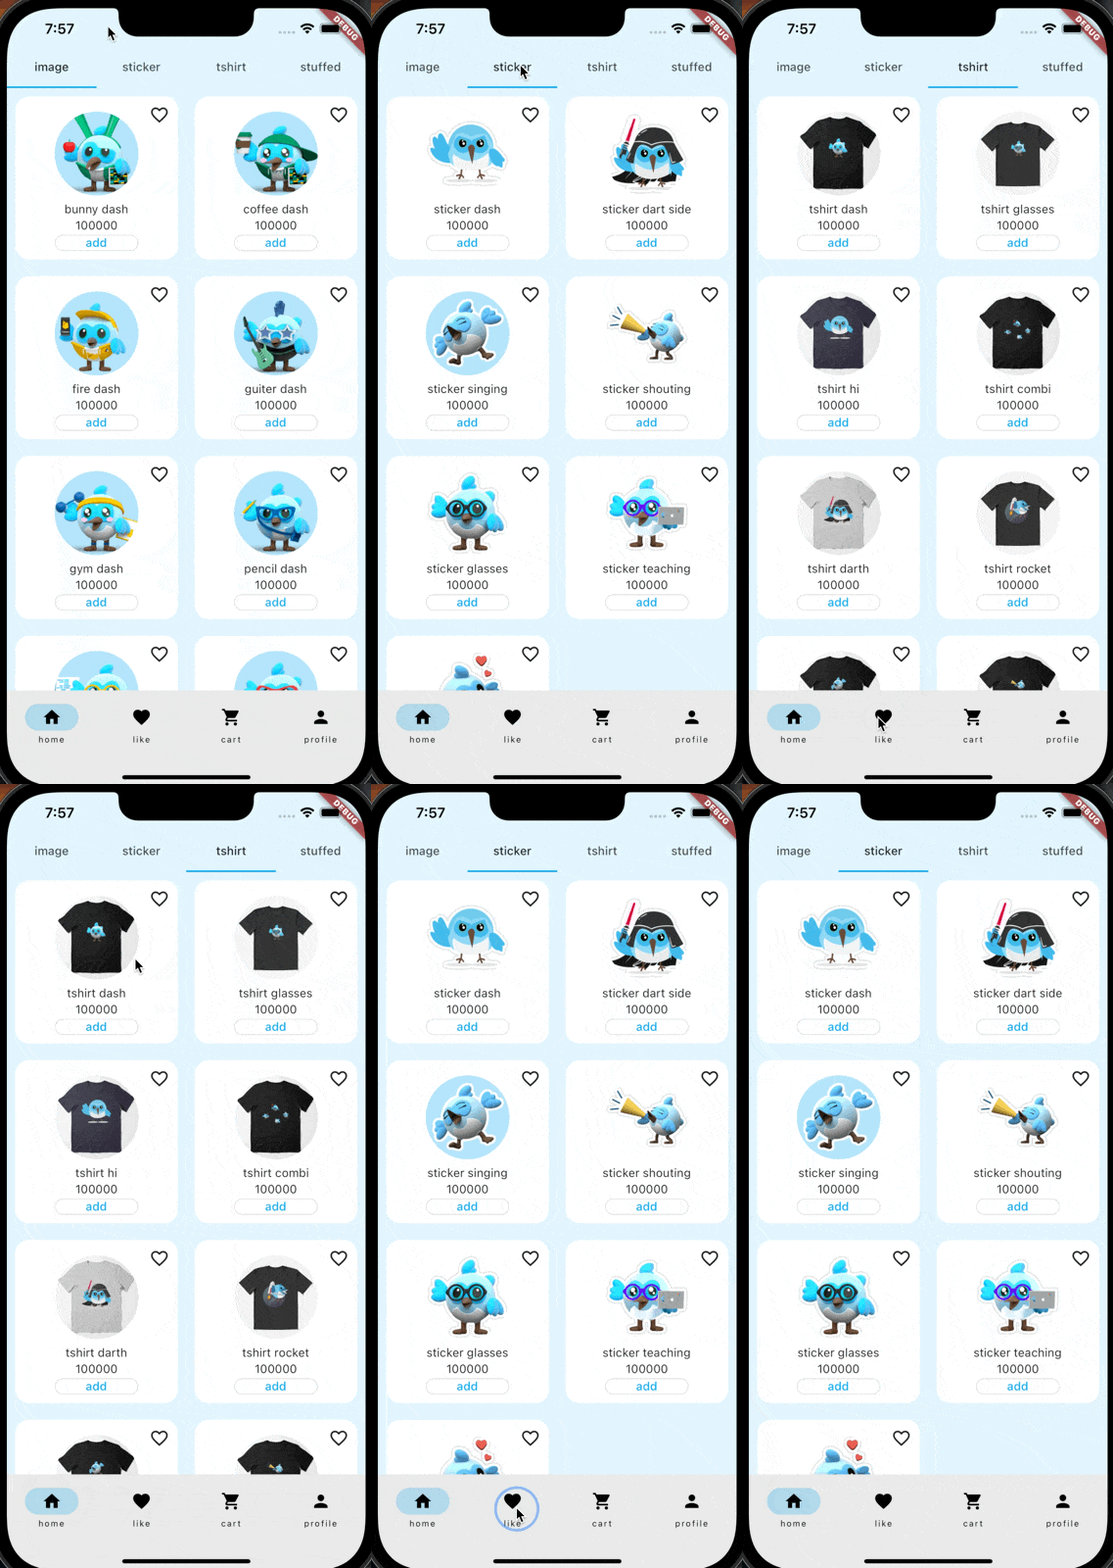
状態値を変化させても、
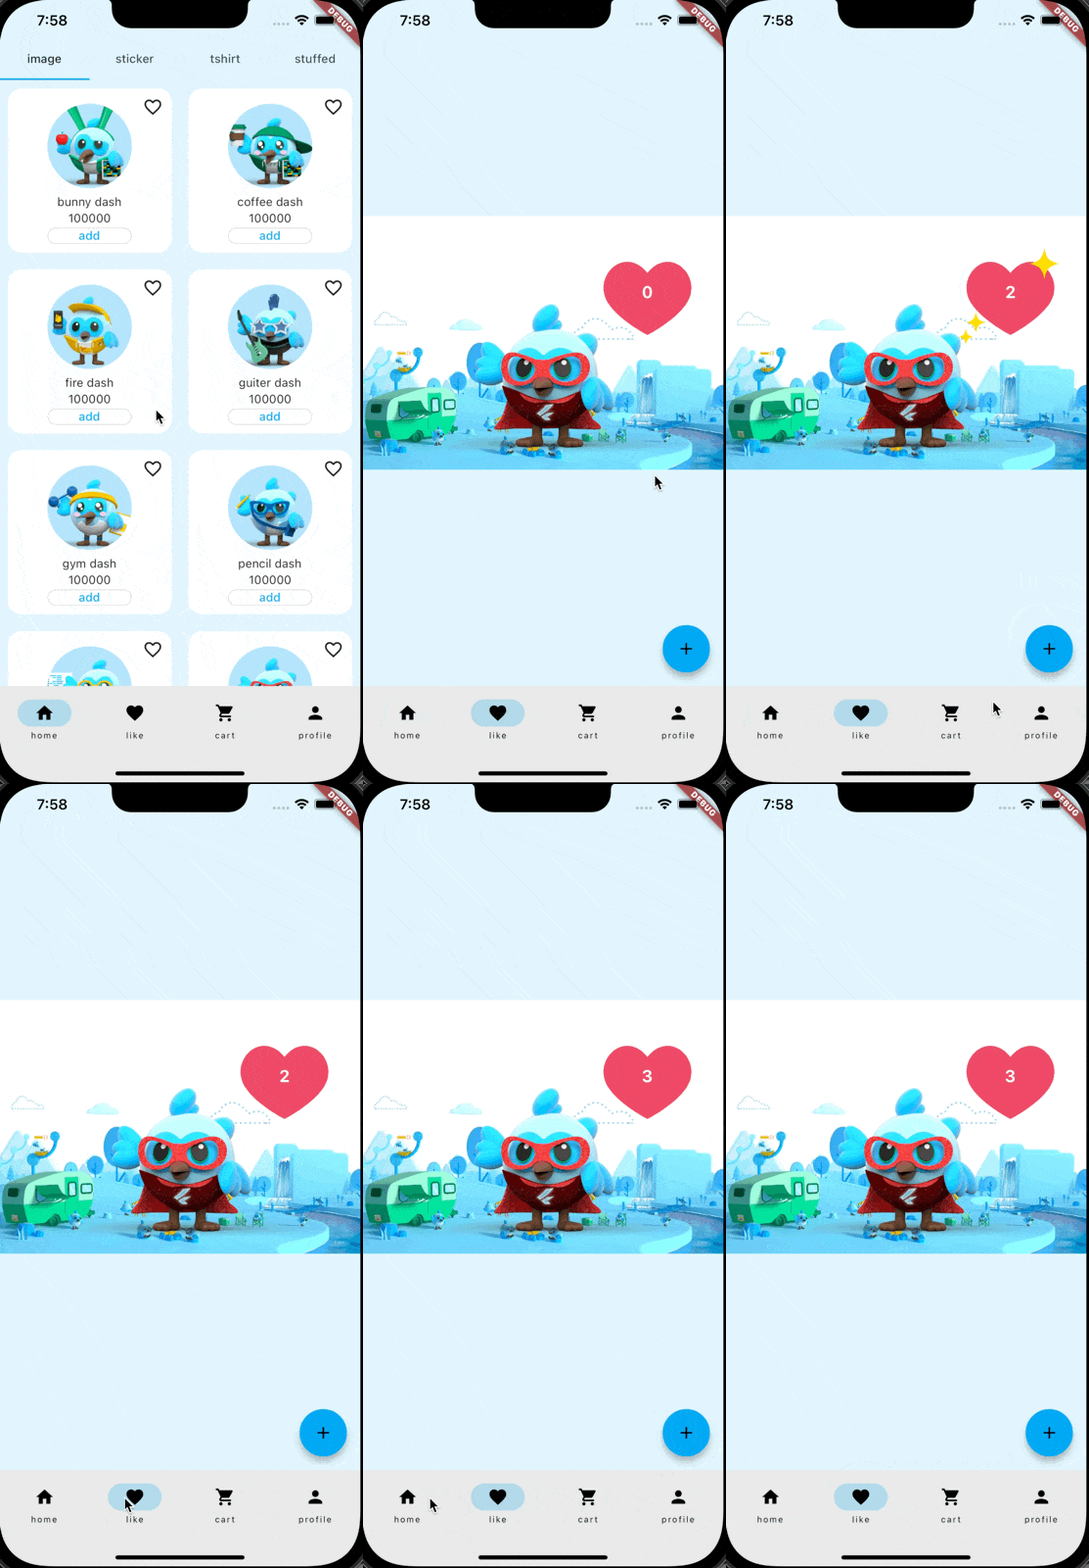
ページ内で画面遷移しても、
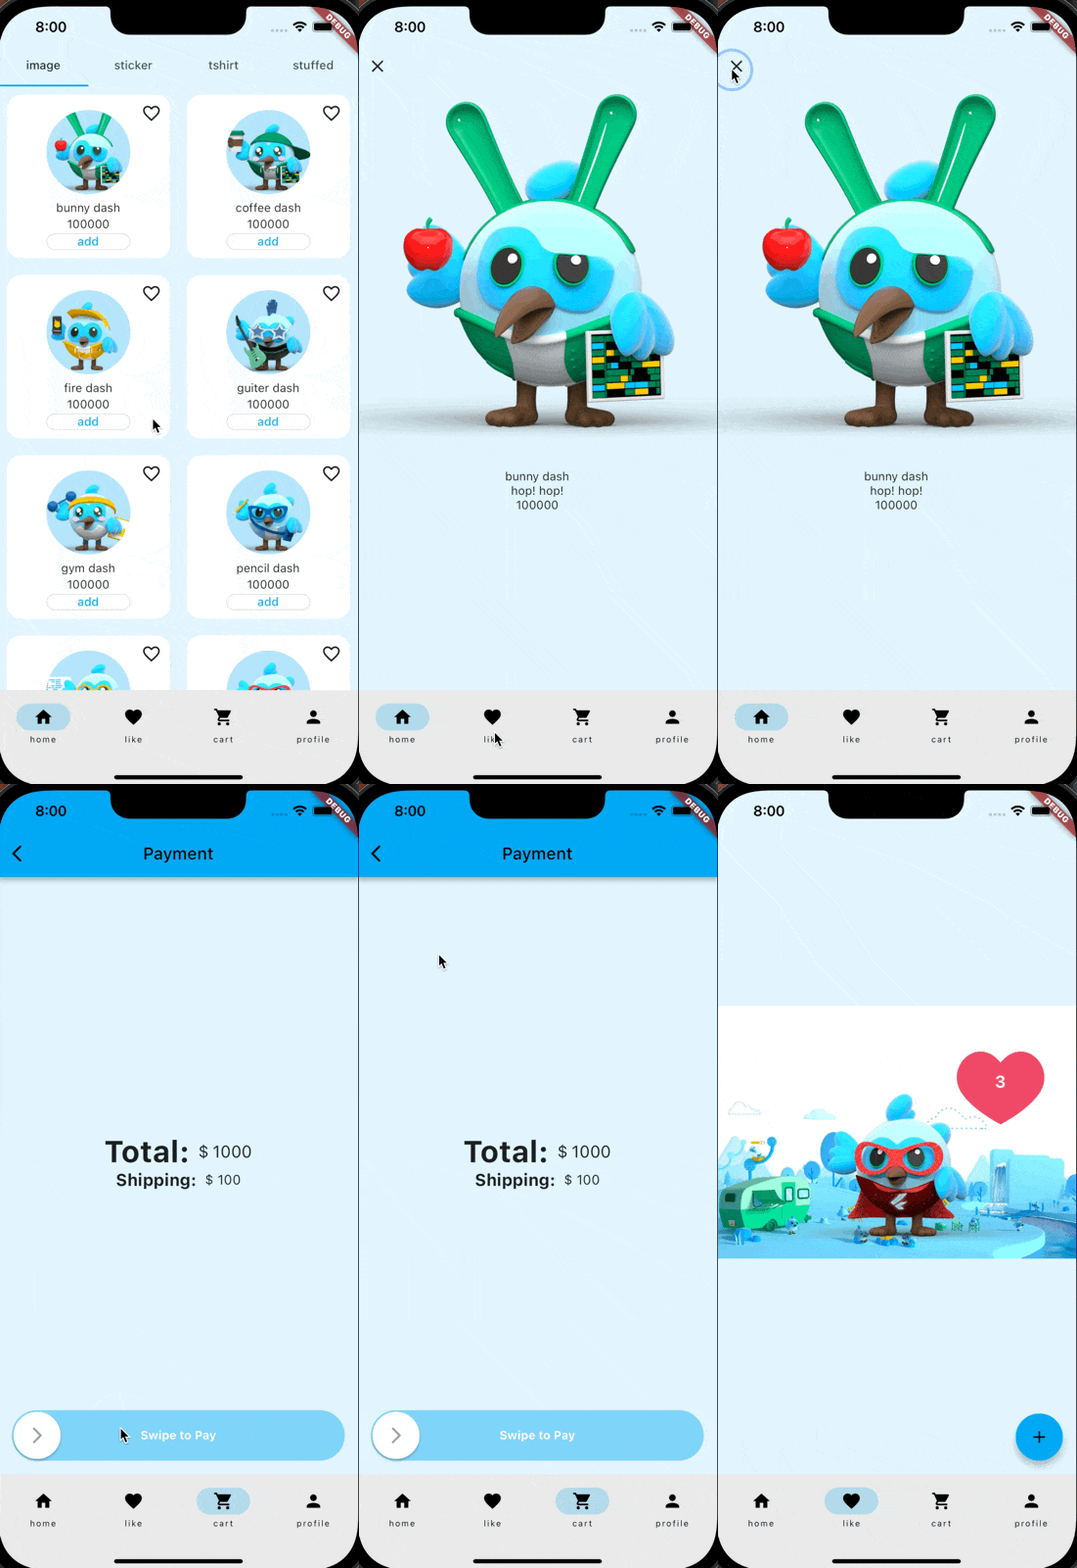
スクロールしても、
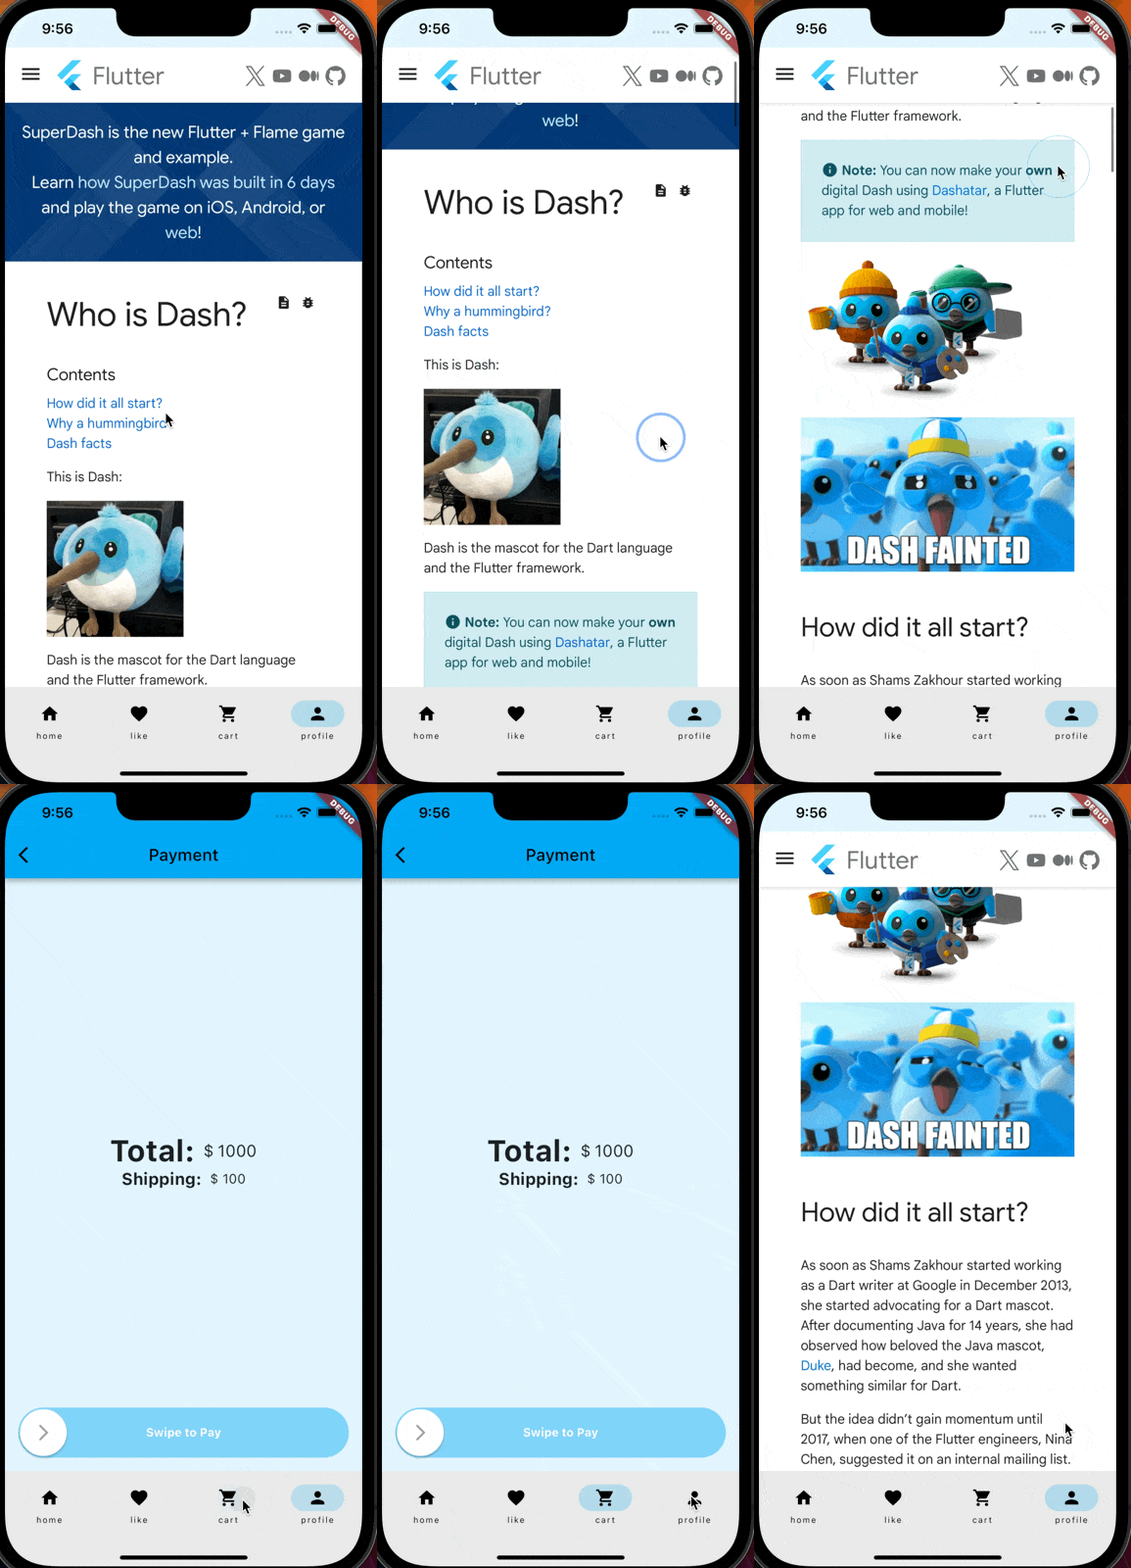
ボトムナビゲーションの各ブランチの状態が保持されているのが分かります。やったね🥳
🚨 StatefulShellRouteの課題
以前はgo_routerでボトムナビゲーションの永続化でさえ一工夫必要で、各タブ内の状態保持は諦めざるをえない状況でしたが、お陰でとてもスッキリとその両方を実現できるようになりました。ありがとう、Flutterチーム🐦✨
ただ、実は 「 逆に状態を破棄出来ない 」という課題があることを今回知る事が出来ました。
例えば、以下のようにページ内で遷移した画面で決済を行った場合、決済完了という事で決済画面ではなく、その前のカート画面にタブ内の状態を戻したいとします。しかし、この場合タブ内の状態を破棄する方法がない為、決済画面のままとなってしまいます。

こちらについては以下で認知されているもののP2ラベルが付いていて最優先タスクとはなっていません。その為、リダイレクトや遷移構成自体を工夫する必要がありそうです。少し残念...(逆に、実は出来るよ!って方いたら是非コメント欄にお願いします🙇)
【おまけ ①】 ボトムナビゲーション以外の画面の表示
ログイン画面やトップページなどボトムナビゲーション以外の画面を出したい時もあるかと思います。その場合は、StatefulShellRouteと同階層にGoRouteを定義しましょう。
StatefulShellRouteはあくまでも高機能なGoRouteです。
 final appRouter = GoRouter(
  navigatorKey: rootNavigatorKey,
  initialLocation: '/home',
  routes: [
    StatefulShellRoute.indexedStack(
      ...
    ),
    // 同階層に定義
+   GoRoute(
+     name: 'top',
+     path: '/top',
+     pageBuilder: (context, state) => MaterialPage(
+       key: state.pageKey,
+       child: const TopScreen(),
+     ),
+     routes: [
+       // サブルートへの画面遷移のサンプル
+       GoRoute(
+         name: 'signin',
+         path: 'signin',
+         pageBuilder: (context, state) => MaterialPage(
+           key: state.pageKey,
+           child: const SigninScreen(),
+         ),
+       ),
+       GoRoute(
+         name: 'signup',
+         path: 'signup',
+         pageBuilder: (context, state) => MaterialPage(
+           key: state.pageKey,
+           child: const SignupScreen(),
+         ),
+       ),
+     ],
+   ),
  ]
 );
ボトムナビゲーションの画面へ遷移する場合は、他のGoRoute同様、context.goで遷移します。
context.go('/home');
【おまけ ②】go_router_builderで実装する
またgo_routerをタイプセーフに扱うサポートをしてくれる go_router_builder パッケージでもStatefulShellRouteは対応されています。
導入の流れ
go_router_builder を使う際はStatefulShellRoute, StatefulShellBranch, GoRouteをそれぞれ以下のクラスを継承するクラスとして定義します。
-
StatefulShellRoute→StatefulShellRouteData -
StatefulShellBranch→StatefulShellBranchData -
GoRoute→GoRouteData
その後、遷移構成を @TypedStatefulShellRoute アノテーションを付けてStatefulShellRouteDataを継承したクラスの前に記述します。
実際にコードを見た方が分かりやすいかと思います。app_route_data.dartという別ファイルにgo_router_builderを使った実装を記述していきます。
クラス名は任意のクラス名で大丈夫です。
1. StatefulShellRouteDataを追加
class AppShellRouteData extends StatefulShellRouteData {
const AppShellRouteData();
static final GlobalKey<NavigatorState> $navigatorKey = rootNavigatorKey;
Widget builder(
BuildContext context,
GoRouterState state,
StatefulNavigationShell navigationShell,
) {
return AppNavigationBar(
navigationShell: navigationShell,
);
}
}
NavigatorStateは $navigatorKey というstaticなクラス変数に代入します。
ボトムナビゲーションを持つ画面はbuilderメソッド内で返す事でStatefulShellRoute.indexedStackコンストラクタのbuilderと同じ状態で生成されます。
2. StatefulShellBranchDataを追加
class HomeBranch extends StatefulShellBranchData {
  const HomeBranch();

  static final GlobalKey<NavigatorState> $navigatorKey = homeNavigatorKey;
}
こちらも同様にNavigatorStateは $navigatorKey というstaticなクラス変数に代入します。
3. GoRouteDataを追加
class HomeRouteData extends GoRouteData {
const HomeRouteData();
Widget build(BuildContext context, GoRouterState state) {
return const HomePage();
}
}
class DetailRouteData extends GoRouteData {
const DetailRouteData({this.$extra});
final Product? $extra;
Widget build(BuildContext context, GoRouterState state) {
return ProductDetailScreen(product: $extra!);
}
}
4. @TypedStatefulShellRoute アノテーションを付けて遷移構成を定義
次にTypedStatefuShellRoute > TypedStatefulShellBranch > TypedGoRouteの順に入れ子にした遷移構成を定義します。
<AppShellRouteData>(
branches: <TypedStatefulShellBranch<StatefulShellBranchData>>[
TypedStatefulShellBranch<HomeBranch>(
routes: [
TypedGoRoute<HomeRouteData>(
path: Routes.home,
routes: [
TypedGoRoute<DetailRouteData>(path: Routes.detail),
],
),
],
),
TypedStatefulShellBranch<LikeBranch>(
routes: [
// ...省略
],
),
TypedStatefulShellBranch<CartBranch>(
routes: [
// ...省略
],
),
TypedStatefulShellBranch<ProfileBranch>(
routes: [
// ...省略
],
),
],
)
class AppShellRouteData extends StatefulShellRouteData {
...
}
5. 生成されるファイルのimportを追加
生成されるファイルをapp_route_data.dartの一部としてpart句を付けてインポートします。
part 'app_route_data.g.dart';
6. コードを生成
お決まりのbuild_runnerを走らせて、コードを生成します。
flutter pub run build_runner build --delete-conflicting-outputs
7. $appRoutesをGoRouterに渡す
build_runnerを走らせると全ての遷移構成が$appRoutesという変数に格納されるので、そちらをGoRouterのroutesフィールドに渡します。
 final appRouter = GoRouter(
   initialLocation: 'top',
+ routes: $appRoutes,
 );
完成
これでgo_router_builderでStatefulShellRouteを定義することができました。個人的には冗長に感じる部分も多いので、状況に応じてお好みでお使いください。
以上
課題点となる「状態の破棄」を除けば、非常にシンプルにボトムナビゲーションを実装する事が出来ました。もはや挑戦ではなくなってしまいましたね⛰️
個人的には宣言的な遷移を用いるNavigator2.0は画面構成が分かり易いので、気に入っています。go_routerは課題が多く、最近ではapp_routeなどを好む方もいる印象ですが、少しずつ進化するgo_routerの動向も引き続き追っていきたいと思います🕵️
Discussion
試してないけど、GoRouterをRiverpod Providerでラップして、invalidate()すれば破棄できるかもしれません!全部破棄されて最初の状態に戻っちゃいますが。。
確かに、全部初期化であればそれ行けそうですね!ありがとうございます!