【Flutter Widget of the Week #31】Draggableを使ってみた
はじめに
Flutter Widget of the Week #31 Draggable についてまとめましたので、紹介します。
Draggable
あるフォルダから別のフォルダにドキュメントを移動したりするなど、ドラッグを伴うUIパターンはたくさんあります。そんな、ユーザーにドラッグ操作をさせたい場合、Draggable が使えます。
では、さっそくサンプルを動かして使い方を見てみましょう。
Draggable サンプルコード
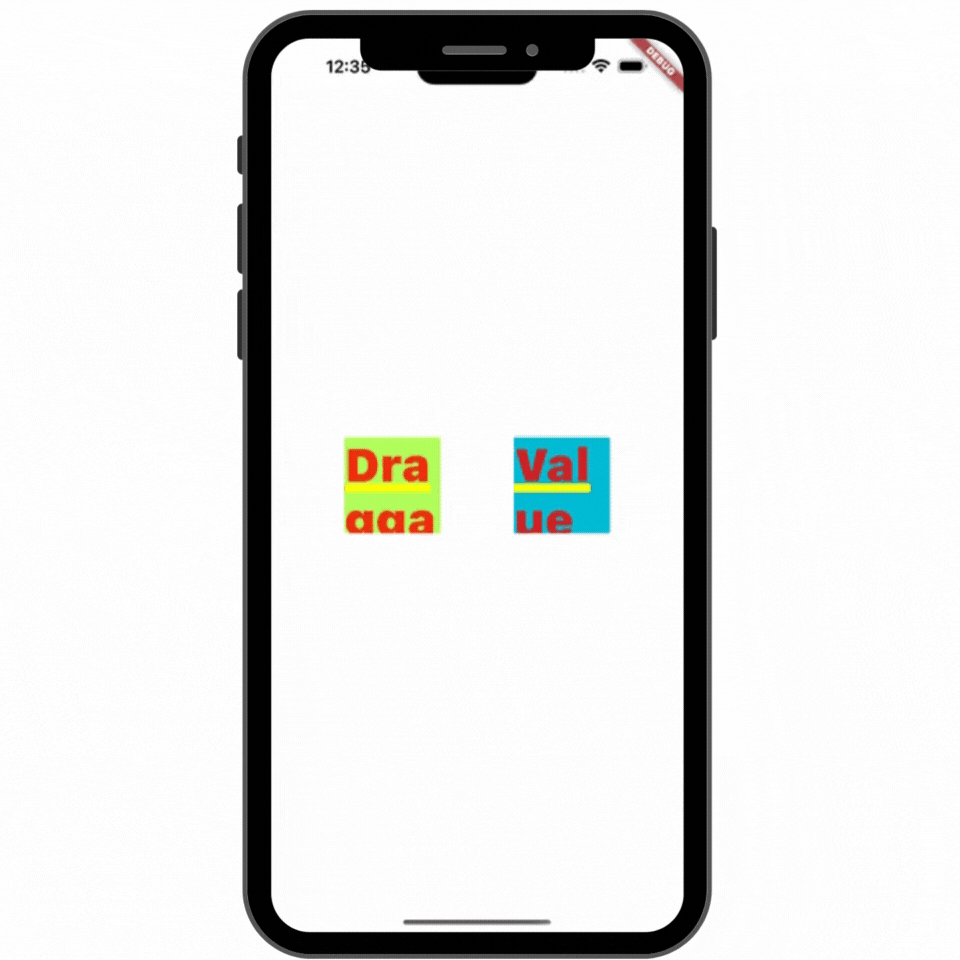
Draggable サンプル実行画面
基本のサンプルコード全体
class DraggableSample extends StatefulWidget {
const DraggableSample({super.key});
State<DraggableSample> createState() => _DraggableSampleState();
}
class _DraggableSampleState extends State<DraggableSample> {
int acceptedData = 0; // 受け側のデータ
Widget build(BuildContext context) {
return Container(
color: Colors.white,
child: Row(
mainAxisAlignment: MainAxisAlignment.spaceEvenly,
children: <Widget>[
// 黄緑のボックス
Draggable<int>(
data: 10,
feedback: Container(
color: Colors.deepOrange,
height: 100,
width: 100,
child: const Icon(Icons.directions_run),
),
childWhenDragging: Container(
height: 100.0,
width: 100.0,
color: Colors.pinkAccent,
child: const Center(
child: Text('Child When Dragging'),
),
),
child: Container(
height: 100.0,
width: 100.0,
color: Colors.lightGreenAccent,
child: const Center(
child: Text('Draggable'),
),
),
),
// 水色のボックス
DragTarget<int>(
builder: (
BuildContext context,
List<dynamic> accepted,
List<dynamic> rejected,
) {
return Container(
height: 100.0,
width: 100.0,
color: Colors.cyan,
child: Center(
child: Text('Value is updated to: $acceptedData'),
),
);
},
onAccept: (int data) {
setState(() {
acceptedData += data;
});
},
),
],
),
);
}
}
使い方としては、
まずドラッグできる要素を Draggable で作ります。
Draggable は child にドラッグできる要素そのものを指定し、feedback にドラッグした時の要素の見え方を指定します。
サンプルだと、child に Container で黄緑のブロックを表示する widget を指定し、feedback にはオレンジのブロックを表示する widget を指定してます。それにより、何もしてない時は黄緑のボックスが表示されていて、ドラッグをするとオレンジのボックスに変化する動きになります。
今回のサンプルでは使われていませんが、Draggable には onDragStarted や onDragCompleted のようにドラッグしたときの状態によって実行する処理を設定できます。
次にドロップする先の要素を DragTarget で作ります。
DragTarget では builder プロパティに widget を指定します。
サンプルだと、水色のボックスの上に文字が入った widget を指定されています。
また、onAccept でドロップが成功した時の処理も指定しています。
以上、このように基本的にはドラッグできる要素とドラッグ先の要素の2つを作ることでドラッグ操作機能を実装することができます。
Draggable のプロパティについて
Draggable にはいくつかプロパティがあるので、一部紹介します。
Tには intやStringなどの型が入ります。
(new) Draggable<T> Draggable({
  Key? key,
  required Widget child,
  required Widget feedback,
  T? data,
  Axis? axis,
  Widget? childWhenDragging,
  Offset feedbackOffset = Offset.zero,
  DragAnchor dragAnchor = DragAnchor.child,
  Offset Function(Draggable<Object>, BuildContext, Offset)? dragAnchorStrategy,
  Axis? affinity,
  int? maxSimultaneousDrags,
  void Function()? onDragStarted,
  void Function(DragUpdateDetails)? onDragUpdate,
  void Function(Velocity, Offset)? onDraggableCanceled,
  void Function(DraggableDetails)? onDragEnd,
  void Function()? onDragCompleted,
  bool ignoringFeedbackSemantics = true,
  bool ignoringFeedbackPointer = true,
  bool rootOverlay = false,
  HitTestBehavior hitTestBehavior = HitTestBehavior.deferToChild,
})
①feedback
ドラッグ中に表示する widget を指定する
型は Widget 型
②data
任意のデータを持つ値を指定する
型は T 型
③childWhenDragging
ドラッグ中に child: の表示を変えたい場合は、ここで widget を指定する
型は Widget 型
④onDragStarted
ドラッグ開始時に呼び出される処理を設定する
型は Function() 型
⑤onDragUpdate
ドラッグの位置が変わるたびに呼び出される処理を設定する
型は Function(DragUpdateDetails) 型
⑥onDraggableCanceled
ドラッグ中の widget が DragTarget の範囲の外でドロップされたときに呼び出される処理を設定する
型は Function(Velocity, Offset) 型
⑦onDragEnd
ドラッグが終了したときに呼び出される処理を設定する
型は Function(DraggableDetails) 型
⑧onDragCompleted
ドラッグ中の widget が DragTarget の範囲内でドロップされたときに呼び出される処理を設定する
型は Function() 型
DragTarget のプロパティについて
DragTarget にはいくつかプロパティがあるので、一部紹介します。
Tには intやStringなどの型が入ります。
(new) DragTarget<T> DragTarget({
  Key? key,
  required Widget Function(BuildContext, List<T?>, List<dynamic>) builder,
  bool Function(T?)? onWillAccept,
  void Function(T)? onAccept,
  void Function(DragTargetDetails<int>)? onAcceptWithDetails,
  void Function(T?)? onLeave,
  void Function(DragTargetDetails<T>)? onMove,
  HitTestBehavior hitTestBehavior = HitTestBehavior.translucent,
})
①onWillAccept
DragTarget の範囲内にドロップされたときに呼び出される処理を設定する
処理のreturn値に bool値を設定して、trueのときはドロップ可能、falseのときはドロップが不可能とドロップの可否を設定できる
型は Function(T?)? 型
②onAccept
ドロップが成功したときに呼び出される処理を設定する
型は Function(T) 型
③onLeave
DragTarget の範囲から離れたときに呼び出される処理を設定する
型は Function(T?) 型
④onMove
DragTarget の範囲内で位置が変わるたびに呼び出される処理を設定する
型は Function(T?) 型
最後に
今回は Draggable を紹介しました。ドラッグ&ドロップ機能はよくある機能の一つなので覚えておいて損はない widget だと思います。是非使ってみてください。
次は #32 AnimatedList です。またお会いしましょう。
参考記事
Discussion