住宅情報を Cloud Functions for Firebase でスクレイピングしよう
Nihon University Advent Calendar 2023の 19 日目の記事です。
本記事ではクライアントから送信された URL を Cloud Functions for Firebase 上でスクレイピングして、スクレイピング結果を Cloud Firestore と Cloud Storage for Firebase に保存し、保存した情報をクライアントで表示するアプリを作成します。
長くてややこしいですね。
Firebase Functions でスクレイピングするところがメインです。
以降は Cloud Functions for Firebase を Functions、Cloud Firestore を Firestore 、Cloud Storage for Firebase を Storage と表記します。
はじめに
SUUMO のような住宅情報サイトを利用して家探しをした経験がある人は少なくないと思います。 これらの住宅情報サイトでは掲載が終了した物件は写真や設備などの情報は見ることができなくなってしまいます。(さまざまな事情があるようです)
筆者がたくさんの物件をお気に入りに追加した数日後に半分程度が掲載終了していたときはちょっとショックでした。
もうこんな思いはしたくないので物件情報を簡単に保存していい感じに表示するアプリを作ってしまいましょう。
作成するアプリについて
作成するアプリの利用の流れは次の通りです。
- クライアントから物件情報が掲載されたページの URL を Functions に POST
- Functions で POST された URL をスクレイピングし、結果を Firestore に保存
- このとき画像については Storage に保存しダウンロード用 URL を Firestore に保存する
- クライアントでスクレイピング結果を表示
Functions でのスクレイピングには個人的な興味もあって Web テストと自動化のためのフレームワークである Playwright を用います。
クライアントの構築には主に React を用います。ここはおまけみたいなものなのでざっくりいきます。
Firebase プロジェクトの追加と設定
Firebase を利用にはプロジェクトを追加する必要があります。
プロジェクトの追加は Firebase Console から行うことができます。
プロジェクト追加の細かい流れ
-
プロジェクトに好きな名前をつける
- ChatGPT に scan-rent という名前をつけてもらいました
-
Google アナリティクスを有効にするか聞かれる
- 今回は別になくてもいいので無効にするが、有効でも問題ない
-
準備完了
プロジェクトの追加が完了したら、サイドバーから次の設定を行います。
-
Firestore の有効化
-
Storage の有効化
-
Functions の有効化
- 有効化にはプロジェクトのアップグレードが必要なことに注意
-
Web アプリを登録
Firestore の有効化の細かい流れ
- サイドバーの構築から Firestore Database を選択
- db を作成をクリック
- 特にこだわりがなければ asia-northeast1 (Tokyo)を選択
- テストモードを選択して完了
Firestore の有効化の細かい流れ
- サイドバーの構築から Storage を選択
- 始めるをクリック
- テストモードを選択
- 特にこだわりがなければ asia-northeast1 (Tokyo)を選択(Firestore を先に有効化した場合は自動的に選択される)して完了
Functions の有効化の細かい流れ
- サイドバーの構築から Functions を選択
- プロジェクトをアップグレードをクリックして続行
- 予算を 10 円と入力して続行
- 購入
Web アプリを登録の細かい流れ
- サイドバーのプロジェクトの概要をクリック
- Web を表す</>をクリック
- 好きなニックネームを入力してアプリを登録
- 今回は scan-rent-web としました
Firebase を初期化しよう
ここからはコードの準備です。
Firebase を初期化するために FirebaseCLI をインストールしましょう。
筆者はパッケージマネージャに pnpm を利用しているので、他のパッケージマネージャを利用している方は適宜読み替えてください。 npm と pnpm の CLI コマンドの対応表も紹介しておきます。
pnpm add --global firebase-tools
インストール成功後に Firebase CLI にログインします。
firebase login
その後プロジェクトルートに移動して Firebase の初期化を行います。
firebase init
ほとんどの部分は Enter を押すだけで良いですが、一部は次のようにしてください。
- Which Firebase features do you want to set up for this directory? Press Space to select features, then Enter to confirm your choices.
-
Functions,Firestore,Storage,Emulatorsを選択
-
- Please select an option: (Use arrow keys)
-
Use an existing projectを選択して、先ほど追加したプロジェクトを選択する
-
- What language would you like to use to write Cloud Functions?
-
TypeScriptを選択
-
- Do you want to install dependencies with npm now?
- 筆者は pnpm を利用しているため
nと入力 - npm を利用している場合は Enter で良い
- 筆者は pnpm を利用しているため
- Which Firebase emulators do you want to set up? Press Space to select emulators, then Enter to confirm your choices.
-
Functions,Firestore,Storageを選択
-
Functions を使ってみよう
まずは簡単なコードを Functions で動かしてみましょう。
firebase init で依存関係のインストールを行わなかった場合には、作成された functions ディレクトリに移動して依存関係をインストールしてください。
pnpm install
functions/src/index.ts の helloWorld のコメントアウトを解除し functions ディレクトリで次のコマンドを実行すると Emulator が起動し Emulator UI を確認できるようになります。
pnpm run serve
Emulator UI の Logs に表示された http://127.0.0.1:5001/{project idに置き換えてください}/us-central1/helloWorld にアクセスして Hello from Firebase! と表示されれば成功です。
project id は .firebaserc から確認することができます。
ログで node と firebase-functions のバージョンについて警告されるので必要な対応を行いましょう。
volta pin node@18
pnpm update firebase-functions@latest
せっかくなので一度デプロイしてみましょう。
次のコマンドを実行することでデプロイを行えます。
pnpm run deploy
Firebase Console の Functions のダッシュボードからデプロイした関数を確認することができます。
デプロイした関数の実行方法はいろいろありますが、今回は GCP のコンソールから Cloud Shell を用いて実行してみましょう。
ダッシュボードで関数を選択し 3 点メニューから使用状況の詳細な統計情報をクリックすると GCP の Cloud Fucntions へ飛べます。
テスト中と書かれたタブの下側にある CLOUD SHELL で実行と書かれたボタンを押して Enter を押しましょう。Hello from Firebase! と帰ってきたら成功です。
Functions でスクレイピングしよう
次はスクレイピングのための関数を実装していきます。
最初に情報の取得部分を実装して、その後に取得した情報の保存部分の実装します。
情報の取得
スクレイピングに利用する Playwright をインストールしましょう。
pnpm add playwright
次に Playwright で利用するブラウザのインストールを行います。
pnpm exec playwright install chromium
ここから実際にスクレイピングを行う scrapeSuumo 関数を実装していきます。
まずは特定の物件の情報をスクレイピングしてみましょう。
今回は SUUMO を利用して、URL が https://suumo.jp/chintai/jnc_xxxxxxxxxxxx/?bc=xxxxxxxxxxxx または https://suumo.jp/chintai/bc=xxxxxxxxxxxx のようになっている家賃や物件の写真が載ったページを探して URL を保存しておきます。

SUUMOのページの例
Playwright Library と Page を参考にページのコンテンツを取得してみましょう。
export const scrapeSuumo = onRequest(async (request, response) => {
  const targetUrl = "SUUMOの賃貸物件の情報が載ったページのURL";

  const browser = await chromium.launch();
  const page = await browser.newPage();
  await page.goto(targetUrl);
  const content = await page.content();
  await browser.close();

  logger.info(content, { structuredData: true });
  response.send(content);
});
Emulator を起動して http://127.0.0.1:5001/{project idに置き換えてください}/us-central1/scrapeSuumo にアクセスするとシンプルな見た目になった物件情報のページが表示されると思います。
また Emulator の Logs にも <!DOCTYPE html PUBLIC から始まる HTML が表示されていると思います。
ここから物件のタイトルと写真を抽出していきます。
抽出には selector が必要なので、ブラウザでスクレイピングするページに移動してデベロッパーツールを開いて対象の selector を取得しましょう。
デベロッパーツールは Chrome では右クリックして Inspect (もしかしたら検証かもしれません)から開くことができます。
セレクトモードに切り替えて対象の要素をクリックして、ハイライトされたエレメントを Copy -> Copy selector します。
物件タイトルの selector は #wrapper > div.section_h1 > div.section_h1-header > h1 のようになると思います。
写真はカルーセルの写真部分をクリックした後にハイライトされ得た要素の少し下に property_view_gallery-slick-view というクラスが書かれた div 要素があるのでそれの中の要素をどんどん展開してくと img 要素が出現します。
最終的には #js-view_gallery-list > li:nth-child(1) > a > img のような selector が取得できます。
selector を取得したところで実際に情報を取得していきましょう。
title の取得は次のように書くことができます。
const title = await page
  .locator("#wrapper > div.section_h1 > div.section_h1-header > h1")
  .textContent();
写真の取得は少し複雑なのでコードを示してから解説していきます。
const imgUrls = await Promise.all(
  (
    await page.locator("#js-view_gallery-list li a img").all()
  ).map((img) => img.getAttribute("src"))
);
const images = await Promise.all(
  imgUrls.map(async (imgUrl) => {
    const response = await fetch(imgUrl as string);
    const arrayBuffer = await response.arrayBuffer();
    const buffer = Buffer.from(arrayBuffer);
    const contentType = response.headers.get("Content-Type");

    return {
      buffer,
      contentType,
    };
  })
);
現時点での scrapeSuumo
export const scrapeSuumo = onRequest(
  { timeoutSeconds: 100, memory: "1GiB" },
  async (request, response) => {
    const targetUrl = "SUUMOの賃貸物件の情報が載ったページのURL";

    const browser = await chromium.launch();
    const page = await browser.newPage();

    await page.goto(targetUrl);

    // 物件タイトルの取得
    const title = await page
      .locator("#wrapper > div.section_h1 > div.section_h1-header > h1")
      .textContent();

    // 写真の取得
    const imgUrls = await Promise.all(
      (
        await page.locator("#js-view_gallery-list li a img").all()
      ).map((img) => img.getAttribute("src"))
    );
    const images = await Promise.all(
      imgUrls.map(async (imgUrl) => {
        const response = await fetch(imgUrl as string);
        const arrayBuffer = await response.arrayBuffer();
        const buffer = Buffer.from(arrayBuffer);
        const contentType = response.headers.get("Content-Type");

        return {
          buffer,
          contentType,
        };
      })
    );

    await browser.close();

    response.send(title);
  }
);
まず imgUrls の取得部分では selector #js-view_gallery-list > li:nth-child(1) > a > img を参考にカルーセル部分の img 要素の src 属性を全て取得しています。
画像は容量の制限の関係で Firestore に直接保存することができません。
そこで一旦 Storage に保存することを見越して buffer として保持しておきます。
また Storage への保存時に拡張子をつけるために contentType として Content-Type を保持しておきます。
関数の最後の部分を次のように変更して動作を確認してみましょう。
http://127.0.0.1:5001/{project idに置き換えて}/us-central1/scrapeSuumoにアクセスして物件タイトルが表示されれば成功です。
response.send(title);
ここまでの成果をデプロイして Functions でも動作を確認してみましょう。
デプロイの前にスクレイピングのために 2 つの変更を加える必要があります。
まず Functions で Playwright を利用するために、ブラウザをインストールする必要があります。
npm-scripts の Life Cycle Scripts を利用して次のように prepare を追加します。
  "scripts": {
    "prepare": "PLAYWRIGHT_BROWSERS_PATH=0 playwright install chromium",
    "lint": "eslint --ext .js,.ts .",
こうすることで pnpm install が行われた後に prepare の部分が実行されます。
Functions 環境で任意のパスでファイルの書き込みを行うことは難しいのでドキュメントを参考に PLAYWRIGHT_BROWSERS_PATH=0 として node_modules 内にブラウザをインストールします。
合わせて Functions 実行時の環境変数にも PLAYWRIGHT_BROWSERS_PATH=0 を追加します。今回は簡単のために functions/.env ファイルを作成し、そこに記載します。
ローカルでの同様の path にブラウザをインストールするためにここで一度 pnpm install を実行しておきます。
次にデフォルトで割り当てられるメモリだとブラウザを動作させることが難しいのでドキュメントに習って Functions の関数に割り当てるメモリとタイムアウトまでの時間を設定します。
export const scrapeSuumo = onRequest(
  { timeoutSeconds: 100, memory: "1GiB" },
  async (request, response) => {
ここまできたら pnpm run deploy してみましょう。先ほどと同様の確認方法で物件タイトルが帰ってきたら成功です。
スクレイピングしたデータの保存
データが取得できていることを確認できたので次はデータの保存に取り掛かります。
Firestore はドキュメントの最大サイズが 1MiB になっていて、複数枚の画像を保存することはできません。
そこでテキストデータは Firestore に、画像は Storage に保存します。
筆者はドキュメントの制限を忘れていて、後から慌てて Storage を追加しました。
ここからは Emulator の Functions から firebase-admin で Firestore と Storage に接続するために Emulator の実行方法を次のように変更します。
また、Functions だけでなく Storage と Firestore の Emulator も起動できるようにしておきます。
FIREBASE_STORAGE_EMULATOR_HOST=127.0.0.1:9199 FIRESTORE_EMULATOR_HOST=127.0.0.1:8080 firebase emulators:start
ここからが保存に関する実装です。
最初に firebase-admin を用いた初期化を行います。
import { initializeApp } from "firebase-admin/app";
import { getFirestore } from "firebase-admin/firestore";
import { getStorage } from "firebase-admin/storage";

const app = initializeApp();
const db = getFirestore(app);
const bucket = getStorage(app).bucket();
次に先ほど取得した画像を Storage に保存する部分の実装を行います。
import { randomUUID } from "crypto";

const app = initializeApp();
const bucket = getStorage(app).bucket();
const publicUrls = await Promise.all(
  images.map(async (img) => {
    const imgId = randomUUID();
    const path = `${docId}/${imgId}.${img.contentType?.replace("image/", "")}`;
    const file = bucket.file(path);
    const publicUrl = file.publicUrl();

    await bucket.file(path).save(img.buffer);

    return publicUrl;
  })
);
Storage にアップロードするときのパスは docId(物件のid)/imgId(ユニークなid).${img.contentType?.replace("image/", "")}(拡張子) になるようにしておきますが、特に深い理由はありません。
ポイントは Storage に画像をアップロードした後に、画像をダウンロードするための publicUrl を取得しておいたところです。
次は Firestore へ物件の情報と取得した publicUrls を保存する部分の実装を行います。
const docId = db.collection("rental_houses").doc().id;

const publicUrls = ...

await db.collection("rental_houses").doc(docId).set({
  title,
  publicUrls,
});
Storage の保存に docId を用いるので先に取得しておきます。
ここまできたら http://127.0.0.1:5001/{project idに置き換えてください}/us-central1/scrapeSuumo にアクセスして Emulator で Firestore とStorageを確認してみましょう。
Firestore に物件情報が、Storage に画像が保存されていれば成功です。
デプロイしても動作するか確認しておきましょう。
最後にスクレイピング対象の URL を外部から与えられるようにしましょう。
const targetUrl = request.body.targetUrl;
curl -X POST -H "Content-Type: application/json" -d '{"targetUrl":"SUUMOの賃貸物件の情報が載ったページのURL"}' http://127.0.0.1:5001/{project idに置き換えてください}/us-central1/scrapeSuumo
最終的な functions/src/index.ts
/**
 * Import function triggers from their respective submodules:
 *
 * import {onCall} from "firebase-functions/v2/https";
 * import {onDocumentWritten} from "firebase-functions/v2/firestore";
 *
 * See a full list of supported triggers at https://firebase.google.com/docs/functions
 */

import { onRequest } from "firebase-functions/v2/https";
import * as logger from "firebase-functions/logger";
import { chromium } from "playwright";
import { initializeApp } from "firebase-admin/app";
import { getFirestore } from "firebase-admin/firestore";
import { getStorage } from "firebase-admin/storage";
import { randomUUID } from "crypto";

// Start writing functions
// https://firebase.google.com/docs/functions/typescript

export const helloWorld = onRequest((request, response) => {
  logger.info("Hello logs!", { structuredData: true });
  response.send("Hello from Firebase!");
});

const app = initializeApp();
const db = getFirestore(app);
const bucket = getStorage(app).bucket();

export const scrapeSuumo = onRequest(
  { timeoutSeconds: 100, memory: "1GiB" },
  async (request, response) => {
    logger.info(request.body, { structuredData: true });
    const targetUrl = request.body.data.targetUrl;

    logger.info(targetUrl);

    const browser = await chromium.launch();
    const page = await browser.newPage();

    await page.goto(targetUrl);

    // 物件タイトルの取得
    const title = await page
      .locator("#wrapper > div.section_h1 > div.section_h1-header > h1")
      .textContent();

    // 写真の取得
    const imgUrls = await Promise.all(
      (
        await page.locator("#js-view_gallery-list li a img").all()
      ).map((img) => img.getAttribute("src"))
    );
    const images = await Promise.all(
      imgUrls.map(async (imgUrl) => {
        const response = await fetch(imgUrl as string);
        const arrayBuffer = await response.arrayBuffer();
        const buffer = Buffer.from(arrayBuffer);
        const contentType = response.headers.get("Content-Type");

        return {
          buffer,
          contentType,
        };
      })
    );

    await browser.close();

    const docId = db.collection("rental_houses").doc().id;

    const publicUrls = await Promise.all(
      images.map(async (img) => {
        const imgId = randomUUID();
        const extension = img.contentType?.replace("image/", "");
        const path = `${docId}/${imgId}.${extension}`;
        const file = bucket.file(path);
        const publicUrl = file.publicUrl();

        await bucket.file(path).save(img.buffer);

        return publicUrl;
      })
    );

    const data = {
      title,
      publicUrls,
    };
    await db.collection("rental_houses").doc(docId).set(data);

    response.send({ data });
  }
);
クライアント
クライアントの作成過程の紹介は割愛します。
完成品のリポジトリを置いておくのでよければ見ていってください。

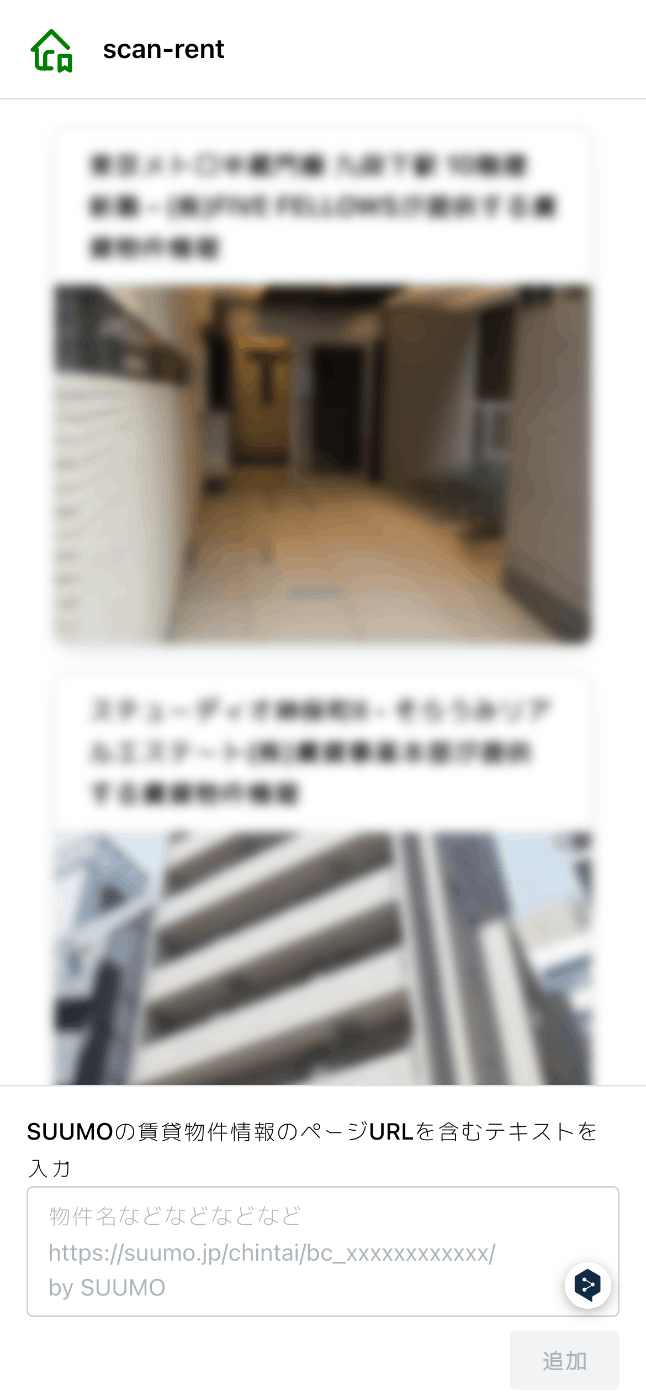
作成したクライアント(大人の事情でぼかしています)
おまけで React を用いたとても簡単なクライアントの実装したときに困ったところを紹介しておきます。
クライアントから Emulator の Storage にアクセスできない
クライアントから Emulator の Storage にアクセスできなかったのでひとまず storage.rules を firestore.rules に習って書き換えました。
rules_version = '2';

// Craft rules based on data in your Firestore database
// allow write: if firestore.get(
//    /databases/(default)/documents/users/$(request.auth.uid)).data.isAdmin;
service firebase.storage {
  match /b/{bucket}/o {
    match /{allPaths=**} {
      // この部分のif以降をfirestore.rulesの似た部分から取ってくる
      allow read, write: if request.time < timestamp.date(2024, 1, 17);
  }
}
保存した publicUrl で画像を取得できなかった(わけではありませんでした)
頑張って保存した publicurl では画像を取得することができませんでした。と思って今試したらできました。寝ぼけていたせいで何かを勘違いしていたようです。
当時はわざわざ publicUrl から getDownloadUrl を用いて新たにリンクを取得することで問題が改善されました。
Functions に targetUrl を渡せない
テストではうまく渡せていた気がしていましたが、クライアントから Firebase SDK を利用して呼び出すことがでなかったので次のように変更を加えました。
- const targetUrl = request.body.targetUrl;
+ const targetUrl = request.body.data.targetUrl;
Discussion