【Render.com×Twitter API】珍しい名字Botを作成した話
はじめに
最近新しい趣味ができました。珍しい名字を調べることです。
そのうち自分で調べるだけでなく皆にも共有したいなと思い始めたので、X(旧Twitter)で珍しい名字を紹介するBotを作ります。
よく見ているWebサイトは以下(名字由来netさん)。 出典元とURLを記載すればデータは外部で利用可能とのことでしたので、今回はこちらから各種情報を取得し、ランダムでポスト(ツイート)していきます。
前提条件
作成・運用ともにすべて無料で行うこと。
利用するツール・サービス
-
Twitter API v2:ツイッターに自動投稿するために利用。兎にも角にもこれがないと始まらない。
https://developer.twitter.com/ -
Render.com:作成したWebアプリケーションを載せるためのPaaS。無料で利用可能。
https://render.com/ - github:作成したWebアプリケーションを格納するために利用。Render.comと連携させる。
-
Python:機能はPythonで実装する。主に利用するライブラリ・フレームワークは以下。
- FastAPI:PythonのWebフレームワーク。Webサーバを立ち上げるために利用する。
- BeautifulSoup:PythonのWEBスクレイピング用ライブラリ。HTMLファイルからデータを取得するために利用する。
- tweepy:PythonからTwitter APIを利用するためのライブラリ。
- Google Apps Script(GAS):Webアプリケーションに定期的にヘルスチェックを送信するために利用。
事前準備
-
Xのアカウント作成
作成手順は省略。 -
作成したXアカウントでTwitterAPIに開発者登録
登録手順は省略。以下ページが参考になる。
https://qiita.com/stephinami/items/f341d55dd9fe6668e709
無料プランで月間1500件の投稿ができるため、無料プランで十分。 -
Render.comのアカウント作成
作成手順は省略。 -
githubのアカウント作成
作成手順は省略。 -
Googleのアカウント作成(GASを使うため)
作成手順は省略。 -
開発環境のセットアップ
Pythonを利用できる環境を用意すること。
今回利用するライブラリ・フレームワークも事前にインストールしておく。(インストール済みのものは外してください)
sudo pip install apscheduler,requests,beautifulsoup4,tweepy,schedule,fastapi,uvicorn,python-dotenv
Render.comでサービス作成
ダッシュボード右上の+NewからWeb Serviceを押下し、次の画面で自身のgithubアカウントと連携させる。
各種設定値は以下の通り設定。


サービス作成が完了すると、画面左上にWebアプリケーションのルートURLが表示されます。

Twitter APIでアプリケーション作成
まずはTwitter APIでアプリケーションを作成しましょう。
以下のリンクからTwitter APIにアクセスし、アプリケーションを作成します。
ポストを行うので、App permissionsはRead and writeを選択。
Type of AppはWeb App, Automated App or Botを選択。

Callback URI / Redirect URLにはコールバック用ページのURLを指定します。
Website URLは適当でOK。
その他はoptionalなので空欄のままSaveします。

Pythonスクリプト -Webサーバの作成-
後述するPaaS、Render.comには様々なアプリケーションタイプが存在します。
定期的にポスト投稿するスクリプトのため、本来であればcronアプリケーションが理想ですが、cronアプリケーションには無料プランが存在しないため課金が必須となります。
そのためWebアプリケーションとして実装を行い、定期実行処理をWebアプリに組み込みます。
# 各種ライブラリをインポート
import xxxx

# FastAPIのインスタンス作成
app = FastAPI()

# ルートURLにアクセスされたときの処理
@app.get("/")
async def home():
    #TwitterAPIのAuthorization画面にアクセスする処理を記載

# ルートURL/callbackにアクセスされたときの処理
@app.get("/callback")
async def callback(request: Request):
    #コールバックされたURLから認証情報を取得する処理を記載
    #定期的に認証情報を更新する処理を記載(一度取得した認証情報は一定時間で無効になるため)
    #定期的にXにポストを行う処理を記載

# ルートURL/healthにアクセスされたときの処理
@app.get("/health")
async def health_check():
    #ヘルスチェックが成功していることをreturnする処理を記載

if __name__ == "__main__":
    uvicorn.run(app, host="0.0.0.0", port=10000)
それでは具体的な処理を記述していきましょう。
import os
import requests
from bs4 import BeautifulSoup
import tweepy
import random
import schedule
import time
from fastapi import FastAPI, Request
from fastapi.responses import RedirectResponse
import tweepy
import uvicorn
from apscheduler.schedulers.background import BackgroundScheduler
from apscheduler.triggers.cron import CronTrigger
import urllib.parse
from dotenv import load_dotenv
import datetime
import unicodedata
import csv
import re

# APSchedulerのスケジューラー設定
tweet_scheduler = BackgroundScheduler()
accesstoken_fetch_scheduler = BackgroundScheduler()

# ルートURLにアクセスされたときの処理
@app.get("/")
async def home():
    #認証URLを取得
    redirect_url = oauth2_user_handler.get_authorization_url()
    print(redirect_url)
    return RedirectResponse(redirect_url)

# ルートURL/callbackにアクセスされたときの処理
@app.get("/callback")
async def callback(request: Request):
    #コールバックされたURLを取得
    full_url = str(request.url)

    #関数accesstoken_scheduled_fetchに、full_urlを引数として渡して実行
    accesstoken_scheduled_fetch(full_url)

    #スケジューラーにジョブを追加(ツイート:8-24時の間で20分ごとに実行)
    trigger = CronTrigger(minute='0,20,40', hour='23,0-14')
    tweet_scheduler.add_job(tweet_scheduled_message, trigger)
    tweet_scheduler.start()

    #スケジューラーにジョブを追加(アクセストークン取得:100分ごとに取得)
    accesstoken_fetch_scheduler.add_job(accesstoken_scheduled_fetch, 'interval', minutes=100, args=[full_url])
    accesstoken_fetch_scheduler.start()
    print(datetime.datetime.now())

    return {"message": "Twitter認証が完了しました。自動ツイートが開始されます。"}

# ルートURL/healthにアクセスされたときの処理
@app.get("/health")
async def health_check():
    return {"status": "healthy"}

if __name__ == "__main__":
    uvicorn.run(app, host="0.0.0.0", port=10000)
Pythonスクリプト -Twitter APIの認証情報設定-
関数accesstoken_scheduled_fetchの内容は以下となります。
まず、あらかじめ取得しておいたTwitter APIの各種認証情報を用いてクライアント情報を設定します。
その後、コールバックされたURLからアクセストークンを取得し、これをもってクライアント情報を更新します。
# グローバル変数でTwitterクライアントを保持
client = None

# Tweepyを初期化
oauth2_user_handler = tweepy.OAuth2UserHandler(
    client_id=CLIENT_ID,
    redirect_uri=CALLBACK_URL,
    scope=["tweet.read", "tweet.write"],
    client_secret=CLIENT_SECRET
)

# アクセストークン取得関数
def accesstoken_scheduled_fetch(full_url):
    print("アクセストークン取得を開始します。")
    access_token = oauth2_user_handler.fetch_token(full_url)
    access_token = access_token['access_token']
    global client
    client = tweepy.Client(bearer_token=access_token,consumer_key=API_KEY,consumer_secret=API_SECRET,access_token=ACCESS_TOKEN,access_token_secret=ACCESS_TOKEN_SECRET)
    print("Twitterクライアントが初期化されました。")
Pythonスクリプト -Webスクレイピング・ツイートの処理作成-
今回ツイートに必要な要素は以下6つです。
・名字
・名字の読み
・全国ランキング順位
・人口
・由来
・名字ページのURL
また、今回ポストするのは以下の名字です。
①人口が500人以下の名字
②管理人が独断と偏見で厳選した名字
まずは①の処理からです。
人口が500人以下の名字、順位、人数は、名字由来netの全国ランキングページから取得できます。

画像の通り、24ページ目からだいたい500人くらいになってくるので、24ページから79ページ(執筆時点で80ページ目以降は存在しない)の中からランダムでページを指定し、さらにその中から名字をランダムに選ぶよう処理を記述しましょう。
※ページ数をランダムで指定する処理は、後述するスケジューラ関数に記載します。
そして、名字の読み方や由来、URLは、その名字のページから取得します。

htmlファイルをパースし各種情報を取得するのには、beautifulsoupを利用します。
##### 名字データ取得関数(通常) #####
def get_surname_data(pagenum):

    # WebページのURLを指定
    ranking_url = f"https://myoji-yurai.net/prefectureRanking.htm?prefecture=%E5%85%A8%E5%9B%BD&page={pagenum}"
    response = requests.get(ranking_url)
    soup = BeautifulSoup(response.text, 'html.parser')

    # 「人数」が含まれるテキストを持つテーブルのインデックスを探す
    table_list = []
    for i in range(50):
        selector = f"#content > div.post > table:nth-child({i}) > thead > tr > th:nth-child(1)"
        element = soup.select_one(selector)
        if element is None:
            continue
        if "順位" in element.get_text():
            table_list.append(i)

        i += 1
    # table_listの要素数の範囲内でランダムな整数を生成
    random_table_num = random.choice(table_list)

    while True:
    # 1~500の範囲内でランダムな整数を生成
        random_row_num = random.randint(1, 500)
        selector = f"#content > div.post > table:nth-child({random_table_num}) > tbody > tr:nth-child({random_row_num}) > td:nth-child(1)"
        element = soup.select_one(selector)
        if element is not None:
            break

    # 各データを取得
    rank_selector = f"#content > div.post > table:nth-child({random_table_num}) > tbody > tr:nth-child({random_row_num}) > td:nth-child(1)"
    rank = soup.select_one(rank_selector).get_text(strip=True)

    surname_selector = f"#content > div.post > table:nth-child({random_table_num}) > tbody > tr:nth-child({random_row_num}) > td:nth-child(2)"
    surname = soup.select_one(surname_selector).get_text(strip=True)

    population_selector = f"#content > div.post > table:nth-child({random_table_num}) > tbody > tr:nth-child({random_row_num}) > td:nth-child(3)"
    population = soup.select_one(population_selector).get_text(strip=True)


    #苗字ページに飛んで、由来・読み方を取得
    surname_url = f"https://myoji-yurai.net/searchResult.htm?myojiKanji={surname}"
    response = requests.get(surname_url)
    soup = BeautifulSoup(response.text, 'html.parser')
    n3 = 1
    for i in range(50):
        selector = f"#content > div:nth-child({i}) > div.box > h4"
        element = soup.select_one(selector)
        if element is None:
            continue
        if '由来解説' in element.get_text():
            n3 = i
            break
        i += 1

    origin_selector = f"#content > div:nth-child({n3}) > div.box > div"
    origin = soup.select_one(origin_selector).get_text(strip=True)
    #不要な文字列がある場合は削除する
    del_str = 'この名字について情報をお持ちの方は「みんなの名字の由来」に投稿いただくか(※無料会員登録が必要です)、「名字の情報を送る」よりお寄せください。'
    origin = origin.replace(del_str,'')

    n4 = 1
    for i in range(15):
        selector = f"#content > div:nth-child({i}) > p"
        element = soup.select_one(selector)
        if element is None:
            continue
        if '読み' in element.get_text():
            n4 = i
            break
        i += 1

    #名字ページのURLは、マルチバイト文字(日本語)をパースして設定する
    encoded_name = urllib.parse.quote(surname)
    surname_url_encode = f"https://myoji-yurai.net/searchResult.htm?myojiKanji={encoded_name}"

    reading_selector = f"#content > div:nth-child({n4}) > p"
    reading = soup.select_one(reading_selector).get_text(strip=True)
    del_str = '【読み】'
    reading = reading.replace(del_str,'')

    # 各項目を整形
    rank = f"【ランク】{rank}"
    surname = f"【苗字】{surname}({reading})"
    population = f"【人口】{population}"
    origin = f"【由来】{origin}"
    surname_url_encode = f"{surname_url_encode}"

    #Xのポストは280文字までのため、文字数チェックを行う
    lencheckitem = [rank, surname, population, surname_url_encode]
    origin_strlen = 0
    except_origin_strlen = 0
    for i in range(4):
        except_origin_strlen += get_east_asian_width_count(lencheckitem[i])
        i += 1
    strlen = except_origin_strlen + get_east_asian_width_count(origin)
    print(strlen)
    if strlen > 280:
        print("文字数超過のため由来の文章を削ります。")

        #由来の文章の文字数調整
        max_length = 280 - except_origin_strlen
        truncated_text = truncate_text_to_length(origin, max_length)
        origin = truncated_text

    # 結果を出力
    print(rank)
    print(surname)
    print(population)
    print(origin)
    print(surname_url_encode)

    return rank, surname, population, origin, surname_url_encode

# 文字数カウント関数
def get_east_asian_width_count(text):
    count = 0
    for c in text:
        if unicodedata.east_asian_width(c) in 'FWA':
            count += 2
        else:
            count += 1
    return count

# 文章短縮関数
def truncate_text_to_length(origin, max_length):
    # 句点「。」で文章を区切る
    sentences = origin.split('。')

    # 最後の要素が空なら削除(「。」で終わる場合の処理)
    if sentences[-1] == '':
        sentences.pop()

    # 文字数を確認しながら文章を削除
    while get_east_asian_width_count('。'.join(sentences)) > max_length:
        sentences.pop()  # 最後の文章を削除

    # 削った後の文章を再結合し、末尾に「。」を追加
    truncated_text = '。'.join(sentences) + '。'

    return truncated_text
最後にツイート用のスケジュールジョブ用関数を作成してあげれば、完成です。
(②の処理は関数get_selected_surname_dataとして別で用意していますが、内容は①とほぼ同じなため省略します)
# 定期ツイート関数
def tweet_scheduled_message():
    print("ツイート生成を開始します。")
    global client
    if client is None:
        print("Twitterクライアントが初期化されていません。")
        return
    # 現在の時間を取得
    current_time = datetime.datetime.now()
    current_hour = current_time.hour
    current_minute = current_time.minute

    # XX時00分の投稿の場合、管理人厳選苗字をツイートする。
    if 0 <= current_minute <= 10:
        rank, surname, population, origin, surname_url_encode = get_selected_surname_data()
    else:
        pagenum = random.randint(24, 79)
        rank, surname, population, origin, surname_url_encode = get_surname_data(pagenum)

    try:
        message = f"{rank}\n{surname}\n{population}\n{origin}\n{surname_url_encode}"
        client.create_tweet(text=message)
        print("ツイートが送信されました!")
    except Exception as e:
        print(f"ツイートエラー: {e}")
GAS(Google Apps Script)からRender.com上のWebアプリへ定期的にヘルスチェック送信するよう設定
Render.comの無料プランでは、15分以上外部からのアクセスがないとSleep状態になります。
すなわち今回のような使い方では、15分経過後はツイート用スケジューラが停止してしまいます。
そこで、GASからヘルスチェックをかけ定期的にアクセスすることで、常に起動状態を保ちます。
詳細な手順は割愛しますが、以下の記事が参考になります。
これにて完成。
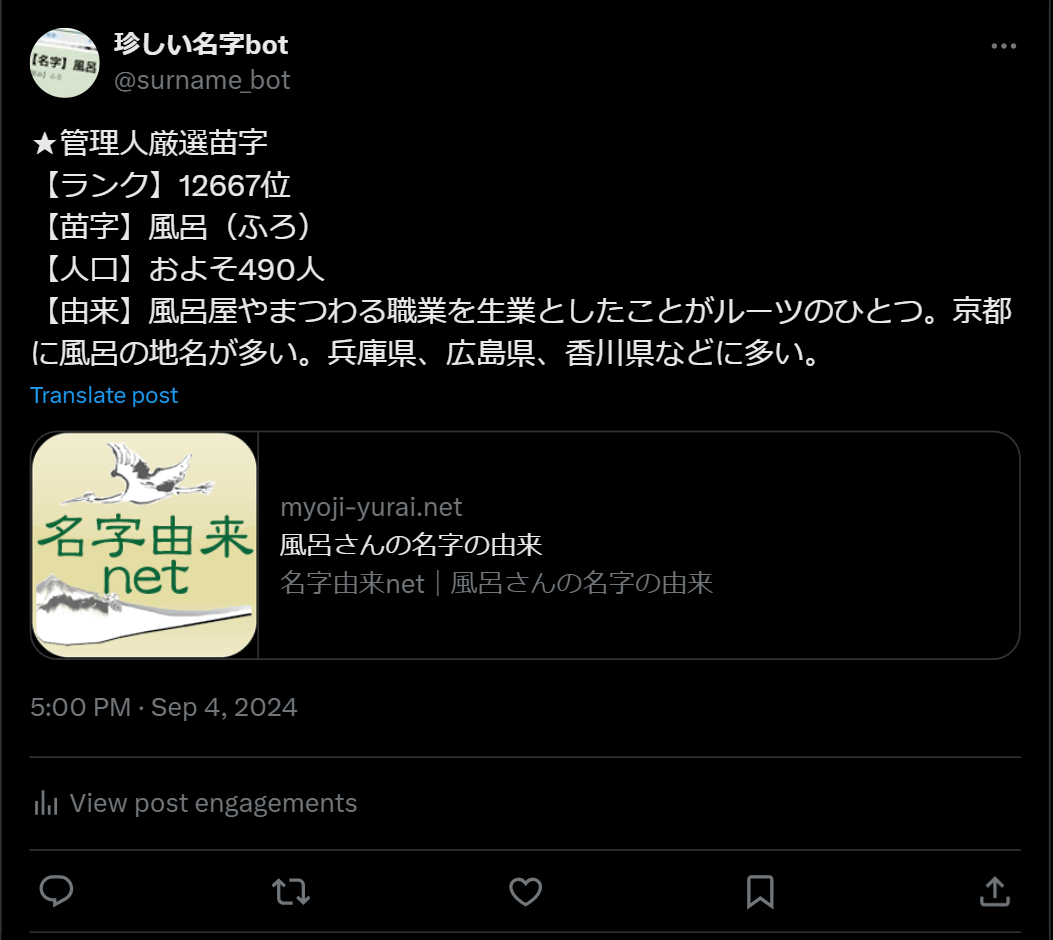
ツイートが送信されていることも確認できました。

まとめ
いかがだったでしょうか?
指定のページから情報を引っこ抜いてくるのはbeautifulsoupを使えば、Xへのポストはtweepyを使えば簡単にできますね。
Twitter APIの認証周りは少々複雑で、バージョンによって仕様が変わっているため、公式ドキュメントを読むことを強くお勧めします。


Discussion