HUGOで作ったブログをデプロイしよう!
はじめに
「自分だけのブログを公開してみたいーー!」と思ったことはありませんか?
今回は前回記事で作成したブログをデプロイして公開してみようと思います。
使ったもの
| 使ったもの | バージョン |
|---|---|
| macOS | Ventura 13.3.1 |
| Visual Studio Code | 1.80.1 |
| HUGO | v0.113.0+extended darwin/arm64 |
前回の内容
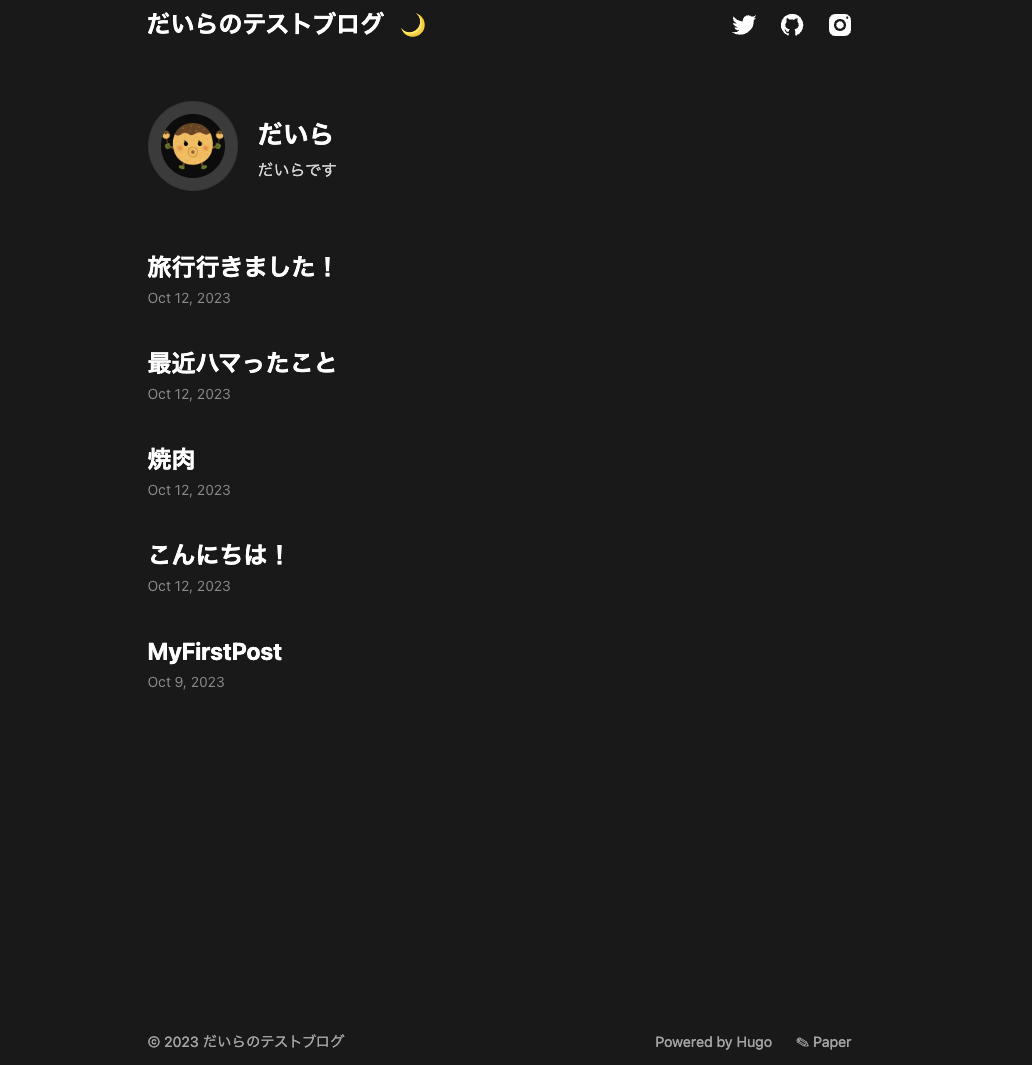
前回、筆者はこのようなブログを作成しております。
この時にサラッとHUGOのことに触れているので、HUGOって何じゃい!という方は実際のドキュメントまたは前回の記事を参考にしてみてください。
Github ActionsとGithub Pagesとは?
Github Actionsは、定義した処理と条件の組み合わせ(Workflow)を自動化するGithubの公式機能になります。リポジトリに対するpushなどを条件に、Workflowに定義しておいた処理を自動で行ってくれます。もちろん、CI/CD(テスト、ビルド、デプロイ)を実現することも可能です。
一方、Github PagesはGitHubリポジトリ内の静的ウェブコンテンツをホスティングするためのサービスです。Github Pagesを使えば、HTML/CSS/JavaScriptで作成されたウェブサイトを非常に簡単にホストできます。さらにHTTPSとカスタムドメインもサポートしてくれちゃってます。そして、無料(重要)です。
さっそくデプロイ!
それではHUGOのドキュメントに沿って、Github ActionsとGithub Pagesを用いてデプロイを行います。 HUGOにデプロイの手順書があるなんて、かなり親切ですな、、。
前提作業
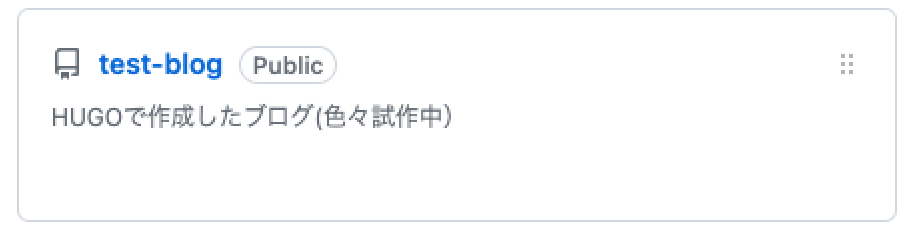
と、その前にGithubにレポジトリを作成しておきましょう。
↓リポジトリの作り方全く知らないんだぜな方は、以下の資料が参考になるかと思います。
こんな感じにGithubにレポジトリを作成したらOKです。
Github Actionsを使おう!
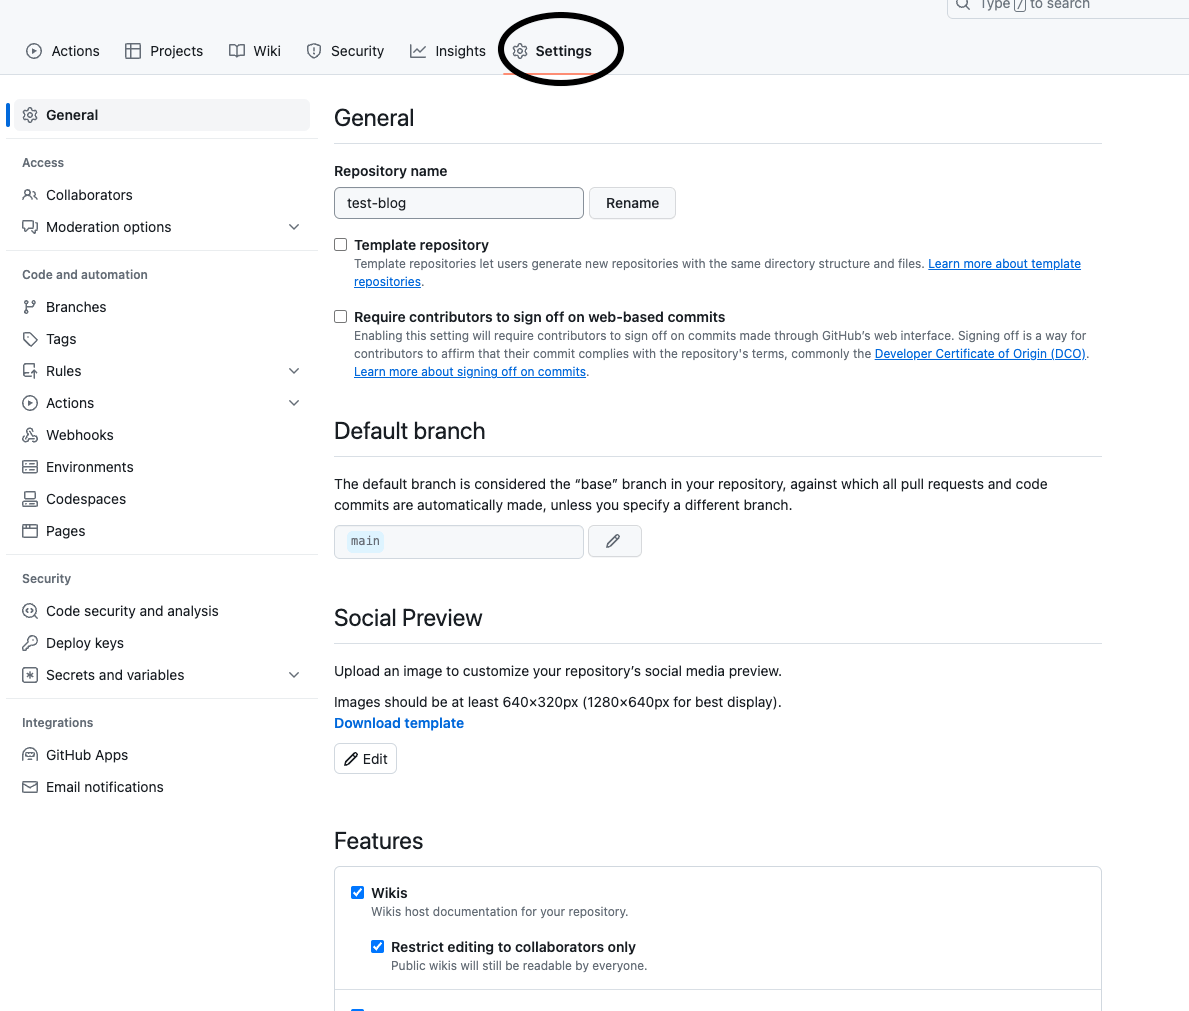
まずはレポジトリ内の「Settings」タブをクリックし、「Code and automation」から「Pages」をクリックします。
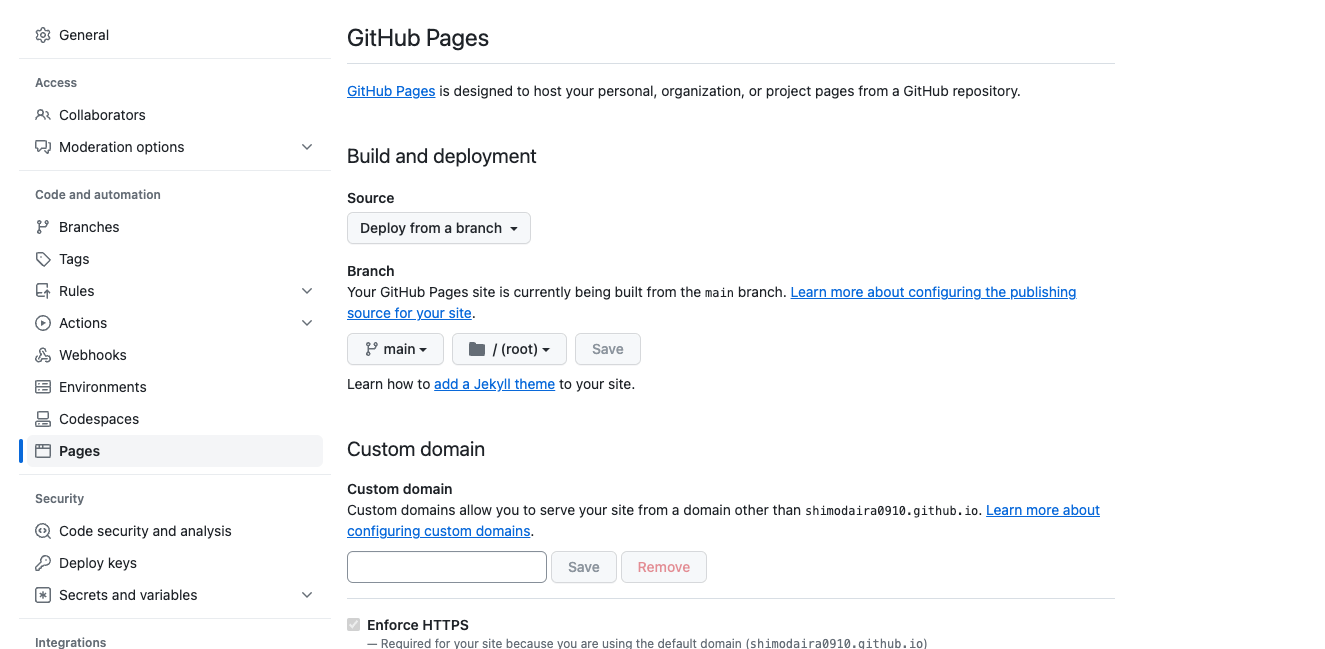
こんな感じの画面に遷移するので、
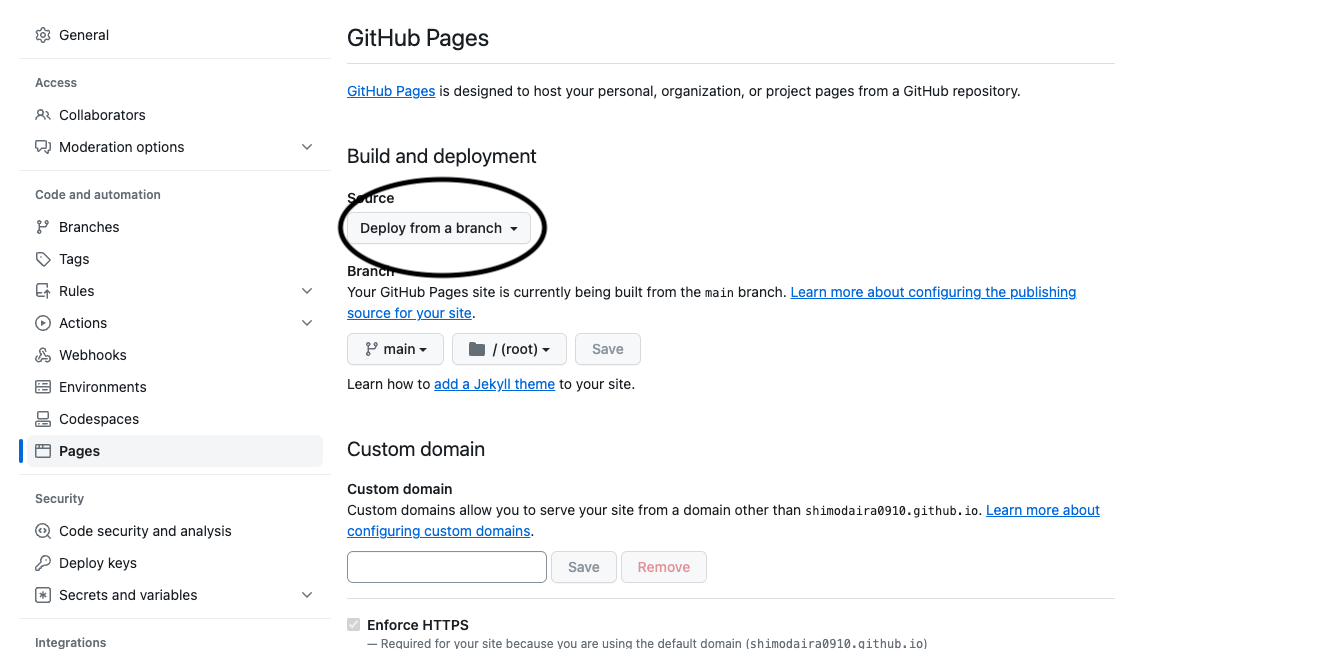
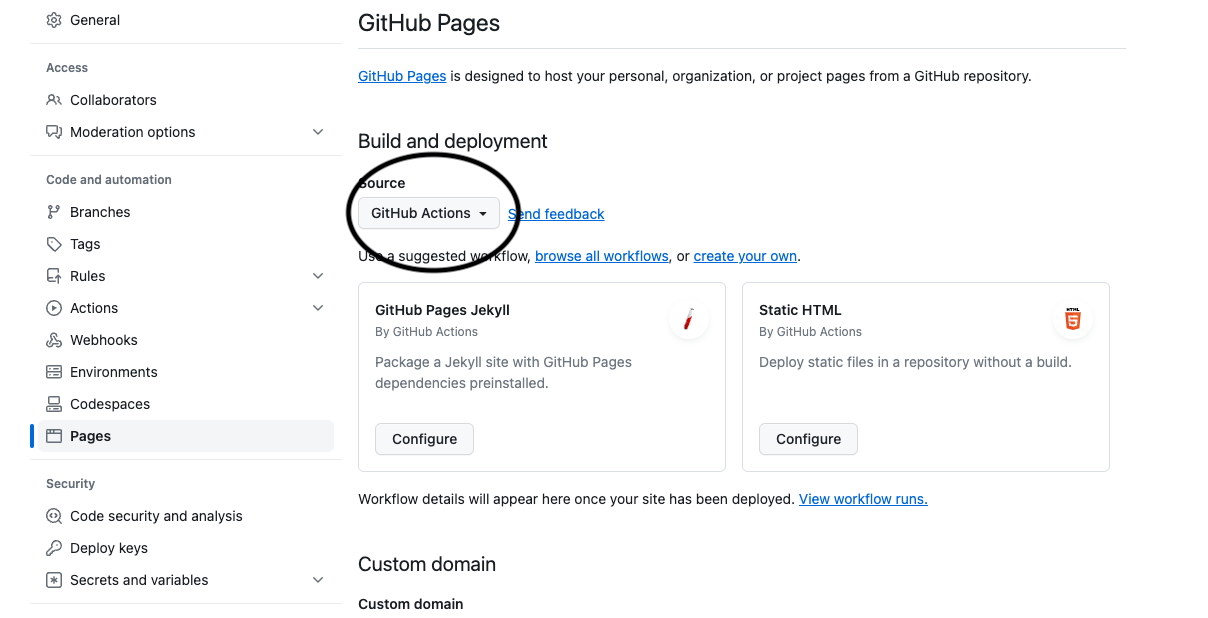
図に丸をつけた部分を「Deploy from a branch」から「Github Actions」に変更します。
その後、作成したHUGOのブログのルートディレクトリで、「.github/workflows」ディレクトリを作成、hugo.yamlファイルを作成し、以下のyamlファイルをコピペして貼り付けます。(yamlファイルは公式サイトからの引用です。: https://gohugo.io/hosting-and-deployment/hosting-on-github/)
mkdir .github/workflows
cd .github/workflows
touch hugo.yaml
# Sample workflow for building and deploying a Hugo site to GitHub Pages
name: Deploy Hugo site to Pages

on:
  # Runs on pushes targeting the default branch
  push:
    branches:
      - main

  # Allows you to run this workflow manually from the Actions tab
  workflow_dispatch:

# Sets permissions of the GITHUB_TOKEN to allow deployment to GitHub Pages
permissions:
  contents: read
  pages: write
  id-token: write

# Allow only one concurrent deployment, skipping runs queued between the run in-progress and latest queued.
# However, do NOT cancel in-progress runs as we want to allow these production deployments to complete.
concurrency:
  group: "pages"
  cancel-in-progress: false

# Default to bash
defaults:
  run:
    shell: bash

jobs:
  # Build job
  build:
    runs-on: ubuntu-latest
    env:
      HUGO_VERSION: 0.115.4
    steps:
      - name: Install Hugo CLI
        run: |
          wget -O ${{ runner.temp }}/hugo.deb https://github.com/gohugoio/hugo/releases/download/v${HUGO_VERSION}/hugo_extended_${HUGO_VERSION}_linux-amd64.deb \
          && sudo dpkg -i ${{ runner.temp }}/hugo.deb
      - name: Install Dart Sass
        run: sudo snap install dart-sass
      - name: Checkout
        uses: actions/checkout@v3
        with:
          submodules: recursive
          fetch-depth: 0
      - name: Setup Pages
        id: pages
        uses: actions/configure-pages@v3
      - name: Install Node.js dependencies
        run: "[[ -f package-lock.json || -f npm-shrinkwrap.json ]] && npm ci || true"
      - name: Build with Hugo
        env:
          # For maximum backward compatibility with Hugo modules
          HUGO_ENVIRONMENT: production
          HUGO_ENV: production
        run: |
          hugo \
            --gc \
            --minify \
            --baseURL "${{ steps.pages.outputs.base_url }}/"
      - name: Upload artifact
        uses: actions/upload-pages-artifact@v1
        with:
          path: ./public

  # Deployment job
  deploy:
    environment:
      name: github-pages
      url: ${{ steps.deployment.outputs.page_url }}
    runs-on: ubuntu-latest
    needs: build
    steps:
      - name: Deploy to GitHub Pages
        id: deployment
        uses: actions/deploy-pages@v2
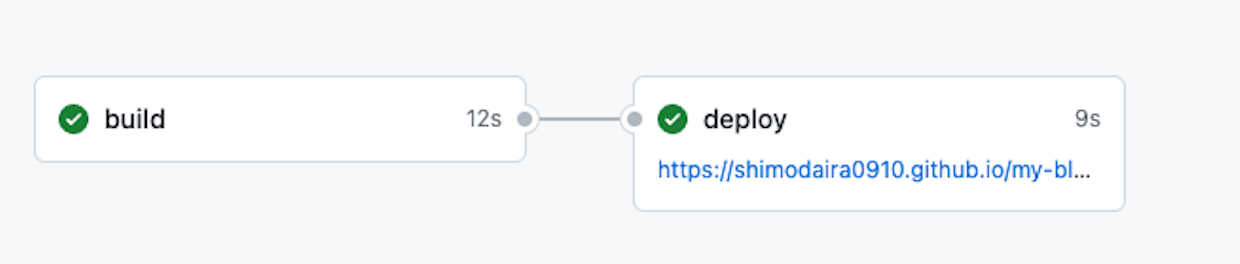
yamlファイルへのコピペが完了したら、Githubへのpushを行い、Githubへもう一度アクセスします。それから「Actions」タブを開き、pushしたWorlflowをクリックします。

遷移先のページで、実際にビルドとデプロイが行われています。
↓ このような形でチェックマークがついてたらビルドandデプロイ完了です!
早速表示されたURLでデプロイしたブログを確認しに行きましょう!!
無事デプロイできたと思ったら
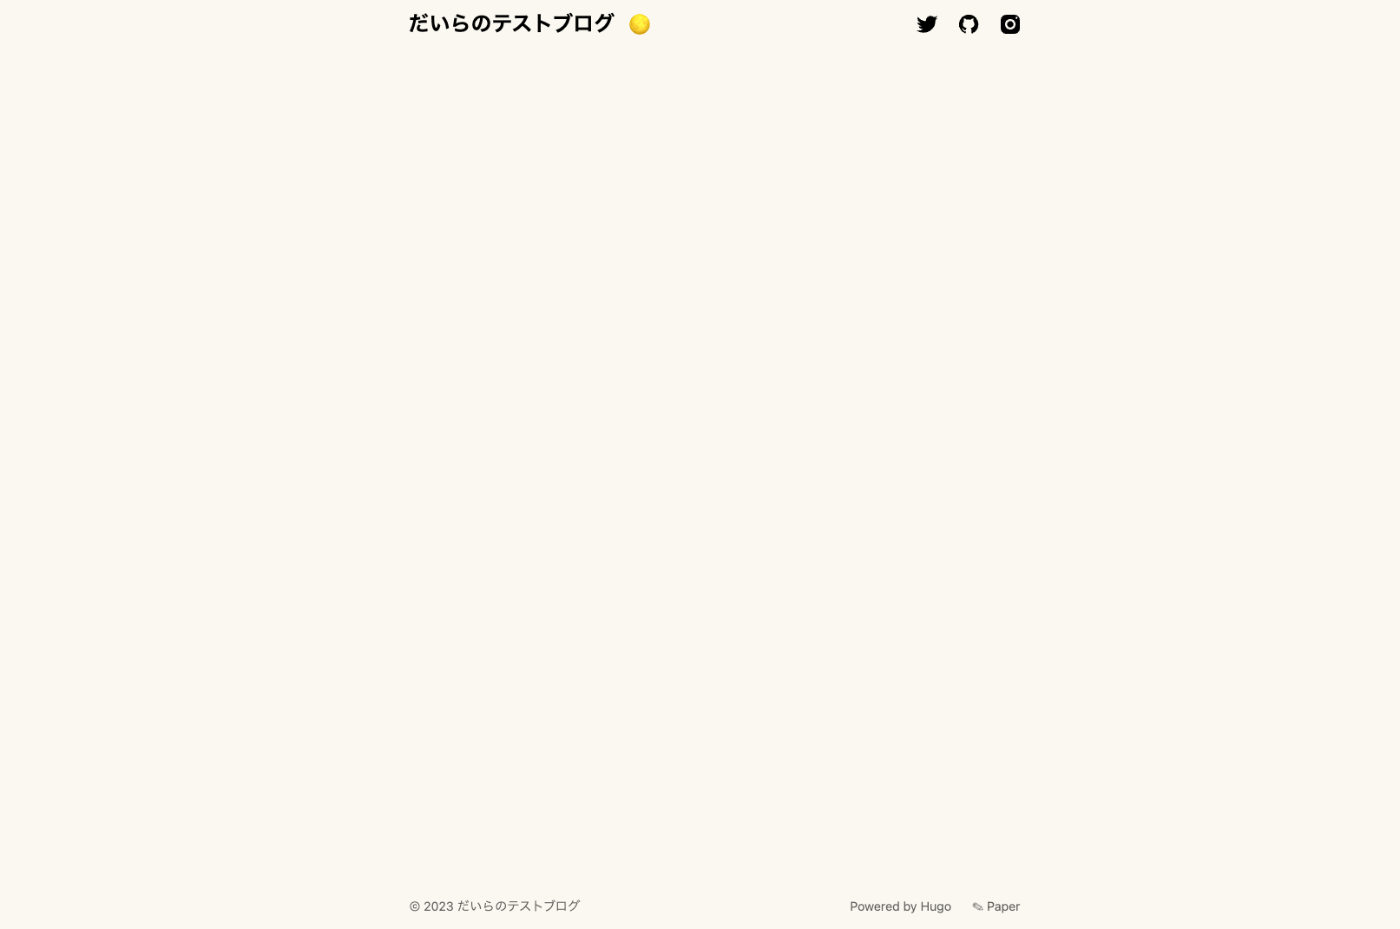
デプロイできてる!
でも、、、プロフィールと記事が、、、ない、、、、、!?

原因
記事を作成した際、「下書き記事」としてcontent/posts配下に配置されていたのが原因のようです。この下書き記事の状態ですと、ビルドした際に記事が生成されなくなってしまいます。
前回の記事でプレビューの際に下書き記事が表示されていたのは、hugo serverコマンドに--buildDraftsオプションを指定していたからのようです。
・下書き記事なしでプレビュー
hugo server
・下書き記事もプレビュー
hugo server --buildDrafts
では、どこを見れば記事が下書き状態かどうかわかるの??という話ですが、、
---
title: "My First Post"
date: 2023-10-08T16:35:27+09:00
draft: true
---
初めまして!
ブログ始めました!!
この生成したmdファイルの
---
title: "My First Post"
date: 2023-10-08T16:35:27+09:00
# ↓ここ
draft: true
---
draftという箇所でした、、。ここで記事を下書き状態かどうか判別しているようです。
じゃあどうすればビルドした時に記事として認識されるんすかって話ですが、答えは簡単で、draft: falseにしてやればいいだけです。
---
title: "My First Post"
date: 2023-10-08T16:35:27+09:00
draft: false
---
初めまして!
ブログ始めました!!
では全ての記事をdraft: trueからdraft: falseに変更し、もう一度GitHubにpushして、デプロイされたブログを確認してみましょう。
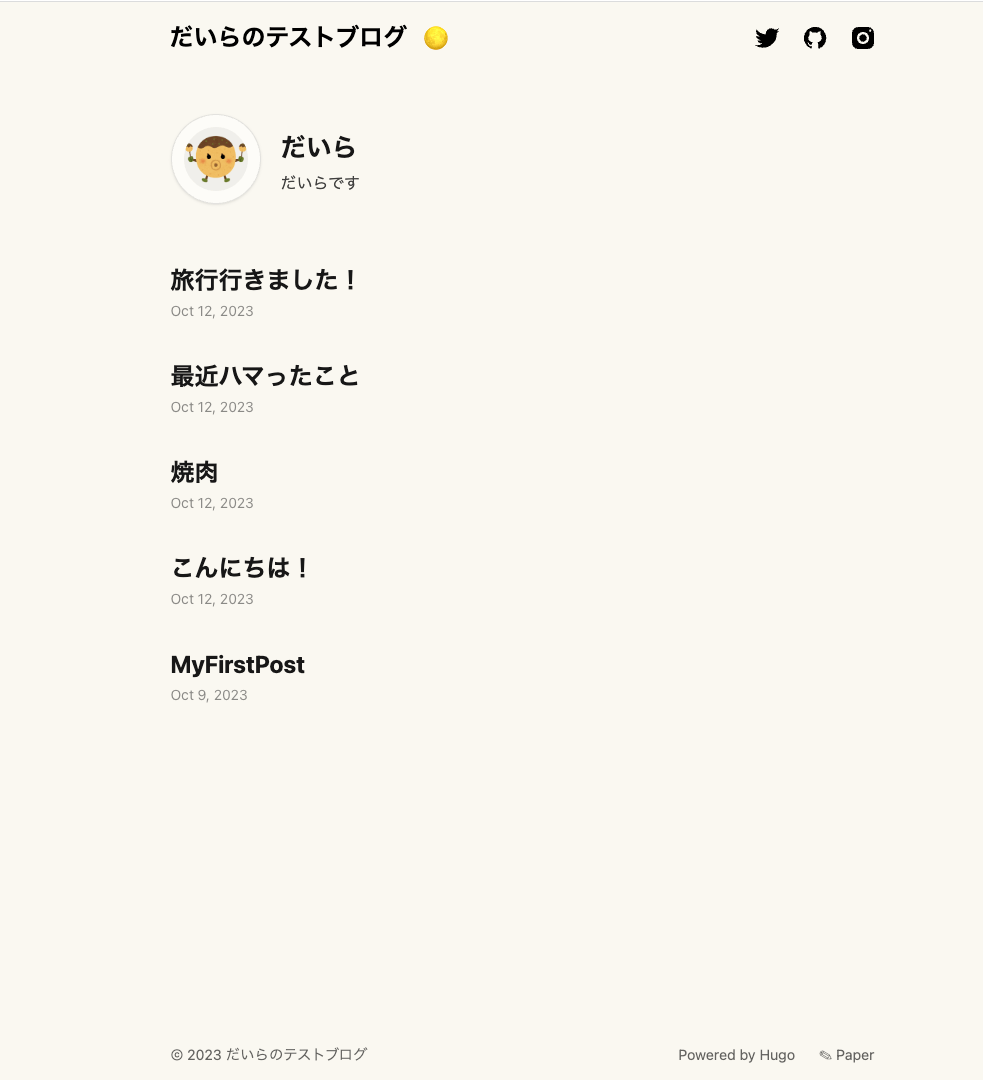
無事に記事の内容とプロフィールが反映されています!
おわりに
今回はGithub ActionsとGithub PagesでHUGOで作成したブログを実際にデプロイをしました。
途中トラブルもありましたが、なんとかブログを公開することができました、、、。
Github ActionsとGithub Pagesを使うことで、CI/CDを簡単に実装し、デプロイが容易になります。
前回の記事でも書きましたが、デプロイが簡単なことを含めて、個人ブログを作成したい人にとって良い選択肢の一つになりうるフレームワークだと改めて思いました。
参考資料まとめ
Discussion