こんにちは、酒井です!
株式会社 EGGHEAD(エッグヘッド)という「製造業で生成 AI を活用したシステム開発」をしている会社の代表をしております。
この記事では、LangGraph UI を使って AI アプリケーションを簡単に構築する方法について解説します。LangGraph UI は、LangChain のエコシステムの一部として提供されている UI 構築のためのライブラリで、LangGraph をバックエンドとした AI アプリケーション開発を大幅に効率化できます。
この記事の内容
- LangGraph UI を使ったチャットアプリケーションの基本的な作り方
- メッセージのストリーミングや編集機能の実装方法
環境準備
まず、Next.js のプロジェクトを作成します。以下のコマンドを実行します。
$ npx create-next-app@latest
プロジェクト作成時に以下のオプションを選択します。この辺りは好みの設定で問題ないです。
- プロジェクト名: chatbot-sandbox
- TypeScript: Yes
- ESLint: Yes
- Tailwind CSS: Yes
- src/ ディレクトリ: Yes
- App Router: Yes
- Turbopack: Yes
- Import alias: Yes
フロントエンドを立ち上げておきます。
$ npm run dev
LangGraph UI の設定
1. 必要なパッケージのインストール
$ npm install @langchain/langgraph-sdk @langchain/core
2. langgraph.json の設定
プロジェクトのルートディレクトリにlanggraph.jsonを作成します。このファイルは、バックエンドとフロントエンドの接続設定を定義します。
{
  "dependencies": ["."],
  "graphs": {
    "agent": "./backend/agent.py:graph"
  },
  "ui": {
    "agent": "./src/app/agent/ui.tsx"
  }
}
3. バックエンドの実装
backend/agent.pyを作成し、以下のコードを実装します。このコードは、シンプルな天気情報を返すエージェントを定義しています。
import uuid
from typing import Annotated, Sequence, TypedDict

from langchain_core.messages import AIMessage, BaseMessage
from langchain_openai import ChatOpenAI
from langgraph.graph import StateGraph
from langgraph.graph.message import add_messages
from langgraph.graph.ui import AnyUIMessage, ui_message_reducer, push_ui_message

class AgentState(TypedDict):
    messages: Annotated[Sequence[BaseMessage], add_messages]
    ui: Annotated[Sequence[AnyUIMessage], ui_message_reducer]

async def weather(state: AgentState):
    class WeatherOutput(TypedDict):
        city: str

    weather: WeatherOutput = (
        await ChatOpenAI(model="gpt-4-mini")
        .with_structured_output(WeatherOutput)
        .with_config({"tags": ["nostream"]})
        .ainvoke(state["messages"])
    )

    message = AIMessage(
        id=str(uuid.uuid4()),
        content=f"Here's the weather for {weather['city']}",
    )

    push_ui_message("weather", weather, message=message)
    return {"messages": [message]}

workflow = StateGraph(AgentState)
workflow.add_node(weather)
workflow.add_edge("__start__", "weather")
graph = workflow.compile()
4. フロントエンドの基本実装
src/app/page.tsxを作成し、基本的なチャットインターフェースを実装します。
LangGraph UIのポイントになるのが、useStreamでlanggraph.jsonで定義したGraph名をassistantIdに指定します。これだけでLangGraphのワークフローが実行できます。
"use client";

import { useStream } from "@langchain/langgraph-sdk/react";
import type { Message } from "@langchain/langgraph-sdk";

export default function App() {
  const thread = useStream<{ messages: Message[] }>({
    apiUrl: "http://localhost:2024",
    assistantId: "agent",
    messagesKey: "messages",
  });

  return (
    <div>
      <div>
        {thread.messages.map((message) => (
          <div key={message.id}>{message.content as string}</div>
        ))}
      </div>

      <form
        onSubmit={(e) => {
          e.preventDefault();

          const form = e.target as HTMLFormElement;
          const message = new FormData(form).get("message") as string;

          form.reset();
          thread.submit({ messages: [{ type: "human", content: message }] });
        }}
      >
        <input type="text" name="message" />

        {thread.isLoading ? (
          <button key="stop" type="button" onClick={() => thread.stop()}>
            Stop
          </button>
        ) : (
          <button keytype="submit">Send</button>
        )}
      </form>
    </div>
  );
}
バックエンドを以下のコマンドで立ちあげます。
$ npx @langchain/langgraph-cli dev
warn:    ▪ Launching Python server from @langchain/langgraph-cli is experimental. Please use the `langgraph-cli` package from PyPi instead.
   Built forbiddenfruit==0.1.4
Installed 48 packages in 110ms
INFO:langgraph_api.cli:

        Welcome to

╦  ┌─┐┌┐┌┌─┐╔═╗┬─┐┌─┐┌─┐┬ ┬
║  ├─┤││││ ┬║ ╦├┬┘├─┤├─┘├─┤
╩═╝┴ ┴┘└┘└─┘╚═╝┴└─┴ ┴┴  ┴ ┴

- 🚀 API: http://localhost:2024
- 🎨 Studio UI: https://smith.langchain.com/studio/?baseUrl=http://localhost:2024
- 📚 API Docs: http://localhost:2024/docs

This in-memory server is designed for development and testing.
For production use, please use LangGraph Cloud.

実行した結果が以下の動画です。
高度な機能の実装
基本的なチャット機能に加えて、以下の機能を実装します。
- メッセージの編集機能
- AI の応答の再生成機能
メッセージ編集コンポーネント
page.tsxを以下のように編集します。
"use client";

import type { Message } from "@langchain/langgraph-sdk";
import { useStream } from "@langchain/langgraph-sdk/react";
import { useState } from "react";

function BranchSwitcher({
  branch,
  branchOptions,
  onSelect,
}: {
  branch: string | undefined;
  branchOptions: string[] | undefined;
  onSelect: (branch: string) => void;
}) {
  if (!branchOptions || !branch) return null;
  const index = branchOptions.indexOf(branch);

  return (
    <div className="flex items-center gap-2">
      <button
        type="button"
        onClick={() => {
          const prevBranch = branchOptions[index - 1];
          if (!prevBranch) return;
          onSelect(prevBranch);
        }}
      >
        Prev
      </button>
      <span>
        {index + 1} / {branchOptions.length}
      </span>
      <button
        type="button"
        onClick={() => {
          const nextBranch = branchOptions[index + 1];
          if (!nextBranch) return;
          onSelect(nextBranch);
        }}
      >
        Next
      </button>
    </div>
  );
}

function EditMessage({
  message,
  onEdit,
}: {
  message: Message;
  onEdit: (message: Message) => void;
}) {
  const [editing, setEditing] = useState(false);

  if (!editing) {
    return (
      <button type="button" onClick={() => setEditing(true)}>
        Edit
      </button>
    );
  }

  return (
    <form
      onSubmit={(e) => {
        e.preventDefault();
        const form = e.target as HTMLFormElement;
        const content = new FormData(form).get("content") as string;

        form.reset();
        onEdit({ type: "human", content });
        setEditing(false);
      }}
    >
      <input name="content" defaultValue={message.content as string} />
      <button type="submit">Save</button>
    </form>
  );
}

export default function App() {
  const thread = useStream({
    apiUrl: "http://localhost:2024",
    assistantId: "agent",
    messagesKey: "messages",
  });

  return (
    <div>
      <div>
        {thread.messages.map((message) => {
          const meta = thread.getMessagesMetadata(message);
          const parentCheckpoint = meta?.firstSeenState?.parent_checkpoint;

          return (
            <div key={message.id}>
              <div>{message.content as string}</div>

              {message.type === "human" && (
                <EditMessage
                  message={message}
                  onEdit={(message) =>
                    thread.submit(
                      { messages: [message] },
                      { checkpoint: parentCheckpoint }
                    )
                  }
                />
              )}

              {message.type === "ai" && (
                <button
                  type="button"
                  onClick={() =>
                    thread.submit(undefined, { checkpoint: parentCheckpoint })
                  }
                >
                  <span>Regenerate</span>
                </button>
              )}

              <BranchSwitcher
                branch={meta?.branch}
                branchOptions={meta?.branchOptions}
                onSelect={(branch) => thread.setBranch(branch)}
              />
            </div>
          );
        })}
      </div>

      <form
        onSubmit={(e) => {
          e.preventDefault();

          const form = e.target as HTMLFormElement;
          const message = new FormData(form).get("message") as string;

          form.reset();
          thread.submit({ messages: [message] });
        }}
      >
        <input type="text" name="message" />

        {thread.isLoading ? (
          <button key="stop" type="button" onClick={() => thread.stop()}>
            Stop
          </button>
        ) : (
          <button key="submit" type="submit">
            Send
          </button>
        )}
      </form>
    </div>
  );
}
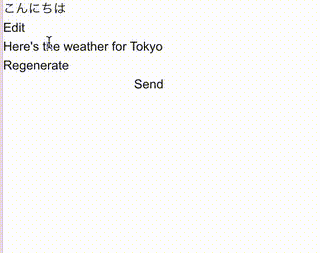
以下の動画のように回答の再生成もできますし、編集もuseStreamの機能で簡単に実装することができます。
まとめ
この記事では、LangGraph UI を使って AI チャットアプリケーションを構築する方法について見てきました。
LangGraph UI は、AI アプリケーションの開発を大幅に効率化できるライブラリです。特に、プロトタイプの実装に適していると思います。
また、LangGraphで作成したバックエンドを簡単にデプロイするサービスとして、LangGraph Cloudがあり、これはLangSmithの有料プランに入っていると使えるようなので、次回試してみたいと思います。

Discussion