Nuxt+shadcn-vue+Storybookのテンプレートを作ってみる検証スクラップ
目標
- 以下の技術スタックが同梱されている
- ✅Nuxt
- ✅TypeScript
- ✅Tailwindcss
- ✅ESLint
- ✅prettier
- ✅Storybook
- ✅vitest
- ✅shadcn-vue
- husky
- hygen
- Sass
- ✅上記のスタックでStorybookを公開
- ✅お試しで一つコンポーネントとstoryを公開(リンク)
- ✅テストファイルの作成
- huskyでコンポーネントのテンプレートを作成
- ✅shadcn-vueでbuttonコンポーネントを追加
- ✅shadcn-vueで追加したコンポーネントをラップするコンポーネントの作成
- ✅上記コンポーネントのStory化
- (more)FigmaのvariablesをExport Filtered Variablesでjson化してコピペし、Style-Dictionaryでcss変数化する
- (more)storycapでVRTの実装
- (more)Laravelへの移植
- (more)Gitに絵文字プレフィクスをつける
リポジトリ
Nuxtのインストール
npx nuxi@latest init nuxt-template
✔ Which package manager would you like to use?
npm
cd nuxt-template
npm run dev

ESLintのインストール
npx nuxi module add eslint
そもそもnuxiってなんなんだ?って感じだけどNuxt3から追加されたCLIらしい。
テンプレート追加機能もあるらしくてhuskyでやろうとしてることをやってくれそう・・・?
これはこれで別途調べたい。
上記のコマンドでESLintがインストールできたらnpm run buildするとeslint.config.mjsがルートフォルダに作成されている。
Nuxt ESLintのレシピによると、ESLint VS Code拡張ではESLint Flat configがデフォルトで有効になっていないため、ESLintを動作させるにはeslint.experimental.useFlatConfig設定で有効にする必要があるとのこと。
なので、.vscode/settings.jsonを作成し、以下の記述を行う。
{
  "eslint.experimental.useFlatConfig": true
}
prettierのインストール
npm install --save-dev --save-exact prettier
node --eval "fs.writeFileSync('.prettierrc','{}\n')"
touch .prettierignore
# Ignore artifacts:
public
{
  "printWidth": 100,
  "singleQuote": true
}
TypeScriptのセットアップ
npm install --save-dev vue-tsc@^1 typescript
build時にtypeチェックを行う場合はnuxt.configにTypeScriptの設定を加える
// https://nuxt.com/docs/api/configuration/nuxt-config
export default defineNuxtConfig({
  devtools: { enabled: true },
  modules: ['@nuxt/eslint'],
+  typescript: {
+    typeCheck: true,
+  },
});
.nuxt/nuxt.d.tsと.nuxt/tsconfig.jsonを生成するにはnpx nuxi devを実行する
Tailwindのインストール
npx nuxi module add @nuxtjs/tailwindcss
npx tailwindcss init
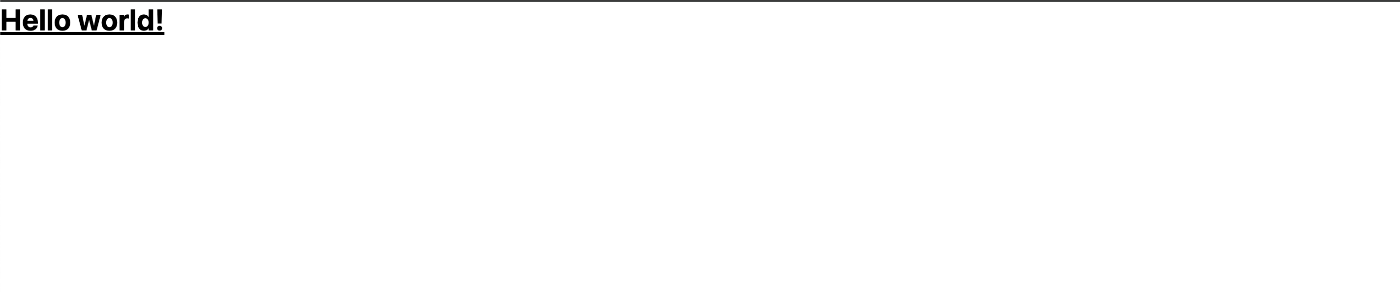
動作確認を行う
<template>
  <h1 class="text-3xl font-bold underline">Hello world!</h1>
</template>
npm run dev
Storybookのインストール
npx nuxi@latest module add storybook
上記コマンドだとNuxt modulesにないと言われるので以下のコマンドで代用
issue探せないんだけど合ってるんだろうか・・・
npx nuxi@latest module add @nuxtjs/storybook
Nuxt moduleパスを有効にしたい場合は--enable-moduleをつけてinitする。特に現状moduleはないけど今後のために一応有効にしておく。
npx storybook-nuxt init --enable-module
npm run dev
動作確認
http://localhost:6006でStorybookが確認できる。

お試しコンポーネントを作ってstoryを公開する
ディレクトリー構成はNuxtの以下のページを参考にする ただし、storyファイルについてはコンポーネントファイルと同列に持ちたい。
| components/
--| common/
----| Button/
------| Button.vue
------| Button.stories.ts
------| Button.spec.ts
みたいな感じ。
ただ、Nuxtはデフォルトでパスを含めたコンポーネント名を自動で定義してオートインポートを行うようになっている。
なので、上記のようなファイル構成だとコンポーネント名がCommonButtonButtonになってしまう・・・?
いったんここまで検証する。
まずは上記の構成でコンポーネントを作成する。
mkdir -p components/common/Button
touch components/common/Button/Button.vue
<script setup lang="ts">
const props = defineProps({
  label: {
    type: String,
    required: true,
  },
});
</script>
<template>
  <button
    class="bg-blue-500 hover:bg-blue-700 text-white font-bold py-2 px-4 rounded"
    type="button"
  >
    {{ label }}
  </button>
</template>
<style scoped></style>
この時点で.nuxt/components.d.tsを確認するとCommonButtonとして登録されていることがわかる。
app.vueに挿入して使ってみる。
<template>
  <CommonButton label="Hello World!" />
</template>

使えた🥳
次にstoryの追加をしてみる。
touch components/common/Button/Button.stories.ts
import Button from './Button.vue';

export default {
  title: 'components/Button',
  component: Button,
  tags: ['autodocs'],
};

export const Default = {
  args: {
    label: 'ボタン',
  },
};
現状のstorybookの設定だとcomponentsの中のstoriesファイルを見てくれないので設定を変更する。
import type { StorybookConfig } from "@storybook-vue/nuxt";

const config: StorybookConfig = {
  stories: [
-    "../stories/**/*.mdx",
-    "../stories/**/*.stories.@(js|jsx|mjs|ts|tsx)",
+    "../**/*.mdx",
+    "../**/*.stories.@(js|jsx|mjs|ts|tsx)",
  ],
  addons: [
    "@storybook/addon-links",
    "@storybook/addon-essentials",
    "@storybook/addon-interactions",
  ],
  framework: {
    name: "@storybook-vue/nuxt",
    options: {},
  },
  docs: {
    autodocs: "tag",
  },
};
export default config;
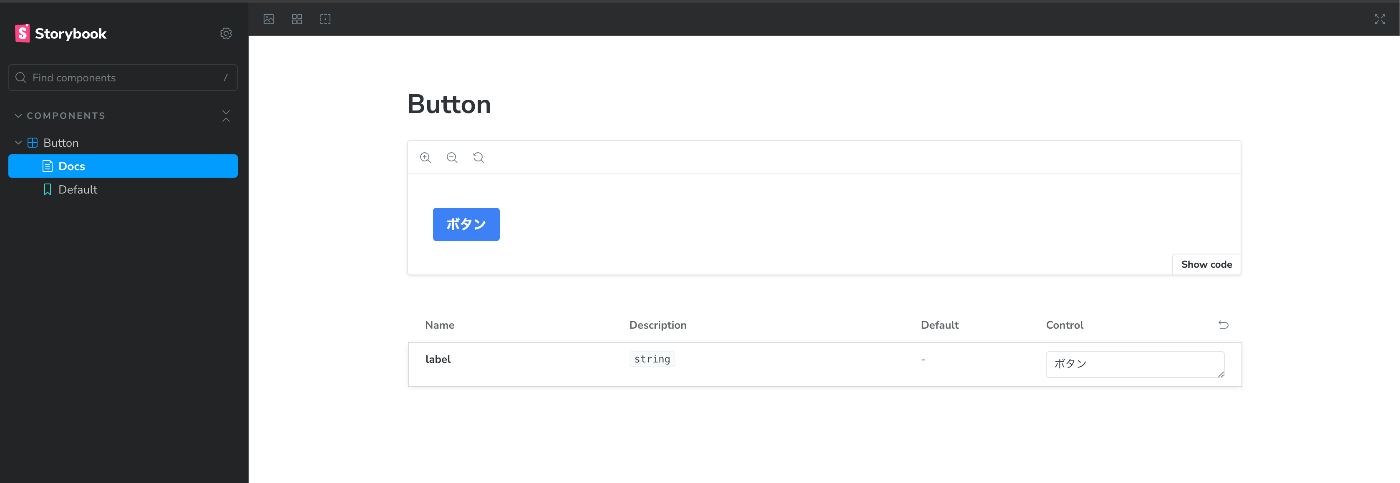
できた 🥳
vitestのセットアップ
nuxt/test-utilsが内部でvitestを使っているのでこれを使う。
なんぞやについてはこちらのスライドがわかりやすかった
npm i --save-dev @nuxt/test-utils vitest @vue/test-utils happy-dom playwright-core
nuxt.config.tsにvitestのモジュールを追加する
// https://nuxt.com/docs/api/configuration/nuxt-config
export default defineNuxtConfig({
  devtools: { enabled: true },
  modules: [
    '@nuxt/eslint',
    '@nuxtjs/tailwindcss',
    '@nuxtjs/storybook',
+    '@nuxt/test-utils/module'
  ],
  typescript: {
    typeCheck: true,
  },
});
vitest.config.tsを作成する
import { defineVitestConfig } from '@nuxt/test-utils/config';

export default defineVitestConfig({
  // any custom Vitest config you require
});
この部分、何を言わんとしているかがわからない・・・
vitestの設定をすべてに効かせるためvitest.config.tsに以下の記述を行う。
+import { fileURLToPath } from 'node:url'
import { defineVitestConfig } from '@nuxt/test-utils/config';

export default defineVitestConfig({
  // any custom Vitest config you require
+  test: {
+    environment: 'nuxt',
+    // you can optionally set Nuxt-specific environment options
+    // environmentOptions: {
+    //   nuxt: {
+    //     rootDir: fileURLToPath(new URL('./playground', import.meta.url)),
+    //     domEnvironment: 'happy-dom', // 'happy-dom' (default) or 'jsdom'
+    //     overrides: {
+    //       // other Nuxt config you want to pass
+    //     }
+    //   }
+    // }
  }
});
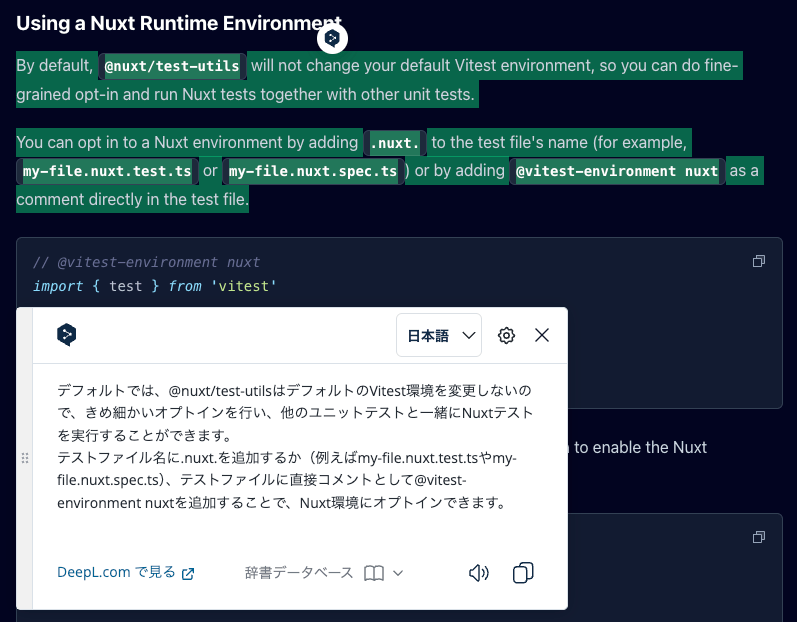
上記の設定をした場合は、個別のテストファイルの1行目に以下の記載をするとenvを切り替えることができる。
// @vitest-environment node
試しにButtonのテストを作成する
import { test } from 'vitest'

test('my test', () => {

})
auto importだって見た気がするんだけどコンポーネントをimportしないとVSCode上エラーになる・・・
ここまで調べたけど@nuxt/test-utilsの情報が少なすぎるので@vue/test-utilsに切り替える。
vue test utilsのセットアップ
改めて・・・
npm i --save-dev vitest @vue/test-utils happy-dom @vitejs/plugin-vue
import { defineConfig } from 'vitest/config'
import vue from '@vitejs/plugin-vue'

export default defineConfig({
  plugins: [vue()],
  test: {
    environment: 'happy-dom',
  },
});
package.jsonにテストコマンドを追加
"scripts": {
  "build": "nuxt build",
  "dev": "nuxt dev",
  ...
+  "test": "vitest"
},
改めてButton.spec.tsを作る
import { describe, it, expect } from 'vitest';
import { mount } from '@vue/test-utils';

import Button from './Button.vue';

const defaultProps = {
  label: 'Hello world',
};

describe('render button', () => {
  it('is contain label', () => {
    const wrapper = mount(Button, { props: defaultProps });
    const buttonElement = wrapper.find('button');
    const buttonText = buttonElement.text();
    expect(buttonText).toBe(defaultProps.label);
  });
});
秒殺でした・・・

shadcn-vueのインストール
FrameworksにviteとNuxtが並んでいる。以前Nuxtを選んでインストールした後Storybookが表示できない問題があったので、今回も同様の問題が発生した場合viteで作り変えることも検討する。
まずはNuxtの手順を参考に進める。
手順3までは完了しているので4から進める。
npx nuxi@latest module add shadcn-nuxt
nuxt.config.tsにshadcnの設定を追加
// https://nuxt.com/docs/api/configuration/nuxt-config
export default defineNuxtConfig({
  devtools: { enabled: true },
  modules: ['@nuxt/eslint', "@nuxtjs/tailwindcss", "@nuxtjs/storybook", "shadcn-nuxt"],
  typescript: {
    typeCheck: true,
  },
+  shadcn: {
+    /**
+     * Prefix for all the imported component
+     */
+    prefix: '',
+    /**
+     * Directory that the component lives in.
+     * @default "./components/ui"
+     */
+    componentDir: './components/ui'
+  }
});
shadcnのinit
npx shadcn-vue@latest init
以下の要領でinitを進める。
✔ Would you like to use TypeScript (recommended)? … no / yes
✔ Which framework are you using? › Nuxt
✔ Which style would you like to use? › Default
✔ Which color would you like to use as base color? › Slate
✔ Where is your global CSS file? … assets/css/tailwind.css
✔ Would you like to use CSS variables for colors? … no / yes
✔ Where is your tailwind.config located? … tailwind.config.js
✔ Configure the import alias for components: … @/components
✔ Configure the import alias for utils: … @/lib/utils
✔ Write configuration to components.json. Proceed? … yes
一旦ここまででローカルとStorybook、テストに影響がないか確認。
→OK
shadcn vueでbuttonをインストールして現状のボタンコンポーネントを差し替えする。
これまでCommon/Button/Button.vueとして作成していたコンポーネントをCommon/BasicButton/BasicButton.vueとして変更し、呼び出し箇所を変更。
http://localhost:3000でボタンコンポーネントは表示されるがStorybookではエラーとなる。

前回検証した際に発生したエラーと同様のエラーが発生した。
これについてはunplugin-auto-importとunplugin-vue-componentsを利用し、vue3-viteに差し替えると解消されることは確認できている。
また、上記の設定だけではTailwindが効かないのでpostcssとautoprefixerの追加も必要。・・・だけどこれもStorybook上でTailwindが効かない。
やはりshadcn(Radix)とStorybook+Nuxtが相性悪いのかと思っていたら、shadcnからコピーしたコンポーネント内のimportを変更することでエラーを解消できることをチームの方が見つけてくれました 👏👏👏👏
<script setup lang="ts">
import type { HTMLAttributes } from 'vue';

- import { Primitive, type PrimitiveProps } from 'radix-vue';//ここを削除
+ import { Primitive, type PrimitiveProps } from '@/node_modules/radix-vue'; //ここを追加

import { type ButtonVariants, buttonVariants } from '.';
import { cn } from '@/lib/utils';

interface Props extends PrimitiveProps {
  variant?: ButtonVariants['variant'];
  size?: ButtonVariants['size'];
  class?: HTMLAttributes['class'];
}

const props = withDefaults(defineProps<Props>(), {
  as: 'button',
});
</script>

<template>
  <Primitive
    :as="as"
    :as-child="asChild"
    :class="cn(buttonVariants({ variant, size }), props.class)"
  >
    <slot />
  </Primitive>
</template>
huskyのインストールとセットアップ
ここまで問題なく表示できることが確認できたのでhuskyで以下の機能をセットアップする。
- commit時のESLint/prettier実行
- コマンド実行によるコンポーネントテンプレートの作成
インストール&init
npm install --save-dev husky
npx husky init
この時点でpackage.jsonにスクリプトが追加されてルートフォルダに.huskyフォルダが作成される。
中にはprecommit時に実行するためのスクリプトファイルがインストールされている。
  "scripts": {
    "build": "nuxt build",
    "dev": "nuxt dev",
    "generate": "nuxt generate",
    "preview": "nuxt preview",
    "postinstall": "nuxt prepare",
    "storybook": "storybook dev --port 6006",
    "build-storybook": "storybook build",
+    "test": "vitest",
+    "prepare": "husky"
  },
huskyのpre-commitコマンドを変更しておく。
lint-stagedはこの後設定する。
#!/usr/bin/env sh
. "$(dirname -- "$0")/_/husky.sh"

#npm run lint-staged && npm run test
各種リンター,フォーマッターの整備
lint-stagedを実行するにあたってコマンドが足りていないので修正する。
ESLintのコマンド追加
この後他のlintコマンドも入ってくるので棲み分けのためにesプレフィクスをつける。
+    "lint:es": "eslint .",
+    "lint:es:fix": "eslint . --fix"
prettierのignoreファイルを追加する。
また、shadcn-vueのファイルも除外する。
# Ignore artifacts:
public
server
.husky
.nuxt
.output
components/common/ui
.gitignore
stylelintのインストール
構成上あまりCSSは利用しない想定だけど、少なからず存在はするのでCSSのフォーマットのためstylelintをインストール Nuxtモジュールがあるのでこっちでインストールする。
npm install -D stylelint
npm install -D @nuxtjs/stylelint-module
nuxt.config.tsにモジュールを追加
公式によるとこれで設定が適用されるらしい。
  modules: [
    '@nuxt/eslint',
    '@nuxtjs/tailwindcss',
    '@nuxtjs/storybook',
    'shadcn-nuxt',
+    [
+      '@nuxtjs/stylelint-module',
+      {
+        extends: [
+          'stylelint-config-recommended',
+          'stylelint-config-standard',
+          'stylelint-config-recommended-vue',
+        ],
+        overrides: [
+          {
+            files: ['**/*.vue'],
+            customSyntax: 'postcss-html',
+          },
+        ],
+      },
+    ],
  ],
package.jsonにコマンドを追加
  "scripts": {
    "build": "nuxt build",
    "dev": "nuxt dev",
    "generate": "nuxt generate",
    "preview": "nuxt preview",
    "postinstall": "nuxt prepare",
    "storybook": "storybook dev --port 6006",
    "build-storybook": "storybook build",
    "test": "vitest",
    "prepare": "husky",
    "lint:es": "eslint .",
    "lint:es:fix": "eslint . --fix",
+    "lint:style": "stylelint './**/*.css'",
+    "lint:style:fix": "stylelint --fix './**/*.css'",
    "format": "prettier --write './**/*.{js,jsx,ts,tsx,vue,json}'"
  },
試しにnpm run lint:styleを実行すると以下のエラーが出た。
設定がないと怒られているのでpackage.jsonの設定箇所を省き、.stylelintrc.jsonを追加する
Error: No configuration provided for
{
  "rules": {
    "block-no-empty": true
  }
}
コマンド通りました 🥳
lint-stagedのインストール
npm install --save-dev lint-staged
package.jsonにコマンドを追加
  "scripts": {
    "build": "nuxt build",
    "dev": "nuxt dev",
    "generate": "nuxt generate",
    "preview": "nuxt preview",
    "postinstall": "nuxt prepare",
    "storybook": "storybook dev --port 6006",
    "build-storybook": "storybook build",
    "test": "vitest",
    "prepare": "husky",
+    "lint": "npm run lint:es:fix && npm run lint:style:fix",
    "lint:es": "eslint .",
    "lint:es:fix": "eslint . --fix",
    "lint:style": "stylelint './**/*.css'",
    "lint:style:fix": "stylelint --fix './**/*.css'",
    "format": "prettier --write './**/*.{js,jsx,ts,tsx,vue,json}'",
+  "lint-staged": "lint-staged"
  },
+  "lint-staged": {
+    "*.{js,jsx,ts,tsx,vue}": [
+      "eslint",
+      "prettier --write"
+    ],
+    "*.json": [
+      "prettier --write"
+    ]
+  },
コミットしてhuskyが正常に動作することを確認 ✅
テンプレートファイル追加コマンドの作成
(WIP)