【Flutter Widget基礎】Button
基本的なおさらい
基本的にはFlutterでよく利用されるのはTextButton、ElevatedButton、OutlinedButtonの3種類のボタンとなります。ほかにFloatingActionButton、CloseButton、IconButtonなどもありますが、今回は説明を割愛させていただきます。
- TextButton:
- Material Designのテキストボタン
- デフォルトではテキストのみ表示される
- クリック時には水面のような波紋が表示される
- スタイルを変更することでカスタマイズ可能
- ElevatedButton:
- Material Designの浮き彫りボタン
- クリック時にはマテリアルが浮き上がるエフェクトがある
- スタイルを変更することでカスタマイズ可能
- OutlinedButton:
- Material Designのアウトラインボタン。
- 基本的にはアウトライン付きのTextButtonである。
- スタイルを変更することでカスタマイズ可能

利用方法
- TextButton(onPressedのコールバック関数とchildが必須):
TextButton(
  onPressed: (){},
  child: Text("TextButton")
),
- ElevatedButton(onPressedのコールバック関数とchildが必須):
ElevatedButton(
  onPressed: (){},
  child: Text("ElevatedButton")
),
- ElevatedButton(onPressedのコールバック関数とchildが必須):
OutlinedButton(
   onPressed: (){},
   child: Text("OutlinedButton")
),
styleのカスタマイズ
styleのカスタマイズの内容に入る前に、軽くこの三つのボタンの実装を見ていこうと思います。
下記表に各ボタンのコンストラクタを抜粋しましたが、実装はほぼ一緒のことはわかると思います。それぞれButtonStyleButtonを継承して、異なるButtonStyleがデフォルトで適用されることで見た目が変わってきます。
| TextButton | ElevatedButton | OutlinedButton |
|---|---|---|
 |
 |
 |
コンストラクタにstyleの属性がありますが、その属性の型はButtonStyleであり、styleのカスタマイズはこの属性を設定することで実現できるようになります。
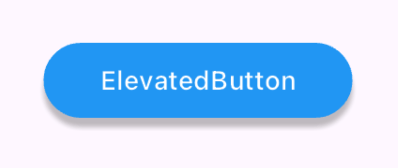
ElevatedButtonのstyleをカスタマイズする例:

        //styleを定義する
    ButtonStyle style = ElevatedButton.styleFrom(
      backgroundColor: Colors.blue,
      foregroundColor: Colors.white,
      elevation: 5,
      padding: const EdgeInsets.symmetric(horizontal: 30),
      shape: const StadiumBorder(),
      side: const BorderSide(color: Colors.blue,),
    );
       //ボタンにstyleを適用する
    ElevatedButton(
       onPressed: (){},
       style: style,
       child: const Text("ElevatedButton"),
    ),
TextButtonとOutlinedButtonも同様にButtonStyleを定義することでボタンのstyleをカスタマイズすることが可能にあります。また、違うボタンの種類であっても、同じstyleを適用することで似たような見た目ができるようになります。
よく利用するstyle属性
| 属性名 | 型 | 用途 |
|---|---|---|
| foregroundColor | Color? | フォアグラウンド色 |
| backgroundColor | Color? | 背景色 |
| disabledForegroundColor | Color? | 無効時のフォアグラウンド色 |
| disabledBackgroundColor | Color? | 無効時の背景色 |
| shadowColor | Color? | 影の色 |
| elevation | double? | 影の深さ |
| textStyle | TextStyle? | 文字スタイル |
| padding | EdgeInsetsGeometry? | 余白 |
| sideBorder | BorderSide? | 枠線 |
| shape | OutlinedBorder? | 形状 |
ボタンのイベント
ボタンを構築時に onPressedのコールバーク関数を渡してクリックイベントを扱う必要があります。また、onLongPress を使って長押しイベントを、onHover を使ってマウスオーバーイベントを、onFocusChange を使ってフォーカスの変化イベントを監視することができます。

また、onPressedとonLongPressがnullの場合はボタン自体が無効になり、styleにあるdisabledForegroundColorとdisabledBackgroundColorの設定が適用されます。

        //styleを定義する
    ButtonStyle style = TextButton.styleFrom(
      backgroundColor: Colors.blue,
      foregroundColor: Colors.white,
      disabledBackgroundColor: Colors.grey, //無効時適用される
      disabledForegroundColor: Colors.black, //無効時適用される
      elevation: 5,
      padding: const EdgeInsets.symmetric(horizontal: 30),
      shape: const StadiumBorder(),
      side: const BorderSide(color: Colors.blue,),
    );
       //ボタンにstyleを適用する
    TextButton(
       onPressed: null,
       onLongPressed: null,
       style: style,
       child: const Text("TextButton"),
    ),
ボタンのサイズ
ボタンのデフォルトスタイルでは、最小サイズが Size(64, 36) に規定されており、最大サイズは無制限になります(3つのボタン全部同様)。

ボタンのサイズを変更したい場合は2つの方法があります。
- 子WidgetのサイズとPaddingを変更
- 親constraintsを追加する
子WidgetのサイズとPaddingを変更

        //styleを定義する
    ButtonStyle style = TextButton.styleFrom(
      backgroundColor: Colors.blue,
      foregroundColor: Colors.white,
      disabledBackgroundColor: Colors.grey, //無効時適用される
      disabledForegroundColor: Colors.black, //無効時適用される
      elevation: 5,
      padding: const EdgeInsets.symmetric(horizontal: 50, vertical: 30),
      shape: const StadiumBorder(),
      side: const BorderSide(color: Colors.blue,),
    );
       //ボタンにstyleを適用する
    TextButton(
       onPressed: (){},
       style: style,
       child: const Text("TextButton"),
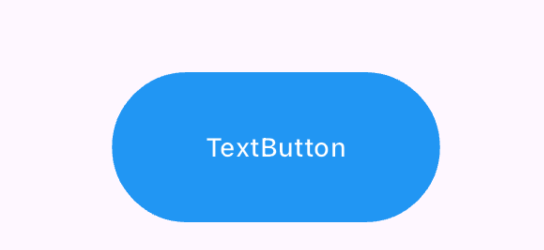
    ),
親constraintsを追加する
親constraintsを追加する場合、ボタンのデフォルトサイズなど無視し、強制的に親constraintsが適用されることになります。

    SizedBox(
       width: 200,
       height: 30,
       child: TextButton(
           onPressed: (){},
           style: style,
           child: const Text("TextButton")),
       ),


Discussion