Closed14
CVAT を EC2 で立ち上げてみる with Terraform
参考
環境
- OS: macOS Ventura 13.5
- AWS CLI: aws-cli/2.8.3 Python/3.9.11 Darwin/22.6.0 exe/x86_64 prompt/off
- tfenv: tfenv 3.0.0
- terraform: Terraform v1.6.6 on darwin_amd64
"On Nvidia GPU Machine" or "On Any other AWS Machine"
Tensorflowアノテーション機能はGPUが必要。
その際の最も簡単な方法の一つは、Nvidia GPU搭載のAWS P3インスタンスを立ててNvidia Driverをインストールして使う方法。
その場合はOn Nvidia GPU Machineに従う必要あり。
今回はTensorflowアノテーション機能を使うのか現時点で分からないので、一旦On Any other AWS Machineで進める。
terraform用のディレクトリを作成
コマンドを実行
mkdir terraform
コマンドを実行
cd terraform
IAMユーザーを作成
した
新規プロファイルを登録
コマンドを実行
aws configure --profile tmp-for-try-deploy-cvat-with-terraform
値を入力
AWS Access Key ID [None]: *****
AWS Secret Access Key [None]: *****
Default region name [None]: ap-northeast-1
Default output format [None]:
確認
コマンドを実行
cat ~/.aws/config
出力
...
[profile tmp-for-try-deploy-cvat-with-terraform]
region = ap-northeast-1
コマンドを実行
cat ~/.aws/credentials
出力
...
[tmp-for-try-deploy-cvat-with-terraform]
aws_access_key_id = *****
aws_secret_access_key = *****
versions.tfを作成
コマンドを実行
touch versions.tf
versions.tf
terraform {
  required_providers {
    aws = {
      source  = "hashicorp/aws"
      version = ">= 4.49.0"
    }
  }

  required_version = "~> 1.6.0"
}

provider "aws" {
    profile = var.profile
}
variables.tfを作成
コマンドを実行
touch variables.tf
variables.tf
variable "profile" {
    type = string
}

variable "project" {
  type = string
}

variable "environment" {
  type = string
}

variable "vpc_cidr" {
  type        = string
  description = "vpc cidrblock"
}

variable "subnet_cidr" {
  type        = string
  description = "public subnet cidr"
}
terraform.tfvarsを作成
コマンドを実行
touch terraform.tfvars
terraform.tfvars
project = "create-EC2"

environment = "dev"

vpc_cidr = "10.0.0.0/16"

subnet_cidr = "10.0.1.0/24"

profile = "tmp-for-try-deploy-cvat-with-terraform"
network.tfを作成
コマンドを実行
touch network.tf
network.tf
# VPC
resource "aws_vpc" "main" {
  cidr_block                       = var.vpc_cidr
  instance_tenancy                 = "default"
  assign_generated_ipv6_cidr_block = false

  tags = {
    Name    = "${var.project}-${var.environment}-vpc"
    Project = var.project
    Env     = var.environment
  }
}

# Subnet
resource "aws_subnet" "public" {
  vpc_id                  = aws_vpc.main.id
  availability_zone       = "ap-northeast-1a"
  cidr_block              = var.subnet_cidr
  map_public_ip_on_launch = true

  tags = {
    Name    = "${var.project}-${var.environment}-public-subnet"
    Project = var.project
    Env     = var.environment
    Type    = "public"
  }
}


# Route table
resource "aws_route_table" "rtb" {
  vpc_id = aws_vpc.main.id

  tags = {
    Name    = "${var.project}-${var.environment}-rtb"
    Project = var.project
    Env     = var.environment
  }
}

# Route table と subnet の関連付け
resource "aws_route_table_association" "public_rtb" {
  route_table_id = aws_route_table.rtb.id
  subnet_id      = aws_subnet.public.id
}

# Internet Gateway
resource "aws_internet_gateway" "igw" {
  vpc_id = aws_vpc.main.id

  tags = {
    Name    = "${var.project}-${var.environment}-igw"
    Project = var.project
    Env     = var.environment
  }
}

# Route table と IGW の関連付け
resource "aws_route" "rtb_igw_route" {
  route_table_id         = aws_route_table.rtb.id
  destination_cidr_block = "0.0.0.0/0"
  gateway_id             = aws_internet_gateway.igw.id
}

# Security Group
resource "aws_security_group" "sg" {
  name        = "${var.project}-${var.environment}-sg"
  description = "security group"
  vpc_id      = aws_vpc.main.id

  ingress {
    from_port   = 22
    to_port     = 22
    protocol    = "tcp"
    cidr_blocks = ["0.0.0.0/0"]
  }

  ingress {
    from_port   = 8080
    to_port     = 8080
    protocol    = "tcp"
    cidr_blocks = ["0.0.0.0/0"]
  }

  egress {
    from_port   = 0
    to_port     = 0
    protocol    = "-1"
    cidr_blocks = ["0.0.0.0/0"]
  }

  tags = {
    Name    = "${var.project}-${var.environment}-sg"
    Project = var.project
    Env     = var.environment
  }
}
data.tfを作成
コマンドを実行
touch data.tf
data.tf
data "aws_ami" "ubuntu" {
  most_recent = true

  filter {
    name   = "name"
    values = ["ubuntu/images/hvm-ssd/ubuntu-focal-20.04-amd64-server-*"]
  }

  filter {
    name   = "virtualization-type"
    values = ["hvm"]
  }

  owners = ["099720109477"] # Canonical
}
ec2.tfを作成
コマンドを実行
touch ec2.tf
ec2.tf
resource "aws_instance" "main" {
  ami                         = data.aws_ami.ubuntu.id
  instance_type               = "t3.large"
  subnet_id                   = aws_subnet.public.id
  associate_public_ip_address = true
  vpc_security_group_ids      = [aws_security_group.sg.id]

  root_block_device {
    volume_size = 20
  }

  tags = {
    Name    = "${var.project}-${var.environment}-ec2"
    Project = var.project
    Env     = var.environment
  }
}
初期化
コマンドを実行
terraform init
出力
...
Terraform has been successfully initialized!
...
プラン
コマンドを実行
terraform plan
出力
...
Plan: 8 to add, 0 to change, 0 to destroy.
yeah!
アプライ
コマンドを実行
terraform apply
出力
...
Apply complete! Resources: 8 added, 0 changed, 0 destroyed.
yeah!!
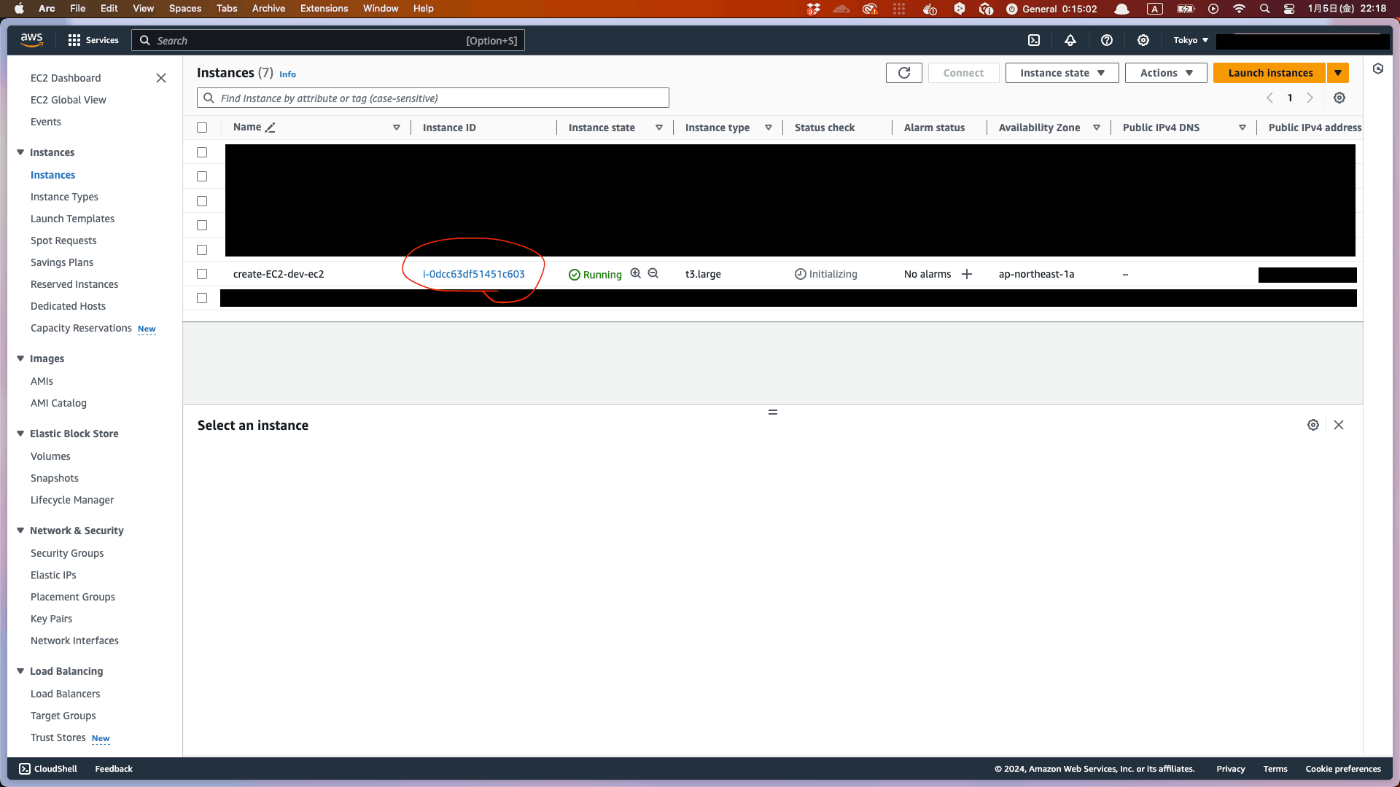
EC2が立ち上がってることを確認
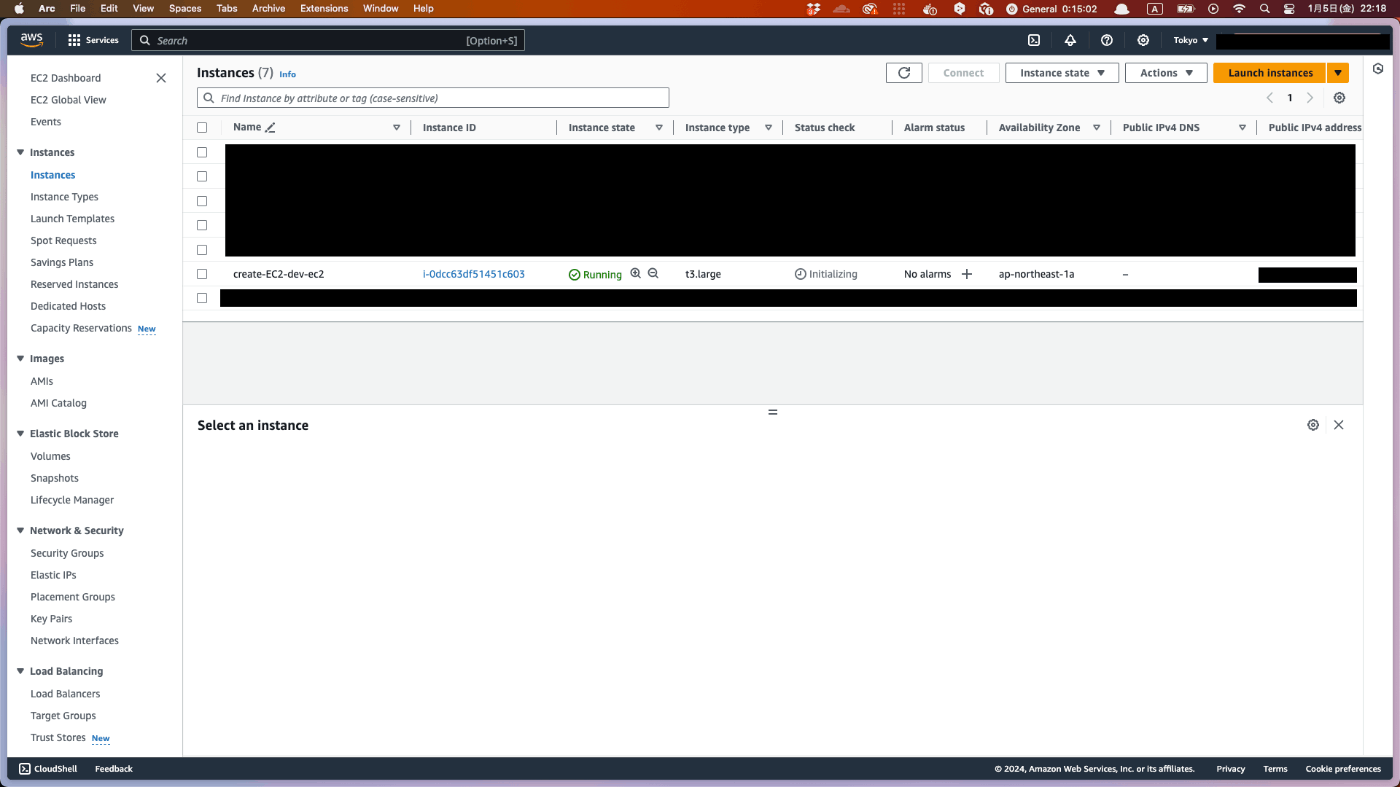
EC2 Instance Connectで接続してターミナルを起動
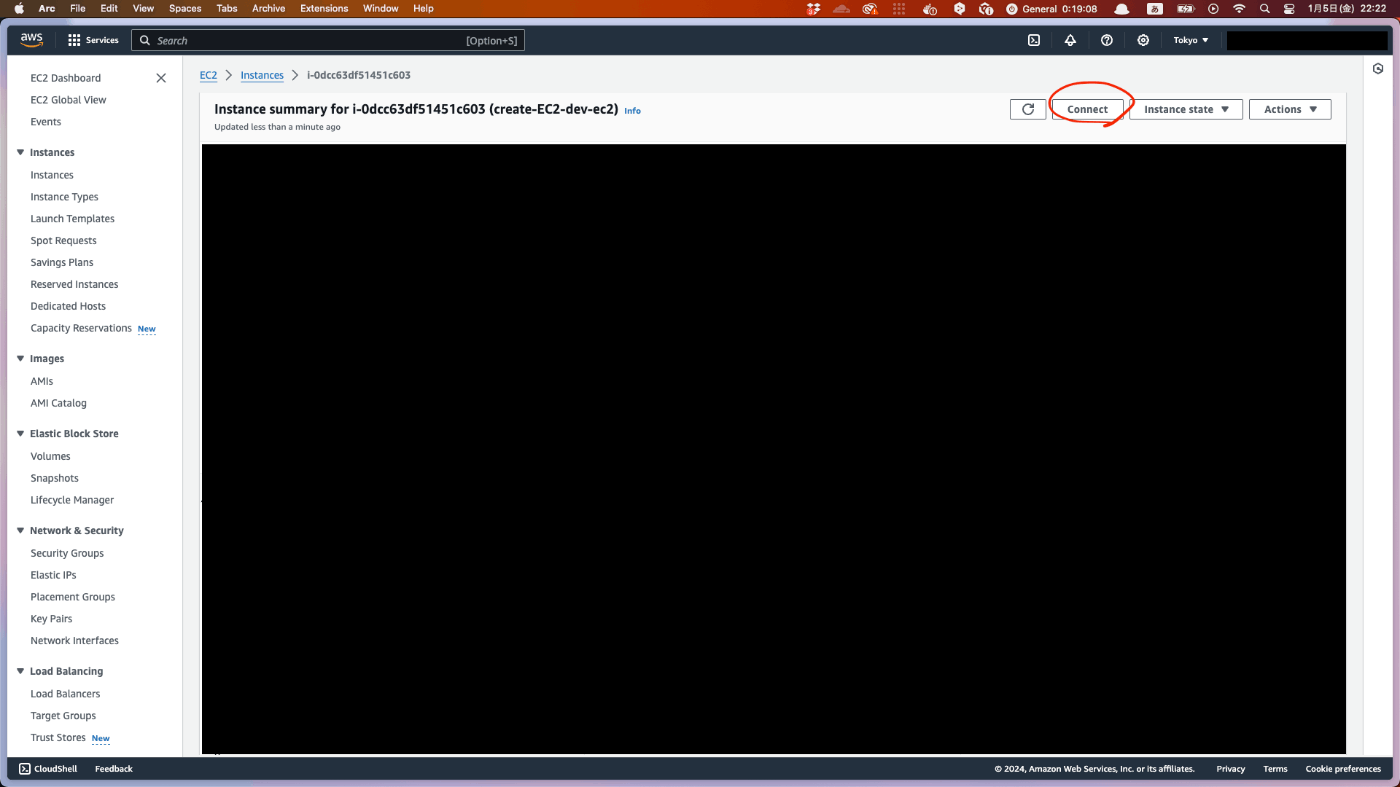
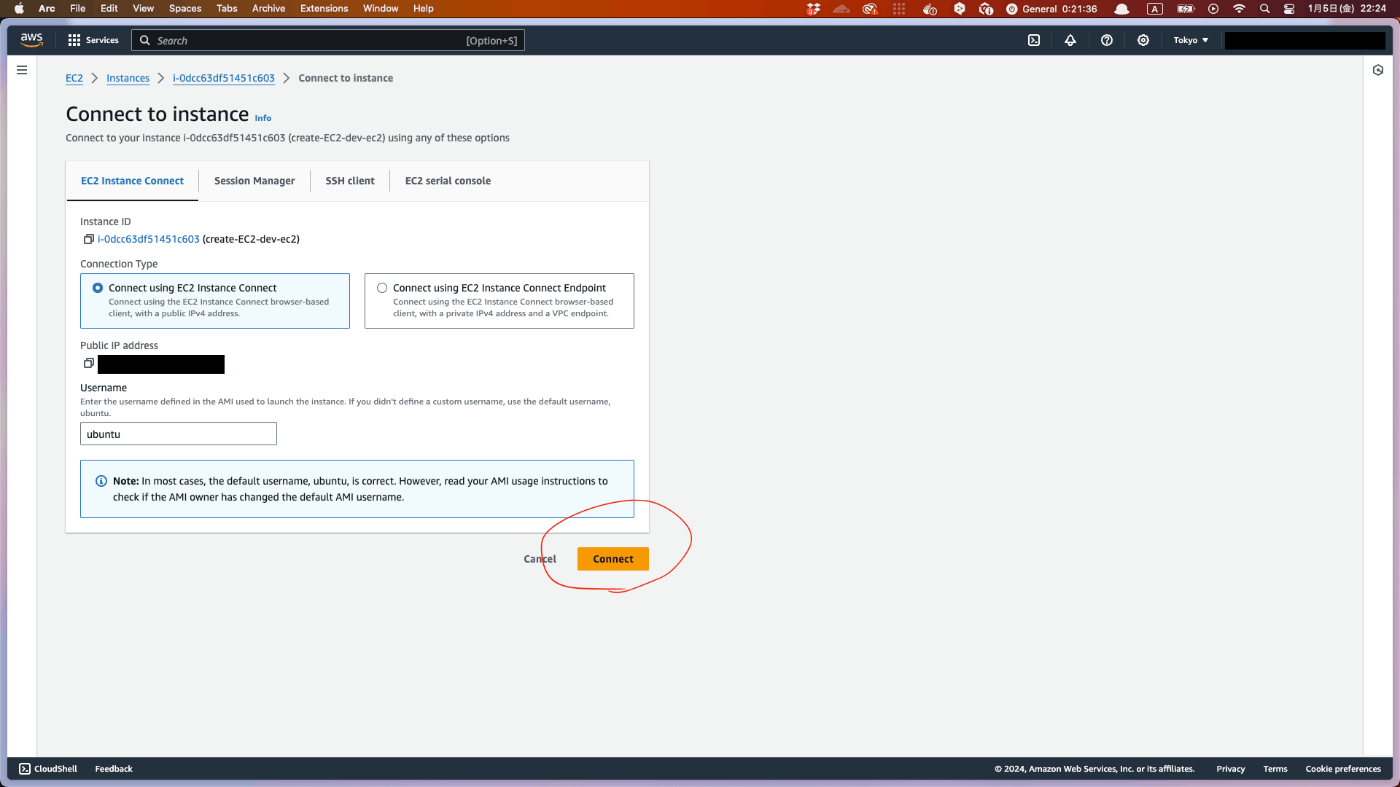
黒い画面が出てきたらok
Docker と Docker Compose をインストール
以降のコマンドは全て、先ほどEC2に接続したターミナルで実行します。
コマンドを実行
sudo apt-get update
コマンドを実行
sudo apt-get --no-install-recommends install -y \
apt-transport-https \
ca-certificates \
curl \
gnupg-agent \
software-properties-common
コマンドを実行
curl -fsSL https://download.docker.com/linux/ubuntu/gpg | sudo apt-key add -
コマンドを実行
sudo add-apt-repository \
"deb [arch=amd64] https://download.docker.com/linux/ubuntu \
$(lsb_release -cs) \
stable"
コマンドを実行
sudo apt-get update
コマンドを実行
sudo apt-get --no-install-recommends install -y \
docker-ce docker-ce-cli containerd.io docker-compose-plugin
root権限無しにdockerを実行できるように設定
コマンドを実行
sudo groupadd docker
コマンドを実行
sudo usermod -aG docker $USER
ここで、設定を反映させるため、一度セッションを閉じて再度Connectする
CVAT を clone する
コマンドを実行
git clone https://github.com/opencv/cvat
コマンドを実行
cd cvat
CVAT_HOST環境変数をセットする
コマンドを実行
export CVAT_HOST=your-ip-address
立ち上げる
コマンドを実行
docker compose up -d
superuser を設定する
コマンドを実行
docker exec -it cvat_server bash -ic 'python3 ~/manage.py createsuperuser'
お片付け
$ terraform destroy- 今回作ったIAM userを削除
- ~/.aws/configと~/.aws/credentialsで、今回作ったprofileを削除
このスクラップは2024/01/05にクローズされました