Open11
FastAPI+Postgres on Heroku
想定環境:wsl2 ubuntu20.04 LTS
pythonは3.9を使う.
環境にない場合はinstallする
$ sudo apt install -y python3.9 python3.9-venv
以下でパスを確認する.
$ which python3.9
/usr/bin/python3.9
$ python3.9 --version
Python 3.9.5
作業用ディレクトリを作成し、python3.9の仮想環境をactivateする
$ python3.9 -m venv env
$ source ./env/bin/activate
最終的なディレクトリの構造は以下のようになる.
app
   __pycache__
   env
   main.py
   Procfile
   requirements.txt
   .gitigonore
コードの説明は下記のチュートリアルを参照.
# main.py
from typing import List

import databases
import sqlalchemy
from fastapi import FastAPI
from pydantic import BaseModel

# SQLAlchemy specific code, as with any other app
# ATABASE_URL = "sqlite:///./test.db"
# 今回はHeroku Postgresを利用するため下記をコメントアウト
DATABASE_URL = "postgresql://user:password@postgresserver/db"

database = databases.Database(DATABASE_URL)

metadata = sqlalchemy.MetaData()

notes = sqlalchemy.Table(
    "notes",
    metadata,
    sqlalchemy.Column("id", sqlalchemy.Integer, primary_key=True),
    sqlalchemy.Column("text", sqlalchemy.String),
    sqlalchemy.Column("completed", sqlalchemy.Boolean),
)


engine = sqlalchemy.create_engine(
    DATABASE_URL, connect_args={"check_same_thread": False}
)
metadata.create_all(engine)


class NoteIn(BaseModel):
    text: str
    completed: bool


class Note(BaseModel):
    id: int
    text: str
    completed: bool


app = FastAPI()


@app.on_event("startup")
async def startup():
    await database.connect()


@app.on_event("shutdown")
async def shutdown():
    await database.disconnect()


@app.get("/notes/", response_model=List[Note])
async def read_notes():
    query = notes.select()
    return await database.fetch_all(query)


@app.post("/notes/", response_model=Note)
async def create_note(note: NoteIn):
    query = notes.insert().values(text=note.text, completed=note.completed)
    last_record_id = await database.execute(query)
    return {**note.dict(), "id": last_record_id}
今回はPostgresを利用するため、下記のように修正する.
engine = sqlalchemy.create_engine(
    # DATABASE_URL, connect_args={"check_same_thread": False}
    DATABASE_URL
)
必要なライブラリをインストールする.
$ python -m pip install --upgrade pip
$ pip install fastapi
$ pip install uvicorn
$ pip install fastapi[all]
$ pip install gunicorn
$ pip install databases
$ pip install psycopg2-binary
requirements.txtを作成しインストールしたライブラリを保存する.
$ pip freeze > requirements.txt
以下のコマンドから起動確認を行う.
$ uvicorn --port 5000 --host 127.0.0.1 main:app --reload
にアクセスする.
Herokuにデプロイを行う.
Procfileを作成し、下記のように記述する.
# Procofile
web: gunicorn -w 4 -k uvicorn.workers.UvicornWorker main:app
runtime.txtで実行環境のpythonのバージョンを記述する.
# runtime.txt
python-3.9.5
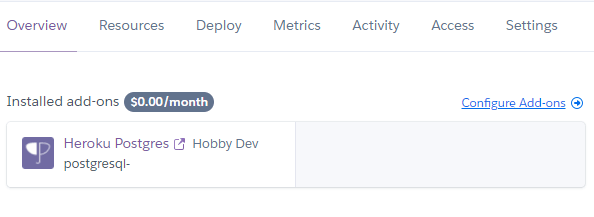
Heroku Dashboardで新規アプリケーションを作成し、add-onsを選択する.
postgresqlを検索し選択する.
Resources > Heroku Postgres > Settings > View Credentials…
からURIを取得し、main.pyのDATABASE_URLに記述する.
Heroku Dashboardで作成したアプリケーションにgitを紐づけしデプロイする.
$ git init
$ heroku git:remote -a app
$ git add .
$ git commit -am "make it better"
$ git push heroku master
参考文献
コンテナデプロイ
- コンテナを作る
├── app
│   └── main.py
└── Dockerfile
└── heroku.yml
Dockerfile
FROM python:3.8

WORKDIR /usr/src/api

COPY requirements.txt ./api/

RUN pip install --trusted-host pypi.python.org -r ./api/requirements.txt &&\
  rm -rf ~/.cache/pip

COPY ./api /usr/src/api

CMD gunicorn -w 4 -k uvicorn.workers.UvicornWorker main:app
heroku.yml
setup:
  addons:
    - plan: heroku-postgresql
      as: DATABASE
build:
  docker:
    web: Dockerfile
- イメージのプッシュ/リリース
heroku container:push web # プロセスタイプをwebに指定
heroku container:release web worker
DBにHeroku Postgresを使う場合、sqlalchemyのcreate_engineで指定するDATABASE_URLはpostgres://をサポートしていないためpostgresql://に書き換える必要がある(HerokuPostgresのconfigureからコピペするとpostgres://のままになっているため注意)
参考