Next.js 13(App Router) + TypeScript + Vercel で、本番環境とステージング環境を作る
はじめに
Next.js 13(App Router)をVercelにデプロイして、本番環境と、Basic認証付きのステージング環境を作成する方法です。
環境
- node: 18以上
- next: 13.4.19
create-next-app
まずはcreate-next-app
npx create-next-app
TypeScriptとApp Routerを使用するので、下記の質問ではYesを選択してください。
他はお好みで設定してください。
? Would you like to use TypeScript? … No / Yes
? Would you like to use App Router? (recommended) … No / Yes
Next.jsでプロジェクトを作成することができたら、リポジトリにて管理します。
Vercelにデプロイ
Vercelにログイン。
リポジトリ単位でVercelへimportすることができます。

Deployボタンを押すと mainブランチの内容が、デプロイされます(簡単!)
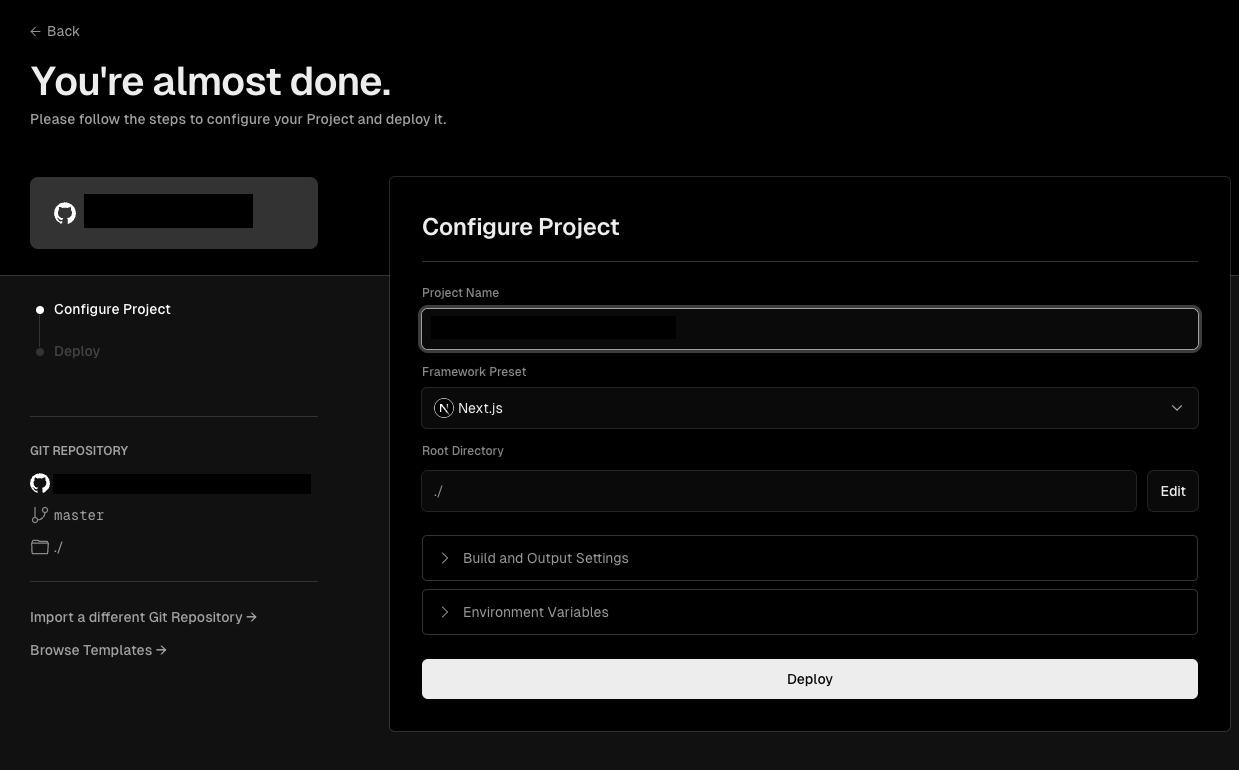
xxx-xxx.vercel.appといったドメインが自動で割り当てられるので、mainブランチの内容が表示されてたらOK!
ステージングの作成
Project Setting→Domainからドメインを作成します。
今回はステージング環境のドメインはpreview-xxx-xxx.vercel.appとしたいので、入力して Addを押します。
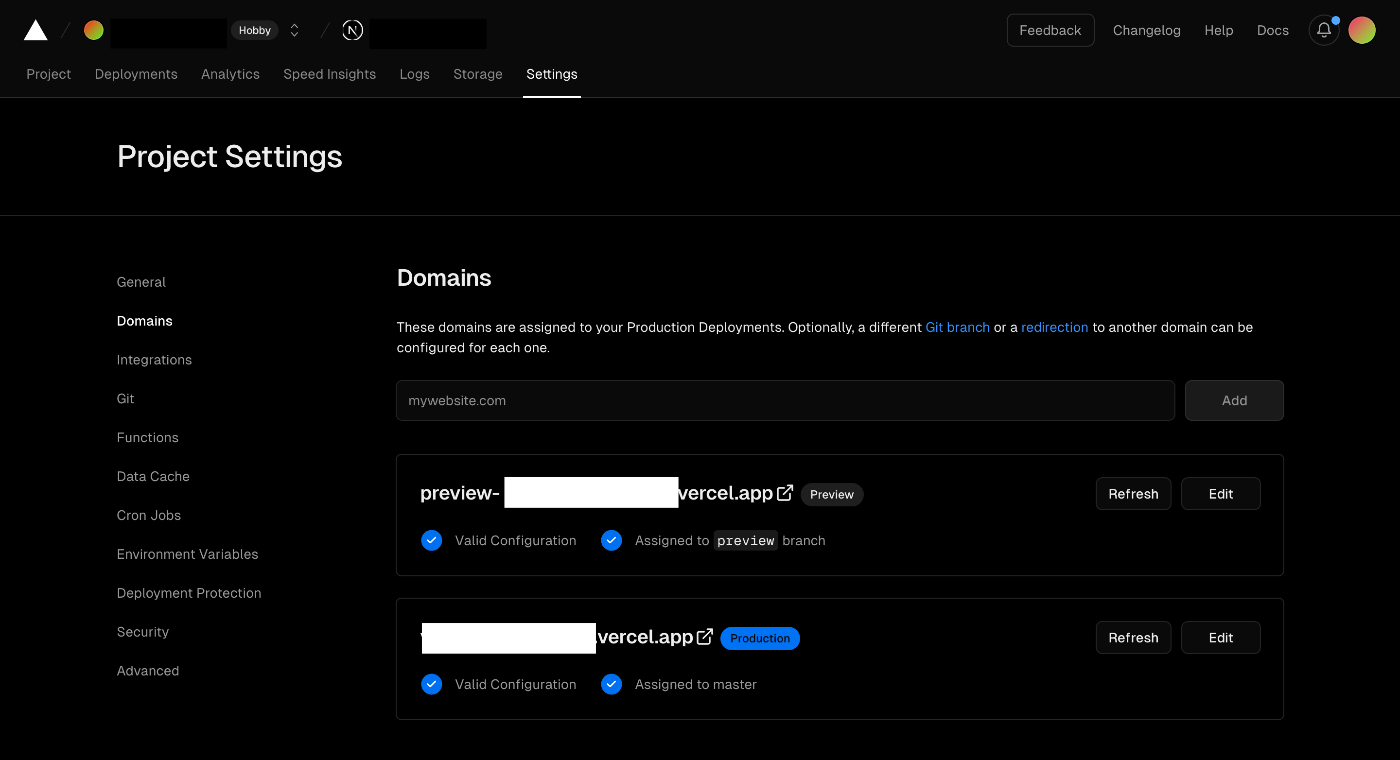
ドメインが追加されたらEditから詳細設定を行います。
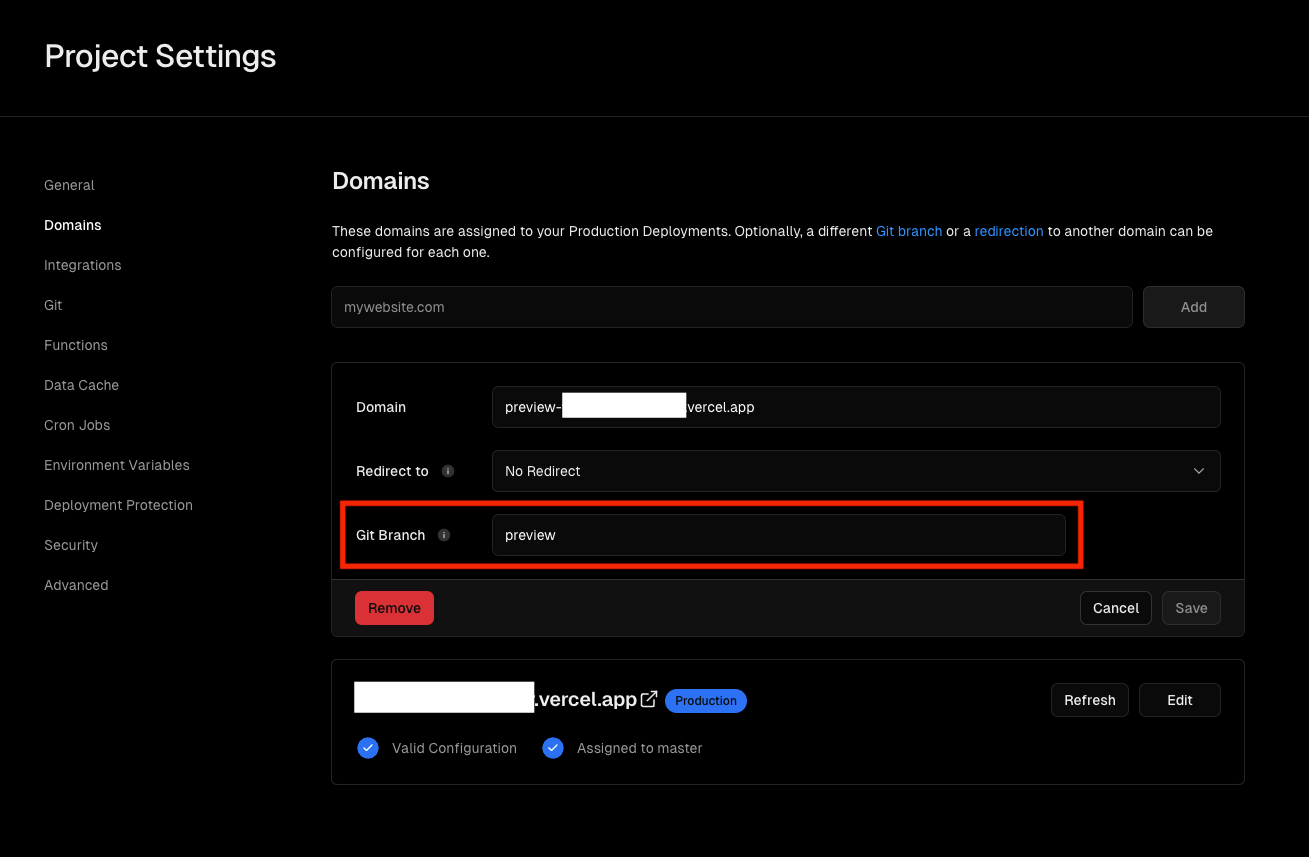
Git Branchにpreview-xxx-xxx.vercel.appと紐づけたいブランチ名を入力します。 (ここではpreview)
これで、
mainブランチでpushすると xxx-xxx.vercel.appへ、
previewブランチでpushすると preview-xxx-xxx.vercel.appへ
デプロイされる環境が作れることができました。
ステージング(preview)にBasic認証をかける
必要なファィルの作成
ステージング環境にBasic認証をかけるため、2つのファイルを作成します。
appにapiというフォルダを作ってその中にauth.tsというファイルを作ります。
import type { NextApiRequest, NextApiResponse } from "next";

export default function handler(_: NextApiRequest, res: NextApiResponse) {
  res.setHeader("WWW-authenticate", 'Basic realm="Secure Area"');
  res.statusCode = 401;
  res.end(`Auth Required.`);
}
加えてappと同階層にmiddleware.tsというファイルを作ります。
import { NextRequest, NextResponse } from 'next/server';

/**
 * @see https://nextjs.org/docs/app/building-your-application/routing/middleware#matcher
 */
export const config = {
  matcher: ['/:path*', '/index/:path*'],
};

export function middleware(req: NextRequest) {
  if (process.env.NEXT_PUBLIC_VERCEL_ENV === "preview") {
    const basicAuth = req.headers.get('Authorization');

    if (basicAuth) {
      const authValue = basicAuth.split(' ')[1];
      // atob is deprecated but Buffer.from is not available in Next.js edge.
      const [user, password] = atob(authValue).split(':');

      if (
        user === process.env.BASIC_USERNAME &&
        password === process.env.BASIC_PASSWORD
      ) {
        return NextResponse.next();
      }

      return NextResponse.json(
        { error: 'Invalid credentials' },
        { headers: { 'WWW-Authenticate': 'Basic realm="Secure Area"' }, status: 401 }
      );
    } else {
      return NextResponse.json(
        { error: 'Please enter credentials' },
        { headers: { 'WWW-Authenticate': 'Basic realm="Secure Area"' }, status: 401 }
      );
    }
  }
}
全体のディレクトリ構成は下記のようになります。
src
 ├─ app
 │   ├─ api
 │   │   └─ auth.ts
 │   ├─ layout.tsx
 │   └─ page.tsx
 └─ middleware.ts
Vercelで設定
Project Setting→Environment Variables
こちらから環境変数を設定することができます。
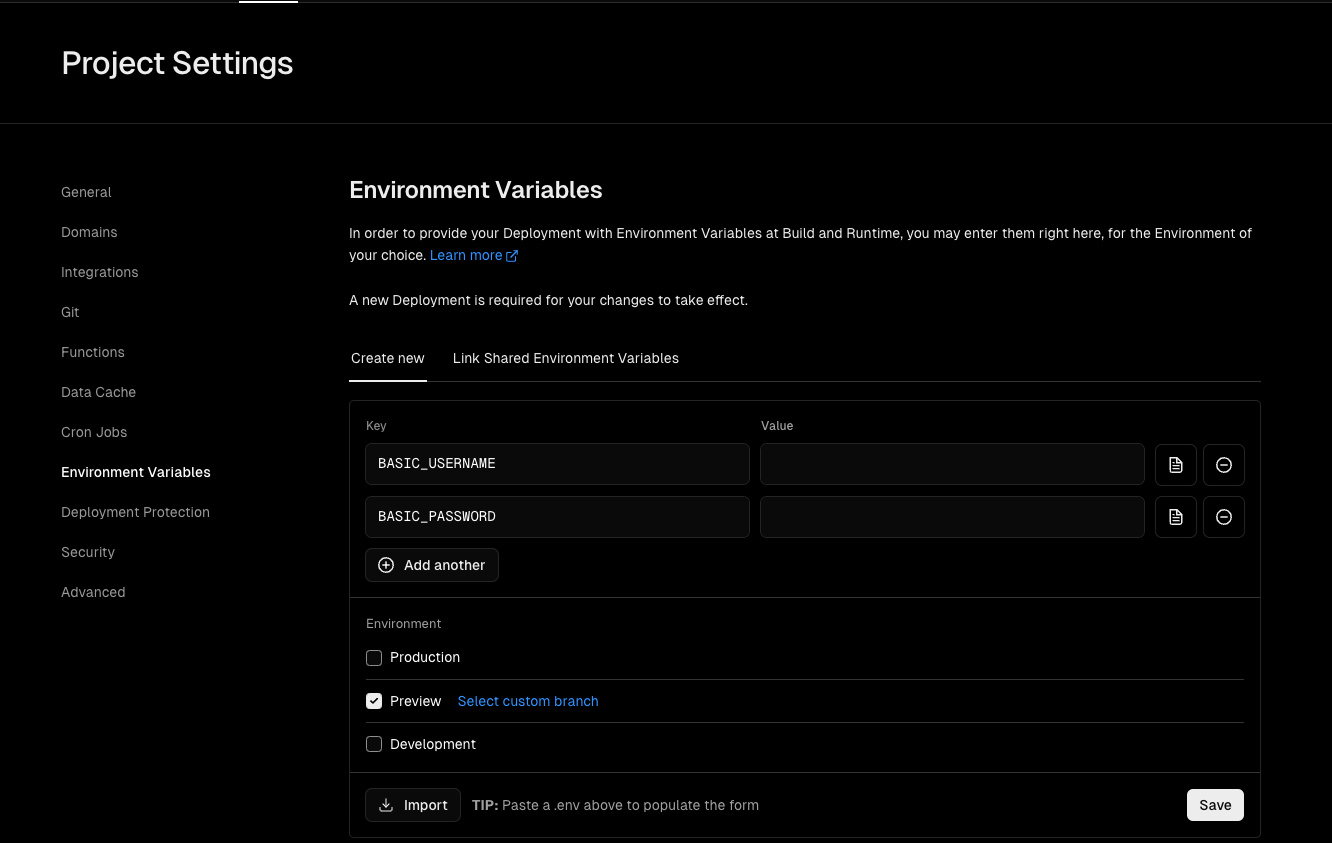
まずKeyにBASIC_USERNAME、 BASIC_PASSWORDを入力し、それぞれのValueを入力します。
これがBasic認証のアイパスになります。
そしてEnvironmentにてPreviewのみにチェックを入れます。
Saveを押して設定を保存。
preview-xxx-xxx.vercel.appにアクセスして、Basic認証がかかっていればOKです。
Discussion