〽️
Raspberry PiのWiFi受信レベルをNew Relicに連携する
Raspberry Pi Zero 2 W(以下RPi02)のWiFi品質(受信強度など)をNew Relicに連携し、ブラウザからグラフ上で確認できるようにします。
実現したいこと
RPiではiwconfigコマンドをを利用して、WiFiのリンク品質、受信レベル、送信レベル、ビットレートなどを取得可能です。この取得結果を加工し、Nwe Relic InfrastructureのFlex統合機能を使ってNew Relicへ情報連携します。
前提など
- Raspberry Pi Zero 2 w
- Raspberry Pi OS(Debian 12.6)
- WiFi設定済み(wlan0)
- New Relic Infrastructureインストール済み
- Python 3.11.2
手順
Wifi情報取得スクリプトの用意
/tmp/wifilevel.sh
#!/bin/bash

# Wi-Fiインターフェース名
interface="wlan0"

# iwconfigコマンドを実行し、出力を変数に格納
output=$(iwconfig $interface)

# Link Qualityの行を抽出
str=$(echo "$output" | grep -oP 'Link Quality=(.*)')

# 区切り文字として"スペース、カンマ、イコール、スラッシュ"を指定
IFS=" ,=/" arr=(${str})

linkQuality=${arr[2]}
linkQualityMax=${arr[3]}
rxPower=${arr[6]}
# bashでは小数点演算できないためPython呼び出し
linkQualityFloat=$(python3 -c "print($linkQuality/$linkQualityMax)")

# Bit Rateの行を抽出
str=$(echo "$output" | grep -oP 'Bit Rate=(.*)')

# 区切り文字として"スペース、カンマ、イコール、スラッシュ"を指定
IFS=" ,=/" arr=(${str})

rate=${arr[2]}
txPower=${arr[6]}

echo $linkQualityFloat,$rxPower,$txPower,$rate
New Relic Infrastructure側の設定
Flex統合用のフォルダに以下の設定ファイルを作成します。
/etc/newrelic-infra/integrations.d/wifi.yml
integrations:
 - name: nri-flex # We're telling the Infra agent to run Flex!
   interval: 15s
   timeout: 10s
   config: # Flex configuration starts here!
     name: RPi02_WiFi
     apis:
      - event_type: wifiSample
        commands:
          - run: 'bash /tmp/wifilevel.sh'
            split: horizontal
            set_header: [wifiQuality,wifiRxPower,wifiTxPower,wifiRate]
            regex_match: false
            split_by: ","
dry runで確認
上記設定が正しくできていることを確認するため、テストします。
NRIA_LOG_LEVEL=trace /usr/bin/newrelic-infra -dry_run -integration_config_path /etc/newrelic-infra/integrations.d/wifi.yml
New Relic infrastructureの実行結果が返ってくるので、WiFiの取得情報が狙い通りに格納されていることを確認します。
----------
Integration Name: nri-flex
Integration Output: {"name":"com.newrelic.nri-flex","protocol_version":"3","integration_version":"1.15.1","data":[{"metrics":[{"event_type":"wifiSample","integration_name":"com.newrelic.nri-flex","integration_version":"1.15.1","wifiQuality":1,"wifiRate":6.5,"wifiRxPower":-37,"wifiTxPower":31},{"event_type":"flexStatusSample","flex.Hostname":"hostname","flex.IntegrationVersion":"1.15.1","flex.counter.ConfigsProcessed":1,"flex.counter.EventCount":1,"flex.counter.EventDropCount":0,"flex.counter.wifiSample":1,"flex.time.elapsedMs":XXX,"flex.time.endMs":XXXX,"flex.time.startMs":XXXX}],"inventory":{},"events":[]}]}
----------
New Relic Infrastructureの再起動
設定用ymlを更新するだけで自動反映されますが、必要に応じてサービスを再起動します。
systemctl restart newrelic-infra
New Relic側で表示
New Relicのサイト側のQuery Youre Dataでデータを取得できているか確認します。
FROM wifiSample select wifiQuality, wifiRxPower, wifiTxPower, wifiRate
できたこと
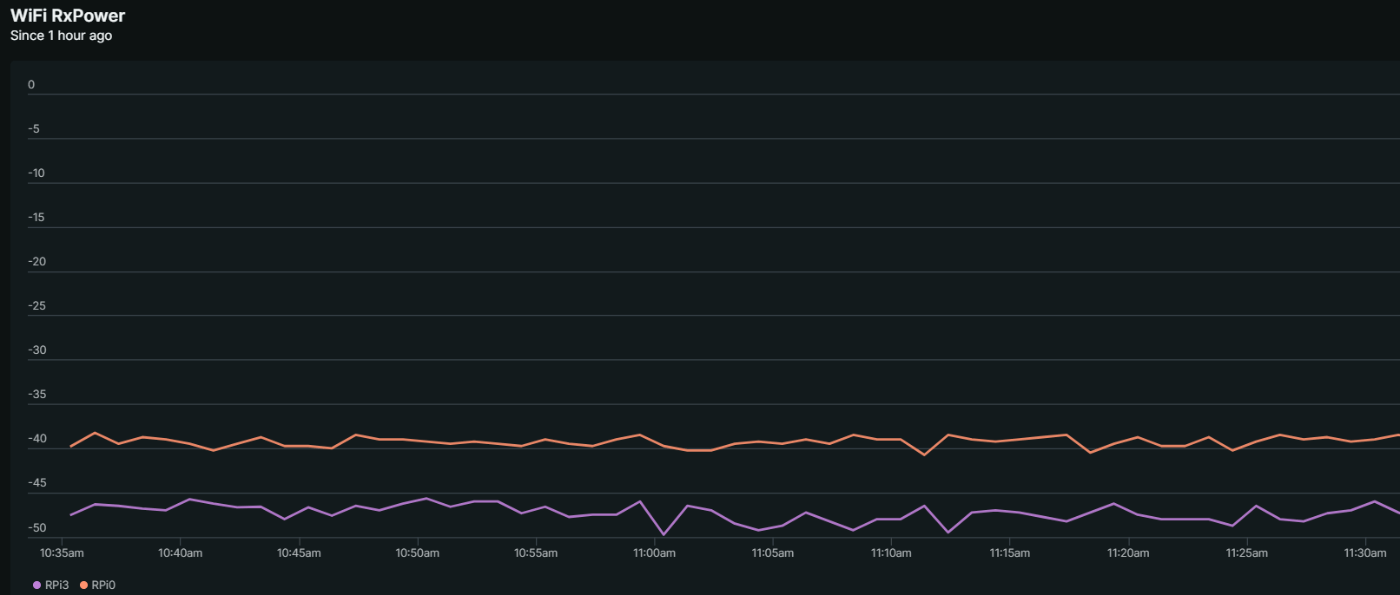
New Relic上でWiFiの品質をグラフィカルに監視できるようになりました。

Discussion