Open8
【Firebase】Cloud Functions for Firebaseを使ってみる
Firebaseプロジェクトの作成
- Google Analyticsは無効にした

- 追記
Firestoreを作成しておく必要がありそう。↓参照
https://zenn.dev/link/comments/5a978b0fb34ec0
環境、Firebase CLIの設定
- Node.js、npm、Firebase CLIが必要
Node.js、npmは既に入っていたのでFirebase CLIを入れる
npm install -g firebase-tools
- (自分の場合はpermissionの関係でエラーが出たので
sudoで実行した) - しかし、後述の
firebase init functionsの中でもnpm installがありpermissionで失敗するので、権限を変えておいた方がよさそう。
sudo chown -R 501:20 "/Users/MyName/.npm"
- 完了!
$ firebase --version
13.3.1
プロジェクト初期化
login
firebase login

ブラウザが立ち上がる
Cloud Firestoreとの接続
firebase init firestore
Firestoreをまだ作成していないエラーに遭遇
firebase init firestore

     ######## #### ########  ######## ########     ###     ######  ########
     ##        ##  ##     ## ##       ##     ##  ##   ##  ##       ##
     ######    ##  ########  ######   ########  #########  ######  ######
     ##        ##  ##    ##  ##       ##     ## ##     ##       ## ##
     ##       #### ##     ## ######## ########  ##     ##  ######  ########
...略...
=== Project Setup

First, let's associate this project directory with a Firebase project.
You can create multiple project aliases by running firebase use --add,
but for now we'll just set up a default project.

? Please select an option: Use an existing project
? Select a default Firebase project for this directory: dara-cloud-function (dara-cloud-function)
i  Using project dara-cloud-function (dara-cloud-function)

=== Firestore Setup

Error: It looks like you haven't used Cloud Firestore in this project before. Go to https://console.firebase.google.com/project/dara-cloud-function/firestore to create your Cloud Firestore database.
- Cloud Firestoreの作成
参考

- いったんテストモードで

functionsの初期化
- 以下のコマンドを実行する前に、npmの権限を変更し、sudo無しで実行できるようにしておいた方が良い(依存関係を入れてくれる際に権限エラーが発生するのを防ぐため)
firebase init functions
完了!
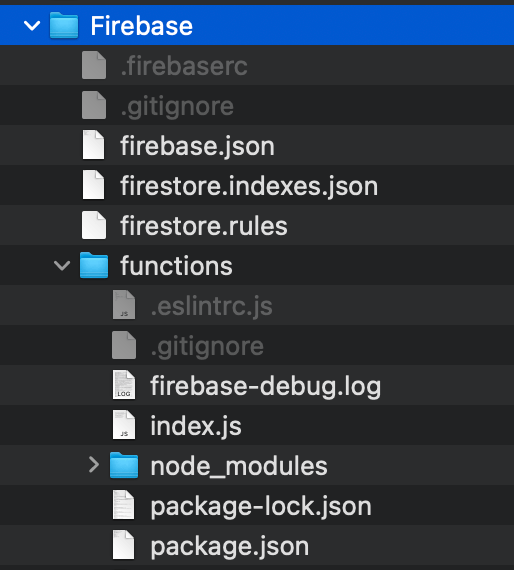
- 作成されたファイルたち

ローカルでAPIでアクセスする
- 下4行のコメントアウトされている部分を有効化し、少し文字列を編集して保存
functions/index.js
const {onRequest} = require("firebase-functions/v2/https");
const logger = require("firebase-functions/logger");

// Create and deploy your first functions
// https://firebase.google.com/docs/functions/get-started

exports.helloWorld = onRequest((request, response) => {
  logger.info("Hello logs!", {structuredData: true});
  response.send("Hello from Firebase Dara!");
});
- ディレクトリを移動してサーバー開始
cd functions/
npm run serve
- アクセス!(コマンドはターミナルに表示されている)
http://127.0.0.1:5001/dara-cloud-function/us-central1/helloWorld
本番デプロイ
PlanをBlazeプランにアップグレードする
- 従量課金のプラン(予算アラートも設定できるので問題なさそう)

デプロイコマンド
firebase deploy --only functions
完了するとエンドポイントが出力された
✔  functions[helloWorld(us-central1)] Successful create operation.
Function URL (helloWorld(us-central1)): https://xxxxxxxxxxxx.run.app
Firestoreにあるデータを読み取る
- こちらの記事を大変参考にさせてもらう。
Firestoreにデータベースを作成

コード追記
functions/index.js
const admin = require("firebase-admin");
admin.initializeApp();
const fireStore = admin.firestore();

exports.getFirestore = onRequest((req, res) => {
  // パラメータを取得
  const params = req.body;
  // パラメータから任意のdocument IDを取得する
  const documentId = params.documentId;

  if (documentId) {
    // "test"というcollectionの中の任意のdocumentに格納されているデータを取得する
    const testRef = fireStore.collection("test");
    testRef.doc(documentId).get().then((doc) => {
      if (doc.exists) {
        res.status(200).send(doc.data());
      } else {
        res.status(200).send("document not found");
      }
    });
  } else {
    res.status(400).send({errorMessaage: "document id not found"});
  }
});
実行
- ローカルでも本番でも、Firesstoreに保存したデータが見られる
- (下記コマンドはローカル検証時)
$ curl http://127.0.0.1:5001/dara-cloud-function/us-central1/getFirestore  --data 'documentId=Ycqg4yjp1DDWejR3pOBJ'
{"name":"dara name","id":1}%

$ curl http://127.0.0.1:5001/dara-cloud-function/us-central1/getFirestore  --data 'documentId=norecord'
document not found%
Firestoreにデータに書き込む
コードに追記
functions/index.js
// 渡されたパラメータのスキーマをチェックする
const validateParamsSchema = (params) => {
  const hasId = 'id' in params;
  const hasName = 'name' in params;
  const hasDocumentId = 'documentId' in params;

  return hasId && hasName && hasDocumentId;
};

// firestoreに任意のデータを保存する
exports.saveFirestore = onRequest((req, res) => {
  const params = req.body;
  // パラメータのスキーマのチェック
  if (!validateParamsSchema(params)) {
    res.status(400).send({errorMessaage: "パラメータが不正です"});
  } else {
    const db = fireStore;
    // 'test'というcollectionがある前提で任意のドキュメントIDのdocumentを生成する
    db.doc(`test/${params.documentId}`).set({
      id: params.id,
      name: params.name,
    });

    // 非同期的に保存したデータを参照する
    db.collection("test")
        .doc(params.documentId)
        .onSnapshot((doc) => {
	  // 取得したデータをレスポンスとして返す
          res.status(200).send(doc.data());
        });
  }
});
- ローカル・本番へコマンドを打って追記されることを確認
- (↓のコマンドはローカル)
curl http://127.0.0.1:5001/dara-cloud-function/us-central1/saveFirestore --data 'id=2&name=testName2&documentId=abcd2'

Firestoreの管理画面からデータが追加されたことを確認