Cloudflare Workers試してみた
本日のお題
こちらです。
https://www.cloudflare.com/ja-jp/products/workers/
「Cloudflare Workers」はCloudflareが提供するサーバーレスのサービス(ややこしい)で、いわゆる「Faas - Function as a service」と呼ばれるものです。AWSで言うならLambdaでしょうか。
実行環境ではJavaScriptを動かすようですが、JavaScript以外にも以下に示すような言語でWorkerを記述することができるそうです。(JavaScriptにコンパイルされるらしい。なにそれすごい)
Kotlin
Dart
Python
Scala
Reason/OCaml
Perl
PHP
FSharp
試してみる
Cloudflareのアカウントを作る
事前に公式サイトでアカウントを作っておきましょう。
https://www.cloudflare.com/ja-jp/
wranglerのインストール
Cloudflare Workersの利用にはwranglerというcliを使います。これはnode.jsのモジュールとなるので、node.jsの実行環境が必要です。
npmなら
npm install -g wrangler
yarnなら
yarn global add wrangler
で、インストールします。
インストールしたら以下のコマンドで自身のCloudflareアカウントと連携します。
wrangler login
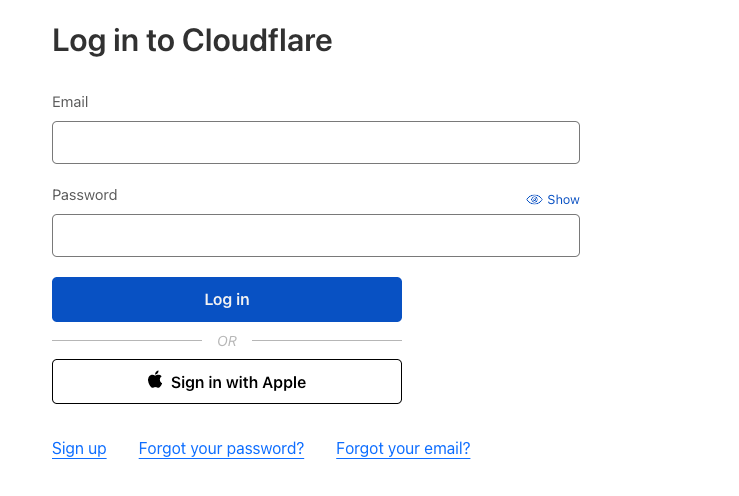
実行するとデフォルトブラウザが起動して下のような画面が表示される、はずですが、

私の環境ではコマンド一発でというわけにはいかず、コマンド実行後のメッセージに出力されたURLを開く手間がありました。このあたりは環境によるのかもしれません。
画面上で必要な情報を入力してログインします。

上のような画面が表示されたら成功です。
私の場合はこの記事を書きながら実行していたので、認証がタイムアウトして一度エラーになってしまいました・・・ご注意ください。
workerプロジェクトの初期化
プロジェクトを作成したいディレクトリに移動して以下のコマンドを実行します。
wrangler init hello_world
hello_worldの部分は任意のプロジェクト名を決めて入力します。
ここで入力した名称のディレクトリが、現在のディレクトリ下に作成されます。
また、いくつか質問を受けます。私の場合は以下のような内容でした。
Using npm as package manager.
✨ Created hello_world/wrangler.toml
✔ No package.json found. Would you like to create one? … yes
✨ Created hello_world/package.json
✔ Would you like to use TypeScript? … yes
✨ Created hello_world/tsconfig.json
✔ Would you like to create a Worker at hello_world/src/index.ts? › Fetch handler
✨ Created hello_world/src/index.ts
✔ Would you like us to write your first test with Vitest? … yes
✨ Created hello_world/src/index.test.ts
-
package.jsonが見つからないので作りますよ? -> 普通はyでいいはず - TypeScript使います? -> これもイマドキならyでよいかと。
- Workerになる
index.tsを作りますか? -> ここでは選択肢が提示されました。(None / Fetch handler / Scheduled handler)(後述) - Vitestを使った最初のテストを書いてみませんか? -> よきにはからって選択してください。yを選ぶとテストコード(
index.test.ts)が作成されます。(後述)
workerのボイラープレート
自動で生成されるworkerのコードはFetch handlerだとこんな感じに、
export interface Env {
}

export default {
    async fetch(
        request: Request,
        env: Env,
        ctx: ExecutionContext
    ): Promise<Response> {
        return new Response("Hello World!");
    },
};
Scheduled handlerだとこんな感じに、
export interface Env {
}

export default {
    async scheduled(
        controller: ScheduledController,
        env: Env,
        ctx: ExecutionContext
    ): Promise<void> {
        console.log(`Hello World!`);
    },
};
※コメント部は割愛しています。
Noneだとindex.tsは作成されませんでしたので、すべて自前で実装することになるようです。
Scheduled handlerも気になりますが、ここは無難にわかりやすそうなFetch handlerを選択して進めてみます。
テストコードのボイラープレート
ちなみにテストコードはこんな感じで生成されました。
デフォルトでテストはpassする状態になっています。
import { unstable_dev } from "wrangler";
import type { UnstableDevWorker } from "wrangler";
import { describe, expect, it, beforeAll, afterAll } from "vitest";

describe("Worker", () => {
    let worker: UnstableDevWorker;

    beforeAll(async () => {
        worker = await unstable_dev("src/index.ts", {
            experimental: { disableExperimentalWarning: true },
        });
    });

    afterAll(async () => {
        await worker.stop();
    });

    it("should return Hello World", async () => {
        const resp = await worker.fetch();
        if (resp) {
            const text = await resp.text();
            expect(text).toMatchInlineSnapshot(`"Hello World!"`);
        }
    });
});
localで動作確認
下記のコマンドを実行してローカルでworkerを稼働させます。
wrangler dev --local
Delegating to locally-installed wrangler@2.10.0 over global wrangler@2.10.0...
Run `npx wrangler dev --local` to use the local version directly.

 ⛅️ wrangler 2.10.0
--------------------
Want to try out the next version of local mode using the open-source Workers runtime?
Switch out --local for --experimental-local and let us know what you think at https://discord.gg/cloudflaredev !
⎔ Starting a local server...
╭──────────────────────────────────────────────────────────────────────────────────────────────────────────────────────────────────────────────────────────────────────────────────────────────────╮
│ [b] open a browser, [d] open Devtools, [l] turn off local mode, [c] clear console, [x] to exit                                                                                                   │
╰──────────────────────────────────────────────────────────────────────────────────────────────────────────────────────────────────────────────────────────────────────────────────────────────────╯
Debugger listening on ws://127.0.0.1:45645/7fb55a45-d590-4748-8c85-7a97cb4b1a19
For help, see: https://nodejs.org/en/docs/inspector
Debugger attached.
[mf:inf] Worker reloaded! (191B)
[mf:inf] Listening on 0.0.0.0:8787
[mf:inf] - http://127.0.0.1:8787
[mf:inf] - http://172.17.0.2:8787
[mf:inf] Updated `Request.cf` object cache!
うまく動いているようです!ポート8787でlistenしているそうなので、http://localhost:8787にcurlをかけてみます。
❯ curl -i -w'\n' http://localhost:8787
HTTP/1.1 200 OK
content-type: text/plain;charset=UTF-8
content-length: 13
Date: Sun, 19 Feb 2023 07:52:15 GMT
Connection: keep-alive
Keep-Alive: timeout=5

Hello World!
cloudflareへpublish
ここまで完了したらpublishしてみます。
wrangler publish
cloudflareアカウントでサブドメインを設定していない場合は、ここでサブドメインの指定を求められるかもしれません。
▲ [WARNING] You need to register a workers.dev subdomain before publishing to workers.dev

✔ Would you like to register a workers.dev subdomain now? … yes
✔ What would you like your workers.dev subdomain to be? It will be accessible at https://<subdomain>.workers.dev …
.....
私の場合、初回のデプロイでは1分ちょっとの時間がかかりました。サブドメインの初期化に少し時間がかかるようです。

下の画像のような状態になったらデプロイ完了です。プレビューのリンクをクリックすると、ブラウザ上で動作確認が行えます。

まとめ
ここまでの手順をふりかえり、ざっくりと以下のような作業を行いました。
- プロジェクトの初期化
- ローカルで動作確認
- デプロイ
Cloudflare Workersには実行時間やコードの容量など、ある程度の制限はありますが、ここで書いたようなかんたんなステップで、クラウド上で動作するAPIが作れてしまいます。
ご参考になれば幸いです。
ではまた!
参考資料
https://developers.cloudflare.com/workers/platform/languages/#compiled-to-javascript
https://developers.cloudflare.com/workers/wrangler/commands/#dev


Discussion