Laravelアプリケーションをflyにデプロイ
Laravelで作成した自作アプリをflyにデプロイしたので、手順をまとめます。
環境
Windows PCにWSLをインストールしており、ubuntu環境にDockerを構築して、Dockerの中でLaravelを動かしており、ubuntuはroot権限で使ってます。
インストール手順
flyctlをインストール
Lavarelのフォルダに移動して、以下のコマンドでflyctlをWSL/ubuntu環境にインストール
root@:/develop_docker/src/laravelapp# curl -L https://fly.io/install.sh | sh
  % Total    % Received % Xferd  Average Speed   Time    Time     Time  Current
                                 Dload  Upload   Total   Spent    Left  Speed
100  1735    0  1735    0     0   1859      0 --:--:-- --:--:-- --:--:--  1859
######################################################################## 100.0%
set update channel to shell
flyctl was installed successfully to /root/.fly/bin/flyctl
Run 'flyctl --help' to get started
flyctlを実行
次に、flyctlを実行。
root@:/develop_docker/src/laravelapp# flyctl
This is flyctl, the Fly.io command line interface.

Usage:
  flyctl [flags]
  flyctl [command]

Here's a few commands to get you started:
  flyctl launch    Create and configure a new app from source code or a Docker image
  flyctl status    Show app status
  flyctl deploy    Deploy Fly applications
  flyctl logs      View app logs
  flyctl apps      Manage apps
  flyctl machine   Commands that manage machines

If you need help along the way:
  Use `fly docs` to open the Fly.io documentation, or visit https://fly.io/docs.
  Use `fly <command> --help` for more information about a command.
  Visit https://community.fly.io to get help from the Fly.io community.

For a full list of commands, run `fly help`.
flyに新規ユーザ登録
初回の場合は下記のコマンドで新規ユーザ登録をします。
root@:/develop_docker/src/laravelapp# flyctl auth signup
failed opening browser. Copy the url (https://fly.io/app/auth/cli/xyzxyzxyzxyzxyz) into a browser and continue
Opening https://fly.io/app/auth/cli/xyzxyzxyzxyzxyzxyz ...

Waiting for session... Done
successfully logged in as makino_vn@yahoo.co.jp
ブラウザが開かなかったので、手動で以下のurlにブラウザからアクセス。
https://fly.io/app/sign-up
クレジットカードの登録を求められるので取り敢えず登録。
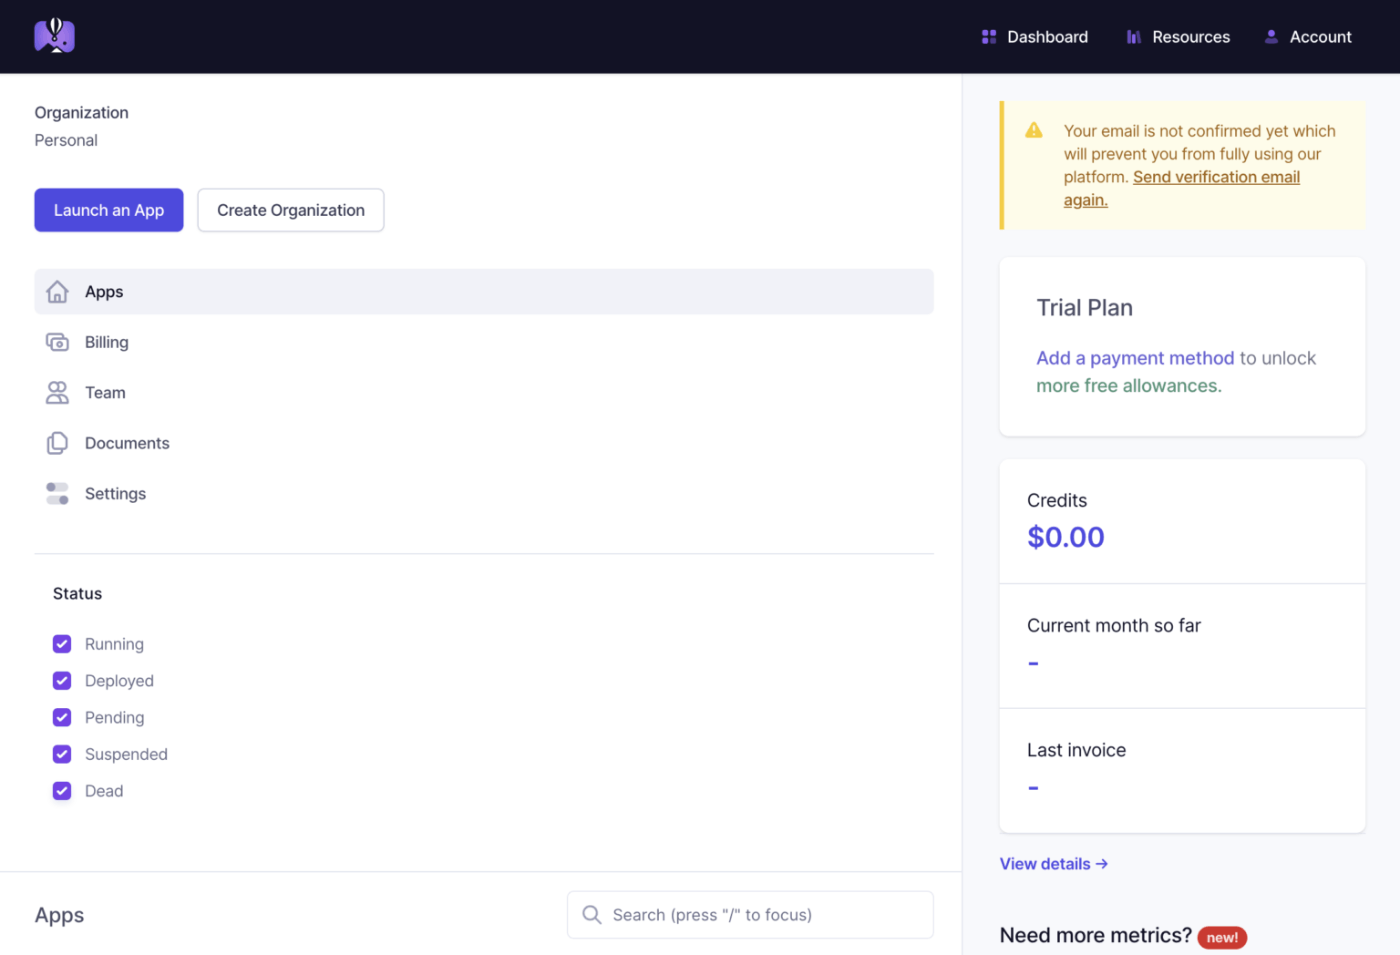
以下のような画面が表示されればOKです。
flyダッシュボード
デプロイの実行
初回のデプロイ時は以下のコマンドを実行します。
root@:/develop_docker/src/laravelapp#  flyctl launch
Creating app in /home/xyxyxy/develop_docker/src/laravelapp
Scanning source code
Detected a Laravel app
? Choose an app name (leave blank to generate one):
とアプリ名を聞かれるので、好きなアプリ名を入力してEnter。ただし同一名があればエラーとなります。
automatically selected personal organization: conbrio
Some regions require a paid plan (bom, fra, maa).
See https://fly.io/plans to set up a plan.

? Choose a region for deployment:
とリージョンのサーバを使うか聞かれるので、↑↓矢印でTokyo, Japan(nrt)を選択しEnter。
App will use 'nrt' region as primary

Created app 'xyzabc' in organization 'personal'
Admin URL: https://fly.io/apps/xyzabc
Hostname: xyzabc.fly.dev
Set secrets on xyzabc: APP_KEY
Wrote config file fly.toml
? Would you like to deploy now?
とデプロイしてよいかを聞かれるので、yと入力してEnter。
Validating /home/xyxyxy/develop_docker/src/laravelapp/fly.toml
Platform: machines
✓ Configuration is valid
==> Building image

  :

This deployment will:
 * create 2 "app" machines

No machines in group app, launching a new machine
Creating a second machine to increase service availability
Finished launching new machines
-------
NOTE: The machines for [app] have services with 'auto_stop_machines = true' that will be stopped when idling

-------

Visit your newly deployed app at https://xyzabc.fly.dev/
データベースの作成
fly上にpostgreSQLデータベースを作成します。
root@:/develop_docker/src/laravelapp# flyctl postgres create
? Choose an app name (leave blank to generate one):
好きなデータベース名を入力してください。ここも同一名があればエラーとなります。先程のアプリ名も使用できないので、別の名前を入れましょう。
automatically selected personal organization: conbrio
Some regions require a paid plan (bom, fra, maa).
See https://fly.io/plans to set up a plan.

? Select region:
ここもTokyo, Japan (nrt)を入力します。
? Select configuration:
データベースの性能を聞かれます。小さい容量で十分なので、
Development - Single node, 1x shared CPU, 256MB RAM, 1GB disk
を選択しEnterします。もう一度聞かれるのでyesを入力してEnterします。
  :
Connect to postgres
Any app within the conbrio organization can connect to this Postgres using the above connection string

Now that you've set up Postgres, here's what you need to understand: https://fly.io/docs/postgres/getting-started/what-you-should-know/
fly上でLaravelアプリとデータベースを接続
次に以下のコマンドを打って、Laravelアプリとデータベースを接続します。
root@:/develop_docker/src/laravelapp# flyctl postgres attach {DB名} -a {アプリ名}
Checking for existing attachments
Registering attachment
Creating database
Creating user

Postgres cluster {DB名} is now attached to {アプリ名}
The following secret was added to xyzabc:
  DATABASE_URL=postgres://xyzabc:rPfHl5ZlptrjXXP@xyzabcdb.flycast:5432/xayabc?sslmode=disable
次にpostgreSQLが接続先のDBであることを記述します。
root@:/develop_docker/src/laravelapp# fly secrets set DB_CONNECTION=pgsql
Updating existing machines in 'xyazbc' with rolling strategy

-------
 ✔ [1/2] Machine 3287332a37e285 [app] update succeeded
 ✔ [2/2] Machine e784994ce3d683 [app] update succeeded
-------
マイグレーションの実行
fly環境でmigrateを実行してデータベースを作成をする必要があります。
まずは、fly環境にリモート接続してflyにログインします。
root@:/develop_docker/src/laravelapp# flyctl ssh console
Connecting to fdaa:3:8546:a7b:b4f1:7658:985a:2... complete
次に、laravelアプリがあるフォルダに移動し、マイグレーションを実行します。
root@e784994ce3d683:/var/www/html# php artisan migrate
**************************************
*     Application In Production!     *
**************************************

 Do you really wish to run this command?
ここで"yes"を入力します。
Migration table created successfully.
Migrating: 2014_10_12_000000_create_users_table
Migrated:  2014_10_12_000000_create_users_table (0.01 seconds)
Migrating: 2014_10_12_100000_create_password_resets_table
Migrated:  2014_10_12_100000_create_password_resets_table (0.01 seconds)
Migrating: 2019_08_19_000000_create_failed_jobs_table
Migrated:  2019_08_19_000000_create_failed_jobs_table (0 seconds)
Migrating: 2023_09_20_213117_create_posts_table
Migrated:  2023_09_20_213117_create_posts_table (0.01 seconds)
flyにAPP_KEYを設定
最後に、Laravelの.envで設定したAPI_KEYをfly環境に設定します。
※この設定が必要かどうかはLaravelアプリによります。
root@e784994ce3d683:/var/www/html# exit
logout
root@:/develop_docker/src/laravelapp# fly secrets set API_KEY={Laravel .evnのAPP_KEY}
Updating existing machines in 'xyzabc' with rolling strategy

-------
 ✔ [1/2] Machine 3287332a37e285 [app] update succeeded
 ✔ [2/2] Machine e784994ce3d683 [app] update succeeded
-------
これでデプロイは完了
flyにアクセス
https://fly.io/dashboard/personal
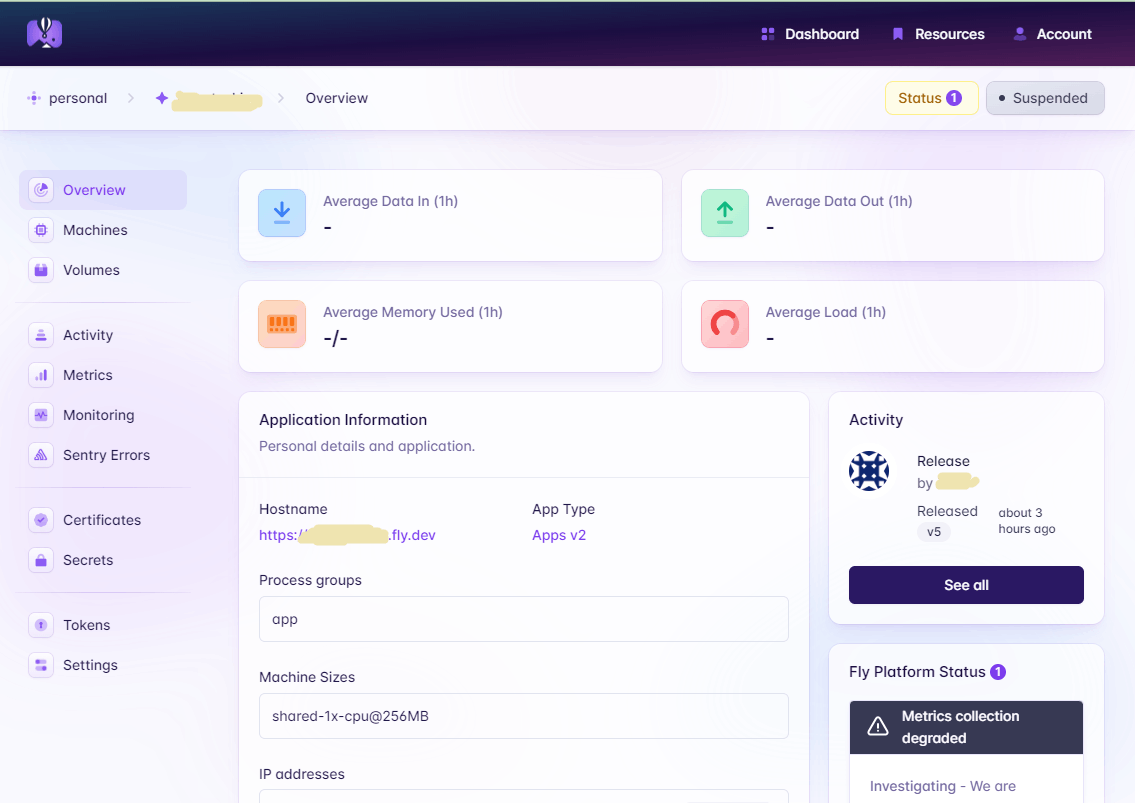
flyのpersonal画面に作成したアプリ名・DB名が表示されます。アプリ名をクリックすると以下のような画面になりHostnameにURLが表示されます。urlをクリックしてサイトにアクセスしてください。


Discussion